Aperture and depth of field
advertisement
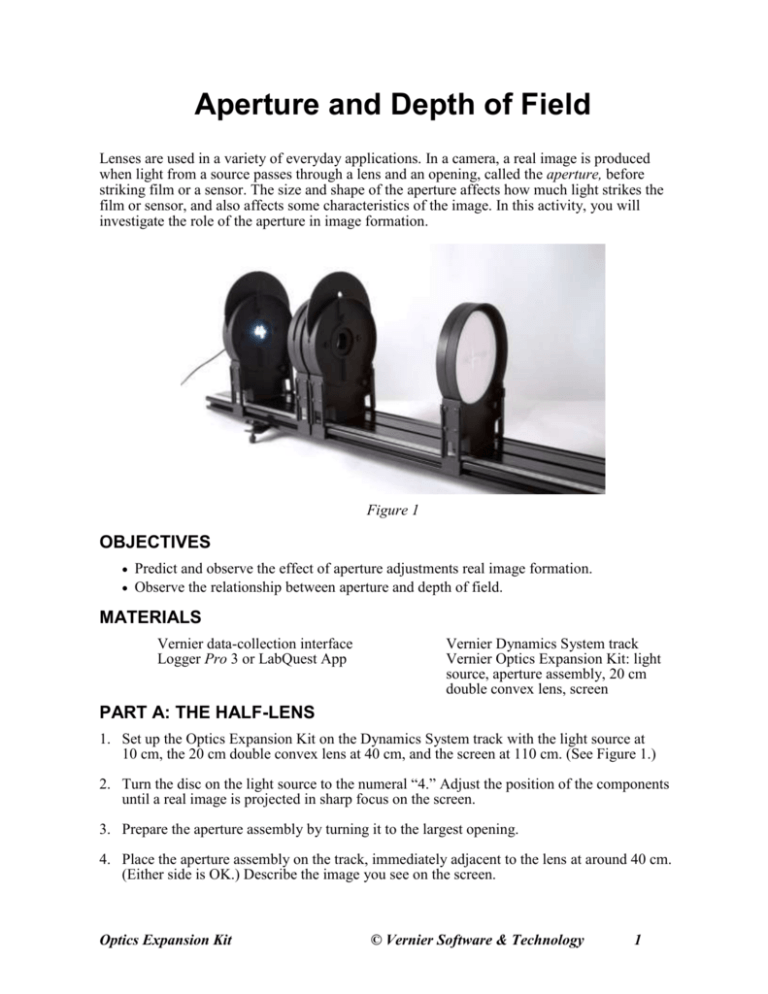
Aperture and Depth of Field Lenses are used in a variety of everyday applications. In a camera, a real image is produced when light from a source passes through a lens and an opening, called the aperture, before striking film or a sensor. The size and shape of the aperture affects how much light strikes the film or sensor, and also affects some characteristics of the image. In this activity, you will investigate the role of the aperture in image formation. Figure 1 OBJECTIVES Predict and observe the effect of aperture adjustments real image formation. Observe the relationship between aperture and depth of field. MATERIALS Vernier data-collection interface Logger Pro 3 or LabQuest App Vernier Dynamics System track Vernier Optics Expansion Kit: light source, aperture assembly, 20 cm double convex lens, screen PART A: THE HALF-LENS 1. Set up the Optics Expansion Kit on the Dynamics System track with the light source at 10 cm, the 20 cm double convex lens at 40 cm, and the screen at 110 cm. (See Figure 1.) 2. Turn the disc on the light source to the numeral “4.” Adjust the position of the components until a real image is projected in sharp focus on the screen. 3. Prepare the aperture assembly by turning it to the largest opening. 4. Place the aperture assembly on the track, immediately adjacent to the lens at around 40 cm. (Either side is OK.) Describe the image you see on the screen. Optics Expansion Kit © Vernier Software & Technology 1 Aperture and Depth of Field 5. The aperture has a setting that covers half the lens vertically, so the opening is in the shape of a “D.” Predict how the appearance of the image will change when half the lens is covered. 6. Adjust the aperture assembly to the D-shaped opening. What do you observe? How does that compare with your prediction? 7. Predict what will happen to the image as the round aperture is made smaller and smaller. Try it. What do you observe? How does that compare to your prediction? Why might this be happening? PART B: APERTURE AND DEPTH OF FIELD 1. Using the same setup as in Part A, turn the aperture to one of the mid-sized openings. Move the screen toward and away from the screen. When is the image in focus? Is the image only in focus at a fixed location, or is there a range over which the image appears to be in focus? Over what distance can you move the screen while keeping the image in focus? In photography, there is a term known as the depth of field. This refers to the range over which an image appears to be in focus. For example, in a photo with a large depth of field, you might see a person in the foreground with scenery in the background, and all of these subjects are in sharp focus. A narrow depth of field yields a single object in focus, while the scenery and background are out of focus. This is sometimes used to draw the viewer’s attention to an object. 2. Predict: Look at the different openings on the aperture apparatus in your setup. Do you think the larger or smaller apertures will produce greater depths of field? Justify your answer. 4. Set the aperture to the largest setting. Beginning with the screen far away from the lens, move the screen closer until the image produced first appears to be in good focus. Record the distance. 5. Continue moving the screen toward the lens until the image just begins to lose focus. Record this second distance. 6. Find the difference between the two distances to calculate the range of focus. Record this value in the Data Table. 7. Repeat Steps 4 - 6 with each of the round apertures, with 5 being the largest, and 1 being the smallest. Which aperture has the greatest depth of field? DATA TABLE Aperture Depth of field (cm) 5 (largest) 4 3 2 1 (smallest) 2 Vernier Software & Technology Aperture and Depth of Field EXTENSIONS 1. Research the term “f-stop” in photography. How do the f-stop values relate to the values for aperture in your table? What tradeoffs are involved in the decisions a photographer makes with respect to f-stop? 2. Research the cause for the improved depth of field which results from a small aperture. 3 INSTRUCTOR INFORMATION Lenses are used in a variety of everyday applications. In a camera, a real image is produced when light from a source passes through a lens and an opening, called the aperture, before striking film or a sensor. The size and shape of the aperture affects how much light strikes the film or sensor, and also affects some characteristics of the image. In this activity, you will investigate the role of the aperture in image formation. OBJECTIVES Predict and observe the effect of aperture adjustments real image formation. Observe the relationship between aperture and depth of field. MATERIALS Vernier data-collection interface Logger Pro 3 or LabQuest App Vernier Dynamics System track Vernier Optics Expansion Kit: light source, aperture assembly, 20 cm double convex lens, screen PART A: THE HALF-LENS 1. Set up the Optics Expansion Kit on the Dynamics System track with the light source at 10 cm, the 20 cm double convex lens at 40 cm, and the screen at 110 cm. (See Figure 1.) 2. Turn the disc on the light source to the numeral “4.” Adjust the position of the components until a real image is projected in sharp focus on the screen. 3. Prepare the aperture assembly by turning it to the largest opening. 4. Place the aperture assembly on the track, immediately adjacent to the lens at around 40 cm. (Either side is OK.) Describe the image you see on the screen. [The numeral is upside-down and reversed.] 5. The aperture has a setting that covers half the lens vertically, so the opening is in the shape of a “D.” Predict how the appearance of the image will change when half the lens is covered. [Students may predict that half the image will remain.] 6. Adjust the aperture assembly to the D-shaped opening. What do you observe? How does that compare with your prediction? [The image will be dimmer, but the entire image will still be visible.] 7. Predict what will happen to the image as the round aperture is made smaller and smaller. Try it. What do you observe? How does that compare to your prediction? Why might this be happening? [The smaller the aperture, the dimmer the image. This is because less light is allowed through the lens due to the decreased area.] 4 Aperture and Depth of Field PART B: APERTURE AND DEPTH OF FIELD 1. Using the same setup as in Part A, turn the aperture to one of the mid-sized openings. Move the screen toward and away from the screen. When is the image in focus? Is the image only in focus at a fixed location, or is there a range over which the image appears to be in focus? Over what distance can you move the screen while keeping the image in focus? [Students will produce a range of values over which the image appears to be in focus.] In photography, there is a term known as the depth of field. This refers to the range over which an image appears to be in focus. For example, in a photo with a large depth of field, you might see a person in the foreground with scenery in the background, and all of these subjects are in sharp focus. A narrow depth of field yields a single object in focus, while the scenery and background are out of focus. This is sometimes used to draw the viewer’s attention to an object. 2. Predict: Look at the different openings on the aperture apparatus in your setup. Do you think the larger or smaller apertures will produce greater depths of field? Justify your answer. [Students predictions may vary.] 4. Set the aperture to the largest setting. Beginning with the screen far away from the lens, move the screen closer until the image produced first appears to be in good focus. Record the distance. 5. Continue moving the screen toward the lens until the image just begins to lose focus. Record this second distance. 6. Find the difference between the two distances to calculate the range of focus. Record this value in the Data Table. 7. Repeat Steps 4 - 6 with each of the round apertures, with 5 being the largest, and 1 being the smallest. Which aperture has the greatest depth of field? [The smallest aperture has the greatest depth of field. This is true because a smaller aperture ensures the light rays are closer to the optical axis, reducing aberration. The extreme case is a pinhole camera, which has nearly infinite depth of field, but exposure must be very long.] DATA TABLE Sample Data Aperture Depth of field (cm) 5 (largest) 1.5 4 1.5 3 5 2 5 1 (smallest) 11.5 5 Instructor Information EXTENSIONS 1. Research the term “f-stop” in photography. How do the f-stop values relate to the values for aperture in your table? What tradeoffs are involved in the decisions a photographer makes with respect to f-stop? [A larger f-stop has a smaller aperture. By choosing a larger f-stop, a photographer can work with a greater depth of field, but less light hits the film, and a slower shutter speed must be used.] 2. Research the cause for the improved depth of field which results from a small aperture. [Larger apertures allow more light through, and aberration increases. A good reference is the Wikipedia article, “Depth of Field:” http://en.wikipedia.org/wiki/Depth_of_field Look for the term “circle of confusion.”] 6 Vernier Software & Technology
