WIN MMC - what`s new in v2
advertisement
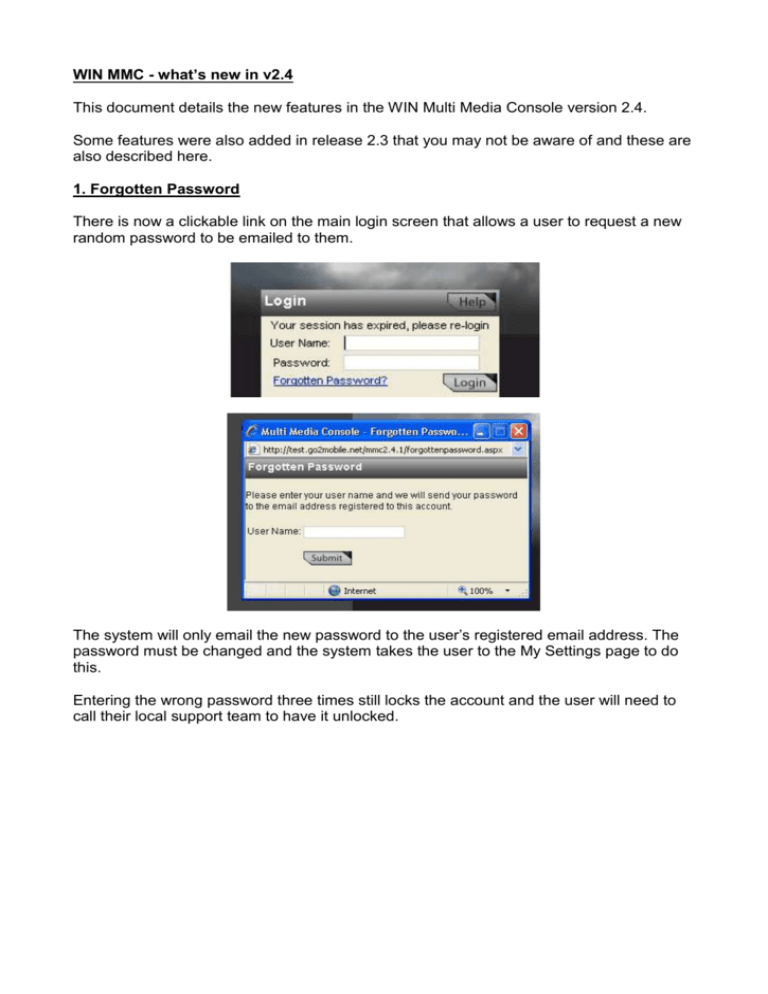
WIN MMC - what’s new in v2.4 This document details the new features in the WIN Multi Media Console version 2.4. Some features were also added in release 2.3 that you may not be aware of and these are also described here. 1. Forgotten Password There is now a clickable link on the main login screen that allows a user to request a new random password to be emailed to them. The system will only email the new password to the user’s registered email address. The password must be changed and the system takes the user to the My Settings page to do this. Entering the wrong password three times still locks the account and the user will need to call their local support team to have it unlocked. 2. Multiple Publish Destinations In previous versions messages could be ‘published’ to a single destination: the Presenter. These messages would be highlighted green. Some parts of the BBC wish to use the console in the normal way but also to be able to send messages to other destinations – e.g. their website or on-screen graphics. In version 2.4 you will notice a new drop down menu in the main inbox view call ‘Publish Output’. Initially for most users this drop down will only have one available setting of 1Presenter. Existing users will not experience any changes to their way of working. When your console has multiple outputs enabled you will be able to switch between which output you are working with using this drop down: The Quick Publish Key will publish messages to the output that is currently selected using the Publish Output drop down. The system will highlight the messages that have been published in the colour associated with that output only. This is so that the screen remains relatively uncluttered when working with multiple outputs such that programmes teams are not distracted by the activities of other teams. For example here the user is working with output 2 (web) so the messages that have been published to the web (only) are shown highlighted in pink: Switching to view output 1-Presenter using the Publish Output drop-down shows the messages that have been published to the presenter only (highlighted in green): When a message has been published to another output you will also see this indication in the message strip: This indicates where the message has been published to outputs 1,2 and 4. This would (for example) allow teams to make sure that they don’t send the same message to different destinations. The Publish Preview screen also incorporates the new Output selector: The screen opens with the Publish Output set to the current one selected in the main view and can then be changed to view any available output. Items that have been Previewed and Published to the selected output are deisplayed in this screen. 3. Setting up Multiple Publish Outputs On the Settings view there is a new option under Console Admin called Output Streams: Clicking on this brings up the screen where up to five Publish Outputs can be selected and named: Output 1 is always set to be Presenter and Enabled. The others can be renamed and switched on and off by an administrator. Messages from each output can be picked up by other systems using the xml api by passing the parameter feed=n in the query string. 4. Multi-user working Some programme teams wish to be able to divide the messages between members of a team, allowing each member to only see ‘their’ section so that they can be confident that two or more people aren’t working on the same message. When Multi-User mode is enabled an extra menu appears in the left-hand navigation: This allows the user to select whether to view All Messages (the default) or the messages for a particular user (in this case there are three users set up) When in Multi-User mode, all messages are divided between the users as equitably as possible. For SMS, MMS, Video and Voice messages they are divided using the last-digit of the phone number. For Twitter and email messages they are divided using the last letter of the sender’s name. This ensures that messages from a particular sender always end up being seen by a single BBC user so that they can keep across a conversation thread and ignore repeat messages. 5. Setting up Multi User working In the Console Admin menu there is the option to configure the console to work in MultiUser mode: Clicking on this brings up the Multi User configuration menu where up to 10 users can be enabled and named. The number of users and their names can be altered by the Administrator. The Enable Multi-Users on this Console check-box turns the feature on and off. 6. View Votes and Competitions All users can now view the results of Votes and Competitions. There is a new menu option on the Settings Screen: The user will see buttons to view results and start or stop a vote: Results are represented graphically: Although not shown here, the system will also allow the selection of one or more winners and will also allow votes to be capped (e.g. 1 per sender etc). 7. Improved User Admin The system now allows administrators to see three different cuts of the user list: All Users (across the whole BBC), Users Of This Division (e.g. A&M), or Users of This Console Only (e.g. 5Live). This allows Administrators to more easily see who has access to their console and to add users from other areas of the BBC. 8. Clear Search There is now a clear button for the Search box: This clears the current search term and refreshes the screen. 9. Select/De-Select All From the right-click menu and Actions drop-down it is now possible to Select All messages in the current view and De-Select all messages that have been selected in a single click: 10. Edit Tools In My Settings a user can select whether they can see the new Edit Tools: The options are Disabled, Enabled in Row or Enabled as a Column. When enabled four new buttons appear unless Edit Only is checked (in which case only the Edit button is visible). Enabled as a Column means that the Edit Tools appear in every message strip. Enabled in Row means that the Edit Tools only appear in the message strip that is being hovered-over. The four edit tools are: Edit Message: this brings up a screen where the message can be edited: Add Host Comment: allows the user to add a separate comment about the message: This comment is then visible by other users and is also passed as a separate piece of text by the api. Add Image: allows the user to add an image to the message Add EMP: allows the user to add an EMP (Embedded Media Player) object to the message 11. Mark Message as Offensive In the Edit Message box, there is an option to Mark as Offensive Content: This replaces the text of the message with “This message has been marked as offensive”. This text is passed to the api (not the original). Pictures will not be visible. It is possible to revert back to the original message and/or edit it as this action is effectively a special type of Edit. 12. View Edit History If a message has been edited then there will be a clickable icon to indicate this: Clicking on this icon brings up the Edit History screen: Previous versions can be seen and the user can revert back to a previous version or the original. 13. Printing MMS MMMS messages can now be printed – both the picture and message are printed. The images are resized so that five messages print on a page:

