types of efforts vocabulary
Technology- Structures Project. “Building a Bridge” instructions._
Structures Project. Building a Bridge.
Sheet 1
Quick vocab list: keystone (piedra clave), shape (forma), daily (diario), report (informe), concrete (cemento), while (mientras), dashed (discontinuas), shaded (sombreadas).
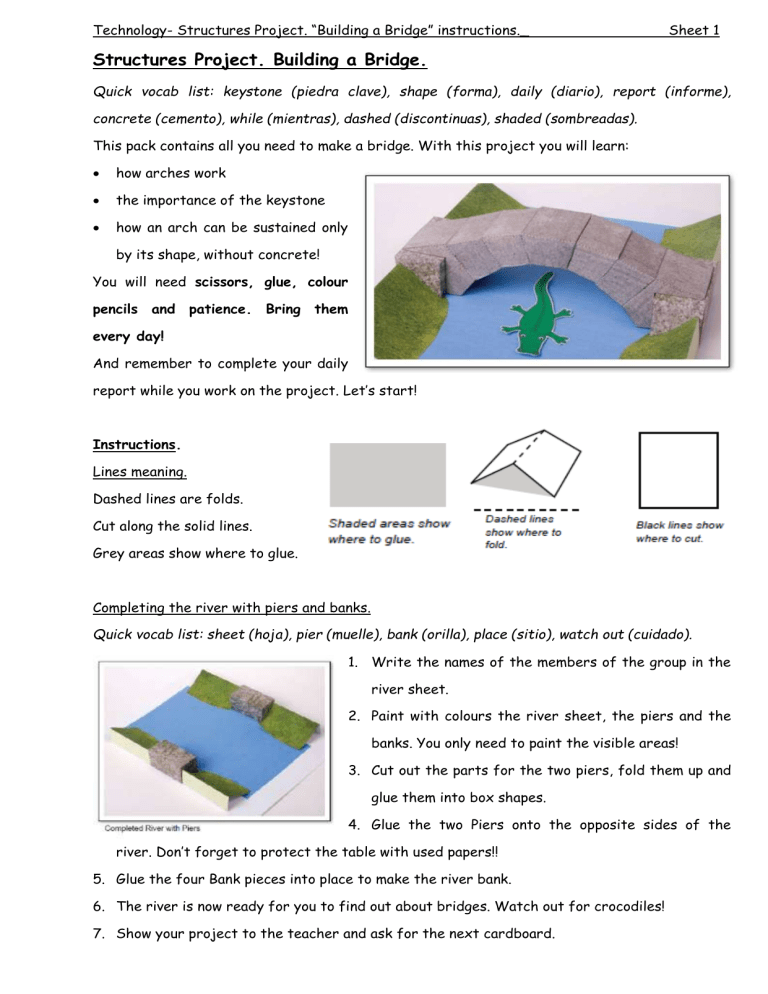
This pack contains all you need to make a bridge. With this project you will learn:
how arches work
the importance of the keystone
how an arch can be sustained only by its shape, without concrete!
You will need scissors, glue, colour pencils and patience. Bring them every day!
And remember to complete your daily report while you work on the project. Let’s start!
Instructions.
Lines meaning.
Dashed lines are folds.
Cut along the solid lines.
Grey areas show where to glue.
Completing the river with piers and banks.
Quick vocab list: sheet (hoja), pier (muelle), bank (orilla), place (sitio), watch out (cuidado).
1.
Write the names of the members of the group in the river sheet.
2.
Paint with colours the river sheet, the piers and the banks. You only need to paint the visible areas!
3.
Cut out the parts for the two piers, fold them up and glue them into box shapes.
4.
Glue the two Piers onto the opposite sides of the river. Don’t forget to protect the table with used papers!!
5.
Glue the four Bank pieces into place to make the river bank.
6.
The river is now ready for you to find out about bridges. Watch out for crocodiles!
7.
Show your project to the teacher and ask for the next cardboard.
Technology- Structures Project. “Building a Bridge” instructions._
Making the arch bridge.
Sheet 2
Quick vocab list: gap (hueco), stone (piedra), brick (ladrillo), strength (resistencia), reverse
(reverso), to assemble (montar), withdraw (retirar).
An arch is a way of bridging a gap.
Arches are usually made from stone, brick or other materials.
The arch works by redirecting the force to the piers. Arches can be difficult to construct. Until they are completed, they have no strength. The final stone at the top of the arch is the key stone. Once the keystone is in place, the arch is completed.
1.
Before cutting out any stone cut the rectangular keys and glue them to the stone.
2.
Cut out the stones and write the initials of the members of the group in the reverse of each stone.
3.
Paint the stones before folding them. You only need to paint the visible areas!
4.
Fold them up and glue them to assemble the seven Stones. Don’t forget to protect the table with used papers!!
5.
Put the two Stone 1 into place on the Piers.
Curve the Arch Former and put it into place as show. This will help you while you assemble your arch.
6.
Drop the two Stone 2 pieces into place. Do the same with the Stone 3 pieces.
7.
Fit the Keystone into place. The bridge should now support itself. Carefully withdraw the
Arch Former and the bridge is complete!!!
8.
Show your project to the teacher.
