Student handout for experiment, with teacher`s notes
advertisement
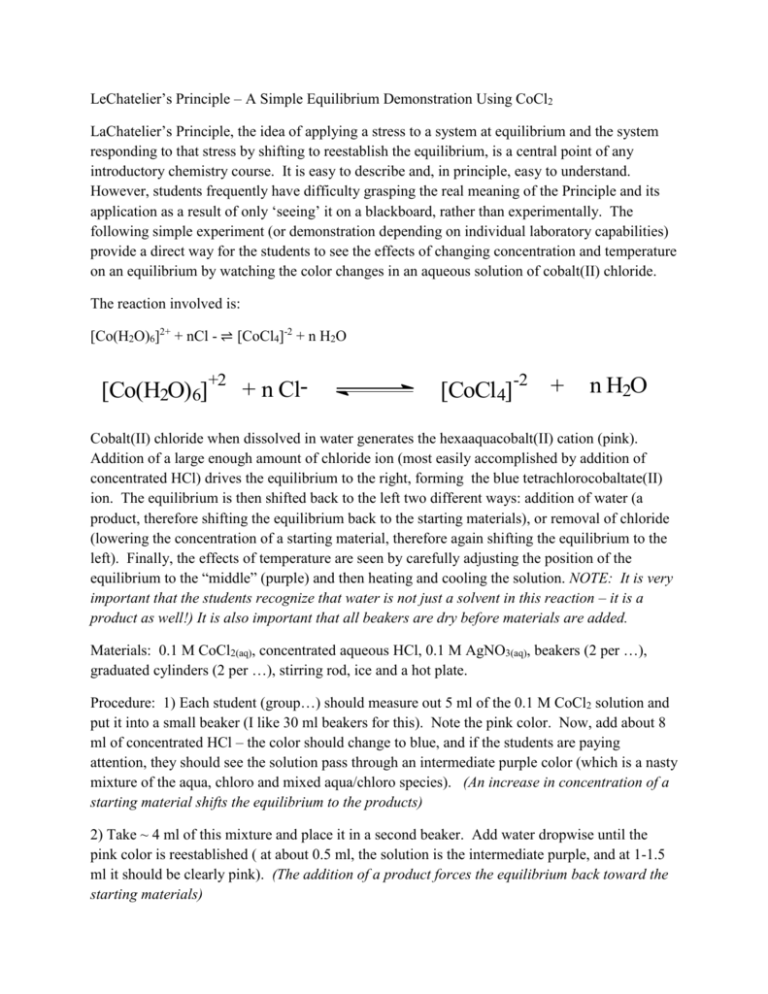
LeChatelier’s Principle – A Simple Equilibrium Demonstration Using CoCl2 LaChatelier’s Principle, the idea of applying a stress to a system at equilibrium and the system responding to that stress by shifting to reestablish the equilibrium, is a central point of any introductory chemistry course. It is easy to describe and, in principle, easy to understand. However, students frequently have difficulty grasping the real meaning of the Principle and its application as a result of only ‘seeing’ it on a blackboard, rather than experimentally. The following simple experiment (or demonstration depending on individual laboratory capabilities) provide a direct way for the students to see the effects of changing concentration and temperature on an equilibrium by watching the color changes in an aqueous solution of cobalt(II) chloride. The reaction involved is: [Co(H2O)6]2+ + nCl - ⇌ [CoCl4]-2 + n H2O [Co(H2O)6] +2 + n Cl- [CoCl4] -2 + n H2O Cobalt(II) chloride when dissolved in water generates the hexaaquacobalt(II) cation (pink). Addition of a large enough amount of chloride ion (most easily accomplished by addition of concentrated HCl) drives the equilibrium to the right, forming the blue tetrachlorocobaltate(II) ion. The equilibrium is then shifted back to the left two different ways: addition of water (a product, therefore shifting the equilibrium back to the starting materials), or removal of chloride (lowering the concentration of a starting material, therefore again shifting the equilibrium to the left). Finally, the effects of temperature are seen by carefully adjusting the position of the equilibrium to the “middle” (purple) and then heating and cooling the solution. NOTE: It is very important that the students recognize that water is not just a solvent in this reaction – it is a product as well!) It is also important that all beakers are dry before materials are added. Materials: 0.1 M CoCl2(aq), concentrated aqueous HCl, 0.1 M AgNO3(aq), beakers (2 per …), graduated cylinders (2 per …), stirring rod, ice and a hot plate. Procedure: 1) Each student (group…) should measure out 5 ml of the 0.1 M CoCl2 solution and put it into a small beaker (I like 30 ml beakers for this). Note the pink color. Now, add about 8 ml of concentrated HCl – the color should change to blue, and if the students are paying attention, they should see the solution pass through an intermediate purple color (which is a nasty mixture of the aqua, chloro and mixed aqua/chloro species). (An increase in concentration of a starting material shifts the equilibrium to the products) 2) Take ~ 4 ml of this mixture and place it in a second beaker. Add water dropwise until the pink color is reestablished ( at about 0.5 ml, the solution is the intermediate purple, and at 1-1.5 ml it should be clearly pink). (The addition of a product forces the equilibrium back toward the starting materials) 3) Take another ~4 ml of the blue mixture, transfer it to a second beaker. Add 0.1 M aqueous silver nitrate dropwise to the solution. The first observation is that a precipitate of AgCl forms. Make sure the students recognize that the precipitate is white and that the color is from what is still in the solution. Initially, the mixture should still be blue (but opaque). As more silver nitrate solution is added, the color should change to purple and finally pink (about 1 ml of the silver nitrate solution should do it). (The removal of a starting material (chloride ion) from the reaction causes the reaction to shift to the starting materials) 4) Temperature effects. Take the remaining solution and carefully add water dropwise until the solution is the intermediate purple/lavender color. Divide that solution into two beakers (one to serve as the reference). Take one of the beakers and place it on the hot plate, observing the color change; it should become distinctly bluer. The color will also intensify as a result of the different extinction coefficients for the aqua and chloro species (which you may or may not want to get into). The color and intensity should be compared to the reference beaker. Then take the hot solution and cool it in ice. The color should again change, first back to the lavender of the reference beaker and then to a pinker color. (Equilibria and equilibrium constants are temperature dependent). Please note that in this last part, we are cheating a little bit. It is easy to raise the temperature of a room temperature solution significantly (~25 to as much as 100 C), but harder to lower it by as much (only ~25 to 0 C) so seeing the effect of cooling the solution is not as obvious. By having the students heat the solution first, they are also driving off a little of the HCl which helps when the solution is cooled. I don’t bring this up, but if someone asks I do explain it to them including the temperature differential problem. If you are doing this as a demo rather than an experiment (group or individual), you’ll need to increase volumes so the students can see it. Also, don’t try to ‘project’ it using an overhead projector. The heat from the projector is enough to cause a bit of chaos for you. Waste disposal: The small amounts generate very little waste, but it can be dealt with more easily by adding base. If all the Co and Ag containing solutions are combined, addition of NaOH until pH ~9 will precipitate the metals. Filtration then provides a very small amount of solid waste and the filtrate contains only NaCl, NaNO3 and H2O.
