Paper Mache Bowls
advertisement
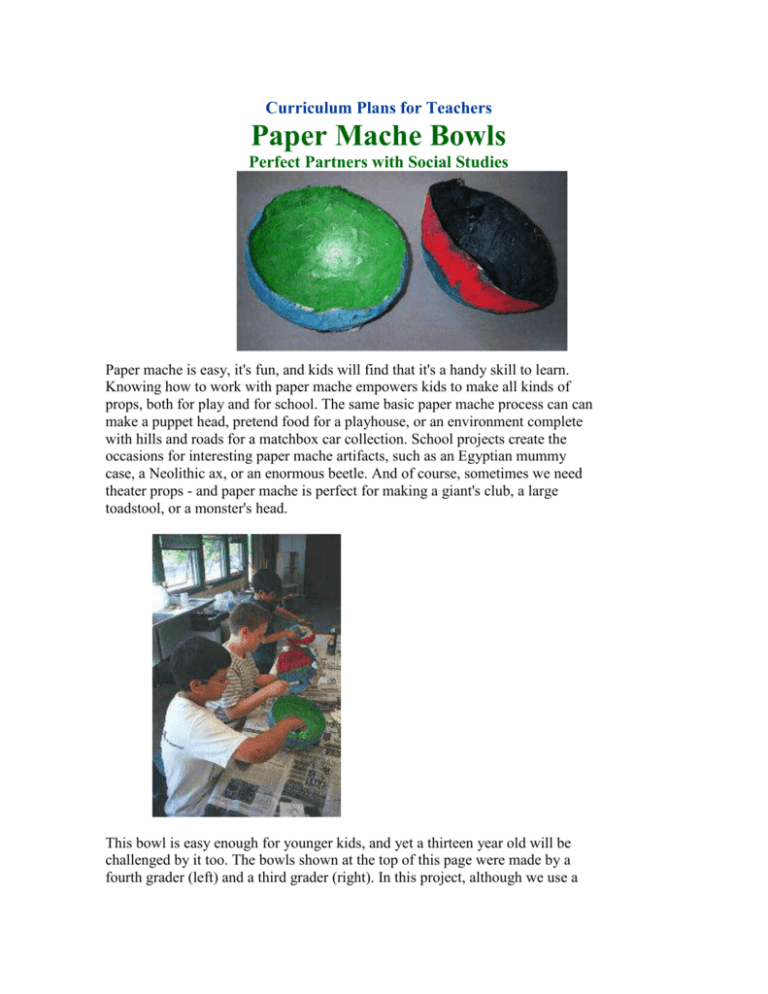
Curriculum Plans for Teachers Paper Mache Bowls Perfect Partners with Social Studies Paper mache is easy, it's fun, and kids will find that it's a handy skill to learn. Knowing how to work with paper mache empowers kids to make all kinds of props, both for play and for school. The same basic paper mache process can can make a puppet head, pretend food for a playhouse, or an environment complete with hills and roads for a matchbox car collection. School projects create the occasions for interesting paper mache artifacts, such as an Egyptian mummy case, a Neolithic ax, or an enormous beetle. And of course, sometimes we need theater props - and paper mache is perfect for making a giant's club, a large toadstool, or a monster's head. This bowl is easy enough for younger kids, and yet a thirteen year old will be challenged by it too. The bowls shown at the top of this page were made by a fourth grader (left) and a third grader (right). In this project, although we use a balloon for the nice large round shape, the bowl has a flat bottom, so it is stable. Teachers will find many ways to tie these bowls into various Social Studies themes - for example, depending upon how they are painted, the bowl could represent Native American pottery or an Archaic Greek bowl. Note: This is not a project that you'll start and complete in one day. Allow for a few days drying time between each of three stages - the first to form the bowl, the second to attach the base and add more layers, and the third to paint or collage the bowl. What you'll need... A work area covered with newspaper A paper plate for each child's bowl to collect excess glue (write their name on the plate - this will identify their bowl.) A large yogurt or cottage cheese container for each bowl, to support it while applying the paper. Newspapers torn into strips that are about 2" by 5". Make two piles, one black and white, and one color, such as Sunday comics. Then alternate black and white layers with color layers. This makes the idea of "more layers" less abstract, more concrete. White glue diluted with water, so that it is the consistency of cream. Put it out in a small cup with a paint brush for each child. Yogurt cups and 1" sponge brushes are perfect for this. A balloon for each bowl (small sized for younger children, so that there is less to cover) A plastic lid for each bowl (such as for a yogurt container) Paints - acryllics or tempera - and brushes or collage materials Optional - spray gloss for tempera, brush-on gloss for acryllics Getting Started Step 1: Start with a balloon Give each child a blown up balloon, and then holding one up, so that the large round end is seated in your hand and the narrow end with the knot is pointing up, demonstrate how to draw a line around its circumference with a sharpie pen. This will mark the top of the bowl. If you are working with young kids you may want to draw the line for them. The easiest way to work on these is to work on an inverted bowl, by setting the balloon (knot side down) in a large yogurt container so it stays in one place. Step Two: Build up paper mache layers Rather than dip the paper into the glue, which is messy, first paint the balloon with glue, then lay a piece of newspaper on it, and finally paint over the newspaper piece with glue to saturate it and smooth it down. The next piece of newspaper should overlap the first, and so on until one layer is completed. On this curved surface you'll want to work with small strips because as you will discover, large pieces buckle. Repeat with several more layers. Encourage kids to keep going, telling them that the more layers they get on it, the stronger the bowl! Demonstrate how to cover the balloon with the strips of paper, reminding the kids that they do not need to cover the part that is above the line. Set the bowls aside to completely dry. Step Three: The bottom of the Bowl The paper mache should be dry at this stage. Pop the balloon and pull it out. You can trim the edges at this stage if you like. Turn the bowl over. Attach one of the plastic lids to the bottom with tape. Now cover the bottom with paper mache strips, and go on to add another layer- or better yet, several more layers - to the rest of the bowl. Be sure to have some pieces lap over the rim of the bowl to reinforce it. Smooth out all the strips so the surface is not too bumpy! If you plan to collage the bowls, apply a final "skin" of white paper towels. This provides a nice white surface, ready for collage. (If the bowls will be painted instead, you do not need to add this last step.) Set them aside to dry. Step Four: Decorate! When the piece is dry, get out your paints or collage materials (or both, as in the bowl shown above), and get creative. Be sure to let the paint dry before you give it a coat of clear gloss. (Temperas will bleed into the gloss coat if you try to brush it on - use a spray gloss. Also, Tempera paints seem to "soak up" the gloss, so they usually need two coats of spray.) A few things to keep in mind .... Important Tip For Adults Remember, this is the child's project. If she is having difficulty with it, she will learn by doing it herself. Don't preempt that learning process by offering to do things for her. Demonstrate that it's easier to brush the glue onto the balloon instead of dipping the paper into the glue, demonstrate how to overlap the pieces, and to use small pieces for curved surfaces. But then back off and let her try on her own. If you have a preconceived idea of how this bowl should look (don't feel bad, we all do this) and your child does something completely different (and they usually will), you'll want to let go of your idea and enjoy what she's done as the wonderful, imaginative child's art that it is.
