Lakewood City Schools Online Classrooms
advertisement

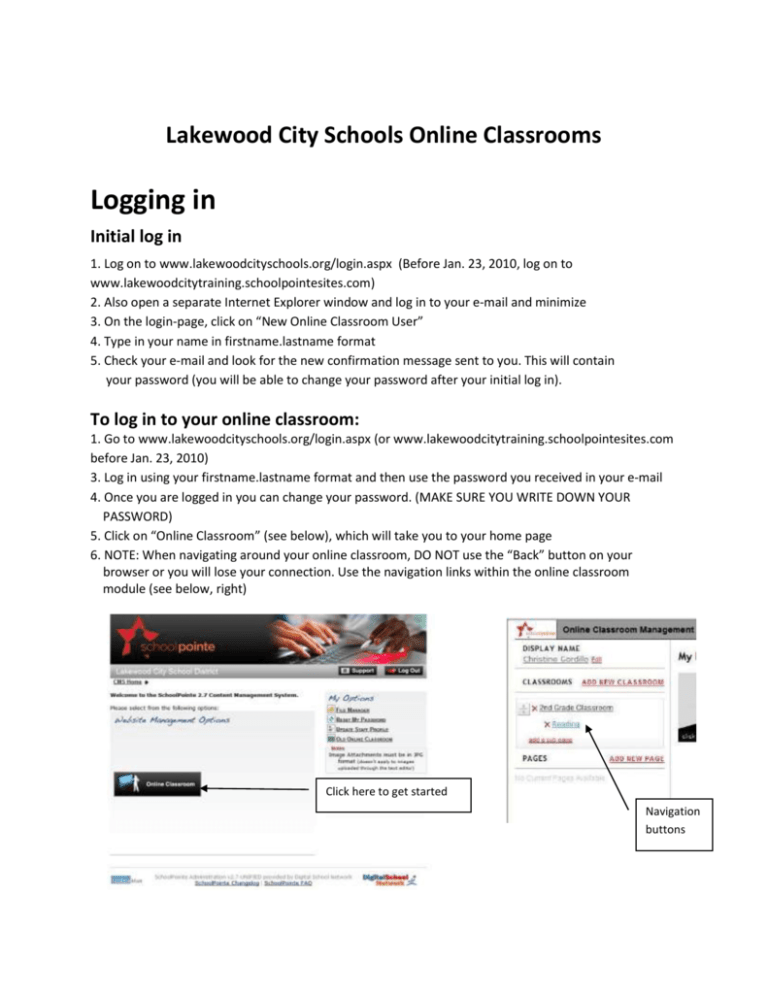
Lakewood City Schools Online Classrooms Logging in Initial log in 1. Log on to www.lakewoodcityschools.org/login.aspx (Before Jan. 23, 2010, log on to www.lakewoodcitytraining.schoolpointesites.com) 2. Also open a separate Internet Explorer window and log in to your e‐mail and minimize 3. On the login-page, click on “New Online Classroom User” 4. Type in your name in firstname.lastname format 5. Check your e‐mail and look for the new confirmation message sent to you. This will contain your password (you will be able to change your password after your initial log in). To log in to your online classroom: 1. Go to www.lakewoodcityschools.org/login.aspx (or www.lakewoodcitytraining.schoolpointesites.com before Jan. 23, 2010) 3. Log in using your firstname.lastname format and then use the password you received in your e‐mail 4. Once you are logged in you can change your password. (MAKE SURE YOU WRITE DOWN YOUR PASSWORD) 5. Click on “Online Classroom” (see below), which will take you to your home page 6. NOTE: When navigating around your online classroom, DO NOT use the “Back” button on your browser or you will lose your connection. Use the navigation links within the online classroom module (see below, right) Click here to get started Navigation buttons Home Page Click here to add your picture To upload or change teacher picture: 1. Click on the picture box on the home page (see above) 2. Click browse 3. Find the picture of your choice 4. Click upload image (images must be in jpg format) To edit teacher information on the home page: 1. Click edit teacher information 2. Type in the information you want listed 3. There are buttons in the dialog box that allow you to bold, italicize, underline, number, bullet, and/or link (How you format it here is how it will look on the webpage. If you do nothing, then it will look as it does on your screen.) 4. Once you have your information typed in, click save teacher description . There is an additional dialog box on the homepage. This can be used for class schedule, detailed information about teacher, announcements, etc. 5. You can type the information into the box and edit it using the buttons located at the top 6. If you put your mouse over the button a box will pop up describing what the button is for 7. Notice that you can insert links and pictures to this portion of the homepage 8. Make sure you click on the gray “Save Page” box in the middle of the page to save this content. Click here to add an event To edit calendar information: 1. Click on the date, “Add Event” or “View Full Calendar” 2. Enter the information you want to display (see sample page below). You do not have to fill in every box. 3. The description will display on the home page calendar. 4. You have the option in the “Class” box to select if you want it to be added to the classroom calendars Classrooms Click here to change name of classroom Click here to upload a class photo To add new classroom: (This will allow you to add announcements, links, assignments, and photo galleries for each class) 1. Click on “ADD NEW CLASSROOM” in left-hand column 2. Type in classroom title 3. Click “Save Classroom” 4. You will notice the title now appears on the left side of your screen under CLASSROOMS To add photo & edit classroom information: 1. Click on “Update Class Photo” below the gray box w/No Image Available text to upload a photo for the class 2. Click Browse 3. Find the photo you wish to upload. 4. Click on “Upload Image” (images must be in jpg format) 5. Next you can add a class description for the class’ homepage by clicking “Edit Class Description.” To edit class calendar: 1. Click on the date, “Add Event”, or “View Full Calendar” 2. Enter the information you want to display. You do not have to fill in every box. (Note: The dates put on the homepage calendar can also be entered to show up on the class calendars.) To add announcements: (see above) (This can be field trips, permission slips, student of the week, etc.) 1. Click on the classroom you want to add announcements to. These will be found listed on the far left side of the screen. 2. Click “Add Announcement” 3. Type in title 4. Type any additional details or description necessary in the white box below the title line 5. Notice you have optional formatting buttons 6. “Optional Image” line lets you upload a photo if you wish 7. Click “Save Announcement” 8. Once the announcement is listed under Class Announcements you have the option to edit or delete. 9. The announcements do not delete when it has passed. You must manually delete the announcements. To add class assignments: (see above) 1. Click “Add Assignments” on your classroom’s home page 2. Type in assignment name 3. Due date, if preferred 4. Type brief description if preferred 5. Click “Save Assignment” To link assignment: 1. Follow steps 1‐4 in “To add class assignments” entry of this manual 2. Highlight the text you wish to link. 3. Click the button that looks like a world with a chain. If you mouse over it, it says “Insert/Edit Link”. 4. Click the Upload tab 5. Click Browse and find the file you wish to link. 6. Click “Save it to the Server” 7. Click “OK” 8. Click “Save Assignment” To allow students to submit assignments online: 1. Follow steps 1‐4 in “To add class assignments” entry of this manual 2. Make sure there is a check mark in the box labeled “Allow Students to Submit Assignment Online” 3. Under the Classroom assignment section of your classroom page you will see a link that says “View Submitted Assignments” To add class files & links: To add folder: 1. If you didn’t set up a classroom for each class you can set up folders for each class here. 2. Click “Add Folder” 3. Type in folder name 4. Click “Save Folder” To add file/download: (see above) 1. Click “Add File/Download” 2. If you set up folders, then you can select the folder here 3. Type in title 4. Click “Browse” to select you the file you want to attach. 5. NOTE: All files must be in pdf format!!! 6. Type brief description if preferred. 7. Click “Save File” To add link: (see above) 1. Click “Add Link” 2. If you set up folders, then you can select the folder here 3. Type in title 4. Insert link (this can be copied and pasted or manually typed in 5. Type brief description if preferred 6. Click “Save Link” To add classroom image gallery: Note: Class Slideshow will be seen on the classroom homepage under the gallery section. (Images must be in jpg format) 1. Click “Add Gallery” 2. Type in a name for that particular gallery in the “Slideshow Title” box (see image above) 3. Click “Browse” to upload images 4. You can only upload 5 images at a time. 5. You can only type in one caption, so if you type in a caption it will be on all pictures in that gallery. There is an opportunity in another step to type captions for each individual picture. 6. Click “Add Slideshow” 8. You will see a list of the pictures you uploaded (see image below) 9. There is an edit button next to each picture 10. If you click on this picture you will be able to add or edit the caption 11. There is also a red X next to each picture. By clicking this you will delete the picture. 12. If you want to add more images you click “Add Images” at the top of the displayed pictures. 13. You can reorder the pictures by clicking and dragging the pictures Click here to add more images to an existing gallery To add images to an already existing gallery: (Images must be in jpg format) 1. Click on the existing gallery you wish to add images to. 2. Click add images (see image above) 3. Remember you can only upload 5 images at a time. To add a new page or sub page: (This allows you to add content to a blank content area, you are still capable of adding images, files, and links within the text area) 1. To Add a new page under the “My Pages” area, click the “ADD NEW PAGE” link on the left-hand side of your home page 2. Type the title of the page (see above) 3. Click the “Save Page” button 4. Pages and sub pages can be connected to a specific classroom or to particular page Adding a sub page 1. Click the “add a sub page” link underneath which class or page you like it located 2. Type in a sub page title 3. Click “Save Sub Page” 4. To add content to the sub page, click on the sub page that is now listed in the left-hand column of your home page and the text box will pop-up where you can add and edit your content 5. Make sure to click “Save Page” when you’re done


