Parallels Containers for Windows 6.0 Beta Homework
advertisement
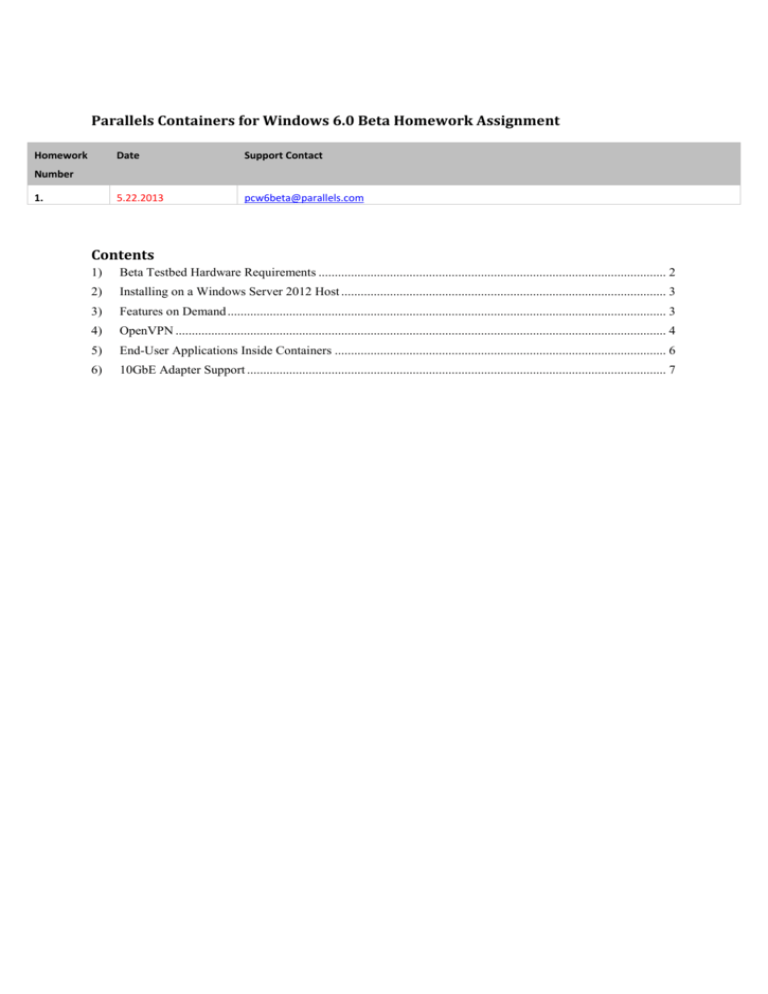
Parallels Containers for Windows 6.0 Beta Homework Assignment Homework Date Support Contact 5.22.2013 pcw6beta@parallels.com Number 1. Contents 1) Beta Testbed Hardware Requirements ........................................................................................................... 2 2) Installing on a Windows Server 2012 Host .................................................................................................... 3 3) Features on Demand ....................................................................................................................................... 3 4) OpenVPN ....................................................................................................................................................... 4 5) End-User Applications Inside Containers ...................................................................................................... 6 6) 10GbE Adapter Support ................................................................................................................................. 7 1) Beta Testbed Hardware Requirements Recommended configuration: 1) One large server (16+ cores, 64+ GB RAM) 2) One low-end server (1-2 dual-core CPUs, 16 GB RAM) 3) 10GbE network for the nodes. Standard configuration: 1) One large server with 16+ cores and 64+ GB RAM. Minimal configuration: 1) Please describe the hardware you have selected for the beta lab. One server with 1-2 dual-core CPUs and 16-32 GB RAM. 2) Installing on a Windows Server 2012 Host CT Rate (1- 5) Comment 5=Excellent; 1=Poor X This version of Parallels Containers 6.0 for Windows Beta 1 can be installed on servers running Windows Server 2012 RTM Datacenter Edition (US English). Before installing Parallels Containers 6.0 for Windows Beta 1, make sure that • the Windows Server 2012 operating system is activated, • no Microsoft updates have been installed after installing Windows Server 2012, you will be able to install Microsoft updates after PVCfW 6.0 installation. Download vzautoinstall.exe from : http://download.parallels.com/pvc/60/win/Beta1/vzautoinstall60.exe. Using autoinstaller download and start installation of Parallels Containers 6.0 for Windows Beta 1. During PVCfW 6.0 installation, please install both the PVA agent and PVA Management Node. Please note that the installer obtains PVA from the installation folder or downloads the latest version from the Internet. So we recommend you to run installation with access to internet. You will also need a Windows distribution as it is required for the new Features on Demand capability of Windows Server 2012. When asked, point the installer to a local or network location of a Windows Server 2012 distribution. A manual installation is available as well. Here is a command example to install PCfW 6.0 in unattended mode: C:\vz\download\w2k12\x64\6.0\containers6.0_x64_w2k12.exe /S /V"/qr PVA_MN=1 PVA_AGENT=1 PVA_MN_IP=192.168.0.50 PVA_MN_HOSTNAME=PVA-MN-0-50 PVA_MN_DNS=192.168.0.2 PVA_MN_PWD=1q2w3eQAZ VZAUTOINSTALL=1 WINSOURCE=C:\dist /lv C:\Windows\virtuozzo-install.log" Please tell us about your experience with the new installer. Do you require any other important configuration steps in the installation wizard? Were product installation and environment configurations easy for you? Doesn’t it conflicts with deployment processes taking place in your company? For more information, please refer to the VzEvaluation guide: http://www.parallels.com/products/parallels-containers-windows/documentation/ 3) Features on Demand CT Rate (1- 5) 5=Excellent; 1=Poor X Comment A new feature of Windows Server 2012 called Features on Demand is intended to simplify Windows installation . Normally, certain Windows components and applications may require files not included in the standard Windows installation but are shipped with the Windows Server 2012 distributive or downloaded from windows update server in what is called Side-by-side assembly or SxS (http://en.wikipedia.org/wiki/Side-by-side_assembly). To avoid issues if required files are not available, during the installation of Parallels Containers for Windows 6.0, we save all the necessary files from the Windows source location to a template and mount it inside every Container to the c:\sources folder. Whenever software inside the Container requires any of those files this local copy of them is used. Please try installing roles you are interested in as well as applications requiring SxS (e.g., dotNET) and give us your opinion of this feature. Was it convenient for you to install software requiring SxS files inside Containers? Do your deployment processes work OK with this feature? For more information, please refer to the page 17 of VzEvaluation guide: http://www.parallels.com/products/parallels-containers-windows/documentation/ 4) OpenVPN CT Rate (1- 5) Comment 5=Excellent; 1=Poor X Beginning with version 6.0, PCfW supports both OpenVPN server and client in Containers. You can allow OpenVPN adapters in Containers the same way you do for MS VPN. The following example will show you a basic OVPN Client – Server connection between Containers. This test describes the configuration inside host-routed Containers, but you can run any OVPN part on either Hardware Nodes or inside bridged Containers. I) OVPN server creation 1) Create a Container: vzctl create 100 --pkgset w2k12 vzctl set 100 --ipadd 192.168.1.100/16 vzctl set 100 --hostname VPN-Server100 vzctl set 100 --diskspace 2000000 vzctl set 100 --userpasswd Administrator:1q2w3eQAZ vzctl set 100 --openvpn on vzctl start 100 2) Connect to Container 100 via RDP. Download the OpenVPN Windows Installer (64-bit) from here: http://openvpn.net/index.php/download.html. 3) Run the OpenVPN installer, select OpenSSL Utils and OpenVPN RSA cert. scripts. Install OpenVPN to c:\openvpn 4) Reboot Container 100 and connect again via RDP. 5) Go to c:\openvpn\config folder. Create file "server.ovpn" with following strings: ca ca.crt proto tcp cert server.crt key server.key dh dh1024.pem dev tun server 1.1.1.0 255.255.255.0 push "route 1.1.1.0 255.255.255.0" 6) Open CMD.exe and go to the OpenVPN folder: # cd c:\openvpn \easy-rsa 7) Run: init-config.bat vars.bat clean-all.bat vars.bat build-ca.bat - This will generate the certificate and the key. vars.bat build-key-server.bat server - This will generate the certificate and the key for the server. Answer with empty strings to the first two questions and choose ""y"" to the last two: ""Sign the certificate? [y/n]:y"" ""1 out of 1 certificate requests certified, commit? [y/n]:y"" Answer "server" in ! Use unique ""Common Name"" and ""Name"" for each server: ""Common Name (e.g., your name or your server's hostname) []:server"" vars.bat build-key.bat client1 Answer with empty strings to the first two questions and choose ""y"" to the last two: ""Sign the certificate? [y/n]:y"" ""1 out of 1 certificate requests certified, commit? [y/n]:y"" This will generate the certificate and the key for the client. ! Use unique ""Common Name"" and ""Name"" for each client: ""Common Name (eg, your name or your server's hostname) []:client1"" vars.bat build-dh.bat - This will generate a Diffie Hellman parameters file. 8) Copy ca.crt, ca.key, dh1024.pem, server.key and server.crt from c:\openvpn\\easy-rsa\keys to c:\openvpn\config 9) Go to c:\openvpn\config , right-click on the file "server.ovpn" -> Start OpenVPN on this config file. 10) Run “ipconfig” in Container 100. From the output find out and note the VPN IP address your server has being assigned, it should look like 1.1.1.X. II) OVPN client creation and connection test 1) Create a Container: vzctl create 101 --pkgset w2k12 vzctl set 101 --ipadd 192.168.1.101/16 vzctl set 101 --hostname VPN-Client101 vzctl set 101 --diskspace 2000000 vzctl set 101 --userpasswd Administrator:1q2w3eQAZ vzctl set 101 --openvpn on vzctl start 101 2) Connect to Container 101 via RDP. Download the OpenVPN Windows Installer (64-bit) from here: 3) http://openvpn.net/index.php/download.html Run the OpenVPN installer, select OpenSSL Utils and OpenVPN RSA cert. scripts. Install OpenVPN to c:\openvpn 4) Restart the Container after the installation. 5) Connect to Container 101 via RDP, download the following files from the OVPN server to c:\openvpn\config: ca.crt, ca.key, server.key, server.cert, client1.key, client1.cert 6) Create c:\openvpn\config\client.ovpn ca ca.crt proto tcp cert client1.crt key client1.key dev tun client remote 192.168.1.100 III) 7) Right-click the c:\openvpn\config\client.ovpn file and select “Start OpenVPN on this config file” 8) Check that a connection was established, an IP address from the VPN IP pool range (1.1.1.0 255.255.255.0) was obtained 9) Check that you can ping the server IP from the client VPN Provider You can use Containers to connect to any VPN provider supporting the OVPN standard. We suggest that you try connecting to the providers requested by your customers using their clients. Just make sure that the provider uses the latest OVPN version and that you are connecting using the OVPN protocol. Create a client Container with access to internet like this: # vzctl create 102 --pkgset w2k12 --name ovpn-prvdr # vzctl set 102 --ipadd 192.168.1.102/16 --nameserver 192.168.0.2 --diskspace 5000000 --openvpn on --userpasswd administrator:1q2w3eQAZ For more information, please refer to the reference guide: http://www.parallels.com/products/parallels-containers-windows/documentation/ 5) End-User Applications Inside Containers CT Rate (1- 5) Comment 5=Excellent; 1=Poor X If you have a list of applications and application templates installed in your every Container, or a list of the most popular applications used by your customers, please install them in Containers and check their functionality. Did you experience any problems with the installation and evaluation of applications inside Containers? We have implemented new libraries for backup and migration operations. Please try to migrate, backup, and restore Containers with configured applications running and pay attention to Container functionality after these actions. To do so, please execute the following commands: vzmigrate -A server -U username -P password 100 vzbackup 100 vzctl destroy 100 vzrestore 100 -b backupID 6) 10GbE Adapter Support CT Rate (1- 5) Comment 5=Excellent; 1=Poor X Please set up a 10GbE network between Nodes running Parallels Containers for Windows 6.0 and ensure that you have the latest network drivers. Test the Node-to-Node speed using applications you commonly use or a network performance tool: 1) Download the netperf utility from here: http://netperf-win.googlecode.com/files/netperf-2.6.0-win-vista-winsrv2k8.zip, extract the binaries to c:\netperf on both Nodes. 2) Disable Windows Firewall on both Nodes or allow all communications on the port 12865. 3) Run “netserver.exe” on node1 4) Run “netperf.exe -t TCP_STREAM -D 10 -l 100 -H node1_IP” on node2, where node1_IP is the IP address of node1 5) You should see speeds around 8-9 Gbit/s Test bridged Container speed: 6) # vzctl create 100 --pkgset w2k12 --name BR_CT 7) # vzctl set 100 --nettype bridged --network vznet1 --ipadd 192.168.0.100 --diskspace 5000000 --userpasswd administrator:1q2w3eQAZ 8) # vzctl start 100 9) Copy the netperf binaries to c:\netperf of the Container BR_CT. 10) Enter BR_CT and run “netperf.exe -t TCP_STREAM -D 10 -l 100 -H node1_IP”, where node1_IP is the IP address of node1 11) Run the same test from node1 to BR_CT. Make sure you have allowed operations through the port 12865 inside BR_CT. 12) You should see speeds close to the Node-to-Node one. 13) Stop the Container: # vzctl stop 100 Test host-routed Container speed: 14) # vzctl create 200 --pkgset w2k12 --name HR_CT 15) # vzctl set 200 --ipadd 192.168.0.200 --diskspace 5000000 --userpasswd administrator:1q2w3eQAZ 16) Copy the netperf binaries to c:\netperf of the Container HR_CT. 17) Enter HR_CT and run “netperf.exe -t TCP_STREAM -D 10 -l 100 -H node1_IP”, where node1_IP is the IP address of node1 18) Run the same test from node1 to HR_CT. Make sure you have allowed operations through the port 12865 inside HR_CT. 19) You should see speeds around 4-5Gbit/s. The reduction in speed is caused by the overhead from Windows routing. You can then enable Jumbo Frames for your 10GbE adapters (and the switch if used) and perform the test again. All results should improve. To read more about Jumbo Frames please refer the the following article: http://en.wikipedia.org/wiki/Jumbo_frame When testing host-routed Containers, please set “vzctl set 0 --jumboframe N" option and specify the size of packets you selected in the adapter configuration (e.g. 4088). Bridged containers don’t need this option. Also please configure the default network setting for your environment and check the functionality with a 10GbE network. Please tell us about your experience with this feature. Did speed and behavior in your environment match your expectations? For more information, please refer to the reference guide: http://www.parallels.com/products/parallels-containers-windows/documentation/

