SolidWorks: Creating a “Nozzle” from Loft Tutorial
(Draft 2, June. 6, 2006)
Introduction
We want to build a non-circular nozzle interior inside a slightly larger cylindrical body. The
nozzle is to have the interior shape of the original SolidWorks loft tutorial. In other words, the
desired fluid space will have the shape of the body resulting from that tutorial.
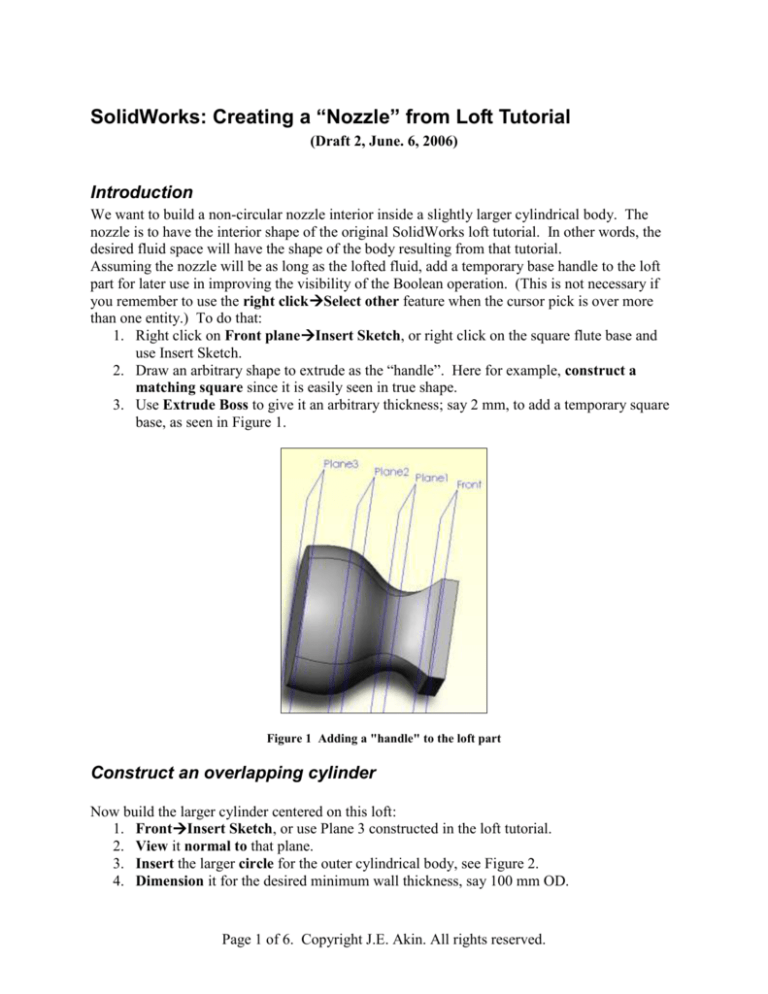
Assuming the nozzle will be as long as the lofted fluid, add a temporary base handle to the loft
part for later use in improving the visibility of the Boolean operation. (This is not necessary if
you remember to use the right clickSelect other feature when the cursor pick is over more
than one entity.) To do that:
1. Right click on Front planeInsert Sketch, or right click on the square flute base and
use Insert Sketch.
2. Draw an arbitrary shape to extrude as the “handle”. Here for example, construct a
matching square since it is easily seen in true shape.
3. Use Extrude Boss to give it an arbitrary thickness; say 2 mm, to add a temporary square
base, as seen in Figure 1.
Figure 1 Adding a "handle" to the loft part
Construct an overlapping cylinder
Now build the larger cylinder centered on this loft:
1. FrontInsert Sketch, or use Plane 3 constructed in the loft tutorial.
2. View it normal to that plane.
3. Insert the larger circle for the outer cylindrical body, see Figure 2.
4. Dimension it for the desired minimum wall thickness, say 100 mm OD.
Page 1 of 6. Copyright J.E. Akin. All rights reserved.
5.
6.
7.
8.
FeaturesExtrude Boss will open the Extrude panel.
In the Extrude panel select Up to surface as the direction.
Turn off “merge result” to form two overlapping centered bodies.
Pick Face 1 of the loft, in Plane 3, as the surface at which to stop the extrusion. These
steps are summarized in Figure 4.
Figure 2 Locate the outer cylinder bounds
Figure 3 Prepare to extrude the overlapping cylinder
When the results are viewed, as in Figure 5, it looks as if it is a single part: a cylinder with a
square block sitting on one end. In fact there are two (CAD) bodies occupying the same space.
You do not have to build the bodies in this fashion. You could build them in different locations
and then use move or translate commands to place them in this relation as preparation for the
Page 2 of 6. Copyright J.E. Akin. All rights reserved.
needed Boolean subtract operation. The reason for adding the optional “handle” to the loft part
should be clear now (or after the next operation).
Figure 4 Preview of the overlapping cylinder
Figure 5 The loft part and cylinder occupy the same space
Boolean operation
Next it is necessary to remove the fluid volume (loft part) from the nozzle cylindrical exterior.
That is done as a Boolean cut operation:
1. InsertFeaturesCombine will open the Combine(#) panel.
2. In the Combine panel select Subtract as the desired operation. That operation is not
commutative so you must select the two bodies in a particular order.
3. As the Main Body select the solid cylinder. Click near its outer diameter.
Page 3 of 6. Copyright J.E. Akin. All rights reserved.
4. As the Bodies to Subtract pick the loft solid by clicking on the added “handle” (that lies
outside the cylinder) as seen in Figure 6. Alternatively, you could right click near the
center of plane 3 and use Select Other to pick the loft part from a pull down list.
5. Preview, OK.
Figure 6 Picking bodies for the subtract operation
Figure 7 The previewed and final hollow nozzle
Page 4 of 6. Copyright J.E. Akin. All rights reserved.
Verify the result
Now lets double check some sections of the non-circular nozzle interior:
1. ViewDisplaySection View.
2. In the Section View panel pick the Right plane.
3. Drag the plane through the part to see various sections.
4. Repeat using the Front plane. (See Figure 8.)
5. Repeat using the Top plane, OK.
Now we have the desired non-circular nozzle for a specialized fluid flow process.
Figure 8 Viewing interior cross-sections of the non-circular nozzle
Alternate approaches
Note that it possible to get the same final result in a reverse order. First you would establish the
same planes, extrude the solid cylinder, and complete the same four loft
Page 5 of 6. Copyright J.E. Akin. All rights reserved.
plane sketches. Now you want to form the loft as a cut out:
1. InsertCutLoft (Figure 9)
2. Create the loft (with or without the extra base handle) as in the tutorial
3. Select the cylinder as the part to cut.
4. Preview, OK. The same nozzle part appears (try it).
Figure 9 Alternate construction with a loft cut
Page 6 of 6. Copyright J.E. Akin. All rights reserved.

