Document 13668491
advertisement
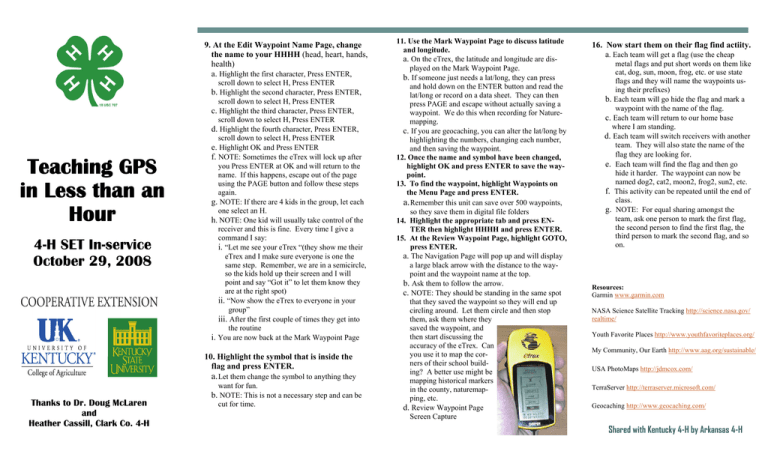
9. At the Edit Waypoint Name Page, change the name to your HHHH (head, heart, hands, health) a. Highlight the first character, Press ENTER, scroll down to select H, Press ENTER b. Highlight the second character, Press ENTER, scroll down to select H, Press ENTER c. Highlight the third character, Press ENTER, scroll down to select H, Press ENTER d. Highlight the fourth character, Press ENTER, scroll down to select H, Press ENTER Teaching GPS in Less than an Hour 4-H SET In-service October 29, 2008 e. Highlight OK and Press ENTER f. NOTE: Sometimes the eTrex will lock up after you Press ENTER at OK and will return to the name. If this happens, escape out of the page using the PAGE button and follow these steps again. g. NOTE: If there are 4 kids in the group, let each one select an H. h. NOTE: One kid will usually take control of the receiver and this is fine. Every time I give a command I say: i. “Let me see your eTrex “(they show me their eTrex and I make sure everyone is one the same step. Remember, we are in a semicircle, so the kids hold up their screen and I will point and say “Got it” to let them know they are at the right spot) ii. “Now show the eTrex to everyone in your group” iii. After the first couple of times they get into the routine i. You are now back at the Mark Waypoint Page 10. Highlight the symbol that is inside the flag and press ENTER. a. Let them change the symbol to anything they want for fun. Thanks to Dr. Doug McLaren and Heather Cassill, Clark Co. 4-H b. NOTE: This is not a necessary step and can be cut for time. 11. Use the Mark Waypoint Page to discuss latitude and longitude. a. On the eTrex, the latitude and longitude are displayed on the Mark Waypoint Page. b. If someone just needs a lat/long, they can press and hold down on the ENTER button and read the lat/long or record on a data sheet. They can then press PAGE and escape without actually saving a waypoint. We do this when recording for Naturemapping. c. If you are geocaching, you can alter the lat/long by highlighting the numbers, changing each number, and then saving the waypoint. 12. Once the name and symbol have been changed, highlight OK and press ENTER to save the waypoint. 13. To find the waypoint, highlight Waypoints on the Menu Page and press ENTER. a. Remember this unit can save over 500 waypoints, so they save them in digital file folders 14. Highlight the appropriate tab and press ENTER then highlight HHHH and press ENTER. 15. At the Review Waypoint Page, highlight GOTO, press ENTER. a. The Navigation Page will pop up and will display a large black arrow with the distance to the waypoint and the waypoint name at the top. b. Ask them to follow the arrow. c. NOTE: They should be standing in the same spot that they saved the waypoint so they will end up circling around. Let them circle and then stop them, ask them where they saved the waypoint, and then start discussing the accuracy of the eTrex. Can you use it to map the corners of their school building? A better use might be mapping historical markers in the county, naturemapping, etc. d. Review Waypoint Page Screen Capture 16. Now start them on their flag find actiity. a. Each team will get a flag (use the cheap metal flags and put short words on them like cat, dog, sun, moon, frog, etc. or use state flags and they will name the waypoints using their prefixes) b. Each team will go hide the flag and mark a waypoint with the name of the flag. c. Each team will return to our home base where I am standing. d. Each team will switch receivers with another team. They will also state the name of the flag they are looking for. e. Each team will find the flag and then go hide it harder. The waypoint can now be named dog2, cat2, moon2, frog2, sun2, etc. f. This activity can be repeated until the end of class. g. NOTE: For equal sharing amongst the team, ask one person to mark the first flag, the second person to find the first flag, the third person to mark the second flag, and so on. Resources: Garmin www.garmin.com NASA Science Satellite Tracking http://science.nasa.gov/ realtime/ Youth Favorite Places http://www.youthfavoriteplaces.org/ My Community, Our Earth http://www.aag.org/sustainable/ USA PhotoMaps http://jdmcox.com/ TerraServer http://terraserver.microsoft.com/ Geocaching http://www.geocaching.com/ Shared with Kentucky 4-H by Arkansas 4-H Teaching GPS in Less than an Hour Materials: 1. Garmin eTrex GPS units (usually one for every 3-4 people) 2. flags (one for every group/GPS unit) batteries (2 AA for every eTrex GPS unit) Steps to teaching outdoors: 1. Have everyone in a semicircle in front of the presenter. Stragglers and those behind the speaker will soon be distracted and they will fall behind in the lesson. Chaos will ensue. 2. Ask everyone to turn on the eTrex. Most will figure out it’s the button that says PWR. This Is a good time to explain one of the advantages of the basic eTrex receiver versus other brands: a. The eTrex is yellow (easy to see) and it is rain and sweat proof. b. The cost is around $90-100. c. If you are using GPS on school campuses or out in the woods, you wouldn’t need a more expensive receiver with road maps. Also, by being in black and white, the batteries last longer. d. Speaking of batteries, it only requires 2. This will make a difference when you have a set of 10 and you only have to charge/buy 20 batteries instead of more when using units that require 3 or 4 batteries. e. The buttons are on the side. If you are right handed, you can push the PWR and PAGE buttons with your thumb and the UP/DOWN/ ZOOM IN/ZOOM OUT and ENTER buttons with your fingers. Other brands like Magellan have their buttons on top of the receiver (not a personal preference of mine unless I’m using it on a bike or in a car). f. it is simple to use with only 4-5 pages (newer eTrex’s now have a trip page added). g. NOTE: I do not put the lanyards on the receivers. People have a tendency to swing them on the lanyard or hit things with them (like trees). Besides, the group shares better when the eTrex is not around someone’s neck. 3. Everyone will see the first page which is the satellite page. a. You need 4 satellites to receive a signal that is accurate within 15-50 feet. Most people will say you only need 3, but this signal will not be as good. b. The screen looks like a guy standing on the earth communicating with 4 satellites. Once the eTrex has locked on to a satellite, the line/ satellite will become bold. Once all 4 satellites have been locked, the page will switch to the map page. c. The USA has a constellation of over 24 satellites just for GPS. We call this constellation NAVSTAR. Russia has a constellation of GPS satellites and the European Union is also planning one. d. What are the differences between GPS and GIS? i. GPS stands for Global Positioning Systems (a system of finding your position on the globe) and you basically need 2 things: satellites and a GPS unit. ii. GIS stands for Geographic Information Systems (a system of placing information layers on a geographic map) and you basically need 2 things: GIS software and data. 1. Where do you get the data? Ex. GPS units, Internet (TerraServer) 2. What software ? ArcGIS, USA PhotoMaps e. NOTE : I find the satellites will lock on faster if you turn them on at the place you will be teaching before you start the lesson. If you have traveled more than 50 miles, it may take longer for the satellites to lock. f. Satellite Page Screen Capture 4. You are now at the Map Page. a. Use the UP/DOWN/ZOOM IN/ZOOM OUT buttons to zoom in and out. When we walk the eTrex is set up to have a bread crumb trail saved behind us. We call this trail a track. You can orient the map ahead or North. To change the setting on the map page, press the ENTER button. b. Waypoints, tracks, and routes will all show up on the map page. c. Map Screen Capture iii. What does Waypoint mean? This is the X, or the point on the map. The position is represented by 2 numbers – latitude and longitude. These numbers represent the distance from the equator and the distance from the Prime Meridian. iv. What is a track? The bread crumb trail. v. What is a route? Think of it as a track with waypoints at certain intervals. c. Menu page screen capture 7. 5. Press the PAGE button to go to the Navigation Page. a. What does this page look like? A compass, but it is not a true compass. We will use this page later when we are navigating to a waypoint. Navigation Page Screen Capture 6. Press the PAGE button to go to the Menu Page. a. Newer eTrex firmware has a trip page which I never use while teaching. If they are here, just ask them to press the PAGE button once more to get to the Menu Page. b. The Menu Page has the battery power, menu items, and time displayed. i. The eTrex gets its time from the satellites, remember though to set the eTrex for your time zone. ii. What does Mark mean? You are saving a position on the Earth almost like when Bugs Bunny was placing an X on the treasure map spot. Highlight MARK and press ENTER. a. Now you will see a Mark Waypoint Page. b. NOTE: You can also get to this page by holding down on the ENTER button. People who have a heavy finger on the ENTER button will tend to save lots of waypoints in numerical order. If someone is having trouble saving/naming their waypoint, look under Waypoints on the Menu Page. If the first tab is full of waypoints named 1,2,3,4,5….. then they are pressing the ENTER button too long. This happens frequently so make sure to remind people to hit that ENTER button quickly unless they are wanting to get to the Mark Waypoint Page. c. Mark Waypoint Page Screen Capture 8. Highlight the number that is inside the flag, press ENTER. These units can save up to 500 waypoints, so it’s a smart idea to name your waypoints. This will be the most difficult task to learn and takes coordination. Younger kids speed through this as opposed to adults.
