WORKING WITH SIDEBARS
advertisement
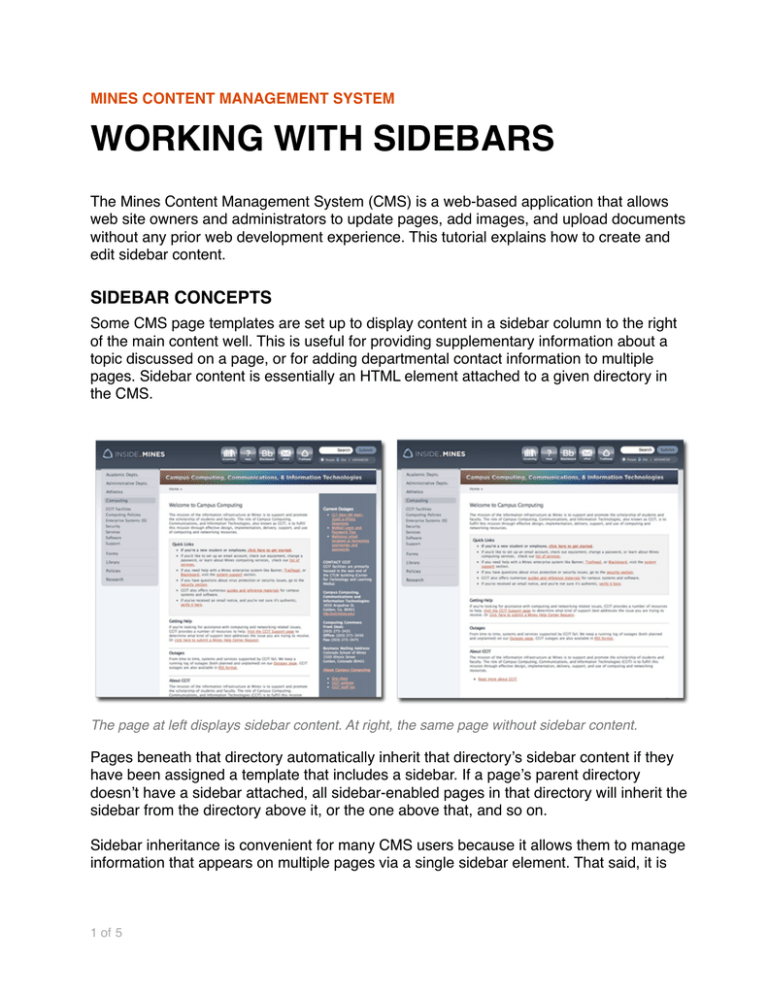
MINES CONTENT MANAGEMENT SYSTEM WORKING WITH SIDEBARS The Mines Content Management System (CMS) is a web-based application that allows web site owners and administrators to update pages, add images, and upload documents without any prior web development experience. This tutorial explains how to create and edit sidebar content. SIDEBAR CONCEPTS Some CMS page templates are set up to display content in a sidebar column to the right of the main content well. This is useful for providing supplementary information about a topic discussed on a page, or for adding departmental contact information to multiple pages. Sidebar content is essentially an HTML element attached to a given directory in the CMS. The page at left displays sidebar content. At right, the same page without sidebar content. Pages beneath that directory automatically inherit that directoryʼs sidebar content if they have been assigned a template that includes a sidebar. If a pageʼs parent directory doesnʼt have a sidebar attached, all sidebar-enabled pages in that directory will inherit the sidebar from the directory above it, or the one above that, and so on. Sidebar inheritance is convenient for many CMS users because it allows them to manage information that appears on multiple pages via a single sidebar element. That said, it is 1 of 5 important to note that sidebar inheritance does not allow separate pages in a single directory to have different sidebars. For example, if your site includes a Faculty section that contains a different page for each faculty member in your department, and your plan is to list all faculty members in the sidebar of each memberʼs page, you can do so by creating a single sidebar for the entire Faculty directory. However, if your plan is to list office hours and contact information on each individual faculty memberʼs page, you must create a separate directory for each faculty member and add a personalized sidebar element to each memberʼs directory. SELECTING A SIDEBAR-FRIENDLY TEMPLATE In order for a page to display the sidebar content attached to its directory, you must ensure that the pageʼs template contains a sidebar element. Itʼs easy to tell whether or not this is the case: simply view the page in a browser. If the pageʼs template contains a sidebar, youʼll see it on the right side of the page. If there is no sidebar visible, you will need to edit the page and select a template that contains a sidebar. To do this: 1. Log in to the CMS and navigate to the page in question. 2. Check the page out and open it in the CMS editor. 3. Use the “Choose Default Template” selector above the “Preview in Template” button to select a template that contains a sidebar. If your site uses the blue Inside.Mines template set, select “Inside - Content (Sidebar) Template” or “Inside - Content (Sidebar/Image) Template.” If your site uses the Mines.Edu template set, select “Content (Sidebar) Template” or “Content (Sidebar/Image) Template.” 4. Preview, save, and approve the changes normally. 5. Check the page in a browser to ensure that the changes are as intended. Use the “Choose Default Template” select to pick a page template that is sidebar-friendly. 2 of 5 Note that if there is no sidebar element defined for the pageʼs parent directory, the sidebar may appear to have no content. This can be remedied by adding a sidebar element to the directory. ADDING A SIDEBAR ELEMENT TO A DIRECTORY If youʼd like to create sidebar content specific to a directory, do the following: 1. Log in to the CMS and navigate to the directory youʼd like to modify. 2. At the top of the CMS screen, you should see a series of breadcrumb-like elements that describe the path to the current directory. Click the “Edit Folder Properties” link under the breadcrumb that represents the directory youʼd like to modify. Click the “Edit Folder Properties” link to add a sidebar element to a directory. 3. You should now be on the “Basic Options” page. Sidebar elements are stored in the directory as HTML, so scroll to the bottom of the page and find the “Add HTML” link. Click it, and youʼll be redirected to a mini CMS editor. Click the “Add HTML” link to create a sidebar element. 4. Give the HTML element a title (this will be displayed at the top of the sidebar) and add content as needed. 3 of 5 5. Click the “Submit” button to save the element and return to the “Basic Options” page. Create your sidebarʼs content and click “Submit” to create it. Your sidebar content should display on any sidebar-enabled page in the directory. EDITING SIDEBAR CONTENT Editing sidebar content is a bit different from editing a page. There is no check-in, checkout process, and changes donʼt have to be approved. To make changes to the content of an existing sidebar, do the following: 1. Log in to the CMS and navigate to the directory youʼd like to modify. 2. Click the “Edit Folder Properties” link under the directory breadcrumb. This opens the “Basic Options” page. 4 of 5 3. Scroll to the bottom of the “Basic Options” page and find the sidebar element. Youʼll see a grey box with your sidebarʼs title listed. Click the “Edit” link to open an existing sidebar in the mini editor. 4. Click the “Edit” link to open the sidebar in the CMS mini editor. 5. Edit the sidebar content as needed and click the “Submit” button. Thatʼs it. Your sidebar content should be updated and visible on any sidebar-enabled pages in the directory. 5 of 5
