1. Electrostatics*
advertisement
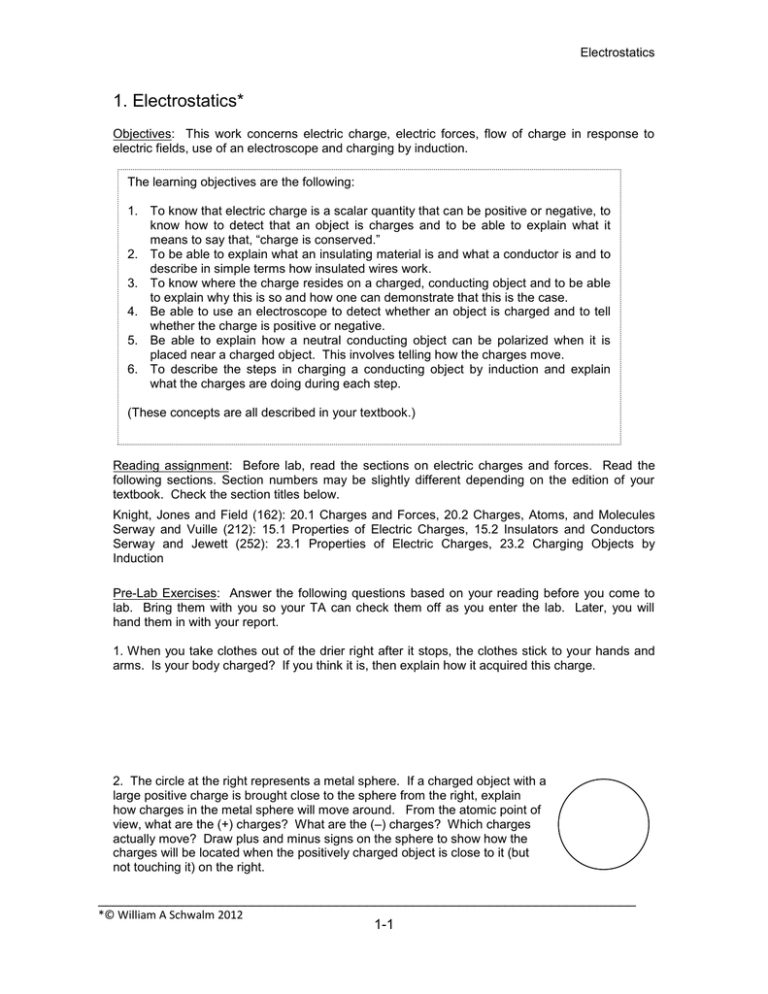
Electrostatics 1. Electrostatics* Objectives: This work concerns electric charge, electric forces, flow of charge in response to electric fields, use of an electroscope and charging by induction. The learning objectives are the following: 1. To know that electric charge is a scalar quantity that can be positive or negative, to know how to detect that an object is charges and to be able to explain what it means to say that, “charge is conserved.” 2. To be able to explain what an insulating material is and what a conductor is and to describe in simple terms how insulated wires work. 3. To know where the charge resides on a charged, conducting object and to be able to explain why this is so and how one can demonstrate that this is the case. 4. Be able to use an electroscope to detect whether an object is charged and to tell whether the charge is positive or negative. 5. Be able to explain how a neutral conducting object can be polarized when it is placed near a charged object. This involves telling how the charges move. 6. To describe the steps in charging a conducting object by induction and explain what the charges are doing during each step. (These concepts are all described in your textbook.) Reading assignment: Before lab, read the sections on electric charges and forces. Read the following sections. Section numbers may be slightly different depending on the edition of your textbook. Check the section titles below. Knight, Jones and Field (162): 20.1 Charges and Forces, 20.2 Charges, Atoms, and Molecules Serway and Vuille (212): 15.1 Properties of Electric Charges, 15.2 Insulators and Conductors Serway and Jewett (252): 23.1 Properties of Electric Charges, 23.2 Charging Objects by Induction Pre-Lab Exercises: Answer the following questions based on your reading before you come to lab. Bring them with you so your TA can check them off as you enter the lab. Later, you will hand them in with your report. 1. When you take clothes out of the drier right after it stops, the clothes stick to your hands and arms. Is your body charged? If you think it is, then explain how it acquired this charge. 2. The circle at the right represents a metal sphere. If a charged object with a large positive charge is brought close to the sphere from the right, explain how charges in the metal sphere will move around. From the atomic point of view, what are the (+) charges? What are the (–) charges? Which charges actually move? Draw plus and minus signs on the sphere to show how the charges will be located when the positively charged object is close to it (but not touching it) on the right. ______________________________________________________________________ *© William A Schwalm 2012 1-1 Electrostatics Scenario: Unlike most lab encounters this semester, this one is not actually a problem-solving lab. Rather it is more like an exploration of electrostatic phenomena. This is partly because the material you have covered so far in class is very basic and we want you to explore some basic ideas. However, if you want, we can suppose your group works for the Electrocopy Corporation, which makes copy machines that use electrostatic forces to deposit ink on the copies. Thus your team is simply exploring some basic physics before starting on a more applied project. In-class group discussion questions: As you go through the following exercises, discuss the meaning of each step with your team members and see how it might relate to one or more of the learning objectives. (Where do you look to find the learning objectives?) These will be included in your report. Be prepared to respond to questions your instructor might ask. In-class responses form part of your lab grade. knob The electroscope shown at the left is a sensitive instrument for detecting electric charge. It is recommended that this exercise be performed early in spring semester or late in fall semester, since it is important that the humidity be as low as possible. body or case Please be careful with the electroscope, as it is rather easy to break and hard to fix. body grounded to fixture Notice that the body of the electroscope (not the knob or the shaft connecting it to the leaves) must be connected to ground in order for it to work properly. You can do this by fastening a wire to the case by means of an alligator clip biting the colar. The other end of the ground wire is attached to some fixture acting as a ground connection, as shown above. The electroscope works as follows. The knob connects electrically through the shaft to a thin metal strip and a small piece of gold foil (very thin and fragile). The strip and the foil are called the fixed leaf and the movable leaf of the electroscope. When the electroscope is uncharged, the movable leaf hangs down, as shown in the diagram at the right. (Here and often below, the ground wire is not shown in order to make the picture less cluttered, but it remains attached.) No charge on the electroscope implies also that the knob is at the same electric potential as the case (i.e. it is grounded, V = 0). However, if a small amount of charge is placed on the knob of the electroscope, it spreads out, since like charges repel one another, and some of the charge finds its way to the leaves. Then the leaves will have similarly signed charges, and thus they too will repel one another. This makes the movable leaf ride up and stand out from the fixed one, as shown in the next figure. (See next page.) 1-2 Electrostatics Please be careful when charging the electroscope. Any more than a very small charge can rip off the gold foil, or even blow it to smithereens. It is difficult and costly to repair. So follow the operating instructions carefully. I. Like Charges Repel Remember to ground the electroscope, as shown in the first figure above. We are going to charge the electroscope using a charged rubber rod. HOWEVER: Do not touch the electroscope knob directly with the charged rod, or quite possibly you will have retired an electroscope from active service. (Notice the little bits of gold leaf splattered all over the ++ insides of most of the electroscopes from previous misuse.) Rather we + will be using what is called a proof plane made of a round metal disk on a plastic handle. This can be used to transfer small amounts of charge from the rod to the electroscope. Use the piece of fuzzy cloth (wool or an appropriate synthetic) to charge the rubber rod by friction. This will charge the rod negatively by giving it some extra electrons. + + + + (a) Where do the extra electrons come from? Next, have your partner transfer some of the electrons from the rod to the electroscope knob using the proof plane. About one scoop full should do it. You may have to mess around a bit. (b) When the rod is electrified, it has extra electrons. Describe the motion of the electrons when the proof plane touches the rod. (c) What do the electrons do when the plane touches the electroscope knob? (d) How does the motion of the leaf illustrate that like charges repel one another? 1-3 Electrostatics II. Unlike Charges Attract Using the proof plane and the rubber rod, charge the electroscope fully, by the method discussed above. Now, charge the glass rod by rubbing it with the silky cloth. Bring the glass rod close (but not too close) to the electroscope knob. (If it comes too close, a spark may jump and the movable leaf will be nothing but gold shrapnel.) You should see the electroscope leaf collapse slightly as the glass rod is brought near. If this does not work, you may have too much negative charge on the electroscope. Scoop some off using the proof plane and deposit it on the ground fixture. (a) Explain how the extra electrons on the electroscope move as the positively charged glass rod comes close, and why. Notice the net charge on the combination of electroscope leaves plus knob does not change, since no charge transfers to or from the glass rod. (b) Since we are assuming the glass rod is positively charged, how does this experiment illustrate the attraction between unlike charges? plastic rod III. Conductors and Insulators Suspend the metal cup from the plastic rod attached to the stand and connect it as shown by means of a conducting wire to the knob of the electroscope. Use a proof plane to make a momentary connection between the knob and the grounded case (recall the ground wire, not shown) thus “shorting out” and completely discharging the electroscope. Important: Place the electroscope as far away from the cup as the wire permits. Next, charge up the glass rod and hold it far away from both the electroscope and the cup. Now bring the glass rod closer to the cup, but not too close. (Do not let the rod touch the cup, or you know what may happen to the gold foil.) Observe the motion of the movable leaf. 1-4 metal cup conducting wire Electrostatics (a) What are the electrons doing in this case? (b) What would the electrons do if the wire were replaced by a dry string that does not conduct electricity? (Are you absolutely sure? How could you find out whether or not your answer is correct?) IV. Charge by Induction Again discharge the electroscope completely by shorting it out. Remove the wire between the metal cup and the electroscope. Charge the rubber rod and bring it close (not too close) to the knob. Observe that the leaves diverge as expected. Now, have your lab partner short out the electroscope knob once again momentarily to the ground wire, this time with the charged rod near by. Notice what the leaves do. After the proof plane has been removed, withdraw the rod once again to a place far from the apparatus. Notice the motion of the leaves. (a) How did the movable leaf behave during each phase of the procedure? Sketch and explain what happened (b) What did the electrons do during each phase? Explain also how the electrons got on or off from the electroscope during the experiment. The latter procedure is called charging by induction, and the resulting charge on the electroscope is called an induced charge. (c) If without changing any connections you bring the charged rubber rod back to the same position where it was during the charge-by-induction procedure, the leaf will collapse. If you now bring it just slightly closer, the leaf will stand out again. Withdrawing the rod slowly, you will see the leaf first collapse briefly and then stand out again. Verify this for yourselves. Explain what the electrons are doing during all of this. 1-5 Electrostatics V. Electric Fields (Be sure to disconnect the cup from the electroscope.) This exercise is only to see what happens qualitatively and to think of what you see in terms of an electric field. Using the rubber rod, charge the electroscope by induction. (See previous exercise.) This should leave it positively charged. Now recharge the rubber rod as much as possible and move it slowly toward the glass on the front of the case of the electroscope, but of course, not too close. About .3 meters should be good. Notice the response of the gold foil to any motion of the rod? Notice the field acts right through the glass. The response would be the same even if there were a complete vacuum, that is empty space, between the rod and the gold foil. The electric force acts at a distance between the two charged objects, even through empty space. Try also bringing a charged glass rod up in place of the rubber rod. (a) How does the gold leaf respond in each case? (b) How does this indicate action at a distance? What seems to act on what “at a distance” here? (c) Explain the role of the electric field in this observation VI. Charge on a Conductor Resides on the Outside (The Ice-Pail Experiment) There still should be no connection between the cup and the electroscope. Again begin by using the proof plane to short the knob to ground, so as to remove all charge from the electroscope. Now, borrow the ground wire by disconnecting it from the electroscope. Use the ground wire and the rubber rod to charge the cup (not the electroscope) by induction. This should result in a substantial positive charge on the cup. To do this, following part IV, go through the following steps. Connect the ground wire to the cup. Bring the charged rod up until it is close to (but not touching) the cup. +++ + + + + + 1-6 Electrostatics Now disconnect the ground wire without moving the rod. Finally remove the rod and connect the ground wire back to the case of the electroscope. Carefully discharge the proof plane on the ground connection. Now dip into the center of the cup with the proof plane, being careful not to touch the rim on the way in, and rub the proof plane around on the inside of the metal cup. Remove the proof plane (again being careful not to touch the rim or the outside of the cup with it) and transfer whatever charge there is on it to the electroscope. Do this several times. No matter how hard you try you should not be able to get any charge from the inside of the metal cup. Even though the cup is charged, there’s no charge inside. Now, try to pick up some charge from the outside of the cup by touching it with the proof plane and transferring it to the electroscope knob. (You may need to take several “scoops.”) (a) What can you conclude from this exercise? (b) Explain the phenomenon in terms of behavior of electrons. (c) Now for a hard question: What is the difference (even geometrically) between the inside and the outside of the cup? sphere 1-7 dented sphere cup Electrostatics Summary: At the end of the period, there will be a brief discussion of how the exercises related to the learning goals listed at the start. Your group should be prepared to contribute. Make note of points brought up in this general discussion by your group and others in the following space. How did the exercises relate to the learning goals? (Learning goals are listed at the front of each lab.) 1-8
