IC210 Fall 2013 Programming Project 1 ASCII Art Antics
advertisement
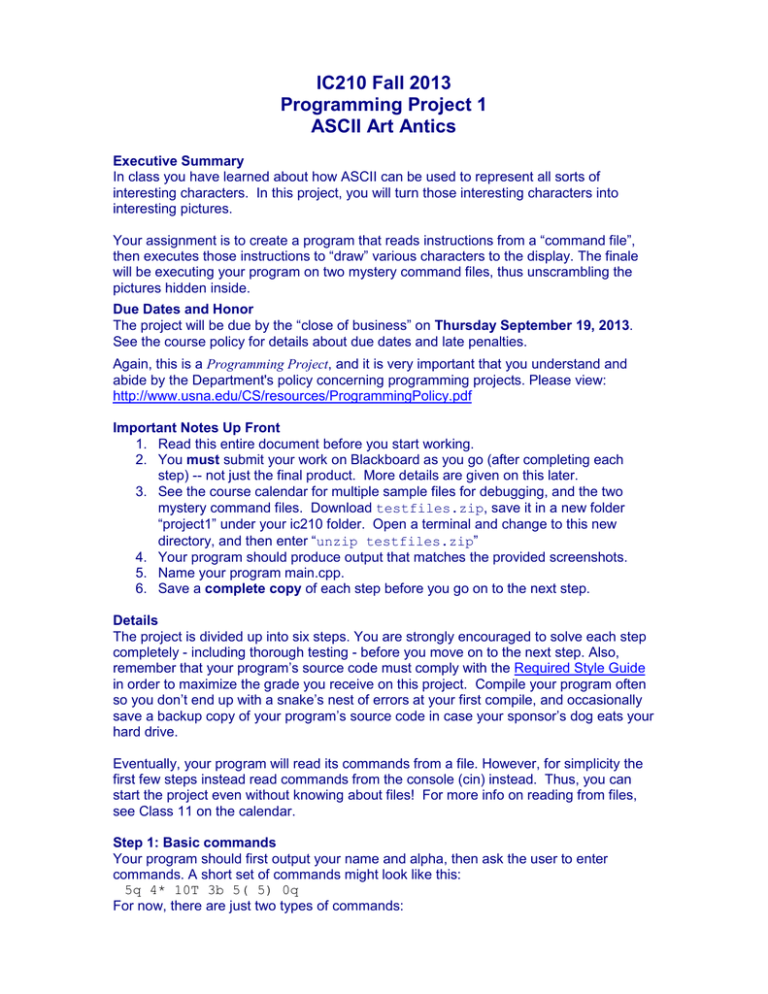
IC210 Fall 2013 Programming Project 1 ASCII Art Antics Executive Summary In class you have learned about how ASCII can be used to represent all sorts of interesting characters. In this project, you will turn those interesting characters into interesting pictures. Your assignment is to create a program that reads instructions from a “command file”, then executes those instructions to “draw” various characters to the display. The finale will be executing your program on two mystery command files, thus unscrambling the pictures hidden inside. Due Dates and Honor The project will be due by the “close of business” on Thursday September 19, 2013. See the course policy for details about due dates and late penalties. Again, this is a Programming Project, and it is very important that you understand and abide by the Department's policy concerning programming projects. Please view: http://www.usna.edu/CS/resources/ProgrammingPolicy.pdf Important Notes Up Front 1. Read this entire document before you start working. 2. You must submit your work on Blackboard as you go (after completing each step) -- not just the final product. More details are given on this later. 3. See the course calendar for multiple sample files for debugging, and the two mystery command files. Download testfiles.zip, save it in a new folder “project1” under your ic210 folder. Open a terminal and change to this new directory, and then enter “unzip testfiles.zip” 4. Your program should produce output that matches the provided screenshots. 5. Name your program main.cpp. 6. Save a complete copy of each step before you go on to the next step. Details The project is divided up into six steps. You are strongly encouraged to solve each step completely - including thorough testing - before you move on to the next step. Also, remember that your program’s source code must comply with the Required Style Guide in order to maximize the grade you receive on this project. Compile your program often so you don’t end up with a snake’s nest of errors at your first compile, and occasionally save a backup copy of your program’s source code in case your sponsor’s dog eats your hard drive. Eventually, your program will read its commands from a file. However, for simplicity the first few steps instead read commands from the console (cin) instead. Thus, you can start the project even without knowing about files! For more info on reading from files, see Class 11 on the calendar. Step 1: Basic commands Your program should first output your name and alpha, then ask the user to enter commands. A short set of commands might look like this: 5q 4* 10T 3b 5( 5) 0q For now, there are just two types of commands: Basic commands, like “10T”, which says to output the letter T 10 times. Likewise, “5q” should output 5 q’s. This type of command will always be one positive integer followed by one character (and this character will not be a digit). The example above has six basic commands. End marker: the command “0q” means to end the program. You must print a newline, then a farewell message before exiting (see example). This command will always be the number zero, followed by a lowercase q (for quit). Here’s an example run: STOP – after you finish each step do two things: Carefully compare your output to the sample output – make sure the number of characters etc. is exactly the same! (aside of course from using your name) Submit your working code on Blackboard. For this first step, submit it under the area for Step 1. Do this after every step. Step 2: Handle newlines and spaces Modify your program so that it can accept two new kinds of commands: Commands like “13sp” say to output 13 spaces. This will always be a positive integer followed by “sp”. Commands like “2nl” say to output 2 “newlines” (moving the output to the next line). This will always be a positive integer followed by “nl” (that is a lowercase N, then lowercase L). So for this input: 5q 4sp 10T 2nl 3b 5( 5) 1nl 10* 0q your program run should look like this: Step 3: Better end-of-commands marker So far, we have assumed that the command “0q” marks the end of the commands. However, this is more verbose than necessary, since no other valid command ever starts with a zero. Modify your program so that simply “0” (a single zero) will end the program. Make sure you still print out the goodbye message when done! (and do NOT require the user to type anything after the “0”). So for this input: 5q 4sp 10T 2nl 3b 5( 5) 1nl 10* 0 your program run should look like this: Step 4: File input Modify your program so that it asks for a filename, then reads from that file. Sample files are available on the IC210 calendar; be sure to download them. The files should be in the same directory as where you run your program. The first thing to do is to have your program try to open the file, and then output an error message if it is not found, like this: After that works, try using test1.txt, which contains this: 5q 4sp 10T 2nl 3b 5( 5) 1nl 10* 0 so running on that file should yield this: NOTE ON TEST FILES: We have provided six “test” files for you to use in debugging your program. Some details: For each of step 4, 5, and 6, there is one “short” test file (test1.txt, test2.txt, or test3.txt) – use this at first, and check carefully that everything matches up (sample output is included in this document). When that looks good, move on to testing with the “long” test file (test4.txt, test5.txt, or test6.txt). The sample output from running with these is provided via some links on the calendar (see date where project is assigned). Check to ensure that your output matches exactly! There are also two “mystery” test files, where we have given an input file but not shown you what the output should look like. These are described more below. Here is a summary of when to use what test files: Step? Short test file Long test file Step 4 Step 5 Step 6 test1.txt test2.txt test3.txt test4.txt test5.txt test6.txt Mystery file to try (when step is complete) mystery1.txt (none) mystery2.txt STOP – once step 4 is done (it works perfectly for test1.txt and test4.txt), your program can already do a lot! Try running it on the provided mystery1.txt. If the resultant picture is something you can understand, then you are on the right track. If not, you need to debug! Step 5: Handle tab-stops Modify your program that so that it accepts a new command, “1tb”. This command will always be the number one followed by “tb” (for “tab”). This command will output one or more spaces in order to advance the output cursor to the next “tab stop”, which for now is located at column 0, 10, 20, 30, etc. in the output. See examples below. Some important notes before the examples: 1. Tabs do NOT mean that you simply print out 10 spaces. Instead, a tab command means you print out however many spaces are needed to reach the next column that is evenly divisible by 10. 2. For this program, we consider the very first column as column zero. 3. The tab command will always output at least one space. So if two consecutive tab commands are issued, the first command will advance to the next “tab stop”, and then the second command will advance an additional 10 spaces. Example #1: given input 3A 3B 1tb 7C 0, your program should first output 3 A’s, then 3 B’s. The tab command (“1tb”) should then use spaces to advance the cursor so that the next output (in this case, the 7 C’s) will begin at column 10. To do this, four spaces must be output, since six characters have been output already and 10-6=4. Example #2: given input 3A 1nl 3B 1tb 7C 0, your program should first output 3 A’s, then a newline, then 3 B’s, then 7 spaces, then 7 C’s, then quit. Note that because there is a newline after the A’s, then after the 3 B’s there are a total of 7 spaces needed to reach the first “tab stop” at column #10 (unlike in Example #1 where only 4 spaces were needed). Example #3: given input 16A 1tb 7C 0, your program should first output 16 A’s, then 4 spaces to reach the next “tab stop” (at column #20), then output 7 C’s, then quit. When you think things are working, try test2.txt, which contains this: 5q 1tb 5q 1sp 4Y 2nl 1tb 4b 1tb 8# 1nl 5( 5) 1nl 10* 0 and running on that file should yield this: When that works, try test5.txt (compare with the output provided on the calendar). Step 6: Variable tab-stops The last command you must add changes the tab-stop width. This command is just a single negative number (with no characters right after it). For instance, the command “-5” says to change the tab-stop width to 5 (meaning tab-stops are now at columns 0, 5, 10, 15, 20, 25, 30, …). As soon as you see this command, change the tab-stop width that is used for any future tab commands. HINT: this is a challenging step. You will have to think carefully about how to read the input commands, and how to handle the tabstops. However, the basic step of reading in a negative number should NOT be the difficult part. In particular, do NOT think about the command “-5” as a dash followed by a “5” – just think of it as a negative number. And remember, if you ask “cin” to read an integer, it will happily read a positive or a negative integer! Example : given input 3A 1tb 1D 1nl -5 3B 1E 1tb 1nl -13 1tb 1F 0, your program should first output 3 A’s, then 7 spaces (to reach the tab-stop at column 10), then 1D, then a newline, then change the tab-stop width to 5, then output 3 B’s, then 2 spaces (to reach the new tab-stop at column 5), then 1 E, then a newline, then change the tab-stop width to 13, then 13 spaces (to reach the first tabstop at column 13), then 1 F, then quit. When you think things are working, try test3.txt, which contains this: 5q 1tb 5q 1sp 4Y 2nl 1tb 4b 1tb 8# 1nl 5( 5) 1nl 10* -20 5q 1tb 5q 1sp 4Y 2nl 1tb 4b 1tb 8# 1nl 5( 5) 1nl 10* 0 and running on that file should yield this: When that all works, also try test6.txt (see sample output on calendar). STOP – once step 6 is done, your program can decode mystery2.txt. looks like a nice picture, take a screenshot and print it. If not, debug! If the result Step 7 Extra Credit: (Max 7 points) Command generator The program you wrote above converts simple commands into ASCII. For this step, do the reverse: write a program that reads in a file containing an ASCII picture, then outputs a command file (using the same syntax we used above) to generate that ASCII picture. Note 1: a challenge here is reading in spaces, since cin usually skips those. See the Class 15 notes for help on this. Note 2: the simplest version of your program probably won’t use any tab-stop commands. After that works, to maximize the amount of extra credit you receive, figure out how to have your program sensibly use tab commands. Name your program make_art.cpp. Submit it under Step 7. Friendly Reminder: You MUST submit (on Blackboard) a working solution for EACH of the above steps as you complete them. Submit just the main.cpp file. It’s okay if you make some changes to a step after you submit it, but we want to see the progression of your steps. The individual steps will not be graded for style or functionality – as long as it looks reasonably like you submitted the steps, what counts will be the style and functionality of the final result (which you also will submit on Blackboard). What to submit and how it will be graded When you are completely finished, submit your main.cpp file on Blackboard for the entry that says “Project 1 Final Submission.” For this step, you should submit your solution for the highest numbered step that actually works. For example, if you had a working solution to Step 4, but only a partially completed solution to Step 5, you would submit your Step 4 solution. Here are the maximum points for the different submitted steps: Step 1 solution: 30 points Step 2 solution: 50 points Step 3 solution: 65 points Step 4 solution: 75 points Step 5 solution: 93 points Step 6 solution: 100 points How points are assigned for a particular solution will vary based on the step, however, program structure, documentation, variable names, etc. will be considered along with program correctness. Important grading points (for the final submitted version): If your program does not compile as submitted, you will receive a zero. Therefore, keep backup copies of main.cpp so you always have a working copy. Your program must read input and write output in the exact format specified in this project description. Your program’s source code must comply with the Required Style Guide in order to maximize the grade you receive on this project. Your grade will also depend on the reasonable use of C++ code. Don’t use 50 lines of code where 5 would do. There will be both a paper and an electronic part to your submissions. The paper submission can be handed to your instructor or slid under their office door (but do not put your project in their mailbox). For the purposes of any late penalties, your project is not considered submitted until your instructor receives BOTH the electronic and paper portions of your submission. Any disagreement between your paper and electronic submissions will result in a grade reduction. Electronic submission: Your electronic submission should be made via Blackboard. As you complete each step you should submit your main.cpp file. When completely finished, submit your main.cpp file (for the highest numbered step that actually works) on Blackboard under Assignments -> Project 1 Final Submission. If you desire to submit a revised solution to any completed step notify your instructor via email so they can clear your previous submission (if Blackboard won’t allow you to change it). However, unless changes are dramatic this is not required for intermediate steps (see “Friendly Reminder” above) – the final submission is what is graded. Paper submission: staple in this order: Cover sheet, with signed honor statement Printout of your code. Make sure the indentation is correct on the printout! See notes on printing on the course homepage For the best step that you got working (the version of the code that you are submitting): A screenshot showing your program working for the same input that was used for the sample screenshot in the instructions above for that step. If you get mystery1.txt to work, include a screenshot of that working. If you get mystery2.txt working, include that instead (only the best one that works is needed). TIPS: At each step, stop and make sure that your output exactly matches the provided screenshots. “Little” differences like outputting 7 spaces instead of 8 results in a program that is NOT correct – and the mystery files will not work properly. Learn how to use copy and paste, in order to paste sample input commands for steps 1, 2, and 3. You can right-click on a terminal and select Copy/Paste as needed. Shift-Insert will also usually work for Paste. Follow the Style Guide as you go! It’s easier to indent and comment as you write than at the end, and you’ll make it easier on yourself to write your program. And you’ll maximize your grade by following the guidelines. Compile often so you don’t end up with a snake’s nest of errors all at once Save backups of main.cpp in case your sponsor’s dog eats your hard drive. Start early! Allow time for you to get new ideas and to see the instructor for help. Final word on honor: Remember that this project is not to be discussed with anyone besides your instructor! Don’t defeat your learning AND jeopardize the honor of yourself or your friends by talking to them about it. Your instructor may distribute some “Project EI Problems”, which are short programming problems that: a. Relate to important parts of the project b. Should be attempted (the most relevant problem) before you come for EI on the project You are permitted to discuss solutions to these practice problems, with anyone as much as you like (classmates, MGSP leaders, your instructor, or others). However, this does not change the policy regarding the actual project – you should not discuss the project itself with anyone besides your instructor, nor provide any other assistance to anyone. If you have any questions about the project itself, ask your instructor. Last minute trouble? Start early to avoid this but if you must…. late projects are accepted – see the course policy for details. Getting extra help from the instructor, then submitting late may be your best action if you get stuck in the end.
