JDBC (Java Database Connectivity)
advertisement
JDBC (Java Database Connectivity)
Java programs can not directly communicate with an ODBC driver. The ODBC API is
written in C - programming language. It uses pointers and other constructs that are not supported in
Java.
While working with Java Technology, we need to use JDBC API to connect Java based
programs to various databases. JDBC provides a set of APIs that can be used by the Java programs
to connect to and manage the databases.
Java Application
JDBC API
JDBC Driver
DBMS/RDBMS
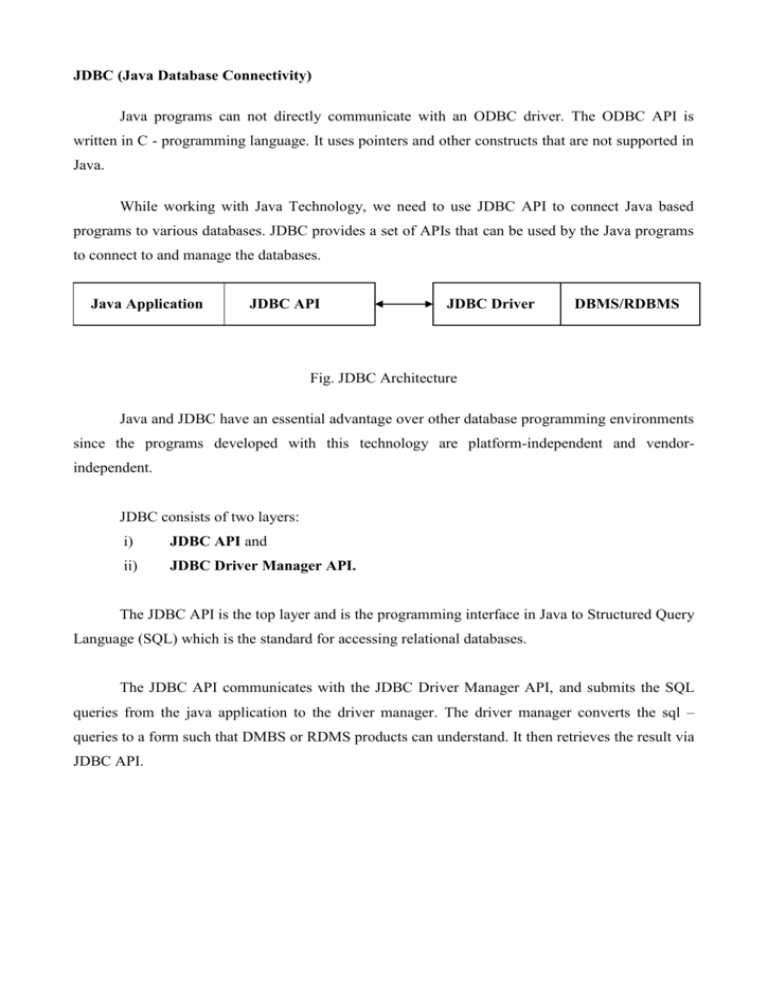
Fig. JDBC Architecture
Java and JDBC have an essential advantage over other database programming environments
since the programs developed with this technology are platform-independent and vendorindependent.
JDBC consists of two layers:
i)
JDBC API and
ii)
JDBC Driver Manager API.
The JDBC API is the top layer and is the programming interface in Java to Structured Query
Language (SQL) which is the standard for accessing relational databases.
The JDBC API communicates with the JDBC Driver Manager API, and submits the SQL
queries from the java application to the driver manager. The driver manager converts the sql –
queries to a form such that DMBS or RDMS products can understand. It then retrieves the result via
JDBC API.
JDBC API
A java program can not directly communicate with an ODBC driver manager. The ODBC
API is written in C-programming language. It uses pointers and other constructs that are not
supported in Java.
While working with Java Technology, we need to use JDBC API to connect Java based
programs to various databases. JDBC provides a set of APIs that can be used by the Java programs
to connect to and to manage the databases.
Java Application
JDBC API
JDBC Driver
DBMS/RDBMS
Fig. JDBC Architecture
In the above figure, any request like SQL queries from the Java based application is sent to
the JDBC driver using JDBC API. The JDBC driver communicate with the required DBMS or
RDBMS product by converting the SQL queries into a meaningful form so that the DBMS or
RDBMS product can understand for replying the request.
So JDBC API is described as follows–
1) It contains a set of classes and interfaces that are used to connect to a database built using
any DBMS or RDBMS products, submit SQL queries to a database, and retrieve and
process the results of SQL queries.
2) It is a low level interface in which SQL select and update statements are directly called from
within Java programs.
3) It can be used with both two tier and three tier architectures.
In two tier architecture, a java program invokes the method of JDBC API, which in turn
communicates with the JDBC driver. In three tier architecture, a java applet or HTML form submits
SQL queries to a middleware server. The middleware server, in turn, uses the JDBC API to
communicate with the database server.
JDBC Driver
There are two points to be considered when developing a database application using JDBC.
They are –
1) Java application can not directly communicate with the database to submit the SQL queries.
It is because a DBMS/RDBMS product can only understand SQL statements and not java
language statements. So we need a mechanism to translate our java statements into SQL
statements.
2) A java application should be DBMS/RDBMS independent i.e. it should be able to
communicate with any kind of database.
JDBC API submits SQL queries to the JDBC driver. The driver converts the SQL – queries
into a form that a particular DBMS or RDBMS product can understand. The JDBC driver also
retrieves the result of SQL – queries and converts it into equivalent JDBC API classes and objects
that can be used by the Java application.
There are different categories of JDBC drivers available. They are –
1) JDBC-ODBC bridge + ODBC driver
2) Native API, partly java driver
3) JDBC-Net, pure java driver
4) Native protocol, pure java driver
1. JDBC-ODBC bridge + ODBC driver
Sun Microsystems provides a driver, called the JDBC-ODBC Bridge, to access ODBC data
sources from JDBC. The bridge between the JDBC and ODBC drivers translates the JDBC
operations into ODBC operations. The ODBC drivers should be configured on the client
side for establishing a link or bridge. A JDBC-ODBC bridge should be used in situations
where there is no JDBC based driver available.
The JDBC-ODBC Bridge provides access to all databases because of the available database
drivers. However, the performance of the application is reduced because of the time
consumed in translating the operations from JDBC to ODBC. The JDBC driver manager
maintains a list of drivers created for various databases and converts a Java application to
the appropriate driver defined in a Java program.
The JDBC-ODBC bridge architecture is given below –
MS-Access
Driver
Java
Application
JDBC Driver
Manager
MSAccess
Database
JDBC-ODBC
Bridge
MS-SQL
Driver
Fig. JDBC-ODBC Bridge + ODBC Driver
MS-SQL
Database
Database Connection
URL (Uniform Resource Locator) “Protocol : Sub-protocol : Sub name”,”user”,”pass”
Syntax:
1) “jdbc:odbc:dsn_name”
2) “jdbc:odbc://localhost/database_name”,”database_user_name”,”password”
Eg. “jdbc:odbc://localhost/db1”,”root”,””
Here,
jdbc protocol and it is always jdbc
odbc type of database, if MS-Access then odbc, if MYSQL then mysql
localhost server name where database remains
db1 database name
root mysql database user name
“” blank password for the database
Execute Query
For select query, executeQuery(q) method is used, where q is the select query
Eg.
String q=”select * from emp”;
ResultSet rs=st.executeQuery(q);
For insert/update/delete query, executeUpdate(q) method is used, where q is the
insert/update/delete query query
Eg.
String q=”insert into emp values(1,’rahul’,13000)”;
st.executeUpdate(q);
Different steps in making a database connection
1) Load the appropriate driver using Class.forName(“driver name”)
Eg.
Class.forName("com.mysql.jdbc.Driver");
2) Create a Connection object from the DriverManager class using getConnection()
method
Eg.
Connection c =
DriverManager.getConnection("jdbc:mysql:localhost//db", "root",
"");
3) Create a Statement object from the Connection object using createStatement() method
to execute the query
Eg.
Statement st=c.createStatement();
4) Execute the SQL - query using Statement object
Eg.
st.executeUpdate("insert into salary
values(‘rahul’,12000)");
//for insert query
st.executeQuery("select * from emp");
//for select query
5) Close the Connection and Statement object
Eg.
st.close();
c.close();
Example shown below opens a database connection, executes a query, and iterates through
the results import java.sql.*;
//needed for JDBC
import java.io.*;
class con {
public static void main (String args[]) {
try {
//load the driver needed by the application
Class.forName("com.mysql.jdbc.Driver");
//Class.forName("sun.jdbc.odbc.JdbcOdbcDriver");
//Make the database connection
Connection c =
DriverManager.getConnection("jdbc:mysql:localhost//db", "root",
"");
//Create a statement and execute the SQL query
Statement st=c.createStatement();
ResultSet rs=st.executeQuery("select * from salary");
//Iterate through the results and print them to standard output
s="NAME \t SALARY \n..............................\n";
while(rs.next()){
s+=rs.getString(1)+"\t"+rs.getInt(2)+"\n";
System.out.println(s);
}
st.close();
c.close();
}
catch (SQLException e) {
System.out.println("SQLException: " + e.);
}
catch(ClassNotFoundException e) {
System.out.println("ClassNotFoundException: " + e);
}
}
}
Example shown below opens a database connection, executes a query, and inserts a record
into the database import java.sql.*;
//needed for JDBC
import java.io.*;
class con {
public static void main (String args[]) {
try {
//load the driver needed by the application
Class.forName("com.mysql.jdbc.Driver");
//Class.forName("sun.jdbc.odbc.JdbcOdbcDriver");
//Make the database connection
Connection c =
DriverManager.getConnection("jdbc:mysql:localhost//db", "root",
"");
//Create a statement and execute the SQL query
Statement st=c.createStatement();
st.executeUpdate("insert into salary values(‘rahul’,12000)");
st.close();
c.close();
}
catch (SQLException e) {
System.out.println("SQLException: " + e.);
}
catch(ClassNotFoundException e) {
System.out.println("ClassNotFoundException: " + e);
}
}
}
