Technology Information Page: Word 2000 Introduction University of
advertisement
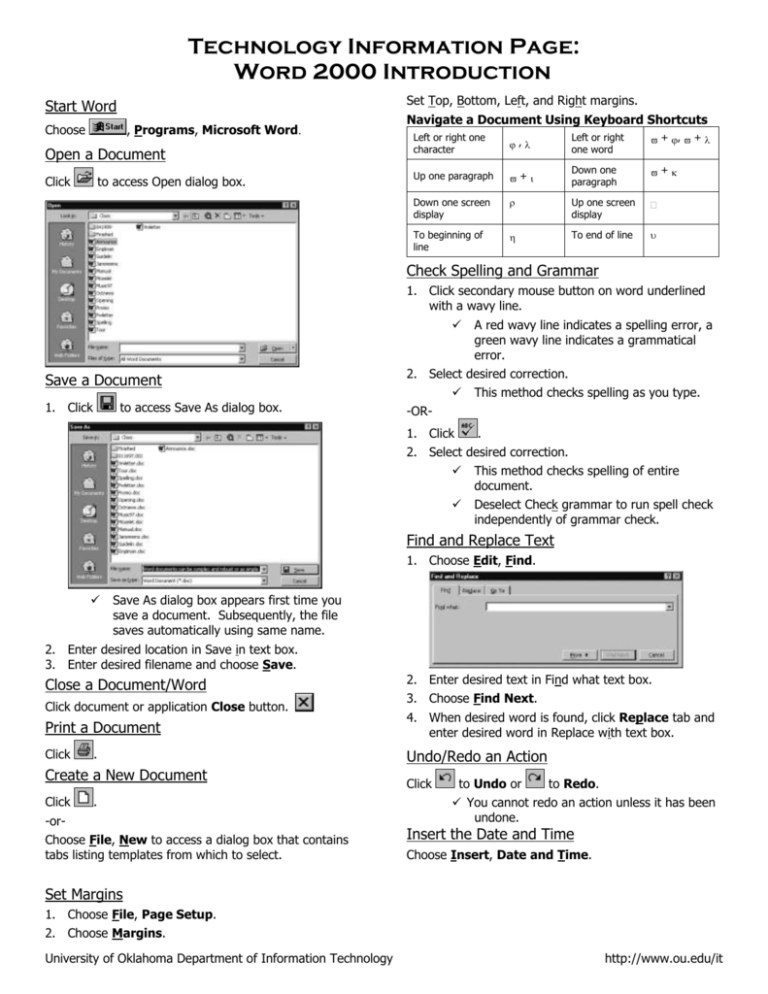
Technology Information Page: Word 2000 Introduction Set Top, Bottom, Left, and Right margins. Start Word Choose , Programs, Microsoft Word. Open a Document Click to access Open dialog box. Navigate a Document Using Keyboard Shortcuts Left or right one character , Left or right one word + , + Up one paragraph + Down one paragraph + Down one screen display Up one screen display To beginning of line To end of line Check Spelling and Grammar 1. Click secondary mouse button on word underlined with a wavy line. A red wavy line indicates a spelling error, a green wavy line indicates a grammatical error. Save a Document 2. Select desired correction. 1. Click -OR- to access Save As dialog box. 1. Click This method checks spelling as you type. . 2. Select desired correction. This method checks spelling of entire document. Deselect Check grammar to run spell check independently of grammar check. Find and Replace Text 1. Choose Edit, Find. Save As dialog box appears first time you save a document. Subsequently, the file saves automatically using same name. 2. Enter desired location in Save in text box. 3. Enter desired filename and choose Save. Close a Document/Word Click document or application Close button. 2. Enter desired text in Find what text box. 3. Choose Find Next. Print a Document 4. When desired word is found, click Replace tab and enter desired word in Replace with text box. Click Undo/Redo an Action . Create a New Document Click . -orChoose File, New to access a dialog box that contains tabs listing templates from which to select. Click to Undo or to Redo. You cannot redo an action unless it has been undone. Insert the Date and Time Choose Insert, Date and Time. Set Margins 1. Choose File, Page Setup. 2. Choose Margins. University of Oklahoma Department of Information Technology http://www.ou.edu/it Technology Information Page: Word 2000 Introduction Format Text Insert Special Characters Bold + Italic + Underline + 1. Choose Insert, Symbol. 2. Click Symbols tab and select desired symbol. -orClick Special Characters tab and select desired character from list. Text Enhancements 3. Choose Insert. Font Insert AutoText Font Size 1. Choose Insert, AutoText. 2. Select desired preformatted AutoText type. -OR- Format Paragraphs Alignment Left + Right Center Justify + 3. Enter a short or abbreviated name for entry in Please name your AutoText entry text box. + Select Page Orientation + 1. Choose File, Page Setup. Additional Paragraph Formatting Options Style Applies a set of formatting options. Format Painter Copies formatting of one paragraph to another. Highlight Highlights selected text. This option is located on Formatting toolbar. Paragraph Indents 1. Select text to become AutoText. 2. Choose Insert, AutoText, New. Bullets and Numbering Increase Indent Bulleted List Decrease Indent Numbered List 2. Click Paper Size tab. 3. Select desired Paper size, Width, Height, and Orientation. Set Tabs 1. Place insertion point in line to contain tab. 2. Click Tab type button (shown below) until desired tab appears. Left Center Right Decimal Bar 3. Click ruler below tick mark to set new tab. Move or Copy Text 1. Select text to be cut or copied. 2. Click or . 3. Position cursor. 4. Click . Cut + Copy + Paste + Borders and Shading 1. Choose Format, Borders and Shading. 2. Choose Border or Shading tab. 3. Select desired border or shading options. Indent Options 1. Select paragraph(s) you want to indent. 2. Select indent marker you want to move. 3. Drag marker to new location on ruler. Moving left indent marker moves both first line and hanging indent markers. To create a first line indent, drag only first line indent marker. To create a hanging indent, drag only hanging indent marker. University of Oklahoma Department of Computing & Telecommunication Services Word 2000 Introduction
