LJ-MB
Apologia
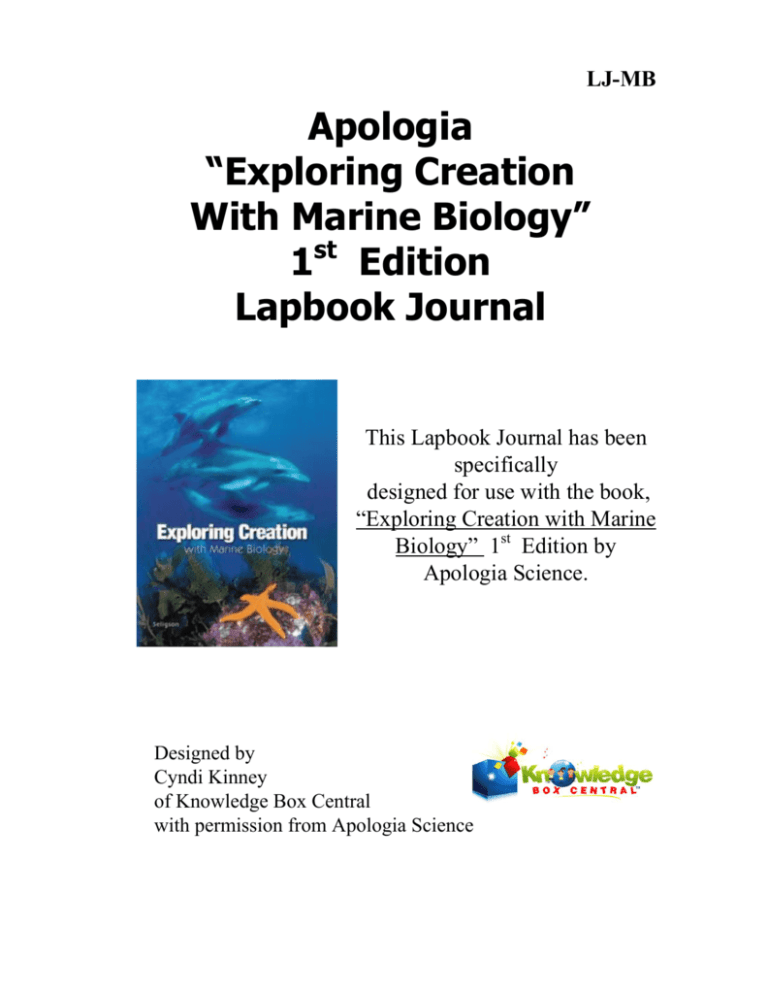
“Exploring Creation
With Marine Biology”
1st Edition
Lapbook Journal
This Lapbook Journal has been
specifically
designed for use with the book,
“Exploring Creation with Marine
Biology” 1st Edition by
Apologia Science.
Designed by
Cyndi Kinney
of Knowledge Box Central
with permission from Apologia Science
Exploring Creation With Marine Biology 1st Edition Lapbook Journal
Copyright © 2015 Knowledge Box Central
www.KnowledgeBoxCentral.com
ISBN #
Ebook:978-1-62472-653-8
CD:978-1-62472-651-4
Printed:978-1-62472-652-1
Publisher: Knowledge Box Central
Http://www.knowledgeboxcentral.com
All rights reserved. No part of this publication may be reproduced, stored in a retrieval
system or transmitted in any form by any means, electronic, mechanical, photocopy,
recording or otherwise, without the prior permission of the publisher, except as provided by
USA copyright law.
The purchaser of the eBook or CD is licensed to copy this information for use with the
immediate family members only. If you are interested in copying for a larger group, please
contact the publisher.
Printed format is not to be copied and is consumable. It is designed for one student only.
All information and graphics within this product are originals or have been used with
permission from its owners, and credit has been given when appropriate. These include, but
are not limited to the following: www.iclipart.com, and Art Explosion Clipart.
PLEASE, PLEASE, PLEASE
Read THIS First!!
I know it’s tempting to go ahead and get to “the good stuff,” but I promise that your use
of this product will be greatly enhanced if you take a few minutes to read a little more
about it. Within this document, you’ll learn how to set up your binder, which files to
print, what types of paper to use, where to view pictures of completed booklets, frequently
asked questions, what can be easily omitted due to time constraints, and so much more.
Also, if after reading this, you think of tips that would have helped you assemble and use
your product, please feel free to let me know. I do want to make sure that we are
providing the best product to supplement these awesome Apologia books.
Table of Contents
* So now you bought it...what do you do with it? …………………………Pg4.
* Setting up the binder…………………………………………….……..Pg 4 & 9
* What’s in each section, supplies needed, how to print, etc.…… …..……Pg 4-9
* On Your Own Journal Pages………………………………………………...Pg 5
* Study Guide Lapbook Pages - Booklet Templates & Background Pages...Pg 6-7
* Study Guide Journal Pages………....…………………………………….…Pg 8
* Lab Reports………………………………………….………………………Pg 8
* Module Summaries………………………………………………………….Pg. 9
* Frequently Asked Questions……………………………………… ……Pg 10-12
* Cover for Lapbook Journal (goes in front of binder).…………..…..……...Pg 14
* Cover for On Your Own Journal………………………………..…..……...Pg 15
* Cover for Study Guide Lapbook Pages..………………………..…..……...Pg 16
* Cover for Study Guide Journal Pages………………………………………Pg 17
* Cover for Lab Reports…...……………………………………..…..……....Pg 18
* Cover for Module Summaries ………………………………..…..……....Pg 19
Knowledge Box Central
www.knowledgeboxcentral.com
Welcome to our Lapbook Journal for Apologia’s Exploring Creation
With Marine Biology 1st Edition by Dr. Jay Wile.
We are very pleased to offer this product, as authorized by Dr. Wile.
So...now you bought it...what do you do with it?
I’ll try to answer your questions here. Please note that there are several ways to use our
Lapbook Journal, and the BEST way is the way that works for your student.
First, purchase a 4 inch 3-ring binder, and divide it into 3 sections. Your dividers should
be labeled as follows:
On Your Own Journal (OYOJ)
Study Guide Pages (STP)
Lab Reports (LR)
Module Summaries (MS)
You may use the acronyms if your label space is limited.
Now you have your binder ready….so what next?
It’s time to print! As for the order or printing...you may choose to print needed pages as
you finish one module and begin the next….or you may choose to print everything up
front. The choice is yours, but I would suggest marking off some time to print it all at
once….that’s just my opinion. Obviously, your time will dictate what you print when.
You will find 16 files within this product. These will consist of one file for each module
of the book. Within each of these files (one per module), you will find the following:
1. On Your Own Journal Pages
2. Study Guide Lapbook Pages - Booklet Templates
3. Study Guide Lapbook Pages - Background Pages
4. Study Guide Journal Pages
5. Lab Reports (Supplies, Introduction, & Procedure filled out already)
6. Lab Reports (No information already filled in...only the report itself with the title of
the experiment at the top)
7. Module Summary
Now I will go into detail about how to print each of these files, what type of paper to
print them on, and how to use them.
As I said on the previous page, there are 16 files (one for each module of the book)
included in this product, and within each of these files, you will find the following:
1. On Your Own Journal Pages
2. Study Guide Lapbook Pages - Booklet Templates
3. Study Guide Lapbook Pages - Background Pages
4. Study Guide Journal Pages
5. Lab Reports (Supplies, Introduction, & Procedure filled out already)
6. Lab Reports (No information already filled in...only the report itself with the title of
the experiment at the top)
7. Module Summary
1. On Your Own Journal Pages
Supplies Needed: Regular White Copy Paper (unless you desire differently)
These pages will be solely devoted to the “On Your Own” questions that appear
throughout each of the modules. Instead of the student having to re-write the questions in
a notebook, we have provided the questions in a “Notebooking” styled setting. There will
be ample space for the students to answer the questions within these Journal Pages, and
the borders and graphics provide a decorative page for documenting learning.
We recommend that these pages be printed on regular, white paper. There is no need to
print these pages on any special type or color, unless that is your preference.
For each module, print these pages, and file them all together under your “On Your Own
Journal Pages” divider tab. As your student comes to these questions, he will go to this
section to document his answers.
IMPORTANT NOTE About Next Section:
NOTE: There are TWO DIFFERENT OPTIONS for the Study Guide questions – they
are the Lapbook Pages OR the Journal Pages – depending on your student’s preference).
There is NO NEED TO PRINT BOTH!!!!!
IMPORTANT NOTE About THIS Section:
NOTE: There are TWO DIFFERENT OPTIONS for the Study Guide questions – they
are the Lapbook Pages (#2 & 3) OR the Journal Pages (#4)
– depending on your student’s preference).
There is NO NEED TO PRINT BOTH!!!!!
HOW do I know which one of these options to use????
*** If your child enjoys hands-on projects, scrapbooking, crafty projects, etc., then you
will probably want to use the Study Guide Lapbook Pages and their Background Pages
(#2 and #3).
*** If your child does NOT enjoy these types of hands-on projects and would rather have
a journaling-style area for documenting the answers to the Study Guide questions, then
you will probably want to use the Study Guide Journal Pages.
You may change after a few modules. You may even want to use both...but not at the
same time….just every other module.
2. Study Guide Lapbook Pages Booklet Templates & Background Pages
Supplies Needed: Regular White Copy Paper, Colored Paper, White Cardstock Paper (if
desired), Glue, Scissors, Metal Brad Fasteners (if desired), Ribbon (if desired), Staples
This section is used with the Study Guide at the end of each module of the book. Instead
of writing the questions and answers into a regular notebook, the student would complete
these booklets to place into his binder.
This section provides more of a “hands-on” opportunity for your students. It is similar to
the traditional lapbooks, but there are no folders in which to place the booklets.
SPECIAL NOTE: Remember, IF your student DOES NOT want to create the lapbook
booklets, we have added another option for the Study Guide Questions, and that is the
Study Guide Journal in section 4.
Study Guide Lapbook Pages Booklet Templates & Background Pages...cont.
We recommend that you print these on the following types of paper:
* Study Guide Lapbook Pages Booklet Templates: colored paper, any weight (we use 24#,
multi-colored paper)
* Study Guide Lapbook Pages Booklet Templates Instructions: white copy paper (these
will ultimately be thrown away, so the weight of the paper isn’t important)
* Study Guide Lapbook Pages Background Pages: white cardstock (These can be printed
on white paper, if you prefer. We print on white cardstock because it is more durable, holds
the weight of the booklets, and holds up to years of “thumbing through” the pages.)
These lapbook-style booklets will provide a 3-dimensional aspect to your student’s learning
experience. Science has proven that the more senses a student uses when learning and
reviewing new material, the more he will retain. So, by adding this section, your student
will be able to use his own hands to create these memories. Also, the colors and shapes of
the booklets will stimulate memory as well.
At the end of each module, allow the student time to create these booklets, and place them
randomly (be creative!) on the Study Guide Lapbook Journal Background Pages (print as
many copies of these as you need).
This is the most time consuming portion of the Lapbook Journal, and I know that time is
very precious. So, if you simply cannot make time for creating ALL of the booklets, or if
your student is at first resistant to this hands-on method, you may choose to have your
student only complete a few of the booklets...maybe the ones that cover areas in which he
needs extra study.
Allow the student to have fun with this section. As he cuts, glues, and folds, he will be
creating something to look back on for years to come. He will also be creating something
that will be WONDERFUL when it comes time to review! There is NO better way to learn,
in my opinion, than for the student to be intensely involved in the process by using his
hands.
3. The Study Guide Lapbook Background Pages – SPECIAL NOTE: You will need to
print as many of these as necessary. How many you need depends on how many booklets
that your student made. Allow your student to arrange the completed booklets in any order
they desire – be creative! You may need a bunch of these pages printed if he really gets the
hang of this!
4. Study Guide Journal Pages
Supplies Needed: Regular White Copy Paper
This section is OPTIONAL and could replace the Study Guide Lapbook Pages
These pages will be solely devoted to the “Study Guide” questions that appear at the end
of each of the modules. Instead of the student having to re-write the questions in a
notebook, we have provided the questions in a “Notebooking/Journal” styled setting.
There will be ample space for the students to answer the questions within these pages, and
the borders provide a decorative page for documenting learning.
If you choose to use these pages, print them, and file them all together under your “Study
Guide Questions” divider tab.
5 & 6. Lab Reports
Supplies Needed: Regular White Copy Paper
This section is where the student will document all of the work done on the lab
experiments within each module.
I conducted a poll before finalizing this section. I wanted to know if parents would like
the Lab Reports to be partially completed….or whether they would rather have the
student write in all of the information themselves. The responses were split right down
the middle. Then, a really smart mom emailed and said, “Why don’t you just put both
formats in the Lapbook Journal?” So….that’s exactly what I did!
There are 2 different sections of each file that are devoted to Lab Reports. There will be
a section that gives you Lab Reports with the Experiment Title & Number, Supplies,
Introduction, & Procedure already filled in. The back of these reports has no information
filled in – this is where the student will document his observations, conclusions, etc. and
draw any diagrams necessary. The other section gives you Lab Reports with ONLY the
Experiment Title & Number filled in...the rest is blank. So, choose which works for you.
You may even want to try both...or you may change midway through the year...or
depending on your time that week. The choice is yours!
Print these on regular white paper, unless you WANT to print them on cardstock. They
are meant to be printed double-sided, but feel free to print them as a 2-page report, if that
works better for you (or for your printer!). PLEASE NOTE: Some Lab Reports are
longer than others (3-4 pages max), so be aware when printing. File them in the “Lab
Reports” section, and refer to them each time your student performs a lab experiment.
7. Module Summaries
Supplies Needed: Regular White Copy Paper
This section is OPTIONAL and could even be used as a “Pre-Test.” This is an exact
copy of what is found at the back of the book, and it is exactly as it sounds...a summary of
the entire module, with blanks to be filled in by the student.
If you choose to use these pages, print them, and file them all together under your
“Module Summaries” divider tab.
BOTTOM LINE:
Here is what your 3-ring binder will look like:
** Section 1:
** Section 2:
** Section 3:
** Section 4:
On Your Own
Study Guide (either the lapbook booklets OR the journal pages)
Lab Reports
Module Summaries
ONE OTHER OPTION:
I have had a few moms tell me that they would RATHER divide their notebook into 16
sections – one for each module. These moms said that they put all of the above
mentioned items in order in EACH section of the notebook.
The choice is yours.
Frequently Asked Questions:
1. What if I don’t have enough time to do all of this? What’s ok to leave out?
If you are really pushed for time, please don’t feel that you have to “do it all!” I am
cursed with this syndrome, and it rears it’s head every time I get in a new piece of
curriculum. YOU alone know what is best for your student, school, and family.
With that said, I’ll say this. If I had to choose something to omit, I would probably first
allow my student to use the Lab Reports that are partially filled in. This will save a lot of
time….and frustration on the part of the student. If I still needed to omit something, then
I would probably allow the student to answer some of the Study Guide questions either
using the journal pages or verbally and only do some of the Lapbook Pages. However, I
would be sure to NOT choose the lapbook booklets that deal with the easiest subject
matter to leave out. I would allow the questions that deal with the easiest subject matter
to be answered orally or via the journal pages, and require that the others be answered
within the booklets.
2. What if I only have white paper, and I cannot afford to get (or don’t have time to get)
colored paper or cardstock?
We have made suggestions as to the colors and paper types that we would suggest, but
they are ONLY suggestions. If your daughter is really into pink, and everything has to be
pink….then print the whole thing on pink! If you are cramped for extra money, and you
only have white paper, then print it all on white! I assure you that the color of the paper
will not KEEP your child from learning. There is scientific research to support the
improvement in memory when using colored paper, but who says the child can’t color the
paper themselves (the lapbook booklets)...draw pictures on them...make them his own.
Or...just leave them white. The choice is ALWAYS yours.
Frequently Asked Questions...continued...
3. My friend wants to use this Lapbook Journal too. Can I let her use my copy? Oh, and
my Co-op might want to use it too.
Our copyright states that any Ebook or CD is purchased for use by ONE household. If
your Aunt Mary, Cousin Martha, and all of their children live in YOUR household (God
Bless You!), then that includes them. You may print as many copies of the material as
you need from the Ebook or CD for those in your household. However, PLEASE do not
share these with friends and family who do NOT live with you.
As for Co-Ops, we do have a Co-Op License available. All you have to do is purchase
the Ebook or CD version of the product as well as the Co-Op License through our
website. In the “comments” section of the purchase, state which product(s) will be used
at the Co-Op. That’s it! It doesn’t matter how many children are represented in your CoOp….print away!! I assure you that it’s WAY less expensive than for each family to
purchase their own copy. You can all split the cost, and it comes out great for everyone.
4. Why are there very few color graphics in this product?
After much research, we believe that the children of this generation are visually overstimulated. Between video games, internet, and television, there is very little left to the
imagination. While colors play an important role in memory and retention of information,
OVER-stimulation with colors has just the opposite effect.
Research ALSO shows that colored shapes have an effect on the memory that is amazing.
Students will remember colored shapes much more than they will remember colored
graphics on white paper.
Another reason…..colored ink costs homeschool moms TONS!
Without colored graphics, students will create their own! Allow them to draw pictures,
color the borders, use their imaginations.
For these reasons, we have chosen to use few color graphics. We feel that this decision,
although not the popular one, will benefit your students in the long run.
Frequently Asked Questions...continued some more...
5. My child doesn’t like lapbooks, so why use this product?
If your child has never used lapbooking, he may not know what he’s missing. However,
if he just doesn’t want to do it – no how and no way – then we have included “Study
Guide Journal Pages” to replace the lapbooking portion of the product. They are included
within the product, right after the lapbooking section.
6. What if I don’t have a printer, or my printer isn’t working?
Most print shops will allow you to email your document to them for printing. Or, you
may choose to burn the Ebook to a CD and take it to them for printing.
7. Is it OK to burn the Ebook to a CD?
Yes, absolutely! In fact, I would suggest it. My computer crashed last year, and I lost SO
many wonderful homeschool products that were in Ebook format!! (still crying!)
8. What if I’m not creative, crafty...etc….and I don’t really want to be?
That’s ok. Not everyone enjoys working with “hands-on” products. That’s why this
product will work for you! All of the planning is done, and the instructions are written so
that the student can read and follow them without assistance from an adult!
Use the following
pages at the
beginning of each
section of your
notebook.
Lapbook Journal
For Exploring Creation
With Marine Biology
1st Edition
By
_____________________
Exploring Creation
With Marine
Biology
1st Edition
On Your Own
Journal
Exploring Creation
With Marine
Biology
1st Edition
Study Guide
Lapbook
Pages
Exploring Creation
With Marine
Biology
1st Edition
Study Guide
Journal
Pages
Exploring Creation
With Marine
Biology
st
1 Edition
Lab Reports
Exploring Creation
With Marine
Biology
st
1 Edition
Module
Summaries
www.knowledgeboxcentral.com
Apologia Exploring Creation With
Marine Biology 1st Edition
Module 1
The following pages are divided into 7 sections,
with a page like this one between each section.
The sections are:
*(1) ON YOUR OWN QUESTIONS (Journal format)
*STUDY GUIDE QUESTIONS:
(Choose either #2 OR #3 & #4 for these questions)
(2) Study Guide Journal Pages
(3) Study Guide Lapbook Pages – Booklet
Instructions & Templates
(4) Study Guide Lapbook Pages – Background
Pages
*LAB REPORTS:
(Choose either #5 OR #6)
(5) Lab Reports (Partially Completed)
(6) Lab Reports (Blank)
*(7) MODULE SUMMARY
www.knowledgeboxcentral.com
The following section is:
Apologia Exploring Creation
With Marine Biology
1st Edition
Module 1
On Your Own Journal Pages
1.1 What are the four major
ocean basins of the world?
1.2 You have a sample of
oceanic crust and a sample of
continental crust. How could
you tell which is which?
Marine Biology - 1st Edition – Module 1 - On Your Own Journal
1.3 If a scientist discovered fossils of an extinct reptile on the
west coast of southern Africa, and he knew that more examples
of the same extinct fossil were found on the east coast of South
America, would this discovery prove that the supercontinent
Pangaea was indeed a reality?
1.4 If you were on a
scientific expedition in
the
deep
Atlantic
Ocean, took a sample
of the sea floor, and
found that it had a
very thick layer of
sediment, would you
presume that this area
was close to or far
from a mid-ocean
ridge?
Marine Biology - 1st Edition – Module 1 - On Your Own Journal
1.5 If an oceanic plate is
colliding with a continental
plate, what will most likely
happen?
1.6 You are given a sample
of sediment from the
ocean. The container says
it is a small sample of a
large amount of sediment
buildup. From which region
of the ocean floor did the
sample most likely come?
Marine Biology - 1st Edition – Module 1 - On Your Own Journal
1.7 What gives water many
of its unusual properties?
1.8 Benzene is a
chemical that is
liquid at room
temperature. If
frozen benzene is
placed in liquid
benzene, will it
float or sink?
Marine Biology - 1st Edition – Module 1 - On Your Own Journal
1.9 If you were given a fish in a fish
tank and were told to keep the
salinity of the water very high and
the temperature of the water very
low in order to keep this fish
healthy, what part of the ocean do
you think was the natural habitat of
this fish?
1.10 The Red Sea is given
its name due to an
abundance of red bacteria
that gives the water a
reddish color. If the red
bacteria were not able to
live in the Red Sea, what
color would the Red Sea
appear to be and why?
Marine Biology - 1st Edition – Module 1 - On Your Own Journal
1.11 During a terrible
storm on the west coast
of South America, a boat
loses a box of its
cargo of rubber
ducks. One of the
ducks is found in
Japan months later.
How did it get there?
1.12 Suppose you
were looking for coral
reefs (which love
warm water) in the
Atlantic Ocean
relatively far from the
equator. Would you
tend to find them on
the eastern coast of
North America or the
western coast of
Europe?
Marine Biology - 1st Edition – Module 1 - On Your Own Journal
1.13 If the moon were
farther from the earth,
what change would you
expect in high tide and
low tide?
1.14 A man living at the
beach looks out his
window and sees a full
moon. What type of high
tides can he expect in the
next few days?
Marine Biology - 1st Edition – Module 1 - On Your Own Journal
1.15 Would you expect to see greater overturn in the
winter or summer months?
Marine Biology - 1st Edition – Module 1 - On Your Own Journal
www.knowledgeboxcentral.com
The following section is:
Apologia Exploring Creation With
Marine Biology
1st Edition
Module 1
Study Guide Journal Pages
You MAY choose to use these
INSTEAD of the Study Guide
Lapbook Pages.
1. Define the following terms:
A. Oceanic crust:
B. Continental crust:
C. Plate tectonics:
D. Mid-ocean ridge:
E. Seafloor spreading:
Marine Biology - 1st Edition – Module 1 – Study Guide Questions Journal
F. Subduction:
G. Continental shelf:
H. Continental slope:
I. Continental rise:
J. Specific heat:
K. Salinity:
Marine Biology - 1st Edition – Module 1 – Study Guide Questions Journal
L. Coriolis effect:
M. Gyres:
N. Spring tide:
O. Neap tide:
2. Name the four large ocean basins of the world in order of increasing
size.
Marine Biology - 1st Edition – Module 1 – Study Guide Questions Journal
3. Geologically speaking, what are the differences between the crust of the
"oceans" and the crust of the "continents"?
4. If a specific location in the world is known for experiencing a large
amount of earthquakes throughout modern history, what would you
propose is occurring in the earth's crust underneath that area?
5. Given the fact that most of the deep ocean trenches in creation are located
in the Pacific Ocean, what is the main type of plate interaction that occurs in
that ocean?
6. Ocean crust is constantly being destroyed and reformed. Considering the
four large ocean basins in the world, which ocean has the most oceanic crust
formation? Which has the most oceanic crust destruction?
7. Although there is a large surface area under the oceans of the earth, in
which main region of the ocean bottom do you find most of the marine life?
Marine Biology - 1st Edition – Module 1 – Study Guide Questions Journal
8. What one major property of water helps it hold its molecules together,
keeping it from having severely colder boiling and freezing
temperatures?
9. If a marine organism lives in an area where there are drastic changes in
the weather resulting in extremely high and low air temperatures, what
property of water prevents the organism from "feeling" such changes?
10. What will happen to the water near the ocean surface if a portion of the
surface layer experiences excess evaporation? What will happen if that
portion experiences a large drop in temperature?
11. Why is the ocean blue?
Marine Biology - 1st Edition – Module 1 – Study Guide Questions Journal
12. A fisherman was deep-sea fishing and pulled up a large bottom-dwelling
grouper he had hooked. He was able to bring the fish up to the surface
very quickly, but was surprised to see that the fish appeared extremely
bloated (puffed up) and did not survive the stress of coming to the
surface. What happened?
13. Why do winds not move in a straight line on the earth?
14. Suppose the earth rotated opposite of the direction it currently rotates.
What effect would that have on the directions of the gyres shown in Figure
1.16?
15. Where do water molecules move in a surface wave?
Marine Biology - 1st Edition – Module 1 – Study Guide Questions Journal
16. During which phase (or phases) of the moon are the tidal ranges
the largest and why?
17. Describe the two major layers of the deep ocean and the
feature that separates them.
Marine Biology - 1st Edition – Module 1 – Study Guide Questions Journal
www.knowledgeboxcentral.com
The following section is:
Apologia Exploring Creation
With Marine Biology
1st Edition
Module 1
Study Guide Lapbook Pages –
Booklet Instructions &
Templates
(You MAY choose to use the
“Study Guide Journal” in place
of this section. )
Apologia Exploring Creation With Marine
Biology – 1st Edition - Module 1
Study Guide Lapbook Pages - Booklet Templates
Assembly Instructions
Question 1. a-0
Cut out along the outer black line edges of each page of the booklet. Then stack the pages
in order, with the title page on top. Punch 2 or 3 holes along the left side of the stack, and
secure with a ribbon or metal brad fasteners. You may choose to just staple the stack
along the left side.
Questions 2 -7
Cut out along the outer black line edges of each page. Stack so that the title is on top and
the pages get longer toward the back. Secure with staples at the top.
Questions 8-10
Cut out along the outer black line edges of each page. Stack so that the title is on the top.
Secure along the left side of the booklet.
Question 11
Cut out along the outer black line edges. Fold along the center line so that the question is
on the outside.
Question 12
Cut out along the outer black line edges. Fold along the center line so that the question is
on the outside.
Questions 13-15
Cut out along the outer black line edges of the booklet. Fold along the center line so that
the words are on the outside. Now cut along the short, horizontal dotted lines to create
“flaps” under which to write your answers.
Marine Biology - 1st Edition – Module 1 – Study Guide Lapbook Templates
Question 16
Cut out along the outer black line edges of both pages. Stack so that the title is on the
top. Secure with a staple or metal brad fastener at the top.
Question 17
Cut out along the outer black line edges. Fold along the center line so that the title is on
the front.
Marine Biology - 1st Edition – Module 1 – Study Guide Lapbook Templates
Module 1
Study Guide Questions – Lapbook Booklet Templates
Question #1: a-o
a. Oceanic crust:
b. Continental crust:
Module # 1
c. Plate tectonics:
Definitions
d. Mid-ocean ridge:
e. Seafloor spreading:
Marine Biology - 1st Edition – Module 1 – Study Guide Lapbook Templates
Question #1
f. Subduction:
k. Salinity:
g. Continental shelf:
l. Coriolis effect:
h. Continental slope:
m. Gyres:
i. Continental rise:
n. Spring tide:
j. Specific heat:
o. Neap tide:
Marine Biology - 1st Edition – Module 1 – Study Guide Lapbook Templates
Questions #2-7
Name the four large ocean basins of
the world in order of increasing size.
Module 1:
Questions
#2-7
Question #2
Geographically speaking, what are
the differences between the crust of
the “oceans” and the crust of the
“continents”?
If a specific location in the world is
known for experiencing a large
amount of earthquakes throughout
modern history, what would you
propose is occurring in the earth’s
crust underneath that area?
Question #3
Question #4
Marine Biology - 1st Edition – Module 1 – Study Guide Lapbook Templates
Questions #2-7 continued
Given the fact that most of the deep
ocean trenches in creation are located
in the Pacific Ocean, what is the main
type of plat interaction that occurs in
that ocean?
Ocean crust is constantly being
destroyed and reformed.
Considering the four large ocean
basins in the world, which ocean has
the most oceanic crust formation
Which has the most oceanic crust
destruction?
Question #5
Marine Biology - 1st Edition – Module 1 – Study Guide Lapbook Templates
Question #7
Although there is a large surface area
under the oceans of the earth, in
which main region of the ocean
bottom do you find most of the
marine life?
Question #6
Questions #8-10
Properties
of
Water
9. If a marine organism lives
in an area where there are
drastic changes in the
weather resulting in
extremely high and low air
temperatures, what property
of water prevents the
organism from “feeling”
such changes?
8. What one major property
of water helps it hold its
molecules together, keeping it
from having severely coler
boiling and freezing
temperatures?
10. What will happen to the
water near the ocean surface
if a portion of the surface
layer experiences excess
evaporation? What will
happen if that portion
experiences a large drop in
temperature?
Marine Biology - 1st Edition – Module 1 – Study Guide Lapbook Templates
Question #11
Why is the
ocean
blue?
Marine Biology - 1st Edition – Module 1 – Study Guide Lapbook Templates
Question #12
A fisherman was deepsea fishing and pulled
up a large bottomdwelling grouper he
had hooked. He was
able to bring the fish up
to the surface very
quickly, but was
surprised to see that the
fish appeared extremely
bloated and did not
survive the stress of
coming to the surface.
What happened?
Marine Biology - 1st Edition – Module 1 – Study Guide Lapbook Templates
Questions #13-15
M
O
T
I
O
N
OF
THE
O
C
E
A
N
Why do winds
not move in a
straight line
on the earth?
W
A
V
E
S
Suppose the
earth rotated
opposite of the
direction it
currently
rotates. What
effect would
that have on
the direction of
the gyres in
Figure 1.16?
Where do water
molecules move
in a surface
wave?
Marine Biology - 1st Edition – Module 1 – Study Guide Lapbook Templates
Question #16
During
which
phase (or
phases) of
the moon
are the
tidal ranges
the largest
and why?
Marine Biology - 1st Edition – Module 1 – Study Guide Lapbook Templates
Question #17
Describe the two
major layers of
the deep ocean
and the feature
that separates
them.
Marine Biology - 1st Edition – Module 1 – Study Guide Lapbook Templates
www.knowledgeboxcentral.com
The following section is:
Marine Biology
1st Edition
Module 1
Study Guide Lapbook
Background Page
(print as many as needed)
Marine Biology
Module 1
Marine Biology - 1st Edition – Module 1 – Study Guide Lapbook Background Pages
www.knowledgeboxcentral.com
The following section is:
Marine Biology
1st Edition
Module 1
Lab Reports
(partially completed)
**You may choose to print these
reports double-sided or singlesided. Some lab reports have
more than 2 pages, so be aware
when printing.
Marine Biology
Lab Report
Experiment # 1.1
The Expansion of Solid Water
Date:
______________
Name: _________________________
Supplies:
·
·
·
A tall, clear or translucent plastic drinking cup or a 20-oz. empty water bottle
Water
A piece of masking tape
Introduction:
When water is in its liquid phase, the molecules are in constant motion, some being held in small
groups due to hydrogen bonding. When water freezes, the molecules slow down and pull apart
from one another. You will observe the result of this movement in this experiment.
Procedure:
1. Fill the cup or bottle 1/4 of the way with water.
2. Mark the water level by placing a piece of masking tape on the container so that the top side of the
tape lines up with the level of the water.
3. Place the container in the freezer on a flat surface. If you are using a bottle, do not put a lid on
top.
4. Allow the container to stay in the freezer overnight.
6. Note the level of the ice as compared to the position of the masking tape.
7. Allow the water to thaw in a sink and clean up.
Page 1
Marine Biology
Lab Report
Experiment # 1.1
The Expansion of Solid Water
Date:
______________
Name: _________________________
Observations:
Diagram:
Summary:
Page 2
Marine Biology
Lab Report
Experiment # 1.2
Removing the Salt From Salt Water
Date:
______________
Name: _________________________
Supplies:
·
·
·
·
·
·
·
·
A liquid measuring cup
Water
A small saucepan
Stove
A tablespoon
Salt
Metal stirring spoon
A small bowl
Introduction:
In order to determine the salinity of the salt water in the ocean, one first must be able to remove and
measure the quantity of salt that is in solution. This experiment shows you one way this is done.
NOTE: If you live near the coast and have access to ocean water, you can place 2 tablespoons of
ocean water in the bowl and skip to step 8.
Procedure:
1. Measure 1 cup of water into the measuring cup, and pour it into the saucepan.
2. Place the saucepan on the stove and heat over medium heat. Do not let it boil.
3. Add two tablespoons of salt to the water while it is heating.
4. Stir the water until the salt dissolves and the water becomes clear again. It is okay if there is a
little bit of undissolved salt left.
5. Turn off the stove and remove the saucepan.
6. Place 2 tablespoons of the salt-water mixture into a bowl, being careful not to transfer any
undissolved salts. The water should appear clear.
7. Clean up everything except the bowl that has 2 tablespoons of salt water in it.
8. Allow the bowl of salt water to sit out for a few days until all the water is gone. (This process
will occur more quickly in a warm, sunny window.)
9. Observe what is in the bowl.
Page 1
Marine Biology
Lab Report
Experiment # 1.2
Removing the Salt From Salt Water
Date:
______________
Name: _________________________
Observations:
Diagram:
Summary:
Page 2
Marine Biology
Lab Report
Experiment # 1.3
The Effects of Salinity and Temperature on the Density of Water
Date:
______________
Name: _________________________
Supplies:
·
·
·
·
·
·
·
·
·
·
·
A measuring cup for liquids
Six clear drinking glasses
Water
Small saucepan
Stove
Measuring tablespoon
Salt
Stirring spoon
Two colors of food coloring (yellow and blue work the best)
Chilled water from the refrigerator
Turkey baster
Introduction:
Many parameters can affect the density of water. You will be performing a three-part experiment to
observe how salinity and temperature affect water density. NOTE: If you live near the coast and
have access to ocean water, you can use one cup of ocean water instead of making salt water in
steps 1 - 3 .
Procedure:
1. Measure one cup of tap water and place it in the saucepan on the stove.
2. Heat the water on medium heat and add 2 tablespoons of salt.
3. Stir until the salt is dissolved, then remove the saucepan from the heat to cool. Turn off the
burner.
4. While the salt water is cooling, perform the next part of the experiment by filling two of the
glasses with tap water until they are one-third full.
5. Add two drops of blue food coloring to one glass and mix.
6. Add two drops of yellow food coloring to the other glass and mix.
7. Draw some of the blue water into the turkey baster, placing your finger over the tip so none will
escape.
8. Very carefully, place the tip of the baster into the very bottom of the glass with the yellow
water. Slowly squeeze the bulb of the baster so that the blue water is injected into the glass. You
do not have to squeeze all the water out — just enough to observe where the blue water goes.
Make a note of what happens. Rinse the baster with tap water.
9. For the second part of the experiment, fill a third glass with chilled water until it is one-third
full.
Page 1
Marine Biology
Lab Report
Experiment # 1.3
The Effects of Salinity and Temperature on the Density of Water
Date:
______________
Name: _________________________
Procedure, continued:
10. Add two drops of blue food coloring and stir.
11. Fill the fourth glass one-third of the way with very hot water from the tap, being careful not to
get burned. Add two drops of yellow food coloring to this glass and stir.
12. Now, using the turkey baster, draw some of the cold (blue) water and carefully place the tip of
the baster into the very bottom of the glass with the hot yellow water.
13. Very slowly, squeeze the bulb of the baster so that the cold blue water comes out into the glass.
Again, you do not have to squeeze all of it out — just enough to note where the blue water goes.
Make a note of what happens. Rinse the baster with tap water.
14. Finally, once the salt water has come to room temperature, fill the fifth glass one-third full of
the salt water and add two drops of blue food coloring to it. Stir.
15. Fill the sixth glass one-third full of tap water. Add two drops of yellow food coloring and
stir.
16. Using the turkey baster, draw up some of the salt water (blue) and carefully place the tip of the
baster into the very bottom of the glass with the yellow tap water.
17. Very slowly, squeeze the bulb of the baster so that the salty blue water comes out into the glass.
Make a note of what happens.
18. Clean up everything and put it away.
Page 2
Marine Biology
Lab Report
Experiment # 1.3
The Effects of Salinity and Temperature on the Density of Water
Date:
______________
Name: _________________________
Observations:
Diagram:
Summary:
Page 3
Marine Biology
Lab Report
Experiment # 1.4
The Coriolis Effect
Date:
______________
Name: _________________________
Supplies:
·
·
·
·
·
·
·
·
One sheet of cardstock
Scissors
A tack or push pin
One foot of string
A pencil
A cork bulletin board or sheet of corrugated cardboard
A marker
A helper
Introduction:
Winds do not move in straight lines on the earth. This experiment will illustrate why this happens.
Procedure:
1. Cut a circle about 6 to 7 inches in diameter out of card stock. To do this, tie a loop on one end
of the string and push the tack through it into the center of the card stock and into the bulletin
board.
2. Tie the pencil to the other end of the string and pull it taut.
3. Draw a circle on the card stock by moving the pencil along in a circular motion while
continuing to keep the string taut.
4. Remove the card stock from the bulletin board and cut the circle out with the scissors.
5. Replace the circle back onto the bulletin board, affixing it through the center with the tack, but
not so tightly that it cannot revolve.
6. Draw an arrow along the outside edge of the circle that points in a clockwise direction.
7. Next, have your helper stand on your right-hand side and place his finger at the 9 o'clock
position on the circle. Meanwhile, place the marking pen at the center of the circle.
8. At the same time, have your helper begin to slowly spin the circle in a clockwise direction while
you slowly try to draw a straight line downward.
9. Remove the circle and note whether the line you drew moved straight down, clockwise (with the
rotation), or counter-clockwise (opposite of the rotation).
Page 1
Marine Biology
Lab Report
Experiment # 1.4
The Coriolis Effect
Date:
______________
Name: _________________________
Observations:
Diagram:
Summary:
Page 2
Marine Biology
Lab Report
Experiment # 1.5
The Motion of Waves
Date:
______________
Name: _________________________
Supplies:
·
·
·
·
A tub
Water
A cork or small toy boat
A 12-inch length of 2-by-4 wood
Introduction:
Surface waves actually move the molecules of water in a circular motion. You will observe this as
you do this experiment.
Procedure:
1. Fill the tub with water until the water is about 3 inches deep.
2. Place the cork or boat in the very center of the tub.
3. Place the length of wood about halfway down into the water at the end of the tub near the spigot
so that its longest side is in the water perpendicular to the length of the tub.
4. Gently but steadily move the plank about 10 times up and down. Move it about 1/2 to 1 inch in
each direction, and keep it at the end of the tub. Do not let it splash! This should create a
series of parallel waves moving down the length of the tub toward the cork. Observe the cork's
position in the tub while you do this.
5. Allow the water to become still again. Reposition the cork, and repeat the experiment a few
more times.
Page 1
Marine Biology
Lab Report
Experiment # 1.5
The Motion of Waves
Date:
______________
Name: _________________________
Observations:
Diagram:
Summary:
Page 2
www.knowledgeboxcentral.com
The following section is:
Marine Biology
1st Edition
Module 1
Lab Reports
(blank)
**You may choose to print these
reports double-sided or singlesided. Some lab reports have
more than 2 pages, so be aware
when printing.
Marine Biology
Lab Report
Experiment # 1.1
The Expansion of Solid Water
Date:
______________
Name: _________________________
Supplies:
Introduction:
Procedure:
Page 1
Marine Biology
Lab Report
Experiment # 1.1
The Expansion of Solid Water
Date:
______________
Name: _________________________
Observations:
Diagram:
Summary:
Page 2
Marine Biology
Lab Report
Experiment # 1.2
Removing the Salt From Salt Water
Date:
______________
Name: _________________________
Supplies:
Introduction:
Procedure:
Page 1
Marine Biology
Lab Report
Experiment # 1.2
Removing the Salt From Salt Water
Date:
______________
Name: _________________________
Observations:
Diagram:
Summary:
Page 2
Marine Biology
Lab Report
Experiment # 1.3
The Effects of Salinity and Temperature on the Density of Water
Date:
______________
Name: _________________________
Supplies:
Introduction:
Procedure:
Page 1
Marine Biology
Lab Report
Experiment # 1.3
The Effects of Salinity and Temperature on the Density of Water
Date:
______________
Name: _________________________
Observations:
Diagram:
Summary:
Page 2
Marine Biology
Lab Report
Experiment # 1.4
The Coriolis Effect
Date:
______________
Name: _________________________
Supplies:
Introduction:
Procedure:
Page 1
Marine Biology
Lab Report
Experiment # 1.4
The Coriolis Effect
Date:
______________
Name: _________________________
Observations:
Diagram:
Summary:
Page 2
Marine Biology
Lab Report
Experiment # 1.5
The Motion of Waves
Date:
______________
Name: _________________________
Supplies:
Introduction:
Procedure:
Page 1
Marine Biology
Lab Report
Experiment # 1.5
The Motion of Waves
Date:
______________
Name: _________________________
Observations:
Diagram:
Summary:
Page 2
www.knowledgeboxcentral.com
The following section is:
Marine Biology
st
1 Edition
Module 1
Module Summary
Marine Biology
Module Summary – Module 1
Review the vocabulary words listed in Question #1 of the study guide
Fill in the blanks. Many blanks contain more than one word.
Please note: I suggest that you actually write these paragraphs out rather than just filling in the
blanks in the book.
The act of writing these things out is a form of studying.
1. The 4 large ocean basins of the world are the ____________, the ___________
___________ and the ____________.
, the
2. The part of the earth's crust that is covered with ocean is made up of ___________
crust. This is composed mainly of ____________, which is relatively dense solidified lava.
The part of the earth's crust that is not covered with ocean is made up of __________ crust. It
is composed mainly of ____________, which is less dense than the crust under the ocean.
3. The crusts float on the earth's _________ . The slow-flowing material that makes up the
mantle is called ___________ because it sometimes behaves like liquid and sometimes behaves
like solid.
4. Scientists hypothesize that all the continents of the world were once part of a large
supercontinent called ___________. The plates of the earth's crust are believed to have drifted
to their present locations via a process known as ___________.
5. There are two types of geological structures where two plates meet: a
______________system, where two plates move away from each other via the process
called____________; and a system where two plates move towards each other, one dipping
down into the mantle. This process is called ____________.
6. The geologic activity most commonly found around ridge systems is in the form of
____________ and the geologic activity most often found around trench systems is in the form
of ____________.
7. Oceanic crust formation mostly occurs in the ___________where there is a large midocean ridge. Oceanic crust is destroyed mostly in the ___________where there are more deep
ocean trenches.
8. The gently sloped shallow section of the edge of a continent is called the ___________.
This location is where most ocean life is found. The ___________is located at the point where
the slope of the bottom begins to become steeper. The steeper section of a continental edge is
called the ___________. It reaches down to a gently sloping area at the base called the
___________, where debris and sediment collect. The deepest region of the seafloor is called
the ____________.
9. The major property of water that keeps its molecules together is _____________. This
creates a flexible "skin" at the water's surface called ___________.
10. Water naturally exists on earth in all three phases: solid - in the form of ________ or
___________, liquid - in the form of ____________, and gas - in the form of __________. When
water freezes it becomes __________, allowing solid water to float on liquid water.
11. Because water has a high ___________, it does not change temperature very quickly despite
drastic air temperature changes.
12. Because water can dissolve more substances than most other liquids, it is often called the
____________.
13. Seawater consists of pure water with materials dissolved in it. The solids come from
____________ on land, carried to the ocean by rivers. They also come from the mantle area of
the earth, released through deep openings called ____________.
14. ____________ is a measure of the total amount of salt dissolved in a solvent. Evaporation
will result in ____________ salinity of the water left behind.
15. The ocean is blue because _________________________________________ can penetrate
much deeper than those of the other colors. The blue color is enhanced by the reflection of the
______________on the surface.
16. _______________ in the ocean increases dramatically with depth. For every 10 meters of
depth, another __________________is added.
17. ____________ in our atmosphere result from temperature differences caused by heat from
the sun. They do not move in straight lines because of the _______________.
18. The major currents of the open ocean are driven by the wind. The circular patterns that result
are called ______________. They move _________in the Northern Hemisphere and
_____________ in the Southern Hemisphere.
19. Waves do not actually transport water, but they carry _________________across the water's
surface.
20. Tidal ranges are their largest during the __________and the _____________. This is because
of the gravitational pull of the aligned _____________and _______________. Scientists call this
a ________________. The smallest tidal range is when the moon and sun are at
______________(during quarter moons). This is called a _________________.
21. Cool winter temperatures cause the water temperature of the surface layer of the ocean to
become colder, resulting in a _______________ portion of water. As this portion begins to sink, it
displaces the same amount of water in a deeper layer. This process is called ________________.
22. The surface layer of the ocean is thin and well-mixed, being exposed to ________________
and _______________. It is generally ______________ in temperature than the rest of the water
column. The _____________ is uniformly cold and much thicker than the surface layer. The
_______________ separates them and is a transitional zone between them.

