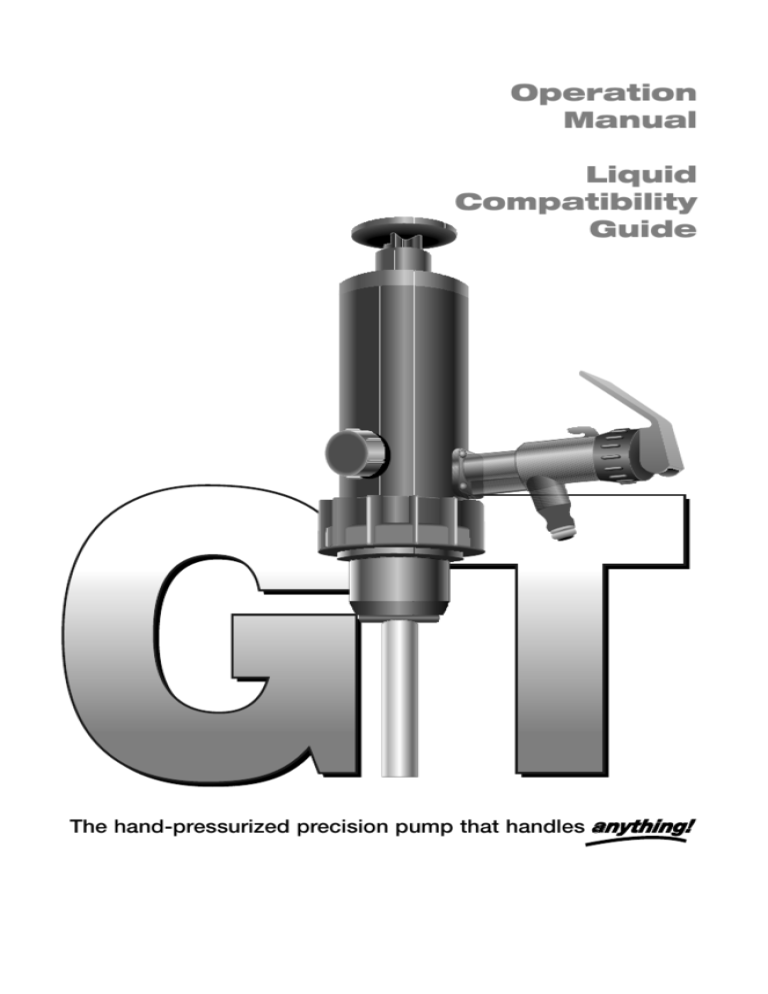
Operation
Manual
Liquid
Compatibility
Guide
The hand-pressurized precision pump that handles anything!
Warning: Not all liquids and containers are safe for use
with this pump. To reduce risk of injury, read and follow
these instructions:
Liquids
• Use pump only with approved liquids as specified in Pump Compatibility
Guide (up-to-date guide available on our web site). When replacing seals,
always use the same type approved for use with your pump (see page 3).
Improper use of pumps or seals will void all warranties, stated or implied.
• Do not dispense liquids at temperatures above 110ºF (43ºC).
• Before use, clearly mark pump with name of liquid to be dispensed. Clean
pump thoroughly before using with another liquid.
• Rinse pump periodically when not in frequent use.
Containers
• Use pump only with undamaged containers in good condition capable of
maintaining an internal pressure of 10 pounds per square inch (psi). Do not
use with thin-walled or damaged containers (see page 3).
• Release pressure before removing pump from container (see page 10).
• Do not leave the container pressurized while the pump is not in use.
• Remove pump and seal container before moving or transporting
containers.
• Check internal pressure relief valve frequently (see page 5). Do not use pump
if pressure relief valve is defective.
General cautions
• Exercise caution when mixing liquids, especially hazardous chemicals.
• Always wear appropriate protective equipment when working with potentially hazardous substances.
• Do not burn discarded seals or other pump components. Check local health,
safety and environmental codes and follow proper disposal procedures.
• Do not disassemble pump except to replace parts as shown on pages 16 - 19
of this manual. Any further disassembly may damage the pump and will
void your warranty.
Molykote is a registered trademark of Dow Corning Corporation.
Rieke Flex Spout is a registered trademark of Rieke Packaging Systems
Viton is a registered trademark of DuPont Dow Elastomers.
Entire contents © 2008 Westcott Distribution, Inc. All rights reserved. Printed in USA.
Operation
Manual
Liquid
Compatibility
Guide
The hand-pressurized pump that handles anything!
Contents
Assembly & Operation
About the pumps ..........................................2
Liquid compatibility guidelines ..................3
Container compatibility guidelines ............3
Assembly & inspection..................................4
Pump operation ..............................................9
Manual pressure release..............................10
Accessory Instructions
Remote DischargeNozzle ............................11
Shop Air Adapter..........................................12
Optional Accessories ......................13 -15
Maintenance
Flushing & cleaning ....................................16
Maintenance inspections ............................16
Replacing tap washers & O-rings..............17
Replacing piston O-rings ............................18
Replacing drum seals ..................................19
Trouble Shooting Guide
Troubleshooting New Installation ............20
Troubleshooting Existing Installation ......21
Parts Diagram ..........................................22
Liquid Compatibitity Guide ......24 -29
Assembly & Operation
About the pumps
Constructed of 100% non-reactive polypropylene, the pumps are engineered for
maximum safety and durability. Four models are available to handle almost any
liquid — petroleum products, acids, caustics, solvents and even the most aggressive industrial chemicals and pesticides.
The pump can be installed in seconds and can be quickly moved from container
to container. Siphon tubes are adjustable from 12 to 40 inches to fit most common container sizes. The pump can be used on containers with either externally
or internally threaded neck openings.
How it works
The pump works by pressurizing a container. To dispense liquids, simply open
the tap. A few strokes of the plunger can pressurize any container from 2-gallon
jugs to 55-gallon drums.
One-touch flow control dispenses liquids at a controlled rate to prevent waste,
conserve inventory, and produces precisely measured amounts every time. Flow
can be continuous, or adjusted to dispense liquids at any rate up to 4.5 gallons
per minute, depending on viscosity.
Safety features
The pumps have two safeguards to prevent overpressurization:
• An external pressure release valve can be opened to vent pressure
manually before removing the pump from a container.
• As an additional safeguard, an internal pressure relief valve
automatically opens if container pressure exceeds 8 psi.
The pump is repairable
Do not throw this pump away. Properly serviced, the pump will last for years.
See trouble shooting guide for common problems. O-ring replacement kits and
other parts are available from your dealer should you need them.
Operating parameters
Pressure
2-8 psi nominal, 8 psi maximum
Operating Temperature
32º to 110ºF (0º to 43ºC)
Storage Temperature
-4º to 122ºF (-20º to 50ºC)
Siphon tube length
9” to 40” (230 mm to 920 mm)
Container neck size
Small seal..............1.8-2.0” (44.4-52 mm)
Medium seal ........2.0-2.2” (52.5-56 mm)
Large seal..............2.2-2.4” (56.5-60 mm)
Maximum flow
rates at 68ºF
Water ....................4.5 gallons per minute
Oil (SAE 30)..........1.0 gallons per minute
Viscosity Range
Best up to 2000 SSU, 270 CP, 300 CST
Drum seal sizes
Small seal......1.8” (44.4 mm) Medium seal ........2.0 (52.5 mm)
Large seal.....2.25” (56.5 mm)
2
Assembly & Operation
Liquid compatibility guidelines
The pumps are available in four models. Each is color-coded to indicate
its type and compatibility with various substances.
Before use, you must check the Pump Compatibility Guide to choose the
proper model for use with substances you intend to dispense. The guide
lists all substances compatible with each pump model. Please review our
website for the most current information.
RED
Nitrile drum seals, for use with most oils and
petroleum-based liquids
BLUE
Ethylene propylene drum seals (EPDM), for
use with general purpose chemicals
BLACK
Santoprene® drum seals
For special applications only (see Pump
Compatibility Guide)
GREEN
Viton® drum seals, for aggressive chemicals,
acids and solvents
WARNING: Use of a pump with any non-approved substances may damage
the pump and could cause risk of personal injury resulting from exposure to
potentially hazardous substances.
Container compatibility guidelines
The following guidelines must be observed for safe operation. Failure to
follow these guidelines may result in container rupture and potentially
hazardous spiills.
• The pumps must be properly fitted to containers in good condition,
and capable of withstanding an internal pressure of 10 psi. Contact
the container manufacturer if you are not certain that it can withstand
this pressure.
• Do not use the pumps with rusty, corroded or damaged containers.
Exercise caution when using the pumps with plastic containers,
which may have thin walls or may have become brittle as a result of
age or exposure to sunlight.
• Thin-walled containers may bulge or deform when pressurized. To
reduce the risk of potentially hazardous spillage, always use external
su
upports for thin-walled containers. We recommend placing thinwalled containers inside an external container before pressurizing.
• Container neck openings must be smooth, with no sharp edges, and
capable of withstanding the force of the expanding drum seal.
• Fittings are available to adapt most containers for use with these
pumps. Please see page 13 for more information.
3
Assembly & Operation
Check package contents
After unpacking, check to make sure your package includes all parts listed
below in undamaged condition. Do not use the pump if any parts are missing
or damaged.
• Pump..........................................1
• Drum seals ................................1 or 3, depending on model **
• Standoff ....................................1
• Siphon tube segments ............4
• Siphon tube connectors ..........3
• Siphon tube foot piece ............1
**Standard models come with medium size drum seal (2.0”) which fit the
Standoff. To fit other containers, large (2.25”) and small (1.81”) drum seals
are available from your dealer.
Pump inspection
To help ensure safe and reliable operation, the following inspections should be
performed each time the pump is fitted to a container:
• New pump contamination check: A new pump may need special treatment
before use to preserve chemical purity. Silicone lubricants are applied to
some pump parts during manufacture. If you intend to dispense solvents
which could dissolve this lubricant, the pump should be cleaned and
flushed with the solvent before initial use. (see page 16)
• Used pump contamination check: If the pump has previously been used, it
should be flushed and cleaned thoroughly to prevent potential contamination or a dangerous reaction. (see page 16)
• Drum seal inspection: Inspect the drum seal to make sure it is in good condition. The seal should be replaced if it shows any signs of damage or deterioration.
• Tap operation check: Test the tap for proper operation as shown below. The
tap should remain in free-flow position until manually closed. When closed,
the tap piston should travel freely to the fully closed position.
Close tap fully
Open tap fully
4
Assembly & Operation
• Internal pressure relief check: Pick up the pump and place one hand over
the Manifold inlet (bottom) so that it is sealed with firm pressure. Grasp the
Piston top with the other hand and pull out the Piston to the end of its travel. Push the Piston in to create pump pressure against the hand sealing the
Manifold. This pressure should occur within the first 1/2 inch of plunger
travel. No air leaking sound should be heard from the pump.
How the pump operates
When you screw the drum seal expander clockwise, the drum seal is compressed between the bottom lip of the pump and the retaining ring. This produces a “donut” which pushes against the wall of your container for an air
tight fit. Air leaks at any point in the system will reduce the pump’s effectiveness. Pressure is added using the piston on top of the pump. Opening the tap
lets the fluid flow.
5
Assembly & Operation
Pump assembly
Please read all instructions thoroughly before beginning assembly. We
have found this to be of great value when assembling your first pump.
Pump standoff
If using the pump with a 20, 30 or a 55 Gallon
container with 2” npt opening, please use the
provided 4” standoff kit. Without it, the spout
can hit the edge of the container. Use of the
Standoff will also give the drum seal a much
longer life.
1 Install Standoff or other fittings, follow instructions on the packaging.
2 Select and fit drum seal
Measure container neck and fit appropriate size seal for opening, standoff or
specialty adapter to pump. (see page 7
for further details).
3 Assemble siphon tube
Measure container depth and assemble
siphon tube segments as needed.
Segments can be cut. Tubes and connectors must be assembled tightly together.
4 Fit foot piece to siphon tube
Attach foot piece to bottom length of
siphon tube (portion nearest bottom of
container). This piece helps prevent
clogging and maintains proper fluid
flow.
Drum seal
Siphon tube
segment
5 Determine final length of tube
Final assembled length should be cut to
1/2 inch higher than the top of fitting or
drum so that tube is wedged firmly
between pump and the bottom of the
container when installed. Failure to do
so may result in loss of siphon tube in
drum. First pump segment must be
inserted and then twisted at least 1 inch
into pump body to secure it.
CAUTION: Insert siphon tube as far as it
will go into the pump, and join all parts
tightly and securely so the siphon
assembly cannot come apart inside the
container.
6
Segment
connector
Foot piece
Assembly & Operation
Installing drum seal on the pump
Drum seals are provided in one or three sizes depending on the model
you have. Be sure to choose the size seal which most closely fits the container opening, standoff or other specialty fitting. If none of the three
sizes can form a tight seal, the container cannot be used with pump.
Drum seal sizes
Small seal......1.8” (44.4 mm) Medium seal ........2.0 (52.5 mm)
Large seal.....2.25” (56.5 mm)
1 Select drum seal which is the closest fit to the opening on the container, standoff, buttress or other
fitting.
2 Apply grease to pump lip
Expander
Apply a very small amount of
Molykote 111 or other silicone
grease to the bottom lip to improve
ease of installation of drum seal.
For clean room installation, do not
use grease. Soak drum seal in
hottest water available for 2-5 minutes until it is pliable.
Lip
Apply grease
3 Make sure drum seal expander is
fully retracted.
4 Put the drum seal on
Push the drum seal completely
over the lip. Make sure the seal
rests on top of the lip and flush to
the retaining disk. Sometimes,
using the palm of the hand to push
the seal on gives the best results.
You will have to push quite hard to
get the seal over the lip. The rubber will not break. Squeeze the
drum seal around the lip to seat it
completely on top of the lip.
WARNING: The drum seal must be completely on the top of the lip or the
pump won’t work.
Remove any visible grease or liquid from the drum seal, lip and wall of
adapter or container opening to prevent the pump from unintentionally ejecting out of the container when pressure is added.
7
Assembly & Operation
Fit pump to container, standoff or other fitting
Before fitting the pump to any container or fitting, make sure both the
drum seal and the container neck or fitting opening are clean and free of
contaminants or grease that could prevent an air-tight seal or allow
pumps to slip out after adding pressure.
1 Loosen drum seal expander
Seal
expander
Loosen seal expander
completely (turn fully
counterclockwise).
2 Insert pump
Insert drum seal fully into
standoff, container neck
opening or other fitting.
Make sure siphon tube is
long enough to firmly extend
from the bottom of the container to 1/2 inch above
standoff or container opening.
Drum seal
3 Tighten collar
Keeping pump firmly
pressed down, tighten seal
expander until firmly fitted
to container neck opening.
4 Check fit
Check fit by attempting to gently pull the pump up and away from
the container. If properly fitted, the pump should remain firmly
attached.
8
Assembly & Operation
Pump operation
Maintain a slow, smooth pumping action to build up pressure in the container.
Liquid can be dispensed in small amounts by manually controlling the tap, or
dispensed in a continuous flow by leaving the tap in the fully open position. If
tap leaks or sticks in open position, inspect tap washer and O-ring for wear and
replace if worn (see page 16 - 18).
1
3 Close tap to
Pump slowly to
pressurize container
stop liquid flow
2 Open tap to dispense liquid
Add pressure to maintain fluid flow
As the fluid is dispensed, the volume of the fluid goes down. As the fluid volume goes down, the space for the air is increased. Therefore, add air to keep the
pressure up and the fluid flowing
For most liquids in smaller containers, only a few strokes will produce sufficient
pressure to maintain a steady flow. More viscous fluids, or liquids in larger containers, may require 10-20 strokes or more.
The pump can pressurize a container to a maximum of 8 psi. As a safety precaution, all pumps are fitted with an internal pressure relief valve that will open
automatically if pressure exceeds 8 psi.
A slight loss in container pressure over time is normal. However, in normal circumstances, about half of the initial pressure should be maintained for up to 60
minutes after the container is pressurized.
To help maintain cleanliness of the pump and chemical, the pump should be left
fitted to the container until it is empty.
WARNINGS:
•
After you stop dispensing, please tap the spout to release small drops of fluid
held by vacuum.
•
Do not lean over a pressurized container. If improperly fitted, the drum
seal could become loose during use, ejecting the pump with potentially
hazardous force.
•
Keep containers away from heat sources. Exposure to heat or sunlight may
increase container pressure and cause unexpected release of liquid when the tap
is opened. Never use with liquids at temperatures above 110ºF (43ºC).
9
Assembly & Operation
Manual pressure release
A manual pressure release valve on the side of the pump can be opened
to vent pressure. Pressure must be released before removing the pump
from a container.
When the pump is not in use, pressure should be released and the tap
valve should be left fully closed to help prevent accidental spillage.
Turn counterclockwise to
release pressure
Turn clockwise to close
valve completely after
releasing pressure
To remove pump from container
To remove the pump, release pressure as shown above, then loosen the
drum seal expander and pull the pump and siphon tube out of the container.
Always release
pressure first before
removing pump
WARNINGS:
•
Do not attempt to remove the pump from a pressurized container.
•
Do not move or transport any container with the pump attached. Remove pump
and seal container before moving.
•
Always exercise caution when working with toxic substances. During
pressure release, high concentrations of potentially hazardous vapors
may be released.
10
Accessory Instructions
Using the remote discharge nozzle
If the pump is fitted with an optional remote discharge tap, always close
the tap immediately after use. When the tap is open, liquid could be
siphoned from the container if the nozzle is held lower than the level of
liquid in the container.
To avoid accidental spills, always drain the extension hose after use.
3 Lift extension
nozzle and open
tap to drain
hose
1
Always release
pressure first before
removing pump
2 Loosen seal collar
4 Lift pump to raise
siphon above fluid level
if desired
11
Accessory Instructions
Using the pump with shop air
Adapters are available to use the pump with shop air, compressors, and
bottled air.
To install and operate
1. Remove the pressure relief valve cap from the side of your pump.
2. Install attached O-ring on the tap body where the pressure cap was.
3. Screw the adapter on in place of the cap. Keep the cap in a safe place.
4. Make sure the air regulator adjustment knob is completely closed.
5. Connect air hose from shop air or compressor to adapter.
6. Lift knob on regulator and turn clockwise to 1 PSI, then gradually
increase to 2 PSI. Your container may swell slightly from the presure.
Release knob to drop and lock in place.
7. If you want a faster flow or if fluid is to be delivered above 6' vertical,
increase pressure to 4 - 6 PSI.
8. The external safety relief valve will open automatically if air pressure
exceeds 6-7 PSI. If this happens please reduce air pressure and close the
safety relief valve completely.
9. If supplied, use anti-tamper kit to prevent over-pressurizing vessels.
To remove
1. Close airflow completely.
2. Disconnect air hose from adapter.
3. Open the safety relief valve on the system manually by pulling up, and
wait for air pressure to be released.
4. Shut off regulator.
5. Unscrew the adapter from the pump, including the O-ring.
6. Replace the pressure cap.
Put O-ring on Pressure
Release on Pump
Body where pressure
cap was.
Safety
Relief
Valve
Regulator Adjustment
Knob
1/4” Air Hose
Quick Connect
0-14 PSI
Pressure Gauge
PVC Adaptor
12
Optional Accessories
Remote Discharge Tap
Remote Discharge Taps are available for point
of use delivery of liquids. All standard hoses
are PVC. We offer specialty hose selections for
fluids not compatible with PVC including FEP
lined tubing, Tygon 2075 and Tygon 4040.
O-ring Repair Kit
Just the essential O-ring and other necessary
elastomeric parts are available for all user-accessible parts in Nitrile, EPDM, Santoprene and
Viton.
Single Siphon Tube
This seamless 38-inch tube is recommended for oily or very viscous fluids.
Standard tubing can allow viscous fluids to leak, or admit air at joined sections.
The seamless tube assures a smooth, uncontaminated flow.
GT Filter Pak
This kit allows for screening of fluids with an 80
x 80 stainless 304 mesh. Kits are available in
Nitrile, EPDM and Viton.
12 Inch Standoff
The 12-inch standoff allows the receiving container to be placed on top of the drum for easier
transfer.
13
Optional Accessories
Buttress Adapters
You may have containers which have a
coarse thread - such as you see here.
The drum seals are not pliable enough
to work with these large threads. There
are buttress adapters for these special
openings: 2.25" for most Asian manufactured drums, 2.5" for most U.S. drums,
and 2.75" for most European drums.
These adapters are sold with a large oring to assist with the seal on the container.
Rieke® Flex Spout® Adapter
This adapter allows the pumps to be used
on containers which feature a Rieke®
FlexSpout®. This eliminates tipping of the
container and associated spill hazards.
Supplied with Nitrile washer as standard,
EPDM and Viton® washers are also available.
Spout Reducer
This adapter allows easy filling of containers with small necks.
Sprayer Wand
Sprayer wands are ideal for applying biocides, rust inhibitors, deodorizers or
degreasing agents in manufacturing
plants, and for the application of fertilizers, hormones and pesticides to plants in
greenhouses, fruit groves and fields. Use
with the shop air adapter if applying
more than 5 feet away from the drum.
Supplied with viton o-rings as standard,
nitrile and EPDM orings are available
from your dealer.
14
2.5” Adapter
2.25” Adapter
Optional Accessories
Shop Air/Compressor Adapter
Featuring a pressure regulator and an external pressure safety valve, the
compressor setup connects to a standard ½" quick disconnect hose and
delivers fluids at up to 4.5 gallons per minute with a working pressure
of only 2 - 4 PSI.
GT Multi-Pump System
Designed to expand capability and streamline operations where multiple process chemicals are dispensed, the GT Multi-Pump Dispensing
System allows simultaneous multiple liquid transfer stations to operate
from a single compressor line with only 2 - 6 psi. The basic system can
handle up to four pumps simultaneously, and additional system components can be added to meet any requirement.
GT Anti-Tamper Kit
The GT Anti-Tamper Kit prevents unintentional over-pressurization of
containers when using the Shop Air Adapter or GT Multi-Pump System.
GTMulti-Pump System
GT Anti-Tamper Kit
15
Maintenance
Flushing and cleaning
After use, the pump may be flushed and cleaned to use with other liquids.
Always make sure the flushing agent used is compatible with any fluids previously dispensed and with fluids you intend to dispense.
Never use abrasives to clean any portion of the pump. To clean the exterior of
the pump, use a cloth dampened with a mild solution of detergent and water.
After cleaning, allow the pump to dry in air away from direct sunlight, heat,
grease and other potential contaminants.
To Clean:
Wearing gloves, remove all tubes from pump and turn
the pump upside down. Open the tap, and run water
or other neutralizing fluid through the center of the
pumps. Fluid will come out of the tap.
CAUTION: Do not burn discarded seals or other pump components. Check local health, safety and environmental codes and
follow proper disposal procedures. Always dispose of hazardous waste or contaminated liquids in a proper fashion.
Maintenance inspections
The pump should be inspected at least every 2-3 months to ensure safe and efficient operation (see page 5). If unused for more than 3 months, the pump must
be visually inspected and the O-rings lubricated with Molykote® 111 compound.
Replacing tap washers and O-rings
Periodically check tap washer and O-rings (both at the tap and at the pressure
release valve) for wear, and replace if necessary. A replacement kit containing
both O-rings and a tap washer is available from your dealer. After installing a
new O-ring, smear a small amount of Molykote 111 lubricant around the ring
and the adjacent area.
Tap piston
Tap O-ring
Tap washer
Tap screw cap
16
Maintenance
Replacing tap washers and O-rings, continued
1 Unscrew tap valve screw
cap.
2 Remove tap washer
and/or o-ring with small,
flat-headed screwdriver.
3 Pre-heat the rubber
washer in boiling water
to reduce the risk of
damage. Fit the washer
to the tap piston by finger manipulation or
tools. Take care not to
split the rubber washer.
If the rubber is split,
remove and replace with
a serviceable one.
4 Fit the valve piston o-ring
to the valve piston. Place
a very light smear of siliicone grease on the oring. Do not use grease
for clean room operations.
5 Slip the valve piston
assembly back into the
tap body. Ensure that the
o-ring is not pinched when
assembling. Rotate the
piston until the guides are
engaged. Push the piston
until it is fully seated in the
bore. Screw the cap
home, being careful not to
cross-thread the cap and
the tap body. Do not overtighten the cap.
6 Operate the tap to ensure
free movement of the tap
piston.
17
Maintenance
Replacing piston O-rings
Periodically check the piston O-ring for wear, and replace if necessary.
Replacement O-rings are available from your dealer.
1
Remove 4 screws, then remove cap and piston from pump
2 Use flat head screwdriver to pry O-ring from piston. Lubricate
inside body barrel with small amount of Molykote111 compound.
and fit replacement o-ring it to piston, making sure it is seated
properly in the groove.
O-ring
3 Replace piston. Align tab on underside of cap with hole
on pump body noting line-up dowl, then replace and
tighten screws.
18
Maintenance
Replacing drum seals
Drum seals are color-coded. For safe operation, drum seals must match
the color coding of the pump.
Red drum seal
Nitrile; use only with red pumps
(oils and petroleum-based liquids)
Blue drum seal
Ethylene propylene (EPDM); use only with
blue pumps (general purpose chemicals)
Green drum seal
Viton; use only with green pumps
(aggressive chemicals and solvents)
Black drum seal
Santoprene®; for special applications only
(see Compatibility Guide)
Drum seal sizes
Small seal......1.8” (44.4 mm) Medium seal ........2.0 (52.5 mm)
Large seal.....2.25” (56.5 mm)
WARNING: Drum seals must match pump color coding. Replacing a seal with the
wrong type may contaminate some types of chemicals or damage the pump which
could cause risk of personal injury resulting from exposure to potentially hazardous substances.
2
1
To remove old drum seal, ease leading
inner edge of drum seal out and over the
lip on base of pump body using small flat
head screwdriver.
1
Pump lip
Seal
Expander
2 Screw seal expander clockwise as far as
possible which pushes drum seal down
and off pump. For small drum seal, soak
bottom of pump with drum seal in hottest
water available for 2 - 5 minutes to facilitate removal.
3
Clamp ring
3 Re-tighten seal expander to expose
clamp ring. Push drum seal off of pump
with clamp ring.
4
4 Lubricate lip of pump body with Molykote
111 compound. For clean room operations, do not use grease. Soak replacment drum seal in hottest water available
for 2 - 5 minutes. Press new drum seal
into position. The seal should fit snugly
on the lip.
1199
Troubleshooting Guide
Troubleshooting guide for new pump installation
PROBLEM
DIAGNOSTIC CHECK
SEE PAGE
No fluid is coming Is the drum seal put firmly on pump body? If
out of the tap.
the drum seal is not correctly installed, no
pressure will build up and therefore, no fluid
can be dispensed.
Are you using the correct fitting for the bung
with sufficient teflon tape to prevent air leaks?
Air leaks at any point in the system will prevent it from working.
Is siphon tube installed correctly and attached
to the pump body? If the siphon tube has
become disconnected from the pump body, no
fluid can be dispensed.
7
6,14
6
If using a very thick fluid in excess of 2000
SSU (thicker than 10W30 oil), you may experience a very slow flow.
A small amount of
fluid comes out
and then it stops.
The fluid spits
My container
bulges
Is the foot piece installed at the bottom end of
the siphon tube? If not, the fluid cannot flow
freely up through the tube.
If the fluid viscous or oily, use a single siphon
tube. Air can enter the fluid stream at connection points with a standard siphon tube set-up
and cause spitting.
Containers need to be able to withstand up to
10 PSI or need to be put in a systems with
external support.
Use less pressure.
The pump leaks Check compatibility between the pump and
from the tap when the fluid to ensure they will work correctly
I dispense fluids. together. If you are using the wrong pump,
this failure will take place in 2 - 4 weeks. See
website for latest compatibility information.
The pump leaks Check compatibility between the pump and
from the tap when the fluid to ensure they will work correctly
I am not dispens- together. If you are using the wrong pump,
ing fluids.
this failure will take place in 2 - 4 weeks. See
website for latest compatibility information.
20
6
13
3
3
3
Troubleshooting Guide
Troubleshooting guide for existing installation
PROBLEM
DIAGNOSTIC CHECK
SEE PAGE
No fluid is coming Raise main body piston and let it go. If it
out of the tap.
drops without pushing, replace the main body
piston o-ring.
Conduct a pressure test to see if there is resistance in the non-return valve (check valve). If
there is no resistance, the non-return valve
has failed. Replace the main pump body/manifold.
Is siphon tube installed correctly and attached
to the pump body? If the siphon tube has
become disconnected from the pump body, no
fluid can be dispensed.
The pump leaks Purchase replacement o-ring/tap washer kit
from the tap when and replace tap o-ring. See below for more
I dispense fluids. diagnostics.
The pump leaks Purchase replacement o-ring/tap washer kit
from the tap when and replace tap washer. See below for more
I am not dispens- diagnostics.
ing fluids.
1
18
5
6
17
17
Main piston does not have any resistance
- To repair, replace main piston o-ring
2 Tap leaks when open
- To repair, replace tap o-ring
3 Tap leaks when closed but pressurized
- To repair, replace o-ring
4
5
Tap leaks when closed but pressurized
-To repair, replace tap washer
Fluid comes out and is found on container
-To repair, call supplier for repair or replacement
Replacement o-ring kits are available from your dealer to correct most situations.
21
Parts Breakdown
22
Parts Breakdown
23
GT 100 Pump:
Oils & petroleum-based liquids
Pump Compatibility Guide
• TGT 100 (red pump with Nitrile seal)
Listed substances are suitable for use with GT 100 pumps. Before use,
read and observe all warnings and cautions below, and in the Operation
Manual. To check for the most recently updated listings, please visit our
web site at www.GoatThroat.com.
ACB - 30
Acetamide
Acetic Acid up to 25%
Acetylene
AGRITOX
Aircraft Soap
Allyl Alcohol
Aluminium Acetate
Aluminium Bromide
Aluminium Chloride 20%
Aluminium Fluoride 20%
Aluminium Nitrate
Aluminium Salts
Aluminium Sulfate 10%
Alums- NH3-Cr-K
Ammonium Carbonate 10%
Ammonium Dibasic
Ammonium Monobasic
Ammonium Nitrate
Ammonium Phosphate
(Di, Tri, & Mono)
Ammonium Salts
Ammonium Sulfate
Ammonium Sulphide
Amyl- Borate
Animal Fats
Arsenic Acid
ASE-60
Automatic Transmission
Fluid
Baking Soda
BAND-ADE Sawing Fluid
Barium Chloride
Barium Hydroxide
Barium Salts
BAYTAN C Flowable seed
dressing
Beet Sugar Liquors
Black Sulphate Liquors
BLAZER
Bordeaux Mixture
(Copper Sulfate Salt)
Boric Acid
Boron Fluids
Brine
BRODAL
BRYTOFA
BUGMASTER FLO
Bunker Oil
Butane (LPG)
Butane (LPG)
Butter
Butyl Amine
Butyl Carbitol
Butylene
Calcium Acetate
Calcium Bisulfide
Calcium Carbonate (Chalk)
Calcium Chloride (Brine)
Calcium Cyanide
Calcium Hydroxide
Calcium Nitrate
Calcium Phosphate
Calcium Salts
Calcium Silicate
Calcium Sulfide
Calcium Sulphite
CALIBRATION FLUID 4113
Cane Sugar Liquors
Carbitol
Carbon Dioxide
Carbon Monoxide
Carbonic Acid
Castor Oil
Caustic Potash Lye
Caustic Soda Up to 40%
Caustic Soda up to 60%
Cetane
GT 200 (blue pump with EPDM seal)
GT 200S (blue pump with Santoprene seal)
GT 300 (green pump with Viton seal)
China Wood Oil
Chrome Alum
Chrome Plating Solutions
Chromic Oxide.88
WT.%,aqueous
Citric Acid
Cobalt Chloride
Coconut Oil
Cod Liver Oil
Coffee
COOLANOL
Copper Chloride
Copper Cyanide
Copper Salts
Copper Sulfate 5% Solution
Corn Oil
Cottonseed Oil
Creosote, Coal Tar
Cutting Oil
D120
D140
De-icing Fluid
Denatured Alcohol
Detergents
Developing Fluids (photo)
Dextron
Diacetone
Diethylene Glycol
Diisobutylene
Distilled Water
DIURON FLOWABLE
DODINE FLOWABLE
DOT Brake Fluid
Dry Cleaning Fluid
DTE Light oil
Engine Oil
ESI-CRYL 11
Ethane
Ethanol
Document date: 17 June 2008
Ethanol 95%
Ethanolamine
Ethyl Cyclopentane
ethyl ether
Ethyl Silicate
Ethylene Diamine
Ethylene Glycol
Fatty Acids
Ferric Chloride
Ferric Nitrate
FLUOMETURON FLOWABLE
FOLICUR 250 EW
FOLICUR 430 SC
FORMULA 517
FORMULA 520
FORMULA 538
Fuel Oil
Gallic Acid
Gelatin
Glucose
Glycerin
Glycols
Green Sulfate Liquor
GUSATHION 200 SC
Heavy Water
Hexyl Alcohol
Hydraulic Fluid
Hydraulic Oils (Petroleum)
Hydrazine
Hydroquinone
Isododecane
Isooctane
Isopropanol
Isopropyl Alcohol
Isopropyl Ether
Lactic Acid
Lard
LARVIN 375
List continues on next page —>
(1) Test pump before use
(2) Wash pump after use
WARNING: Do not use with the following substances:
• Jaguar • Morpholine • Tigrex
* CAPITAL LETTERS denote brand names. All brand
name trademarks and registered trademarks are the
property of their respective corporations.
1GT100-PCG-0608A
GT 100 Pump:
Oils & petroleum-based liquids
Pump Compatibility Guide
• TGT 100 (red pump with Nitrile seal)
Listed substances are suitable for use with GT 100 pumps. Before use,
read and observe all warnings and cautions below, and in the Operation
Manual. To check for the most recently updated listings, please visit our
web site at www.GoatThroat.com.
GT 200 (blue pump with EPDM seal)
GT 200S (blue pump with Santoprene seal)
GT 300 (green pump with Viton seal)
Document date: 17 June 2008
<— List continued from previous page
Lead Acetate
Lead Nitrate
LEAFEX
LEGUMEX
Light Grease
Lime Bleach
Lubricating Oils
(Petroleum)
Magnesium Chloride
Magnesium Hydroxide
Magnesium Salts
Magnesium Sulfate
Magnesium Sulphite
MALATHION
Malic Acid
MCPA
MCPA 375 SALT
MCPA LVE 500
Mercuric Chloride
(Dilute Solu)
Methane
Mild R362
Milk
Mineral Oil
Monoethanolamine
Monovinyl Acetylene
MRW-2560D
Neatsfoot Oil
Neon
NEVADA ALL PURPOSE
CI/DEGREASER
Nickel Acetate
Nickel Chloride
Nickel Sulfate
N-Octane
N-Pentane
Octadecane
Octagon PD 680
Octyl-Alcohol
O-Dichlorobenzene
Olive Oil
OMALA OIL 220
Oxalic Acid (Cold)
OXAMIN LO
Palmitic Acid
PANOCTINE
Peanut Oil
Pentane 2 Methyl
Pentane 2-4 Dimethyl
Penthane 3 Methyl
Petroleum
Pine Oil
Plating Solutions: Antimony
Plating Solutions: Arsenic
Plating Solutions: Brass
Plating Solutions: Bronze
Plating Solutions: Cadmium
Plating Solutions: Copper
Plating Solutions: Gold
Plating Solutions: Indium
Plating Solutions: Iron
Plating Solutions: Lead
Plating Solutions: Nickel
Plating Solutions: Silver
Plating Solutions: Tin
Plating Solutions: Zinc
Polyvinyl Acetate Emulsion
Potassium Acetate
Potassium Borate
Potassium Bromate
Potassium Bromide
Potassium Chloride
Potassium Cupro Cyanide
Potassium Cyanide
Solutions
Potassium Dichromate
Potassium Nitrate
Potassium Salts
Potassium Sulfate
PRIMAL ASE-60
Propane (Liquified) (LPG)
Propylene Glycol
QUINTOZENE FLOWABLE
RAXIL C
Flowable seed dressing
ROVRAL AQUAFLO
ROVRAL LIQUID
ROVRAL LIQUID S.D.
Sal Ammoniac
Salicylic Acid
Sea Water
SEMEVIN 500 P
SENCOR 480 SC
Silicone Greases
Silicone Oils
Silver Nitrate
Soda Ash
(Sodium Carbonate)
Sodium Acetate
Sodium Bicarbonate
(Baking Soda)
Sodium Bisulfate
Sodium Bisulfite
Sodium Borate
Sodium Chloride (Salt)
Sodium Cyanide
Sodium Hydroxide
(20% Solution)
Sodium Hydroxide
(50% Solution)
Sodium Metaphosphate
Sodium Nitrate
Sodium Peroxide
Sodium Phosphate
Sodium Phosphate,
Monobasic
Sodium Phosphate, Tribasic
Sodium Salts
Sodium Silicate
Sodium Sulfide
Sodium Sulphate
Sodium Sulphite
Sodium Thiosulphate
(Hypo)
Sorbitan Monolaurate
Polyoxethylene
Soybean Oil
SPIN FLOWABLE
Stannic Chloride
Stannous Chloride
STEN ERASE
Sucrose Solution
Tannic Acid
Tartaric Acid
TERIC GN9
Transformer Oil
Transmission Fluid Type A
Tung Oil
Turbine Oil
Turbo Oil
TWEEN 20
Urea
Varnish
Vegetable Oils
W 3635 E
W 3671 B
Water
White Oil
Wine and Whiskey
Wood Oil
X77
Xenon
Zinc Acetate
Zinc Chloride
Zinc Salts
Zinc Sulfate
(1) Test pump before use
(2) Wash pump after use
WARNING: Do not use with the following substances:
• Jaguar • Morpholine • Tigrex
* CAPITAL LETTERS denote brand names. All brand
name trademarks and registered trademarks are the
property of their respective corporations.
1GT100-PCG-0608A
GT 200 Pump:
General purpose chemicals
Pump Compatibility Guide
GT 100 (red pump with Nitrile seal)
Listed substances are suitable for use with GT 200 pumps. Before use,
read and observe all warnings and cautions below, and in the Operation
Manual. To check for the most recently updated listings, please visit our
web site at www.GoatThroat.com.
ACB - 30
Acetaldehyde
Acetamide
Acetonitrile
Acetophenone
Acetyl Acetone
Acetylene Tetrabromide
Acrylonitrile (Vinyl Cyanide)
Aircraft Soap
Aluminium Acetate
Aluminium Bromide
Aluminium Chloride 20%
Aluminium Fluoride 20%
Aluminium Nitrate
Aluminium Sulfate 10%
Alums- NH3-Cr-K
Ammonium Carbonate 10%
Ammonium Chloride
Ammonium Hydroxide
Ammonium Nitrate
Ammonium Persulfate
Ammonium Phosphate(
Di, Tri, & Mono)
Ammonium Sulfate
Ammonium Sulphide
Amyl -Alcohol
Anhydrous Ammonia
Anhydrous Hydrazine
Anhydrous Hydrogen
Fluoride
Animal Fats
Anti Freeze (glycol)
ARMOR ALL PROTECTANT
Arsenic Acid
Automotive Brake Fluid
BAND-ADE Sawing Fluid
Barium Chloride
Barium Hydroxide
Barium Sulfide
BAYCOR 300
BAYFIDAN 250 EC
Beer
Beet Sugar Liquors
Benzochloride
Black Sulphate Liquors
Borax (Sodium Borate)
Bordeaux Mixture (Copper
Sulfate Salt)
Boric Acid
Brake Fluid (non-petroleum)
Brine
Butanol
Butter
Butyl Acetate
Butyl Alcohol
Butyl Carbitol
Butyl Cellosolve
Butyl Cellosolve Adipate
Butyric Acid
Calcine Liquors
Calcium Acetate
Calcium Carbonate (Chalk)
Calcium Chloride (Brine)
Calcium Hydroxide
Calcium Nitrate
Calcium Sulfide
Calcium Thiosulphate
Cane Sugar Liquors
Carbitol
Carbon Monoxide
Carbonic Acid
Castor Oil
Caustic Potash
Cellosolve Butyl
Celluguard
Chloroacetone
Chrome Alum
Chromic Acid 5%
Citric Acid
Cod Liver Oil
Coffee
Coliche Liquors
• TGT 200 (blue pump with EPDM seal)
GT 200S (blue pump with Santoprene seal)
GT 300 (green pump with Viton seal)
Copper Acetate
Copper Chloride
Copper Cyanide
Copper Sulfate 5% Solution
CORRECT 100 EC
Cottonseed Oil
D101
D105
D108
D111
D155
De-icing Fluid
Denatured Alcohol
DESTROYER 115
Detergents
Developing Fluids (photo)
Diacetone Alcohol
Dibutyl Phthalate
Diethylamine
Diethylene Glycol
Diisopropyl Ketone
Diisopropylamine
Dimethylisopropylamine
Dioctyle Phthalate
DIPTEREX 500 SL
Distilled Water
DOT Brake Fluid
Dow Corning Silane
EASISOLV 120
EASISOLV 701
Epoxy Resins
Ethanol
Ethanolamine
Ethyl Acetoacetate
Ethyl Alcohol
Ethyl Chloride
Ethyl Oxalate
Ethyl Silicate
Ethylene Chlorohydrin
Ethylene Diamine
Ethylene Glycol
Document date: 17 June 2008
Ethylene Oxide, Liquid
Ethylmorpholine Stannous
Ferric Chloride
Ferric Nitrate
Fluorolube
FOLICUR 250 EC
FOLIMAT 800
FORMULA 540
FORMULA 560
FORMULA 570
FS FORMULA 10184
Furfural
Furfuraldehyde
Furylcarbinol
Gallic Acid
Gelatin
Glucose
Gluearaldehyde
Glycerin
Glycols
Green Sulfate Liquor
HFE-7000
HFE-7100
HFE-7200
HFE-7300
HFE-7500
HFE-7600
HFE-7800
Hydrazine
Hydrobromic Acid
Hydrogen Sulfide
(Wet) (Cold)
Hydrogen Sulfide
(Wet) (Hot)
Hydroquinone
Isobutyl Alcohol
Isobutyl-n-Butyrate
Isopropanol
Isopropyl Alcohol
Lactams- Amino Acids
Lactic Acid
List continues on next page —>
(1) Test pump before use
(2) Wash pump after use
All liquids compatible with GT 200 (EPDM) except
those marked “must use GT 200S” (Santoprene).
WARNING: Do not use with the following substances:
• Jaguar • Morpholine • Tigrex
* CAPITAL LETTERS denote brand names. All brand
name trademarks and registered trademarks are the
property of their respective corporations.
GT200-PCG-0608A
GT 200 Pump:
General purpose chemicals
Listed substances are suitable for use with GT 200 pumps. Before
use, read and observe all warnings and cautions below, and in the
Operation Manual. To check for the most recently updated listings,
please visit our web site at www.GoatThroat.com.
Pump Compatibility Guide
GT 100 (red pump with Nitrile seal)
• TGT 200 (blue pump with EPDM seal)
GT 200S (blue pump with Santoprene seal)
GT 300 (green pump with Viton seal)
Document date: 17 June 2008
<— List continued from previous page
LE - MAT
Lead Acetate
Lead Nitrate
Lead Sulfamate
Lime Bleach
Lime Sulpur
Magnesium Chloride
Magnesium Hydroxide
Magnesium Salts
Magnesium Sulfate
Maleic Acid
Malic Acid
MCPA
MCPA 375 SALT
MCPA LVE 500
Mercuric Chloride
(Dilute Solu)
Methalated Spirits
Methamidos
Methane
Methyl Alcohol
Methyl Butyl Ketone
Methyl Cyanide
Methyl Mercaptan
MICRO-BLAZE
MICRO-BLAZE FOG
Milk
Monoethanolamine
Monoethylene
Monovinyl Acetylene
N-Butyl Benzoate
N-Butyl Butyrate
NEVADA RED DEGREASER
NEVADA YELLOW
DEGREASER
Nickel Acetate
Nickel Chloride
Nickel Sulfate
NITOFOL
N-Methyl-2pyrrolidone
Novec HFE 7600
Novec HFE 7800
Novec HFE-7000
Novec HFE-7100
Novec HFE-7200
Novec HFE-7300
Novec HFE-7500
N-Propyl Acetone
Oxalic Acid (Cold)
Pantendiol
Petroleum
Phosphorous Trichloride
Acid
Plating Solutions:
Chrome
PNB
Polyvinyl Acetate Emulsion
Potassium Acetate
Potassium Chloride
Potassium Cupro Cyanide
Potassium Cyanide
Solutions
Potassium Dichromate
Potassium Hydroxide
Potassium Hydroxide 60%
Potassium Nitrate
Potassium Sulfate
Propyl Alcohol
Propylene Glycol
P-Tertiary Butyl Catechol
Rapeseed Oil
Roots 1-2-3
Sal Ammoniac
Salicylic Acid
SANTICIZER
Sea Water
Silicone Greases
Silicone Oils
Silver Nitrate
Soap Solutions
Soda Ash
(Sodium Carbonate)
Sodium Acetate
Sodium Bicarbonate
(Baking Soda)
Sodium Bisulfate
Sodium Bisulfite
Sodium Borate
Sodium Carbonate
Sodium Chloride (Salt)
Sodium Cyanide
Sodium Hydroxide
(20% Solution)
Sodium Hydroxide
(50% Solution)
Sodium Hydroxide
(80% Solution)
Sodium Hypochlorite
(to 15%)
Sodium Metaphosphate
Sodium Nitrate
Sodium Perborate
Sodium Peroxide
Sodium Phosphate
Sodium Phosphate,
Monobasic
Sodium Phosphate, Tribasic
(1) Test pump before use
(2) Wash pump after use
All liquids compatible with GT 200 (EPDM) except
those marked “must use GT 200S” (Santoprene).
WARNING: Do not use with the following substances:
• Jaguar • Morpholine • Tigrex
* CAPITAL LETTERS denote brand names. All brand
name trademarks and registered trademarks are the
property of their respective corporations.
Sodium Silicate
Sodium Sulfide
Sodium Sulphate
Sodium Sulphite
Sodium Thiosulphate
(Hypo)
Soybean Oil
Stannic Chloride
Sucrose Solution
Sulfurous Acid
Sulphur Hexafluoride
SURF -80
Tartaric Acid
Tera Bromoethane
Toluene Diisocyanate
TOUGH 450 EC
Triacetin
Triaryl Phosphate
Tributoxy Ethyl Phosphate
Tricresylphosphate
Triethanol Amine
Trioctyl Phosphate
Tripoly Phosphate
TruBlue Deoderizer
Vaporene
Vegetable Oils
Vertrel Solvents (Dupont)
Vinegar
Water
Wine and Whiskey
Zeolites
ZEP Protect-ALL
Zinc Acetate
Zinc Chloride
Zinc Sulfate
GT200-PCG-0608A
GT 200S Pump:
Liquids compatible with Santoprene
Listed substances are suitable for use with GT 200S pumps. Before
use, read and observe all warnings and cautions below, and in the
Operation Manual. To check for the most recently updated listings,
please visit our web site at www.GoatThroat.com.
Acetic Acid 10%
Acetic Acid 25 - 85% Special Pump with Viton
Acetic Anhydride
Acetone
May require change of
tap o-rings regularly
Acetonitrile
Acetylene
Acrylonitrile (Vinyl Cyanide)
Aircraft Soap
Aluminium Chloride 20%
Aluminium Sulfate 10%
Alums- NH3-Cr-K
Ammonium Carbonate 10%
Ammonium Chloride
Ammonium Hydroxide
Ammonium Nitrate
Ammonium Phosphate
(Di, Tri, & Mono)
Ammonium Sulfate
Amyl- Acetate
Amyl -Alcohol
Aniline
Arsenic Acid
Baking Soda
Barium Hydroxide
Beer
Benzoic Acid
Borax (Sodium Borate)
Boric Acid
Butane (LPG)
Butyl Acetate
Butyric Acid
Calcium Chloride (Brine)
Calcium Hydroxide
Calcium Hypochlorite
Carbon Monoxide
Caustic Potash Lye
Caustic Soda Up to 40%
Caustic Soda up to 60%
Chloroacetone
Chrome Alum
Citric Acid
Copper Chloride
Copper Sulfate 5% Solution
De-icing Fluid
Destroyer 115
Dibutyl Phthalate
Diethyl Sebacate
Dimethyl Formamide
Dimethylformamide
Distilled Water
DOT Brake Fluid
Dow Corning Silane
Dry Cleaning Fluid
EASISOLV 120
EASISOLV 701
Ethanol
Ethyl Acetate
Ethyl Alcohol
Ethylene Chlorohydrin
Ethylene Glycol
Ethylene Oxide, Liquid
Ferric Chloride
Formaldehyde
Formic Acid
FS FORMULA 10184
Glucose
Glycerin
Glycols
Hydrazine
Hydrobromic Acid
Hydrocyanic Acid
Hydrogen Peroxide 35%
Hydrogen Sulfide
(Wet) (Cold)
Isopropanol
Isopropyl Alcohol
Lactic Acid
Lead Acetate
LUV
Pump Compatibility Guide
GT 100 (red pump with Nitrile seal)
GT 200 (blue pump with EPDM seal)
• TGT 200S (blue pump with Santoprene seal)
GT 300 (green pump with Viton seal)
Document date: 17 June 2008
Magnesium Chloride
Magnesium Hydroxide
Magnesium Salts
Magnesium Sulfate
Mercuric Chloride
(Dilute Solu)
Methyl Alcohol
Methyl Butyl Ketone
Methyl Ethyl Ketone
May require change of
tap o-rings regularly
Methyl Salicylate
Milk
Millenium Clean
Nickel Sulfate
Nitric Acid 5-10% Solution
Nitrobenzene
N-Methyl-2pyrrolidone
Oleic Acid
Oxalic Acid (Cold)
Palmitic Acid
Phosphoric Acid (to 40%
Solution)
Phosphoric Acid-20%
Phosphoric Acid-45%
Phosphorous Trichloride
Acid
Potassium Borate
Potassium Bromate
Potassium Bromide
Potassium Chloride
Potassium Cyanide
Solutions
Potassium Dichromate
Potassium Hydroxide 60%
Potassium Sulfate
Propylene Glycol
SAFETY PAL
Sea Water
Silicone Greases
Silver Nitrate
(1) Test pump before use
(2) Wash pump after use
All liquids compatible with GT 200 (EPDM) except
those marked “must use GT 200S” (Santoprene).
WARNING: Do not use with the following substances:
• Jaguar • Morpholine • Tigrex
* CAPITAL LETTERS denote brand names. All brand
name trademarks and registered trademarks are the
property of their respective corporations.
Soap Solutions
Sodium Bicarbonate
(Baking Soda)
Sodium Bisulfate
Sodium Bisulfite
Sodium Borate
Sodium Carbonate
Sodium Chloride (Salt)
Sodium Hydroxide
(20% Solution)
Sodium Hydroxide
(50% Solution)
Sodium Hypochlorite
(to 15%)
Sodium Hypochlorite
(to 5%)
Sodium Lauryl Sulfate
(dodecyl sulfate 70%)
Sodium Nitrate
Sodium Phosphate
Sodium Sulfide
Sodium Sulphate
Stannous Chloride
Stearic Acid
Tannic Acid
Tartaric Acid
Thinners
Triethanol Amine
TruBlue Deoderizer
Urea
Vinegar
Water
Wine and Whiskey
Zinc Chloride
Zinc Salts
Zinc Sulfate
GT200S-PCG-0608A
GT 300 Pump:
Aggressive chemicals & solvents
Pump Compatibility Guide
Listed substances are suitable for use with GT 300 pumps. Before use,
read and observe all warnings and cautions below, and in the
Operation Manual. To check for the most recently updated listings,
please visit our web site at www.GoatThroat.com.
2,4-D Ester 800
Acetamide
Acetic AcidAcetylene
Acetylene Tetrabromide
ACTICIDE 14
ACTICIDE A2
ACTRIL DS
ALBAROL
Alpha Cypermethryn
Ammonium Persulfate
Amyl Naphthalene
Aniline Hydrochloride 20%
Aniline Oil
Automatic Transmission Fluid
Barium Chloride
BARREL
BAYLETON 125 EC
Benzenesulfonic Acid 10%
Benzoic Acid
Benzyl Alcohol
Benzyl Benzoate
Benzyl Chloride
Biodiesel
BIOPREP
BLUE DRESSING
Boric Acid
Bromine
Bromine- Water
Bromobenzene
Bromochloro Trifluoroethane
Brulin 850
BUCTRIL 200
BUCTRIL MA
BULLDOCK 25 EC
BULLDOCK 8 UL
Bunker Oil
Butadiene
Butane (LPG)
Butter
Butyl Acetyl Rincinoleate
Butyl Amine
Butyl Oleate
Butyl Stearate
Butylene
Butyric Acid
Calcium Hypochlorite
Calibration Fluid
Carbamate
Carbolic Acid
Carbon Bisulfide
Carbon Disulphide
Caustic Potash Lye
Caustic Soda Up to 40%
Cellosolve Acetate
CHLORDANE
Chlorextol
Chlorinated Salt Brine
Chlorine
Chlorine (Wet)
Chlorobenzene (Mono)
Chlorobutadiene
Chlorododecane
Chloroform
Chlorotoluene
Creosote, Coal Tar
Cresol
Cresylic Acid
Cumene
Cutting Oil
Cyclohexane
Cyclohexanol
D160
Decalin (Deklin)
Decane
Demeton-S-Methyl
DESTROYER SX SERIES
DETER
DIAZINON 800
Dibromomethyl Benzene
Dichloro Butane
Diesel Fuel
Di-ester Synthetic Lubricants
DIMENSION EC
DIMENSION EW
Dioctyle Phthalate
Dipentene
Diphenyl
Diphenyl Oxide
D-Limonene
DOT Brake Fluid
Dry Cleaning Fluids
ENDOSULFAN
ENDOSULFAN ULV
ENVIRONALL
Ethyl Benzene
Ethyl Benzoate
Ethyl Bromide
Ethyl Cellulose
Ethyl Chloride
Ethyl Chlorocarbonate
Ethyl Formate
Ethyl Pentochlorobenzene
Ethylene Chloride
Ethylene Dibromide
Ethylene Dichloride
Ethylene Oxide, Liquid
Fenamiphos
FOLIDOL M500
Formaldehyde
Formic Acid
FORMULA 537
FORMULA 575
Freon 113
FUEL DOCTOR
Fumaric Acid
Furfural Alcohol
Gasoline
Glaubers Salt
Glycol Ether
GREEN SENSE FRAGRANCE
GUSATHION A LIQUID
Halothane
Halowax Oil
HELOTHION EC
Hexane
Hexene
GT 100 (red pump with Nitrile seal)
GT 200 (blue pump with EPDM seal)
GT 200S (blue pump with Santoprene seal)
• TGT 300 (green pump with Viton seal)
Hexyl Alcohol
HFE Fluids Azeotropes
[3M/Novec]
Hydrochloric Acid
Hydrofluoric acid
Hydrofluosilicic Acid
Hydrogen Peroxide
INTRICUT 217
Iodine (in Alcohol)
Isopropyl Chloride
Isothiozol
J-SPRAY
Kerosene
KILVAL
Kordek 50C
LARVIN LV
Lavender Oil
LEBAYCID
Lime Sulpur
Linoleic Acid
Linseed Oil
Lubricating Oils (Petroleum)
Macro-Sorb
MALDISON 500
Maleic Anhydride
MARLIN
METASYSTOX
Methyl Bromide
Methyl Chloroformate
Methyl D-Bromide
Methyl Oleate
Methylcyclopentane
Methylene Chloride
MOMENTUM
Monobromobenzene
Monochlorobenzene
Monomethyl Aniline
Muriatic Acid
Naptha
Napthalene
Napthenic Acid
NAXCAT MOD ACID
NEMACUR 400 EC
NEVADA BLUE DRESSING
NEVADA PINK SOAP
Neville Acid
Nitric Acid to 65%
Nitrobenzene
NOVEC (3M) Azeotropes
O-Chlorophenol
Octachlorotoluene
OFTANOL TURF
Oleic Acid
Orthochloro Ethyl Benzene
Paraffin Oil
Parathion Ethyl Methyl
P-Cymene
P-Dichlorobenzene
Penair Mil-C-85590
Perchloric Acid 72%
Perchloroethylene
Phenol (Carbolic Acid)
Phenylbenzene
Document date: 17 June 2008
Phorone
Phosphoric Acid
Phosphorous Trichloride Acid
Picric Acid
Pinene
PRESS WASH 103 (CMG)
Propane (Liquified) (LPG)
Propyl Alcohol
Propylene
Prothiofos
Proxel GL
Pyroligneous Acid
Pyrolubo
Rapeseed Oil
ROGOR 400
ROOTS 1-2-3
ROUNDUP
SEQUESTRIAN 30 A
Silicate Esters
Sodium Hypochlorite (to 15%)
Sodium Hypochlorite (to 5%)
Sodium Xylene Sulphonate
STAIN (MH)
Stearic Acid
STEN ERASE
Sulfur Chloride
Sulfuric Acid )
Sulphur Liquors
SUPRACIDE
Tera Bromoethane
Tergitol (Dow)
Terpineol
Tertiary Butyl Alcohol
Tetrabutyl Titanate
Tetrachloroethane
Tetrachloroethylene
Tetraethyl Lead
Tetraline
Titanium Tetrachloride
TOKUTHION
Toluene
TOP COAT (AU SANCURE)
TOTRIL
Transmission Fluid Type A
Trichloroethylene
TRIDAN
TRIMEC 992
TRUBLUE Deoderizer
TRUEX 70 SERIES
Turpentine
Urea
UV-396 (UV-300)
Varnish
Vesene 100 Dow
Water
White Oil
White Pine Oil
Zep- Brakewash
ZEP Carb X
Zep L.D. Red (Liquid)
ZEP Lubenze Omni
Zep True Blitz
* CAPITAL LETTERS denote brand names. All brand name trademarks and registered trademarks are the property of their respective corporations.
Pump
Your
is Guaranteed to Work.
If you have any questions about its operation,
or if it fails to meet your expectations,
please call your dealer.
This pump is repairable. Do not throw it away.
© 2008 Westcott Distribution, Inc. All rights reserved.
www.goatthroat.com
Telephone: +1 646.486.3636
GT-IM0608

