Beetle Rearing Checklists and Instructions
advertisement
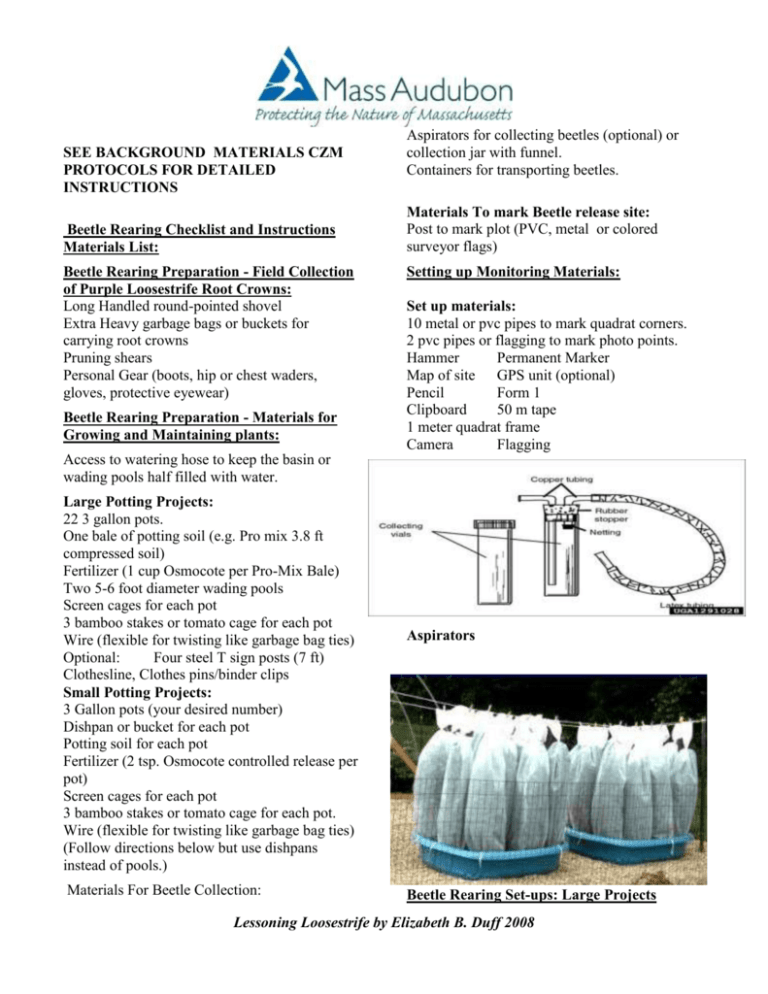
SEE BACKGROUND MATERIALS CZM PROTOCOLS FOR DETAILED INSTRUCTIONS Beetle Rearing Checklist and Instructions Materials List: Beetle Rearing Preparation - Field Collection of Purple Loosestrife Root Crowns: Long Handled round-pointed shovel Extra Heavy garbage bags or buckets for carrying root crowns Pruning shears Personal Gear (boots, hip or chest waders, gloves, protective eyewear) Beetle Rearing Preparation - Materials for Growing and Maintaining plants: Aspirators for collecting beetles (optional) or collection jar with funnel. Containers for transporting beetles. Materials To mark Beetle release site: Post to mark plot (PVC, metal or colored surveyor flags) Setting up Monitoring Materials: Set up materials: 10 metal or pvc pipes to mark quadrat corners. 2 pvc pipes or flagging to mark photo points. Hammer Permanent Marker Map of site GPS unit (optional) Pencil Form 1 Clipboard 50 m tape 1 meter quadrat frame Camera Flagging Access to watering hose to keep the basin or wading pools half filled with water. Large Potting Projects: 22 3 gallon pots. One bale of potting soil (e.g. Pro mix 3.8 ft compressed soil) Fertilizer (1 cup Osmocote per Pro-Mix Bale) Two 5-6 foot diameter wading pools Screen cages for each pot 3 bamboo stakes or tomato cage for each pot Wire (flexible for twisting like garbage bag ties) Optional: Four steel T sign posts (7 ft) Clothesline, Clothes pins/binder clips Small Potting Projects: 3 Gallon pots (your desired number) Dishpan or bucket for each pot Potting soil for each pot Fertilizer (2 tsp. Osmocote controlled release per pot) Screen cages for each pot 3 bamboo stakes or tomato cage for each pot. Wire (flexible for twisting like garbage bag ties) (Follow directions below but use dishpans instead of pools.) Materials For Beetle Collection: Karen Loeffelman, Aspirators University of Idaho, Bugwood.org Beetle Rearing Set-ups: Large Projects Lessoning Loosestrife by Elizabeth B. Duff 2008 Beetle Rearing Preparation - Field Collection of Purple Loosestrife Root Crowns: Long Handled round-pointed shovel Extra Heavy garbage bags or buckets for carrying root crowns Pruning shears Personal Gear (boots, hip or chest waders, gloves, protective eyewear) Step 1. Root Crown Digging Instructions 1. Choose a wetland with easy access. 2. Choose plants with 6-8 stems. After you dig out the plant you can trim the root crown with the pruners till it is about the size of a softball. Leave all plant materials in wetland or carefully dispose of them in the garbage. Do not compost them. 3. Clip old stems at the base and leave them in the wetland. 4. Collect the number of root crowns needed for your project size. 5. Haul them in garbage bags out of the wetland. Beetle Rearing Preparation - Materials for Growing and Maintaining plants: Access to watering hose to keep the basin or wading pools half filled with water. Large Potting Projects: 22 3 gallon pots. One bale of potting soil (e.g. Pro mix 3.8 ft compressed soil) Fertilizer (1 cup Osmocote per Pro-Mix Bale) Two 5-6 foot diameter wading pools Screen cages for each pot 3 bamboo stakes or tomato cage for each pot Wire (flexible for twisting like garbage bag ties) Optional: Four steel T sign posts (7 ft) Clothesline, Clothes pins/binder clips Small Potting Projects: 3 Gallon pots (your desired number) Dishpan or bucket for each pot Potting soil for each pot Fertilizer (2 tsp. Osmocote controlled release/pot Screen cages for each pot 3 bamboo stakes or tomato cage for each pot. Wire (flexible for twisting like garbage bag ties) (Follow directions below but use dishpans instead of pools.) Materials For Beetle Collection: Aspirators for collecting beetles (optional) or collection jar with funnel. Containers for transporting beetles. Step 2. Culturing and Maintaining Instructions (p. 15) 1. Dump bale of soil into a wading pool and dampen completely with water. 2. Mix in fertilizer. 3. Fill a pot ½ full with fertilized soil. 4. Add a root crown 5. Finish filling with potting soil. 6. After all crowns have been potted, water them again, and rinse out the pools. 7. Put pools in a place where they receive southern exposure (or as much daylight as possible). 8. Place pots in pools and fill the pools halffull with water. 9. Water the pots again too. 10. Make 3-4 holes in the sides of the pools above the half-full water line to keep the pools from flooding. 11. As plants grow, keep water in the pool, but do not water the pots directly. That washes out the fertilizer and causes algal growth. Maintaining: 1. Keep water in the pool but do not water the pots directly. 2. Watch plants. When stems are 12 inches tall, carefully pinch off the tip of each stem. This stimulates growth of lateral buds, which provides more food for beetle larvae. 3. When stems are 18 inches tall, beetles can be introduced. Lessoning Loosestrife by Elizabeth B. Duff 2008 Step 3: Beetle Rearing Preparation Assembling Large Structures (optional) 1. Construct two clotheslines which will later be used to support the screen cages for beetle rearing. 2. At the site you have chosen for your pools (in full sunlight) drive sign posts in at the opposite ends of the pools, and string a wire tightly between each of the two posts about 4 feet above the ground. Collect Beetles (optional, you may also purchase your source beetles) 1. Collect beetles in mid to late May when they have just emerged and loosestrife is about 12-18 inches tall. (When crab apples and lilacs begin to bloom. 2. Collect 15 to 20 per pot. Introducing the beetles: 1. Loosestrife plants should be between 1218 inches before you introduce beetles. 2. Handpick any predatory insects (such as ladybugs and spiders) off of the plants. (Place them gently somewhere they can continue to live.) Do not use insecticide. 3. Cover the plants with the screen cages and cinch the draw cord at the bottom of the screen cage tightly around the upper lip of the pots. Seal with duct tape if need ed. 4. Through the top of the screen cage, add 10 -15 beetles per cage by lighly grabbing beetles with your fingers. (No tweezers!) 5. Close the cage by twisting a few times, folding over and securing with a wire, string or cable tie. For large scale projects, you can attach the cage to the “clothesline” with a clothes pin. For small scale projects, the sleeve cages are supported by the bamboo stakes or tomato cages. Maintaining: 1. Check the pools and tubs to make sure they have enough water. Water the pools, not the pots. 2. Check the netting to make sure there are no holes, and that they are tightly cinched. You can use duct tape if cages are slipping. 3. Watch your plants and track the life stage changes. The adults you put in there will live for up to 40 day, and will begin feeding as soon as they are released. 4. Look for egg masses on leaves and stems 7-10 days after adults have begun feeding. 5. If no adults are evident, you may need to recollect adults from the field. 6. Eggs hatch 2-3 weeks after they are laid. Look for larvae damage (“window pane” feeding pattern). 7. Larvae develop after 2-3 weeks of feeding. Then bury themselves in the soil to form pupa. Avoid excessive water at this time. Keep top few inches of soil dry. 8. Adults emarge 2-3 weeks after larvae entered the soil to pupate. Look for them at the top of the cage. Each pot will produce between 1000 and 2000 beetles! 9. When you start to see adults emerging, immediately take the pots to the field for release. If you can’t release them immediately, provide fresh foliage so the adults have food. They will die if there is no food to eat. Make a bouquet of freshly clipped loosestrife collected at a nearby wetland. (These can be collected in advance and stored in a garbage bag in the refrigerator for several days.) Recut the stems with a sharp blade at a 45 degree angle when under water. Place the stems in a 1 qt..canning jar filled with water. Place the jar in the base of the cage, next to the potted loosestrife plant. Lessoning Loosestrife by Elizabeth B. Duff 2008 A full jar will provide 1-2 days worth of food. 10. Releasing adults. Newly emerged adults cannot fly until 24-36 hours after emergence. loosestrife is in full bloom. Choose a photo point which you can easily return to at the same time and place to take annual photos for monitoring purposes over the years. Releasing Beetles Materials: Post to mark plot (PVC, metal or colored surveyor flags) Releasing beetles: 1. Be careful transporting beetles. Using a covered van is ideal, but a truck is ok. Avoid jarring, high temperatures, and tipping pots. Avoid prolonged (over one hour) sun exposure to intense sunlight. 2. Take entire pot with screen into the field. 3. Place 2 to 4 pots adjacent to purple loosestrife plants. Break off nearby loosestrife stems and lay them in the pot so newly emerged adults can walk onto fresh foliage. When releasing adults, it is advisable to lay a mesh material over the vegetation in release area. Releasing beetles under this material will help prevent them from easily blowing away in the wind or from being eaten by predators (such as dragonflies). 4. Remove screen cages and shake out any adults onto nearby foliage. 5. Leave the pots at the site for the remaining beetles to emerge on their own. 6. Mark the site with a PVC pole or flags. Follow up in 1 month or more: 7. Wait at least 4 weeks after the release before recovering you pots for use in rearing next spring. Look for beetle establishment at the site by looking for evidence of adult feeding. 8. Take a photograph of the site where you released the beetles when the purple Lessoning Loosestrife by Elizabeth B. Duff 2008

