Cover Page for Precalculations – Individual Portion
advertisement
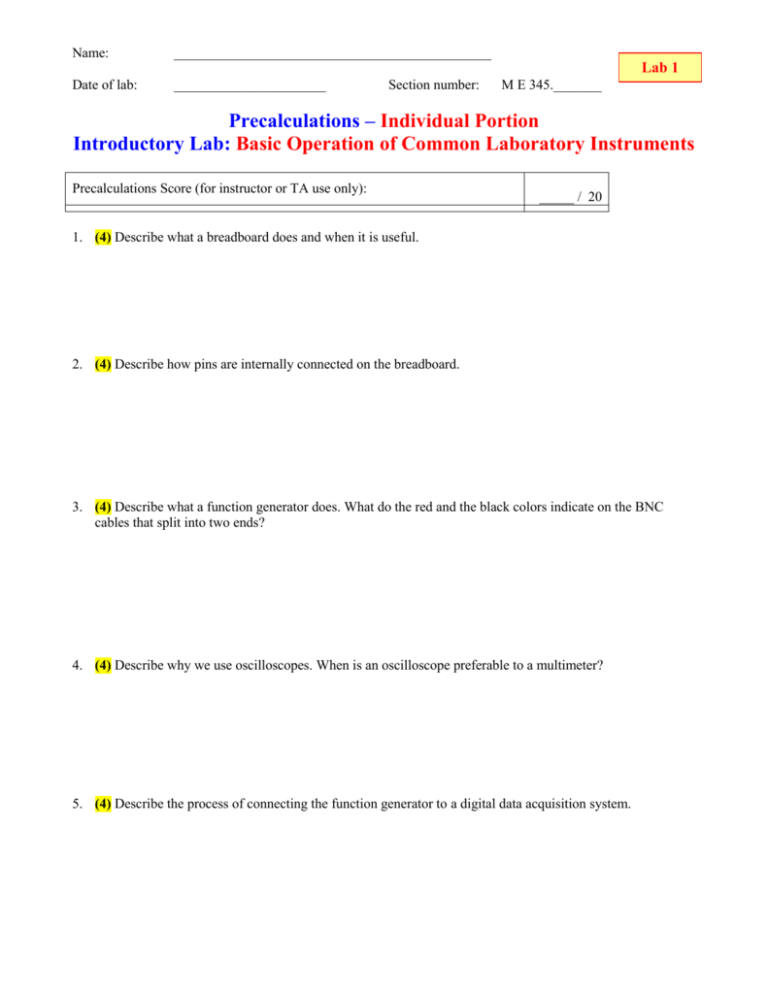
Name: ______________________________________________ Date of lab: ______________________ Lab 1 Section number: M E 345._______ Precalculations – Individual Portion Introductory Lab: Basic Operation of Common Laboratory Instruments Precalculations Score (for instructor or TA use only): _____ / 20 1. (4) Describe what a breadboard does and when it is useful. 2. (4) Describe how pins are internally connected on the breadboard. 3. (4) Describe what a function generator does. What do the red and the black colors indicate on the BNC cables that split into two ends? 4. (4) Describe why we use oscilloscopes. When is an oscilloscope preferable to a multimeter? 5. (4) Describe the process of connecting the function generator to a digital data acquisition system. Lab 1, Introductory Lab. Page 1 Cover Page for Lab 1 Lab Report – Group Portion Introductory Lab: Basic Operation of Common Laboratory Instruments Section M E 345._______ Date when the lab was performed: ______________________ Lab Report Grade (For instructor or TA use only): There are two parts to the lab grade: 1. Group Lab Report, based on the experiment and results, plots, tables, etc. and discussion questions. This part is worth 70 points, and is generally the same for all group members. 2. Lab Skills Assessment, based on demonstrating some basic skills to the TA or instructor. This part is worth 10 points, and is an individual grade, not a group grade. Student Name Lab Report ______ / 70 ______ / 70 ______ / 70 ______ / 70 Assessment ______ / 10 ______ / 10 ______ / 10 ______ / 10 Total ______ / 80 ______ / 80 ______ / 80 ______ / 80 Lab Participation Grade and Deductions – The instructor or TA reserves the right to deduct points for any of the following, either for all group members or for individual students: Arriving late to lab or leaving before your lab group is finished. Not participating in the work of your lab group (freeloading). Causing distractions, arguing, or not paying attention during lab. Not following the rules about formatting plots and tables. Grammatical errors in your lab report. Sloppy or illegible writing or plots (lack of neatness) in your lab report. Other (at the discretion of the instructor or TA). Name Reason for deduction Comments (for instructor or TA use only): Points deducted Total grade (out of 80) Lab 1, Introductory Lab. Page 2 Introductory Lab: Basic Operation of Common Laboratory Instruments Author: John M. Cimbala; also edited by Savas Yavuzkurt, and Mike Robinson, Penn State University Latest revision: 27 August 2014 Introduction and Background (Note: To save paper, you do not need to print this section for your lab report.) The intent of this first lab is to introduce students to the some of the instruments and equipment to be used throughout the course, and to give them practice using these instruments. Almost every lab exercise involves electronic instruments of some kind. In most cases, a voltage, current, or resistance must be measured and converted to a quantity of interest in the experiment (such as temperature, velocity, strain, torque, power, position, etc.). The key to a successful lab experience is to become familiar with the function and operation of the laboratory instruments. Instruments are available for both static and dynamic measurements. Static measurements are satisfactory for parameters that are either constant or changing very slowly, such as the resistance of a resistor or the temperature in a room. These measurements can be done with a digital or analog readout in which only the time averaged (mean) value is required. Oscillations around the mean may exist, but may not be relevant to the measurement. In this lab, an analog multimeter (Simpson meter) and a digital multimeter (DMM) are used for static measurements. Depending on the brand and model, multimeters can measure voltage (both AC and DC), current, resistance, and sometimes capacitance and inductance as well. Dynamic measurements are necessary for time-varying parameters. For example, the stress and strain experienced by a vibrating beam oscillates in time with some frequency, and the amplitude of the oscillation decays with time. A multimeter would be of little use in this situation. Instead, an oscilloscope is used for such dynamic measurements. Analog oscilloscopes provide an instantaneous trace of voltage fluctuations with time, but have no storage capability. Analog scopes use analog electronics, without need for any kind of conversion. Digital oscilloscopes perform the same function, but also digitize and save the signal(s) so that better quantitative analysis is possible. Digital scopes use digital electronics, which require use of an analog-to-digital converter. A digital oscilloscope enables the user to move a cursor along the trace and read the voltage and time values numerically. This is often very convenient for finding things such as peak voltages, and for estimating the frequency of a periodic signal. In most cases, digital scopes provide some kind of connection so that stored data can be directly transferred to a computer for further analysis. Analog scopes have no such capability. Analog oscilloscopes do have some advantages over digital ones, however. For example, the signal trace of an analog oscilloscope is continuous, whereas a digital scope samples at discrete times - the trace is formed by a series of discrete points, and part of the signal is not captured. With the proliferation of personal computers in the 1980’s and 90’s, a new type of instrument became available for laboratory use – digital data acquisition via computer. The graphical resolution and size of a computer monitor are much better than those of a typical digital oscilloscope, and thus very attractive virtual instruments have been created for use with the computer. With graphical programming software such as LabVIEW, and with programs like MATLAB, the computer can be programmed to function as a multimeter, oscilloscope, spectrum analyzer, or most any other electronic instrument, and the computer display can even be made to look like the instrument it is simulating. An obvious advantage for the computer is its flexibility. Electrical engineers and technicians often use a breadboard to quickly build prototypes of circuits for testing. A breadboard has a series of holes or sockets into which jumper wires are inserted to make electrical connections. The wires are easy to connect and disconnect; thus, circuits wired on a breadboard are quickly and easily modified. Some of the sockets are hard-wired to other sockets, forming a bus. There are both short buses (typically containing 5 sockets) and long buses (typically running the full length or width of the breadboard, and containing many sockets, often also in groups of 5) on a breadboard. Short buses are used for component connections, in which two to five wires may be connected to one short bus. Long buses are generally saved for high-usage connections, such as a DC voltage power supply or ground (zero volts). A bus used as ground would, for example, be called a ground bus. Engineers should be familiar with the way the breadboard is internally wired before using the breadboard to create prototype circuits. The sockets on a breadboard are spaced such that standard integrated circuit (IC) chips fit nicely in the empty space between clusters of short buses, as illustrated in the sketch below. [The IC pins are also numbered on the sketch – the convention is counterclockwise numbering starting at the lower left corner of the chip, as typically indicated by a small circle as shown; this is an 8-pin IC] Other components, such as resistors, capacitors, and Lab 1, Introductory Lab. Page 3 diodes can be inserted directly into the sockets. An example of how the leads of a resistor can be inserted directly into the breadboard is sketched below; clusters of 11 short buses are shown on the top and bottom, each containing 5 sockets, aligned vertically and indicated by the red rectangle that encircles them. These 5 sockets are connected to each other, but not to any other sockets. A resistor can either straddle two short buses across the empty space, as the top resistor on the sketch, or cross from one short bus to another within the same cluster of short buses, as the bottom resistor on the sketch. It does not really matter, as long as the two leads of the resistor are inserted into two independent (unconnected) buses. Notice too that from point A to point B on the diagram, these two resistors are in series, since each set of five vertical sockets is a short bus. The equivalent schematic A circuit diagram is shown below: VA R1 R2 VB In this laboratory we use powered breadboards. A powered breadboard has a built-in voltage supply, in our case -15, +5, and +15 V DC, in addition to a common ground. Note that some of the powered breadboards in the lab have +/- 12 rather than +/- 15 V DC power supplies, and some have variable power supplies. 8 7 6 5 IC chip 1 2 3 4 Short bus R1 Objectives 1. Learn how to use a digital multimeter for static measurements of resistance, and voltage. 2. Learn how to generate a periodic signal (e.g., a sine wave) with a function generator. 3. Learn how to use analog oscilloscopes, digital oscilloscopes, and computerized digital data acquisition-based virtual instruments for dynamic measurements of voltage and data logging. 4. Discover the advantages and disadvantages of these different kinds of instruments. 5. Learn how to use a breadboard, and become familiar with wiring electronic components to a breadboard. Equipment function generator powered breadboard and colored jumper wires for breadboarding DC power supply two resistors (10 k, brown, black, orange stripes; and 1.0 M, brown, black, green stripes) two capacitors (0.047 F – the small brownish one, and 100 F – the big black one) digital multimeter (DMM) with leads analog oscilloscope digital oscilloscope PC with USB-based digital data acquisition system (DAQ) and MATLAB software R2 B Lab 1, Introductory Lab. Page 4 Procedure Multimeters 1. Use the digital multimeter (DMM) to measure the resistance of one of your resistors. Experiment with the range setting on the instrument. Pay particular attention to the number of significant digits displayed for each range. 2. (5) Which range would give you the highest number of significant digits when measuring a 2.2035 k resistor? A 2203.5 k resistor? Give your answers and discuss your reasoning in the space below. 3. Practice measuring voltages using the desktop voltage supply. Set the voltage supply to 10 V DC, and measure the voltage with the multimeter. Experiment with the different ranges as you did when measuring resistance. 4. (5) Which range would give you the highest number of significant figures most accuracy when measuring a 10.000 V DC supply? A 10.000 mV DC supply? Give your answers and discuss your reasoning in the space below. 5. (10) How does the range setting on the digital multimeter affect accuracy? How does it affect precision? Think about this, discuss it with your lab partners, and be specific in your answers. Lab 1, Introductory Lab. Page 5 Oscilloscopes and Function Generators 1. Connect the function generator to the analog oscilloscope. Make sure the channel is set to DC, not AC or Ground. Vary the frequency of the output wave, the DC offset, and the amplitude. Note: On some function generators, the DC offset knob must be pulled out or pushed in to become effective. 2. Watch the waveforms on the oscilloscope as the frequency, amplitude, and DC offset of the function generator are adjusted. Turn the various knobs on the oscilloscope to become familiar with the time scale, trigger, and voltage scale adjustments on the oscilloscope. Switch between sine wave, rectangular wave, and triangular wave – the oscilloscope should correctly display the generated waveform. When finished “playing” with the knobs, make sure the VAR Sweep dial and the red VAR knob extension on the Volt/Div knob are both turned all the way clockwise; otherwise, incorrect readings will result. 3. Set up this standard case with the function generator: a sine wave of 100 Hz, with peak-to-peak voltage about 6 V, and with nearly zero DC offset. Record the frequency displayed by the function generator. 4. (3) Measure the period of the wave from the oscilloscope display (by counting divisions on the screen, and take the inverse to calculate the frequency of the signal in Hz). The frequency should agree reasonably well with that displayed by the function generator; if not, seek help. Show your calculations in the space below. 5. (3) Calculate the percentage error of the frequency of the sine wave measured by the analog oscilloscope, assuming that the readout on the function generator is correct. Show all your work in the space below. 6. (4) Repeat Steps 4 through 5, except use the digital oscilloscope. You will be able to use the cursor to read the voltage and time at various locations along the trace. In this manner, the amplitude and frequency of the trace can be determined digitally. In the space below, show calculations to find the percent error in frequency. 7. Play with the display options on the digital oscilloscope so that you can display both frequency and amplitude of the signal. Lab 1, Introductory Lab. Page 6 8. Start MATLAB, and in the user input area, type “softscope” (without the quotes). This launches a virtual oscilloscope. Connect the function generator output to channel 0 of the Measurement Computing USB1608G data acquisition system (DAQ), following the directions on the course website, and with help from your TA or instructor if needed. 9. (5) Play with the virtual oscilloscope such that you can see the signal properly, varying the voltage range, time interval, etc. Note that for this particular software, hit the Trigger button to start taking data. Attach a screen shot of a trace in your lab report. Note: For all lab reports in this course, you must label and number each figure, or points will be deducted. Keep this in mind for all subsequent labs. See attached, Figure number ___________ 10. (5) For this step, use the oscilloscope of your choice (analog, digital, or virtual). With the function generator set to a sine wave, experiment with the “Duty” knob on the function generator. In particular, what does this knob do to the shape of the sine wave? Create a sketch (or insert a photo) of the effect. Note: In later labs, whenever a pure sine wave is desired, always make sure the “Duty” knob on the function generator is all the way to the left. 11. (10) Compare the use of digital versus analog versus virtual oscilloscopes. Discuss some advantages and disadvantages of these three instruments. Digital Data Acquisition; Data Logger 1. A data logger is a device that records voltage signals as a function of time. In the old days, data would be logged on a strip chart. Later on, the data were written to magnetic tape. Nowadays, data loggers simply write voltage data to a file on the computer’s hard disk, and the data can be analyzed in MATLAB, Excel or some other software analysis package. 2. Open the MATLAB virtual instrument that functions as a data logger. The MATLAB program is provided on the Lectures/Labs/HW tab of the course website. 3. Connect the function generator to channel 0 of the data acquisition system and create a 100 Hz sine wave. 4. Run the MATLAB program. It will sample data and write them to an Excel file. Play around with the options for number of data points, sampling frequency, etc. until you can take a good data set. 5. (5) In Excel, create a plot of sine wave voltage as a function of time. Display data points (circles or squares or whatever you like) connected by line segments. Attach a printout of the plot to your lab report. See attached, Figure number ___________ Lab 1, Introductory Lab. Page 7 Breadboard and Electronics For this section, use two 10 kΩ resistors. 1. Practice connecting jumper wires and measuring voltages. For example, connect the +5 V breadboard power supply to a long bus. Connect the ground to another long bus. Be careful not to short circuit the power supply voltages! (For example, make sure +5 V is not connected to ground.) Turn the breadboard power supply on. Measure the voltage with the DMM by inserting its leads into other available sockets along the buses. Verify that the buses are wired properly. 2. (4) Mount two resistors in series on the breadboard. In the space below, either sketch your setup or insert a photo of your setup to show how you wired the resistors. 3. (4) Measure and record the resistance of each resistor individually and the resistance of the two resistors in series. Using the measured resistance of each individual resistor as the value, show calculations for the theoretical series resistance. In the space below, calculate the percent error between your theoretical value and the measured combined resistance. 4. (4) Repeat the above procedure for two resistors in parallel. In the space below, either sketch your setup or insert a photo of your setup to show how you wired the resistors. 5. (3) Calculate the percent error between your theoretical value and the measured combined resistance. Lab Skills Assessment; Lab 1 (10 individual points – see cover page) Each student must individually demonstrate some simple skills to the TA or instructor. Students will be called up one at a time to demonstrate that you understand how to use the equipment from this lab. Be prepared to build a simple circuit and take measurements with a multimeter, and/or create a signal with the function generator and display the signal on the oscilloscope. Lab 1, Introductory Lab. Page 8 Warning about the Digital Oscilloscopes It is important to never push the “Default Set-Up” button. Pressing this button results in the oscilloscope being reverted back to factory settings, with a default amplification of 10X for all output signals. (For instance, you will read 98V instead of 9.8V.) If you are seeing a factor of 10 showing up like this, here are the steps to correct it: Push the “1” button to access Channel 1. [If you cannot see this option, press the “1” button again.] On the right-hand side menu, an option should read “Voltage 1X”. If so, then this channel is okay. But if it shows “Voltage 10X”, then you know there is a problem. By pushing the button on the oscilloscope that is next to that option, you can cycle through the different amplifications. Once you reach 1X amplification, stop. The voltage amplification for Channel 2 can be changed in the same manner as Channel 1. If Channel 1 has the wrong amplitude, it is safe to assume that Channel 2 is wrong as well. Please change Channel 2 even if you are not using that channel this lab. This will save future headaches on upcoming labs. For all labs, the amplification should be set to 1X (no amplification) for all channels. Therefore, you should always check that the amplification is 1X on all channels. If you are viewing results that are off by a magnitude of ten, you should check the amplification by following the steps outlined above. This will be extremely important for future labs.

