Technical Specification for Type Approval of Diaphragm Gas Meters
advertisement
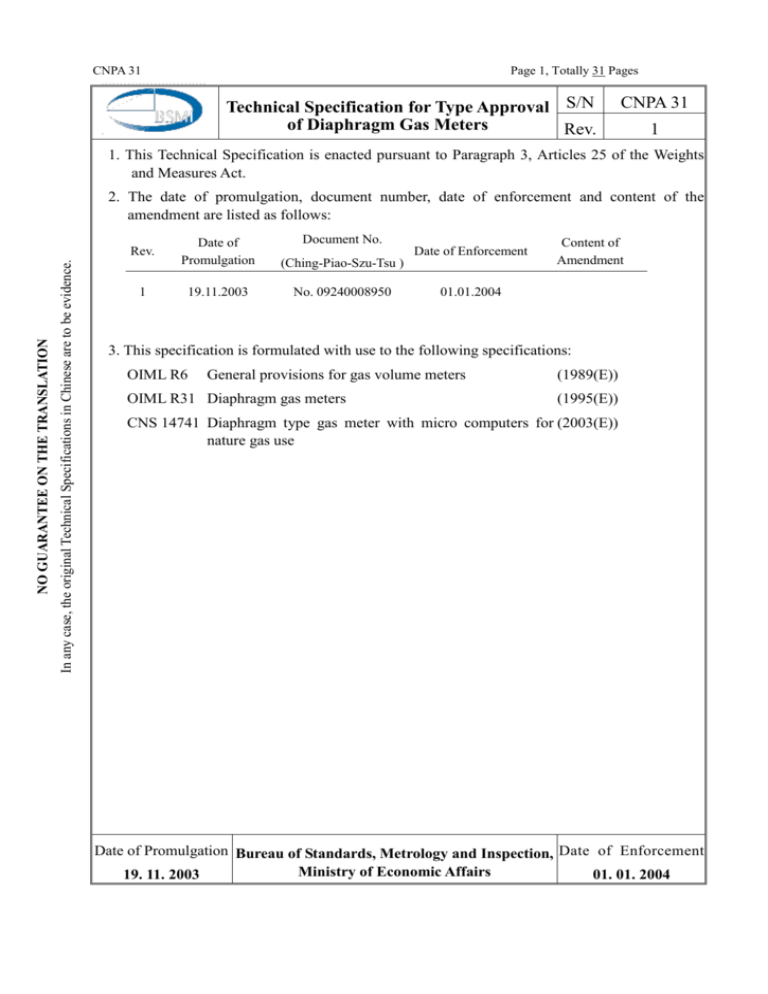
CNPA 31 Page 1, Totally 31 Pages Technical Specification for Type Approval S/N of Diaphragm Gas Meters Rev. CNPA 31 1 1. This Technical Specification is enacted pursuant to Paragraph 3, Articles 25 of the Weights and Measures Act. 2. The date of promulgation, document number, date of enforcement and content of the amendment are listed as follows: In any case, the original Technical Specifications in Chinese are to be evidence. NO GUARANTEE ON THE TRANSLATION Rev. 1 Document No. Date of Promulgation (Ching-Piao-Szu-Tsu ) 19.11.2003 No. 09240008950 Date of Enforcement Content of Amendment 01.01.2004 3. This specification is formulated with use to the following specifications: OIML R6 General provisions for gas volume meters OIML R31 Diaphragm gas meters (1989(E)) (1995(E)) CNS 14741 Diaphragm type gas meter with micro computers for (2003(E)) nature gas use Date of Promulgation Bureau of Standards, Metrology and Inspection, Date of Enforcement Ministry of Economic Affairs 19. 11. 2003 01. 01. 2004 CNPA 31 Page 2, Totally 31 Pages CONTENTS 1. Scope 3 2. Definition 3 3. Range of flowrates 4 4. Details of construction 5 5. Indicating device and test element 5 6. Maximum permissible errors 8 7. Pressure absorption 9 8. Type approval 9 Annex A. Test procedures for Type approval examination of diaphragm gas meters 12 A-1. Test room and test installation 12 A-2. Type approval 14 Annex B. Test report format for the evaluation of diaphragm gas meters 21 CNPA 31 Page 3, Totally 31 Pages 1. Scope: This technical specification applies to diaphragm gas meters (hereinafter referred to as the “gas meter”), that are gas volume meters in which the gas flow is measured by means of measuring chambers with deformable walls, including gas meters with a built-in temperature conversion device. 2. Definition 2.1 Flowrate (Q) Gas volume that flows over the gas meter within unit time. 2.2 Maximum flowrate (Q max) The upper limit of flowrate that gas meter applies within specified error. 2.3 Minimum flowrate (Q min) The lower limit of flowrate that gas meter applies within specified error. 2.4 Transitional flowrate (Q t) The flowrate at which the maximum permissible error changes in value. 2.5 Flowrate range The range of the flowrates of gas limited by the maximum flowrate Qmax and the minimum flowrate Qmin. 2.6 Maximum permissible error The extreme values of the error (positive and negative)permitted by the legal requirements. 2.7 Maximum pressure (P max) The upper limit of gasmeter’s operating pressure. 2.8 Minimum pressure (P min) The lower limit of gasmeter’s operating pressure. 2.9 Pressure range The range of the pressure of operating pressure limitted by the maximum operating pressureand minimum operating pressure.. 2.10 Pressure loss The difference between the pressure at the inlet and outlet of the volume meter while the gas is flowing. 2.11 Indicating device A device accumulates volume of gas measured. 2.12 Integrating value The accumulated gas volume displayed by indicating device. 2.13 Durability The ability of the gas meter to maintain its performance characteristics over a period of use. CNPA 31 Page 4, Totally 31 Pages 2.14 2.14 Value of a given air volume quantity Measured gas volume specified to ensure gas-meter’s instrument error. 2.15 Cyclic volume of gas meter The volume of gas corresponding to the working cycle of the gas volume meter, i.e. to all the movements of the moving components which, except for the indicating device and the intermediate transmissions, resume for the first time the position they occupied at the beginning of the cycle. 2.16 Test element A device to enable precise reading of the gas volume. 2.17 Built-in temperature conversion device A device which converts the volume measured at the metering conditions to a volume at base conditions. 2.18 Pressure absorption With a flow of air of density 1.2 kg/m 3 as a medium, at a flowrate equal to Q max, the pressure loss averaged over a measuring cycle of a gas meter as the total pressure absorption. 2.19 Electronic indicating device A device employing electronic components and performing a specific function. Electronic devices are usually manufactured as separate units and are capable of being independently tested. 2.20 Diaphragm type gas meter micro computers The measuring unit and safety detection control unit associate the diaphragm type gas meter microcomputer. The safety-standard test-controlling unit is composed by fuel gas flowrate sensor, fuel gas blocking valve, fuel gas pressure sensor, seismic sensor, abnormal state judging standard microcomputer motherboard and lithium battery, etc. 3. Range of flowrates 3.1 The authorized values of maximum flowrates and the corresponding values of the upper limits of the minimum flowrates are given in Table 1. Table 1 Q max Upper limit of Q min m3/h m3/h 1 0.016 1. 6 0.016 2. 5 0.016 4 0.025 6 0.040 CNPA 31 Page 5, Totally 31 Pages 10 0.060 16 0.100 25 0.160 40 0.250 65 0.400 100 0.650 160 1.000 250 1.600 400 2.500 650 4.000 1000 6.500 3.2 A gas meter may have a lower value for the minimum flowrate than that shown in Table 1, but this lower value shall be one of the values shown in the table or a decimal submultiple of one of these values. 4. Details of construction 4.1 For each gas meter the difference between the calculated values of the cyclic volume and the nominal value (V) of this volume, indicated on the gas meter, shall not exceed 5% of the latter at reference conditions. 4.2 Gas meter may be provided with a device to prevent the measuring device from functioning whenever the gas is flowing in an unauthorized direction. 4.3 Additional devices 4.3.1 If the gas meter is equipped with prepayment devices, those devices should not influence the function of the gas meter. 4.3.2 If the gas meter is equipped with pulse generators, then it should label the pulse number of unit volume. 4.3.3 If the gas meter is equipped with safety detection control unit and the maximum flowrate is below 16m3/h, it should comply withthe requirements of CNS 14741 and not to affect the metrological function of the gas meter. 5. Indicating device and test element 5.1 General For a gas meter equipped with an indicating device (index) with an integral test element (testing dial or drum) the following conditions apply. The standard deviation of the results of a series of at least thirty consecutive measurements of a volume of air equal to ten times the nominal cyclic volume (or, twenty times when ten times the nominal cyclic volume is less than the volume corresponding to one revolution of the test element), carried out under identical conditions at a flowrate of the order of 0.1 Q max, shall not exceed the values given in Table 2. The test will be carried out on one of the meters supplied for type approval. CNPA 31 Page 6, Totally 31 Pages Table 2 Q max Maximum standard deviation m3/h dm3 1 to 10 inclusive 16 to 100 inclusive 160 to 1000 inclusive 0.2 2 20 Note: The test, to be carried out only in the course of type approval, is intended to assess the repeatability of gas meter and to ascertain that the resolution of the test element matches the need for testing. 5.2 Test element of a mechanical indicating device 5.2.1 a mechanical indicating device may be equipped with either an integral test element according to the provisions of the followings or a device which allows the fitting of a removable test element. The last digit of integrated test element in the indicating device must contain one or two of the two following forms: a. a continuously moving drum bearing a scale. b. a pointer moving over a fixed dial with a scale, or a disk with a scale moving past a fixed reference mark. The diameter of the graduated scale shall at least be 16mm. 5.2.1.1 On the numbered scale of a test element, the value of one complete revolution of the pointer shall be indicated in the form (1 tr ……m3 (or dm3)). The beginning of the scale shall be indicated by the figure zero. 5.2.1.2 The scale spacing shall not be less than 1mm and shall be constant throughout the whole scale. 5.2.1.3 The scale interval must be in the form 1x10n, 2x10 n or 5x10 n m3 (n being a positive or negative whole number or zero). 5.2.1.4 The scale marks shall be fine and uniformly drawn. In the case where the scale interval is in the form 1x10n or 2x10 n m3 all the lines representing multiples of 5, and where the scale interval is in the form 5x10 n m3 all the lines representing multiples of 2, shall be distinguished by being longer than the others lines. The scale marks shall be sufficiently fine to permit accurate and easy reading. 5.2.1.5 The test element may be provided with a scale mark which stands out in contrast to the scale and is of sufficient size to allow automatic photoelectric scanning. The scale mark shall not obscure the graduation. If proper, the index mark can replace “zero” value. And its presence shall not be detrimental to the accuracy of reading. 5.2.1.6. A indicating device shall have a sufficient number to ensure that the volume passed during 1000 hours at maximum flowrate does not return to its initial positions. 5.2.2. An integral test element of mechanical indicating device shall have a maximum CNPA 31 Page 7, Totally 31 Pages scale interval and a scale numbering as specified in Table 3. Table 3 Qmax m3/h Maximum scale interval Numbering every dm3 dm3 1 to 10 inclusive 0.2 1 16 to 100 inclusive 2 10 160 to 1000 inclusive 20 100 5.3 Test element of electronic indicating device 5.3.1 Electronic indicating devices shall be nonresetable and shall be nonvolatile (i.e. must be able to show the last correct indication after the device has recovered from an intervening power failure). 5.3.2 It must use cubical meters or 10n (n is integer) to encode Where the measured values include 10n (n is negative integer) of the cubic meter, they shall be separated by a clear decimal sign from those showingcubic meters. And if the lowest digit is 10n (n is positive integer) of the cubic meter, then there are fixed digits of zero (s) after it (or the making: x10, x100 or x1000), so that the reading is always in cubic meters.. 5.3.3 Sight level of displayed digits should not be less than 4mm. 5.3.4 For digit upgrading (except the lowest digit), the upper digit should be changed concurrently or before the lower digit next to it has changed to zero (0). 5.3.5 It shall have at least a sufficient number to ensure that the volume passed during 1000 hours at maximum flowrate does not return to their initial positions. 5.3.6 Electronic indicating device may be equipped with either an integral test element according to the provisions of the followings or a device which allows the fitting of a removable test element. The last digit of integrated test element must be: a. a continuously moving drum bearing a scale. b. a pointer moving over a fixed dial with a scale, or a disk with a scale moving past a fixed reference mark. The diameter of the graduated scale shall at least be 16mm. 5.3.6.1 The test element may be provided with a scale mark which stands out in contrast to the scale and is of sufficient size to allow automatic photoelectric scanning. The scale mark shall not obscure the graduation. If proper, the index mark can replace “zero” value. And its presence shall not be detrimental to the accuracy of reading. 5.3.6.2 The moveable test element means the impulse-reading device. 5.3.7 An integral test element of mechanical indicating device shall have a maximum scale interval and a scale numbering as specified in Table 3. CNPA 31 Page 8, Totally 31 Pages 5.4 Gas meters with built-in temperature conversion device A gas meter with a built-in temperature conversion device may have only one indicating device displaying the volume at base conditions. The symbol “m3” shall appear on the face plate, accompanied by the specification of those base temperature, expressed as : tb = …oC Note: The values chosen for base temperature shall preferably be 15 oC. Additionally, the maximum permissible errors specified in Table 4 shall be increased by ± 0,5 % in an interval of 10 °C, extending symmetrically around a temperature specified by the manufacturer. The specified temperature shall be between 15 °C and 25 °C. The resulting interval shall be within the range of temperature of the metering conditions indicated on the data plate of the gas meter. The specified temperature should be on the data plate, expressed as: Tsp = …oC 6. Maximum permissible errors 6.1 With air of a density of 1.2 kg/m3 as a test medium, under the conditions laid down as the followings, the maximum permissible errors on type approval are given in Table 4. Table 4 Maximum permissible error Flowrate Q min Q 0.1Q max 0.1Qmin Q Q max Type approval In service 3% -6%, +3% 1.5% 3% 6.1.1 The instrument error of measuring must be expressed by percentage to the relative value; i.e., the ratio of deviation between the indicated value of gas meter and standard value made from standard element, then divided by the standard value made from standard element: Error (%) = (Indicated value - standard value) X 100 (%) (standard value) 6.1.2 The reference density applied to calculate instrument error in measuring air volume is 1.2 kg/m3 (*). 6.1.3 The maximum permissible error is correct in the correct flowing direction. (*) In normal atmosphere condition, the ambient air in lab conforms to this condition. 6.2 On type approval of a meter the absolute value of each meter error shall not exceed CNPA 31 Page 9, Totally 31 Pages 1% at flowrates between 0.1Qmin and Q max, where these errors are all of the same sign. 6.3 For a gas meter with a temperature conversion device and equipment with one indicating device as specified in 5.4, the conventional true value of the volume at the metering temperature shall be converted to the volume at base temperature. The following provisions shall apply. 6.3.1 The maximum permissible errors specified in Table 4 shall be increased by 0.5% in an interval of 10 ℃, extending symmetrically around a temperature specified by the manufacturer. The specified temperature shall be between 15 ℃ and 25 ℃. The resulting interval shall be within the range of temperature the metering conditions indicated on the data plate of the gas meter. 6.3.2 Within the range of temperature of metering conditions indicated on the data plate of the gas meter but outside the interval defined in 6.3.1, the maximum permissible error specified in Table 4 shall be increased by 1.0%. 6.3.3 Compliance with the requirements of 6.3.1 and 6.3.2 shall be test at temperatures not more than 2 ℃ from the upper and lower limits of the specified intervals. 7. Pressure absorption The total pressure absorption of a gas meter, averaged over a measuring cycle, with a flow of air of density 1.2 kg/m3, at a flowrate equal to Q max, shall not exceed the values given in Table 5. Table 5 Flowrate 8. Maximum permissible values for average total pressure absorption (equipped with safety detection control unit) 1 to 10 inclusive 200 (242) 16 to 65 inclusive 300 (330) 100 to 1000inclusive 400 (440) Type approval 8.1 Application for type approval At the same time as the type sample is submitted, the applicant shall place at the disposal of the authority responsible for the examination from two to six sample gas meters manufactured in conformity with the type. 8.2 Examination 8.2.1 The type and the sample gas meters shall comply with the provisions of clauses 3, 4, 5, 6 and 7 of this technical specification. The gas meters shall be submitted to the testing procedure for type approval as specified in Annex A. 8.2.1.1 The errors of the sample gas meters shall be determined at seven flowrates evenly distributed over the working range. 8.2.1.2 At flowrates equal to or is greater than 0.1 Qmax, the errors shall be determined independently at least six times, by varying the flowrate between each consecutive CNPA 31 Page 10, Totally 31 Pages measurement. The difference between any two errors found at each test flow rate shall not exceed 0.6%. 8.2.2 In addition, the difference between the minimum and maximum of the mean error curve as a function of the flowrate shall not exceed 2% for the range 0.1 Qmax and Qmax. 8.2.3 Endurance test 8.2.3.1 The authority responsible for the examination shall choose the number of meters to be submitted to the endurance test from the options given in Table 6 after discussion with the applicant. Table 6 Qmax Number of meters to be submitted m3/h Option 1 Option 2 1 to 25 inclusive 3 6 40 2 4 If different sizes of meter are included, the total number of meters to be submitted shall be as stated in option 2 in Table 6. 8.2.3.2 The endurance test shall be carried out: for gas meters with Q max from 1 to 16 m3/h inclusive: at the maximum flowrate, using gas for which the gas meter is intended to be used. For gas meters with Q max 25m3/h: as far as possible at the maximum flowrate, using gas for which the gas meter is intended to be used; the flowrate during the test shall be at least equal to 0.5 Qmax. .If the manufacturer demonstrates that the diaphragm of the gas meter is sufficiently insensitive to the gas composition, the approving authority may decide to perform the endurance test with air. 8.2.3.3 The duration of the endurance test shall be as follows: For gas meters with Q max from 1 to 16 m3/h inclusive: 2,000 hours; the endurance test may be discontinuous but shall be completed within 100 days; For gas meters with Q max from 25 to 1000 m3/h inclusive: such that each gas meter measures a volume corresponding to 2,000 hours of operation of the gas meter at maximum flowrate: the test shall be completed within 180 days. 8.2.4 After the endurance test the gas meters shall comply with the following requirements. 8.2.4.1 The error curve shall be within the maximum permissible in-service errors as specified in Table 4. 8.2.4.2 The difference between the minimum and maximum of the mean error curve as a function of the flowrate shall not exceed 3% for the range 0.1 Qmax and Qmax. 8.2.4.3 The mean absolute value of errors over the range 0.1 Qmax and Qmax shall not CNPA 31 Page 11, Totally 31 Pages vary by more than 1%. 8.2.5 If the gas meter is equipped with safety detection control unit and the maximum flowrate is below16 m3/h, then this unit needs to follow the test items defined in CNS 14741, Section 8 to perform test. 8.3 Modification of a previously approved type If the request for type approval concerns a modification to a previously approved type, the authority which approved the original type shall decide, according to the nature of the modification, whether and to what extent the requirements of application for type approval and clause 8.2 Examination are applicable. CNPA 31 Page 12, Totally 31 Pages Annex A Test procedures for type approval examination of diaphragm gas meters A.1 Test room and test installation A.1.1 General A.1.1.1 The test room shall be set up so that gas meters can be tested in a correct and efficient way. A.1.1.2 The test room shall be clean and in good order. Engines and other noise-producing machines should be placed outside the test room. A.1.2 Ambient conditions A.1.2.1 The average ambient temperature is defined as the arithmetic mean of the following temperatures: The ambient temperature near the reference standard(s). The ambient temperature around the meter to be tested. The air temperature at the air inlet of the test installation. The ambient temperature near the place in the test room where the meters to be tested are stored prior to examination. Note: The meters to be tested may also be stored in a neighboring room with the same temperature conditions. A.1.2.2 The conditions of the test room air shall be sufficiently stable. This demands at least that: The average ambient temperature does not vary by more than 4oC per 12 hours and by not more than 2 oC per hour. The difference between any two temperatures mentioned in A.1.2.1 does not exceed 2 oC. A.1.2.3 If the following requirements are met the meters may be tested without applying a correction for temperature differences between the reference meter and the meter to be tested: The air used to test the meters is at ambient conditions, The average ambient temperature does not vary by more than 2oC per 12 hours and by not more than 0.5 oC per hour. The difference between any two temperatures mentioned in A.1.2.1 does not exceed 0.5 oC. In all other cases corrections for temperature differences shall be made (see A.1.3.3). A.1.2.4 It shall be established that stable conditions are reached before the start of the first test and that they are maintained until immediately after the last test. A.1.2.5 During measurements the temperature in the test room shall be checked at least CNPA 31 Page 13, Totally 31 Pages once a day. A.1.2.6 the barometric pressure in the laboratory should be measured at least once a day. A.1.3 Test installation A.1.3.1 Test air A.1.3.1.1 The test air shall be clean and free from dust and oil. A.1.3.1.2 The temperature of the test air shall be within 0.5 oC of the average ambient temperature. A.1.3.1.3 The relative humidity shall be such that condensation is avoided at all times. A.1.3.2 Pressure measurement A.1.3.2.1 Pressure tappings for meters under test shall be located one pipe diameter upstream of the meter inlet and one pipe diameter downstream of the meter outlet, or the pressures actually measured shall be verified to be correct indications of the pressures at the above-mentioned locations. A.1.3.2.2 there shall be a straight length of at least one pipe diameter upstream of the inlet pressure tapping and one downstream of the outlet pressure tapping. Each straight length shall be of the same nominal size as the inlet or outlet, respectively. A.1.3.2.3 The holes for pressure tappings shall be perpendicular to the pipe axis. They shall have a diameter of at least 3 mm. The tappings shall not protrude into gas flow. The inside wall of the pipe near the pressure tapping shall be smooth and free from burrs. A.1.3.2.4 The pressure measuring device used to monitor the average pressure absorption of the meter under test shall allow the normal variations in pressure over the meter to be averaged. A.1.3.3 Temperature measurement The temperature representative of the measured gas volume should be measured at the outlet of the meter under test. A.1.3.4 Leakage Periodically the test installation should be extensively tested for leakage, both externally, i.e. into or out of the installation, and internally, i.e. through valves, etc. These leakage tests should be performed with the minimum or maximum operating pressure of the installation whichever is applicable. The rate of leakage shall be smaller than the greater of the following values: 0.1% of the minimum flowrate for which the installation is intended to be used; 100 cm3/h. A.1.3.5 Series testing If meters are to be tested in series, there should be no interaction between the meters. This condition may be verified by testing every meter of the series once CNPA 31 Page 14, Totally 31 Pages at each position in the line. A.1.4 Reference standards A.1.4.1 The test installation shall be equipped with reference standards that are suitable for the testing of diaphragm gas meters. The working range of the reference standards shall match that of the meters to be tested. A.1.4.2 Manometers, thermometers, and reference volume flow standards used to measure parameters that enter into the calculation of any quantity in connection with pattern approval or with initial verification shall have calibration certificates traceable to national or international standards. A.1.4.3 The certificates mentioned in A.1.4.2 shall cover the range for which the instruments are used and shall report the calibration uncertainty. A.1.4.4 The laboratory shall at all times be able to specify type A and type B uncertainties in the determination of gas meter error. The uncertainties shall be calculated according to the Guide to the expression of uncertainty in measurement (1993 edition) and the overall (expanded) uncertainty shall be calculated with a coverage factor k = 2. A.1.4.5 The overall uncertainty in the determination of the meter error shall be at least a factor of 3 smaller than the value of the maximum permissible errors for the meters tested, taken from the applicable values of Table 4. For test installations used for the purpose of pattern approval the same factor shall be at least 5. A.2 Type approval A.2.1 Documents and meters to be submitted A.2.1.1 The applicant shall submit the documents listed below: a description of the meter giving the technical characteristics and the principle of its operation a perspective drawing or photograph of the meter a nomenclature of parts with a description of constituent materials of such parts an assembly drawing with identification of the component parts listed in the nomenclature a dimensioned drawing. a drawing showing the locations of verification marks and seals a drawing of indicating device with adjustment mechanisms a dimensioned drawing of metrologically important components a drawing of the data plate or face plate and of the arrangements for inscriptions a drawing of the additional devices a table setting out the characteristics of the drive shafts a list of electronic components with their essential characteristics CNPA 31 Page 15, Totally 31 Pages a description of electronic devices with drawings, diagrams and general software explaining their construction and operation a list of the documents submitted a test report specifying that the metersmanufactured in conformity with the requirements for safety. 1. The ambient atmosphere in Taiwan area has higher salt content; besides, the operation life of gas meter is above ten years, material applied to in outer shell and inner portion that will directly contact to fuel gas should be anticorrosive material or surface-coated by anti-corrosion treatment. Therefore, if applying the metallic material defined in CNS 14741, Section 5 and Table 1 or equivalent one, it then is no need to perform the test defined in CNS 14741, Section 8.29.1.(3) and the competent unit can directly check the conformity of material list submitted in the application. Yet, if material applied isn’t in the acceptable anticorrosive material list, it then requires performing the test defined in CNS 14741, Section 8.29.1.(3). For non-metallic material, it should apply the test defined in CNS 14741, Section 8.29.2. 2. Material connecting to the fuel-gas-supplying portion should be able to withstand the external impact under normal operation. Applicant should provide the shock test report under the testing condition defined in CNS 14741, Section 8.13. A.2.1.2 The applicant shall submit a number of meters for examination as specified in Section 8.2 with a quantity defined in Section 8.1, Table 6. A.2.1.3 The documents shall be examined to verify that they are in agreement with the meters submitted. A.2.2 General inspection A.2.2.1 The markings and inscriptions on the meters shall be examed. The range of flowrates indicated shall comply with 3.1. Gas meters may be fitted with: (a) prepayment devices (b) integral pulse generator, the outlets of which shall bear an indication of the value of one pulse in the form: “1 imp. ……m3 (dm3)” or “1 m3 (dm3) ……imp.” (c) a built-in temperature compensator device. (d) a built-in self-checking and possible self-adjusting device. The devices are regarded as forming an integral part of the gas meter; they shall have been installed in the gas meter at the time of type approval and initial verification. (e) additional equipment (correcting equipment, recording equipment and CNPA 31 Page 16, Totally 31 Pages supplementary indication equipment etc.). Add them according to the requirements applied in type approval procedures. Each gas meter shall bear, either on the data plate, or on a special data plate, the following markings: a- the type approval number. b- the maker’s trade mark or his trade name. c- the type number and serial number. d- metrological gas name. e- the maximum working pressure P max = …kPa (Pa or bar or mbar). f- the flowrate range: the maximum and minimum flowrate defined in Table 1, the unit is m3/h. g- for volumetric flow meter, the normal value of the cyclic volume: V = …m3 (or dm3). h- the maximum permissible pressure deviation between meter inlet and outlet; the symbol is P max = …kPa (Pa or kgf/cm2 or mmH2O). i- applicable temperature and pressure ranges. j- the nominal diameter (inside diameter of inlet and outlet, expressed by mm). k- inlet and outlet orientations. l- if built-in temperature compensator is installed, label the base temperature t b = …oC and specific temperature tsp = …oC. m- if required, a commercial brand name of the gas meter, a special serial number and the name of the gas distributor . This markings shall be directly visible, easily legible and indelible under normal conditions of use of the meters. A.2.2.2 The places provided for verification marks and protection marks shall be checked. Location of verification and protection marks A.2.2.2.1 General provision The location of the marks shall be chosen in such a way that the dismantling of the part sealed by one of these marks results in permanently visible damage to this mark. A.2.2.2.2 Data plate Gas meters shall have a special location for applying the verification mark. And it’s unable to dismantle this brand without destroying the certification mark. A.2.2.3 The test element(s) shall be checked as specified in section 5. A.2.2.4 The meters to be tested shall be ready for operation as specified in the manufacturer’s operating instructions. CNPA 31 Page 17, Totally 31 Pages A.2.2.5 Meters having additional devices shall be checked to ensure that these devices are correctly connected and that they conform to the documents supplied by the manufacturer (see also A.2.4 and A.2.5). A.2.3 Initial performance test at ambient conditions A.2.3.1 Error curve A.2.3.1.1 Meters shall be stabilized at the temperature of the test room. A.2.3.1.2 Meters shall be installed on the test installation as specified in the manufacturer’s operation instructions. Pipes connected to the inlet and outlet of the meter shall be of at least the same nominal sizes as those of the meter connections. A.2.3.1.3 After a meter is installed on the test installation it shall be brought to the minimum or maximum gauge pressure of the test installation, whichever is applicable. After temperature stabilization the leak rate shall be as specified in A.1.3.4. A.2.3.1.4 Before starting the first series of test, the meter shall be run at maximum flowrate. The volume passed through the meter shall be at least fifty times the cyclic volume of the meter. The actual duration of running in may depend on the time that has elapsed since the meter was last in operation. A.2.3.1.5 The error curve of all meters submitted shall be determined at a minimum of seven flowrates. These flowrates shall include: Q max, 0.7 Q max, 0.4 Q max, 0.2 Q max, 0.1 Q max, 3 Q min, and Q min. A.2.3.1.6 The meter should be tested with a volume of air that equals an integer multiple of the cyclic volume of the meter. If this is not possible the volume of air passing through the meter should be chosen so that the influence of the periodic variation of the working cycle is less than 0.2% for the tests at flowrates equal to or greater than 0.1 Q max and 0.4% for the tests at flowrate less than 0.1 Q max. A.2.3.1.7 If a number of meters are tested in series the average inlet pressure at each meter shall be measured in order to account for the effect on the measured volume of the decreasing pressure in the test line. A.2.3.1.8 The error at each flowrate shall be determined as the mean value of the errors measured. For flowrates Q min and 3 Q min, the error shall be determined twice, once with decreasing flowrate and once with increasing flowrate. For flowrates equal to or greater than 0.1 Q max, the error shall be determined at least six times, thrice with decreasing flowrate and thrice with increasing flowrate. A.2.3.1.9 The errors at each flowrates shall be within the maximum permissible errors specified in 6.1 and 6.2. A.2.3.2 During the test at Q max the pressure differential between the inlet and the outlet of the meter shall be read to check that the average total pressure absorption of the meter complies with clause 7. CNPA 31 Page 18, Totally 31 Pages A.2.3.3 In order to detect mechanical wear occurring during the endurance test the pressure absorption at Q min should be determined. A.2.3.4 The indication of each of the meters submitted shall be determined as specified in 8.2.1.2. A.2.4 Performance test at temperatures other than the reference temperature conditions A.2.4.1 When a meter without a built-in temperature conversion device is designed to be used at temperature other than reference conditions, the meter performance shall be checked over the range of metering temperatures indicated on the meter. The meters shall be tested at least at the following temperatures: a temperature at 0oC of the minimum metering temperature; a temperature within 5oC of the maximum metering temperature; the range of the metering conditions in which the gas meteris required to work within the specified maximum permissible errors, expressed as: tm = … …oC pm = … …MPa (or kPa or Pa or bar or mbar) A.2.4.2 The temperature of the ambient conditions of the meter and of the test air at the meter inlet shall be the same within 1 oC, and the metering temperature at the meter to be tested shall be kept constant within 0.5 oC at a given temperature setting. If at other temperature conditions, it needs to make correction on the temperature deviation. The temperature shall be fully stabilized before testing at a given temperature. The temperature shall be measured. Note: The referenced standard shall always run at a temperature for which its calibration is valid. The humidity of the test air shall be such that no condensation occurs. A.2.4.3 The test shall be performed at the following flowrate: 0.2 Q max, 0.7 Q max and Q max A.2.4.4 The errors shall be determined twice, once with decreasing flowrate and once with increasing flowrate. A.2.4.5 The errors at each test temperatures shall be within the maximum permissible errors on initial verification as specified in 6.1 and 6.2. A.2.5 Additional devices A.2.5.1 If the meter is equipped with a prepayment device it shall be verified that this device has no significant influence on the meter performance. A.2.5.2 If the meter is equipped with a pulse generator, its correct operation and the number of pulses per unit volume shall be checked. A.2.6 Built-in temperature conversion device CNPA 31 Page 19, Totally 31 Pages A.2.6.1 General A.2.6.1.1 All tests specific to the temperature conversion device shall be carried out on the same sample size as used for the type approval of non-converting meters (see A.2.1.2). A.2.6.1.2 The meters shall be tested at the various constant temperatures as specified in A.2.6.2. A.2.6.2 Temperature tests A.2.6.2.1 The meters shall be tested as specified in A.2.4.2 and A.2.4.3. The test temperatures shall be the temperatures that follow from 6.3.3. Test shall be carried out with increasing and decreasing temperatures. A.2.6.2.2 The errors at each test temperature shall be within the maximum permissible errors on initial verification as specified in clause 6. A.2.7 Endurance test (see 8.2.3 and 8.2.4) A.2.7.1 If the endurance tests are carried out outside the laboratory of the approving authority, the meters shall be completely sealed. A.2.7.2 The main components of the gas measured during the endurance test should be known. A.2.7.3 The ambient condition should not be more severe than the normal operating conditions of the meter. A.2.7.4 For each meter, the meter reading at the beginning and at the end of the endurance test shall be noted. The indication of the measured volume shall be verified as being compatible with the measured flowrate and the duration of the test. A.2.7.5 Final error curve A.2.7.5.1 The final error curve shall be determined as soon as possible but no later than 48 hours after termination of the endurance test. During the time interval between termination and the determination of the error curve the meters shall remain shut off. A.2.7.5.2 To conditions and procedure for the determination of the final error curve shall be those of the initial performance test, as specified in A.2.3. The error shall be determined twice, once with decreasing flowrate and once with increasing flowrate. The tests shall be carried out on the same test installation used to determine the initial error curve. A.2.7.5.3 The shift of the mean error curve shall be within the tolerances specified in 8.2.4. A.2.7.6 If the pressure absorption at Q min has changed significantly the meter should be examined for the possible cause. A.2.8 Form of certificate If a gas meter applied for type approval has shown conforming to all requirements, the following particulars shall appear on the certificate. CNPA 31 Page 20, Totally 31 Pages the name and address of the person to whom the type approval certificate is issued,. the type of the gas meter and /or commercial designation, the principal technical and metrological characteristics, such as the minimum flow, maximum working pressure, nominal internal diameter of connected pieces and, in the case of volumetric gas meters: the nominal value of the cyclic volume, the type approval sign, the period of validity of the type approval, the information on the location of the type approval mark, initial verification marks and seals (where appropriate, in the form of photographs or drawings), a list of the documents accompanying the type approval certificate, Any special comments. CNPA 31 Page 21, Totally 31 Pages Annex B Test report format for the evaluation of diaphragm gas meters B.0 General B.0.1 Application no. : Manufacturer : Applicant : (new/modification) Representative : B.0.2 General information on the gas meter(s) Qmax Qmin Pmax V (m3/h) (m3/h) (bar) (dm3) Type of display : mechanical/electromechanical/LCD/LED/… Number of drums/figures : Additional devices : prepayment device : Yes/No pulse generator : Yes/No Built-in temperature conversion device: Yes/No one indicating device :( ) two indicating devices :( ) …pulse/m3 or m3/pulse CNPA 31 Page 22, Totally 31 Pages B.0.3 Overall result of the type evaluation Overall result of type evaluation 1. Documents and meters submitted 2. General inspection 3. Initial performance test 4. Additional devices 5. Built-in temperature conversion device 6. Endurance test (*) mark + when the result meets the requirements mark – when the result does not meet the requirements Final result +/(*) CNPA 31 Page 23, Totally 31 Pages B.1 Document and meters submitted B.1.1 List of documents submitted (A.2.1.1)* Declaration of conformity with safety regulations: yes/no B.1.2 List of meters submitted (A.2.1.2) Qmax Manufacturer’s series number B.1.3 Meters and documents compatible (A.2.1.3): yes/no B.2 General inspection B.2.1 Inscriptions on the meters (A.2.2.1) B.2.1.1 Display panel/data plate Approval sign of the gas meter. : Maker’s trade mark/trade name : Serial number and year : Qmax : m3/h Qmin : m3/h Pmax : MPa, kPa, Pa, bar, mbar V : dm3 tm : o Pm : MPa, kPa, Pa, bar, mbar : pulse/ m3 or m3/pulse C B.2.1.2 Additional devices Pulse generator B.2.1.3 Conversion devices tb tsp : o : o C C CNPA 31 Page 24, Totally 31 Pages Pb : MPa, kPa, Pa, bar, mbar Symbol “m3” : yes/no Flow direction indication : yes/no B.2.1.4 Other indications (*) References are to clauses of this specification unless otherwise stated. CNPA 31 Page 25, Totally 31 Pages B.2.2 Check on locations of sites for verification and protection marks(A.2.2.2) B.2.3 Indicating device(s), test element(s) (A.2.2.3) Indicating device(s), test element(s) +/- General construction Test element Diameter drums/dials Reading of indicating device Advance of figure Removal of indicating device B.2.4 Reading of indicating device Flowrate (appr. 0.1 Qmax) : m3/h Air volume per measurement : dm3 Tolerance : dm3 Indicated volume (Vi) : Mean indicated volume Vm = Vj/30 : dm3 V V Standard Deviation (S.D.) = m i 2 29 Result. CNPA 31 B.3 Page 26, Totally 31 Pages Initial performance test Ambient conditions B.3.1 t = ℃ ± RH = % Pamb = kPa ℃ Error curve(A.2.3.1) m3 at Running in: Flowrate m3/h Test volume m3, dm3 m3/h Errors% 1 2 3 4 Maximum difference 5 6 % Qmax 0.7Qmax 0.4Qmax 0.2Qmax 0.1Qmax 3Qmin Qmin Flowrate m3/h Mean error % Qmax 0.7Qmax 0.4Qmax 0.2Qmax 0.1Qmax 3Qmin Qmin General result for error curve mpe Result % +/- CNPA 31 Page 27, Totally 31 Pages B.3.2 Average total pressure absorption at Qmax : Pa (A.2.3.2) Tolerance B.3.3 Pressure absorption of Qmin : Pa : Pa (A.2.3.3) Result pressure absorption B.3.4 Constant temperature test (A2.4) o Metering temperature: C Flowrate Tested volume m3/h dm3 error Test volume error % dm3 % error Test volume error 0.2Qmax 0.7Qmax Qmax o Metering temperature: Flowrate 3 m /h C Test volume dm 3 0.2Qmax 0.7Qmax Qmax Result constant temperature test % dm 3 % CNPA 31 Page 28, Totally 31 Pages Test No. 1 2 3 4 5 6 7 8 9 10 11 12 13 14 15 16 17 18 19 20 21 22 23 24 25 26 27 28 29 30 Indicated volume V1 Vm – Vi (dm3) (dm3) (Vm – Vi)2 CNPA 31 Page 29, Totally 31 Pages B.4 Additional devices B.4.1 Prepayment device Influence of prepayment device on meter performance B.4.2 Pulse generator Correct operation Number of pulse per unit volume correct B.5 Built-in temperature conversion device B.5.1 List of meters submitted Qmax Manufacturer’s serial number Indicated temperature range Base temperature Specified temperature : : : tm tm tm = = = / o C C o C o B.5.2 Constant temperature tests (A.2.6.2) o Test temperature: C o C o C B.5.2.1 Increasing temperature Flowrate m3/h t= o C error % Up Down t= o C error % Up Down t= o C error % Up Down 0.2Qmax 0.7Qmax Qmax mpe % B.5.2.2 Decreasing temperature Flowrate m3/h t= o C error % Up 0.2Qmax 0.7Qmax Qmax mpe % Result constant temperature test Down t= o C error % Up Down t= o C error % Up Down CNPA 31 Page 30, Totally 31 Pages B.6 Endurance test (8.2.3, 8.2.4) B.6.1 Meter completely sealed B.6.2 Test medium: gas, component : mol % CO2 mol % N2 mol % CH4 mol % C2H6 Relative humidity : % : / Flowrate : m3/h Duration : hours B.6.3 Ambient conditions at test site Ambient temperature o C B.6.4 Data endurance test Meter number. m3 Meter reading 3 (max. flowrate (m /h)) at beginning Measured volume m3 at end Date and time of termination endurance test: B.6.5 Final error curve Date and time of determination of error curve: Flowrate m3/h Test volume error (%) (m3) 1 2 Mean error (%) Shift mpe Result (%) (%) +/- Qmax 0.7Qmax 0.4Qmax 0.2Qmax 0.1Qmax 3Qmin Qmin General result for error curve shift B.6.6 pressure absorption at Qmin : Pa CNPA 31 Page 31, Totally 31 Pages Change B.6.7 Average total pressure absorption at Qmax Change : Pa : Pa : Pa
