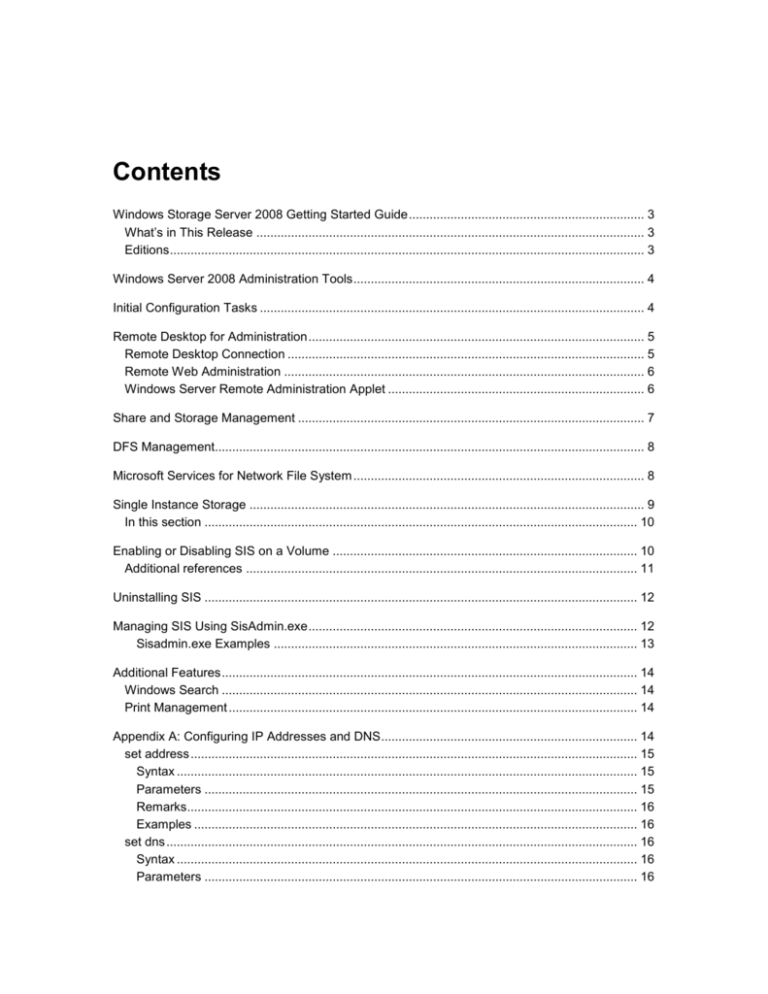
Contents
Windows Storage Server 2008 Getting Started Guide .................................................................... 3
What’s in This Release ................................................................................................................ 3
Editions ......................................................................................................................................... 3
Windows Server 2008 Administration Tools .................................................................................... 4
Initial Configuration Tasks ............................................................................................................... 4
Remote Desktop for Administration ................................................................................................. 5
Remote Desktop Connection ....................................................................................................... 5
Remote Web Administration ........................................................................................................ 6
Windows Server Remote Administration Applet .......................................................................... 6
Share and Storage Management .................................................................................................... 7
DFS Management............................................................................................................................ 8
Microsoft Services for Network File System .................................................................................... 8
Single Instance Storage .................................................................................................................. 9
In this section ............................................................................................................................. 10
Enabling or Disabling SIS on a Volume ........................................................................................ 10
Additional references ................................................................................................................. 11
Uninstalling SIS ............................................................................................................................. 12
Managing SIS Using SisAdmin.exe ............................................................................................... 12
Sisadmin.exe Examples ......................................................................................................... 13
Additional Features ........................................................................................................................ 14
Windows Search ........................................................................................................................ 14
Print Management ...................................................................................................................... 14
Appendix A: Configuring IP Addresses and DNS .......................................................................... 14
set address ................................................................................................................................. 15
Syntax ..................................................................................................................................... 15
Parameters ............................................................................................................................. 15
Remarks .................................................................................................................................. 16
Examples ................................................................................................................................ 16
set dns ........................................................................................................................................ 16
Syntax ..................................................................................................................................... 16
Parameters ............................................................................................................................. 16
Examples ................................................................................................................................ 17
Legal and Copyright Information ................................................................................................... 17
Windows Storage Server 2008 Getting
Started Guide
Microsoft® Windows® Storage Server 2008 operating systems provide a user interface for initial
server configuration, unified storage appliance management, simplified setup and management of
storage and shared folders, and support for Microsoft iSCSI Software Target. It is specially tuned
to provide optimal performance for network-attached storage. Windows Storage Server 2008
provides significant enhancements in share and storage management scenarios, as well as
integration of storage appliance management components and functionality.
Note
The Microsoft iSCSI Software Target is an optional package that is available for use with
Windows Storage Server 2008. If you do not already have it, contact your storage
appliance manufacturer for information about acquiring the Microsoft iSCSI Software
Target.
This document provides an overview of the features and functionality available in Windows
Storage Server 2008.
What’s in This Release
Windows Storage Server 2008 provides more efficient and unified file management by extending
and consolidating the management interface. This includes the following features and
functionality:
Initial Configuration Tasks user interface simplifies setting up the storage appliance. See
Initial Configuration Tasks for more information.
Share and Storage Management is a snap-in that includes two wizards for provisioning
shares and storage. See Share and Storage Management for more information.
Network File System (NFS) provides an identity mapping interface and wizard. See
Microsoft Services for Network File System for more information.
Remote Desktop for Administration provides a Windows Server Remote Administration applet
that enables browser-based remote access to the management console from non-Microsoft
clients. See Remote Desktop for Administration for more information.
Single Instance Storage improvements, including support for clusters, remote management,
up to 20 volumes per server, and support for “unSIS” or removal of SIS from a volume. See
Single Instance Storage for more information.
Editions
Windows Storage Server 2008, Basic Edition, x86
3
Windows Storage Server 2008, Basic Edition, x64
Windows Storage Server 2008, Workgroup Edition, x64
Windows Storage Server 2008, Standard Edition, x64
Windows Storage Server 2008, Enterprise Edition, x64
Note
The x64 editions support only x64-based versions of Microsoft Management Console
(MMC) snap-ins, not 32-bit versions.
Windows Server 2008 Administration Tools
You can use several Windows Server 2008 administration tools to perform normal tasks for your
Windows Storage Server 2008 storage appliance. The topics in this section briefly describe the
following tools:
Initial Configuration Tasks
Remote Desktop for Administration
Share and Storage Management
DFS Management
Microsoft Services for Network File System
Initial Configuration Tasks
The Initial Configuration Tasks window opens each time an administrator logs on to the storage
server, unless the user chooses not to display the window at logon.
In the Initial Configuration Tasks window, you can perform the following tasks:
Initial Computer Configuration
Change the administrator name and password.
Configure networking.
Change the computer name.
Specify language and regional settings.
Change date and time settings.
Windows Updates
Download and install updates.
Configure Automatic Updates.
System Configuration
Set up identity mapping for Microsoft Services for Network File System (NFS) by using the
Microsoft Services for NFS Configuration Guide and the Identity Mapping Setup Wizard.
4
Additionally, command-line support is available for remotely connecting to the storage server.
This command-line support is provided through the Special Administration Console (SAC), which
is the primary Emergency Management Services command-line environment that is hosted by
Windows Server 2008 operating systems.
Remote Desktop for Administration
You can remotely administer a storage appliance by using Remote Desktop for Administration
(formerly known as Terminal Services in Remote Administration mode). You can use it to
administer a computer from virtually any computer on your network. Based on Terminal Services
technology, Remote Desktop for Administration is specifically designed for server management.
Remote Desktop for Administration does not require the purchase of special licenses for client
computers that access the server. It is not necessary to install Terminal Server Licensing when
using Remote Desktop for Administration.
You can use Remote Desktop for Administration to log on to the server remotely with any of the
following features:
Remote Desktop Connection
Remote Web Administration
Windows Server Remote Administration Applet
For more information, see Remote Desktop for Administration, which is also available in
Windows Server 2008 Help.
Note
For secure connections, it is recommended that a certificate be obtained for the server
and that HTTPS connections be used to connect to Windows Storage Server 2008 .
Remote Desktop Connection
Administrators can fully administer computers running Windows Storage Server 2008 from a
remote Windows–based computer by using Remote Desktop Connection. To facilitate access,
administrators can create a remote desktop connection and save it to the desktop of the
computer that is used for remote administration.
To create and save a remote desktop connection to Windows Storage Server 2008
1. Click Start and then click Run. In the Run dialog box, type MSTSC and then click OK. If
you are performing this step from Windows Vista, type MSTSC in the Search box and
then under Programs click mstsc.exe.
2. In the Remote Desktop Connection dialog box, in Computer, type the computer name
or IP address of the storage appliance, and then click Options.
3. In Connection Settings, click Save As.
5
4. In the Save As dialog box, in File name, type the name you would like to use for the
connection, and leave the extension as .rdp.
5. Click Save in, select Desktop, and then click Save.
For more information about how to configure your Remote Desktop Connection, click
Help in the Remote Desktop Connection dialog box.
For more information, see Remote Desktop Connection, which is also available in Windows
Server 2008 Help.
Remote Web Administration
Administrators can remotely administer a server running Windows Storage Server 2008 from a
client computer by using a browser. For computers running a Windows operating system and
Internet Explorer 6 (or later), the Remote RDP Client ActiveX® control will be run. The ActiveX
control offers the same functionality as the Remote Desktop Client, MSTSC.
Windows Server Remote Administration Applet
You can remotely administer Windows Storage Server 2008 from non-Microsoft computers by
using the Windows Server Remote Administration Applet. This applet runs in a browser on the
client computer, and it can be any of the following:
Firefox version 1.0.6 (or later)
Mozilla version 1.7.11 (or later)
The Windows Server Remote Administration Applet is supported on clients running Java 2
Runtime Environment, version 1.4.2, on a computer running a Windows operating system and
Internet Explorer 6 or later, or on Any of the following non-Microsoft operating systems:
Red Hat Enterprise Linux 3 WS
Red Hat Enterprise Linux 4 WS
SuSE Linux Enterprise Server 9
SuSE Linux Enterprise Server 10
You can establish a connection through the browser. Windows Server Remote Administration
Applet does not support sound redirection, printer or port redirection, or automatically starting
applications.
To establish a browser-based connection to Windows Storage Server 2008
1. Open the browser on the client computer.
2. Type the network name or the network IP address of the storage server followed by
/desktop (for example, http://myStorageServer/desktop).
3. In Remote Administration Desktop, provide the appropriate credentials.
Note
6
Administrative credentials are not required to establish a browser-based
connection, but are required to manage the storage server.
Note
If Java Runtime Environment (JRE) is not installed correctly, the Additional plug-ins are
required to display all the media on this page message may be displayed. For
information about installing JRE on a non-Microsoft system, see the installation
instructions on the Java Web site.
Share and Storage Management
With the Share and Storage Management snap-in provided in this release, you can more easily
set up and manage shared folders and storage. Share and Storage Management provides the
following:
MMC-based management of shared folders and storage.
Provision Storage Wizard for creating and configuring storage for file sharing and block
sharing, including creating LUNs on storage subsystems, as well as creating and formatting
volumes on LUNs or server disks.
Note
You must have a VDS Hardware Provider that is appropriate for your storage
appliance installed in order to provision storage on an iSCSI target. If you have
Microsoft iSCSI Software Target running on a Windows Storage Server 2008 storage
appliance, install the Microsoft iSCSI Software Target VDS Hardware Provider on the
client computer.
Provision a Shared Folder Wizard for creating and configuring shared folders that can be
accessed by using either the server message block (SMB) or NFS protocol.
Single Instance Storage (SIS) can be enabled or disabled for each volume that is displayed in
Share and Storage Management. SIS recovers disk space by reducing the amount of
redundant data stored on a volume. It identifies identical files, storing only a single copy of
the file in the SIS Common Store, and replacing the files with pointers to the file in the SIS
Common Store. For more information on SIS, see Single Instance Storage.
The Share and Storage Management snap-in makes it possible to complete most of the
administrative tasks that are required to create and manage shared folders and volumes without
having to use the Shared Folder Management, Storage Manager for SANs, or Disk Management
snap-ins. These tasks include configuring quotas to restrict the quantity of data, configuring file
screening to prevent certain file types or only allowing certain file types defined by the
administrator, and enabling indexing.
Share and Storage Management includes the following tabs for managing shared folders and
volumes:
Volumes
7
This tab displays all volumes that are available to the server and information about each
volume. From here, you can track and manage volumes.
Shares
This tab displays all shared folders created by using Share and Storage Management and
information about each shared folder. From here, you can track and manage shared folders.
DFS Management
The Distributed File System (DFS) solution in Windows Storage Server 2008 provides simplified,
fault-tolerant access to files and WAN–friendly replication. DFS consists of two technologies:
DFS Namespaces
Formerly known as DFS, DFS Namespaces allows administrators to group shared folders
that are located on different servers and present them to users as a virtual tree of folders
known as a namespace. A namespace provides numerous benefits, including increased
availability of data, load sharing, and simplified data migration.
DFS Replication
The successor to File Replication Service (FRS), DFS Replication is a state-based,
multimaster replication engine that supports scheduling and bandwidth throttling. DFS
Replication uses a compression algorithm known as Remote Differential Compression
(RDC). RDC is a protocol that can be used to efficiently update files over a limited-bandwidth
network. RDC detects insertions, removals, re-arrangements of data in files, enabling DFS
Replication to replicate only the deltas (changes) when files are updated.
Note
DFS Replication is not supported on Failover Clusters, and it is not available on
Windows Storage Server 2008 Basic Edition.
Microsoft Services for Network File System
Microsoft Services for Network File System (NFS) is a component of Windows Storage
Server 2008 that provides a file-sharing solution for enterprises that have a mixed Windows and
UNIX environment. By using Microsoft Services for NFS, you can configure storage services to
make it possible for users to store and access files on the Windows Storage Server 2008–based
storage appliance, and to transfer files between the storage appliance and UNIX computers by
using the NFS protocol.
In Windows Storage Server 2008, you can complete the initial configuration of Microsoft Services
for NFS by using the Microsoft Services for NFS Configuration Guide, which includes an Identity
Mapping Setup Wizard. After completing the initial Microsoft Services for NFS configuration, you
can use the Microsoft Services for NFS console for ongoing maintenance and administration.
8
If you are using Windows Storage Server 2008 in an environment that does not include an Active
Directory directory service domain, you can install Active Directory Application Mode (ADAM) on
your storage appliance to provide user name mapping for NFS. Microsoft Services for NFS can
use any RFC 2307 compliant Lightweight Directory Access Protocol (LDAP) service to provide
username mapping services.
For more information about Microsoft Services for NFS, see Microsoft Services for NFS. For
information about using the Microsoft Services for Network File System with User Name Mapping,
see Specify How Server for NFS Obtains Windows User and Group Information. For more
information on ADAM, see Windows Server 2003 Active Directory Application Mode.
Single Instance Storage
The Single Instance Storage (SIS) feature reduces the amount of space that is used to store data
on a volume. SIS does this by replacing duplicate files with logical links that point to a single copy
of the file in the SIS Common Store, which is a hidden folder that is located in the root directory of
the volume.
SIS consists of two primary components that together maintain a database of file signatures.
These components include:
Groveler service - The Groveler service scans the hard-disk volumes on a server for
duplicate copies of files. If the service locates duplicate copies of files, the information about
the duplicates is sent to the Single Instance Storage Filter. The Groveler service runs as a
user-level service.
Single Instance Storage Filter - The Single Instance Storage Filter is a file system filter
service that manages duplicate copies of files on hard-disk volumes. When notified by the
Groveler service of duplicate copies of files, this component copies one instance of a
duplicate file into a central folder. The duplicate is then replaced by a link (a reparse point) to
the central copy. The link file contains information about the original file, such as its current
location, size, and attributes. The Single Instance Storage Filter runs in kernel mode.
The Single Instance Storage Filter service cannot be stopped. If this service is disabled, the
linked files are not accessible. If the central folder is deleted, the linked files can become
permanently inaccessible. If you stop the Groveler service, the files cannot be automatically
linked, but the existing linked files can still be accessible.
You can enable SIS on a maximum of 20 volumes per computer. SIS cannot act upon any files
that are referenced through junction points, and it cannot be used with any file system except the
NTFS file system. SIS will not process files that are 32 kilobytes or less in size.
If you need to access data that is stored on a SIS volume, which might be required for backup
and recovery operations, you must either run or have installed Single Instance Storage Filter on
your computer.
Backup and recovery by using SIS has the following requirements:
The backup software used must support SIS-enabled volumes.
9
The SIS volume, SIS Common Store folder, and reparse points (links) to the files must be
restored to a Windows 2000 NTFS version 5.0 (or later) file system or partition that supports
reparse points or junction points.
The Single Instance Storage Filter must be installed or enabled to access the data in the SIS
volume.
The backup program must be capable and configured to backup and restore the reparse
points or junction points (links) to the files, and the SIS volume and the SIS Common Store
folder must be selected.
For more information about SIS, see Single-Instance Store and SIS Backup.
In this section
Enabling or Disabling SIS on a Volume
Uninstalling SIS
Managing SIS Using SisAdmin.exe
Enabling or Disabling SIS on a Volume
Single Instance Storage (SIS) is enabled or disabled on individual volumes on your storage
appliance. When you disable SIS on a volume that has been using SIS, the Groveler service is
stopped. SIS can be paused or disabled temporarily by pausing the Groveler service or changing
its priority by using the Sisadmin.exe utility.
Once the Groveler service has been paused for a volume, SIS can be removed from that volume
using the Sisadmin.exe utility. When SIS is removed from a volume, the files are unlinked from
the SIS Common Store and restored to their original locations
Note
Disabling SIS on a volume will fail if there is not sufficient disk space on the volume to
account for each duplicate file and the SIS Common Store.
Membership in the local Administrators group is required to complete this procedure.
To enable SIS on a volume
1. In Share and Storage Management, on the Volumes tab, click the volume for which you
want to enable SIS.
2. In the Actions pane, click Properties.
3. On the Advanced tab, select the Enable SIS on this volume check box, and then click
OK.
To disable SIS on a volume
1. In Share and Storage Management, on the Volumes tab, click the volume for which you
10
want to disable SIS.
2. In the Actions pane, click Properties.
3. On the Advanced tab, clear the Enable SIS on this volume check box, and then click
OK.
Note
Every time you enable or disable SIS on a volume, the Groveler service is restarted. To
avoid performance issues when enabling or disabling SIS on a large number of volumes,
specify them all in a single command. Grouping the volumes into a single command
requires only a single restart of the Groveler service.
To install SIS on a volume by using Sisadmin.exe
1. Open an elevated command prompt. Click Start, right click Command Prompt, and then
click Run as administrator.
2. Type the command sisadmin.exe /i <volumename>, where <volumename> is the letter
name of the volume where SIS is to be enabled.
To uninstall SIS from a volume by using Sisadmin.exe
1. Open an elevated command prompt. Click Start, right click Command Prompt, and then
click Run as administrator.
2. Type the command sisadmin.exe /u <volumename>, where <volumename> is the letter
name of the volume from which SIS is to be removed.
To enable SIS on a volume by using Sisadmin.exe
1. Open an elevated command prompt. Click Start, right click Command Prompt, and then
click Run as administrator.
2. Type the command sisadmin.exe /e <volumename>, where <volumename> is the letter
name of the volume where SIS is to be enabled. The Groveler service will be enabled
and started for the volume.
To disable SIS on a volume using Sisadmin.exe
1. Open an elevated command prompt. Click Start, right click Command Prompt, and then
click Run as administrator.
2. Type the command sisadmin.exe /d <volumename>, where <volumename> is the letter
name of the volume where SIS is to be disabled. The Groveler service will be stopped
and disabled for the volume.
Additional references
Single-Instance Store and SIS Backup
11
Uninstalling SIS
By default, Single Instance Storage (SIS) is installed in Windows Storage Server 2008, but it is
not enabled on any volumes. If left in this state it has no impact on system performance and can
be left installed. If you decide to proceed with uninstalling SIS from your storage appliance, you
must first disable SIS on each volume where it has been applied. Failing to do so may result in
lost data.
Caution
If you have already enabled SIS on one or more volumes on the storage appliance and
then decide that you want to uninstall SIS from the Windows Storage Server 2008
operating system, you must use the SysAdmin.exe command-line tool to “unSIS” the files
(remove all reparse points and restore all copies of the affected files) on all SIS-enabled
volumes before you can uninstall SIS.
To uninstall SIS from the storage appliance
1. On the computer running Windows Storage Server 2008, open Server Manager.
2. In the console tree, expand Roles, click File Services, and then click Remove Role
Services.
3. On the Select Role Services page, clear the checkbox Single Instance Storage, click
Next, and then click Remove.
4. When prompted to restart the server, click Yes.
5. When the computer restarts, confirm that the message on the Removal Results page
indicates that Single Instance Storage role service was removed, and then click Close.
After you remove SIS from the operating system, the checkbox to enable SIS no longer
appears on the properties page for that volume.
Managing SIS Using SisAdmin.exe
Single Instance Storage (SIS) can be enabled or disabled on a volume through the Share and
Storage Management console, but the primary administration tool is Sisadmin.exe. The syntax for
Sisadmin.exe is:
sisadmin.exe [/m <server>] [command]
Valid command options for Sisadmin.exe include:
/m <server> - This option shifts the focus of the command line to a remote server. If the /m
option is not specified, the command line will be applied to the local server. <server> can be
expressed as a host name, fully qualified domain name (FQDN), or as an IP address.
/? or /h – These options displays a list of the valid command options for Sisadmin.exe.
12
/I <volumes> - Installs SIS for the designated volumes. If SIS is already enabled on the
designated volumes this command preserves the current enabled/disabled status.
/f <volumes> - This option sets the Groveler service to run in foreground priority for the
designated volumes.
/b <volumes> - This option sets the Groveler service to run in background priority for the
designated volumes, which is the default setting for the service.
/r <volumes> - This option initiates a full scan of the designated volumes.
/e <volumes> - This command option enables and starts the Groveler service on the
designated volumes.
/d <volumes> - This option stops and then disables the Groveler service on the designated
volumes.
/v <volumes> - This option displays statistics for the specified SIS-enabled volumes.
/l <volumes> - This command option displays a list of SIS-controlled files on the designated
volumes.
/s <files> - This option displays information about designated SIS-controlled files. <files> is
expressed as a space delimited list of file names, including path.
/u <volumes> - This option is used to “unSIS” a volume (stop the Groveler service on the
volume, restore all file copies, and remove reparse points). This option should always be
used on each SIS-enabled volume prior to removing SIS from the server.
Note
For each command option that uses <volumes> as a parameter, <volumes> represents
a space delimited list of volume names (for example: d: e: f: g:).
Sisadmin.exe Examples
To temporarily increase performance levels of the Groveler service on the E: and F: volumes
of a server, you might use the following command:
sisadmin.exe /f E: F:
To disable the Groveler service on the E: volume of a server without removing SIS from the
volume, you might use the following command:
sisadmin.exe /d E:
To “unSIS” or remove SIS entirely from the F: volume of a remote server using the IP
address of the server, you might use the following command:
sisadmin.exe /m 192.168.1.50 /u F:
13
Additional Features
Windows Search
Windows Search Service is a new indexing solution that is included in Windows Server® 2008 as
a role service in the File Services role. It creates an index of the most common file and non-file
data types on your server—such as e-mail, contacts, calendar appointments, documents, photos,
multimedia, and other formats extended by non-Microsoft files. Indexing files and data types
enables you to perform fast file searches on your server from computers running Windows Vista,
or from computers running Windows XP or Windows Server 2003 with Windows Desktop Search
installed.
Note
Indexing is not supported in clustered environments.
Print Management
Print Management is an MMC snap-in that you can use to view and manage printers and print
servers in your organization. You can use Print Management from any computer running
Windows Storage Server 2008, and you can manage all network printers on print servers running
Windows 2000 Server, Windows Server 2003, Windows Storage Server 2003, Windows Storage
Server 2003 R2, or Windows Storage Server 2008.
Print Management provides details such as the queue status, printer name, driver name, and
server name. You can also set custom views by using the Print Management filtering capability.
For example, you can create a view that displays only printers in a particular error state. You can
also configure Print Management to send e-mail notifications or run scripts when a printer or print
server needs attention. The filtering capability also allows you to bulk edit print jobs, such as
canceling all print jobs at once. You can also delete multiple printers at the same time.
Administrators can install printers remotely by using the automatic detection feature, which finds
and installs printers on the local subnet to the local print server. Administrators can log on
remotely to a server at a branch location, and then install printers remotely.
Appendix A: Configuring IP Addresses and
DNS
Note
The steps in this topic are only required if you are configuring a storage appliance without
a local monitor, keyboard, and mouse. If you can log on to the storage appliance directly,
these steps are unnecessary. They are also not required if the storage appliance will
14
receive its network configuration through the Dynamic Host Configuration Protocol
(DHCP).
You can use commands in the netsh interface IP context to remotely configure addresses, default
gateways, DNS servers, and Windows Internet Name Service (WINS) servers for a network
interface on a storage appliance. After this initial configuration, you can connect remotely to the
server and use the graphical user interface to complete other configuration and management
tasks.
You can run these commands at the command prompt in a Windows Storage Server 2008
operating system or at the command prompt for the netsh interface IP context. For these
commands to work at the command prompt in Windows Storage Server 2008, you must type
netsh interface ip before typing the commands and parameters that are shown in this section.
For more information about the netsh command and how to use it, see Scripting Tools, which is
also available in Windows Server 2008 Help.
set address
Configures an IP address and a default gateway on a specified interface.
Syntax
netsh interface ip set address [name=]InterfaceName [source=]{dhcp | static
[addr=]IPAddress[mask=]SubnetMask [gateway=]{none | DefaultGateway
[[gwmetric=]GatewayMetric]}}
Parameters
[ name =] InterfaceName
Required. Specifies the name of the interface for which you want to configure address
and gateway information. The InterfaceName parameter must match the name of the
interface as specified in Network Connections. If InterfaceName contains spaces, use
quotation marks around the text (for example, "Interface Name").
[ source=]{ dhcp| static[ addr=] IPAddress[ mask=] SubnetMask[ gateway=]{ none|
DefaultGateway[[ gwmetric=] GatewayMetric]}}
Required. Specifies whether the IP address to configure originates from a Dynamic
Host Configuration Protocol (DHCP) server or is static. If the address is static,
IPAddress specifies the address to configure, and SubnetMask specifies the subnet
mask for the IP address being configured. If the address is static, you must also specify
whether you want to leave the current default gateway (if any) in place or configure one
for the address. If you configure a default gateway, DefaultGateway specifies the IP
address of the default gateway to be configured, and GatewayMetric specifies the
metric for the default gateway to be configured.
15
/?
Displays Help at the command prompt.
Remarks
You can use this command to switch an interface between DHCP configuration and static
configuration. If the interface is configured statically, the DNS and WINS server addresses for
this interface must also be statically configured.
Omitting the DefaultGateway parameter does not clear the gateway configuration, but it
preserves any previous configuration.
Examples
netsh interface ip set address name=”Storage Mgmt” source=static addr=11.11.11.11
mask=255.0.0.0
netsh interface ip set address name="Storage Mgmt” gateway=11.11.11.12 gwmetic=0
set dns
Configures a DNS server address for a specified interface.
Syntax
set dns [name=]InterfaceName [source=]{dhcp | static }[addr=]{IP Address | none}
[register=]{none | primary | both}
Parameters
[ name=] InterfaceName
Required. Specifies the name of the interface for which you want to set DNS
information. The InterfaceName parameter must match the name of the interface as
specified in Network Connections. If InterfaceName contains spaces, use quotation
marks around the text (for example, "Interface Name").
[ source=]{ dhcp| static }
Required. Specifies whether the IP address of the DNS server is configured by DHCP
or is static.
Note
If the interface is already statically configured, the static parameter replaces the existing list of
16
DNS server addresses with the list specified in the command.
[ addr=]{ IP Address| none }
If the IP address is static, IP Address specifies the IP address of the DNS server to
configure, and none specifies that the DNS configuration should be removed.
The [addr] option for configuring a static list of DNS server IP addresses for the
specified interface is available only if the [source] is static.
[ register=]{ none| primary| both }
None specifies whether to disable DNS dynamic update protocol. Primary registers the
computer name under the primary DNS suffix only. Both registers the computer name
under both the primary DNS suffix as well as under the connection-specific suffix.
/?
Displays Help at the command prompt.
Examples
set dns name="Storage Mgmt" source=dhcp
set dns "Storage Mgmt" static 10.0.0.1 primary
Legal and Copyright Information
Information in this document, including URL and other Internet Web site references, is subject to
change without notice. Unless otherwise noted, the companies, organizations, products, domain
names, e-mail addresses, logos, people, places, and events depicted in examples herein are
fictitious. No association with any real company, organization, product, domain name, e-mail
address, logo, person, place, or event is intended or should be inferred. Complying with all
applicable copyright laws is the responsibility of the user. Without limiting the rights under
copyright, no part of this document may be reproduced, stored in or introduced into a retrieval
system, or transmitted in any form or by any means (electronic, mechanical, photocopying,
recording, or otherwise), or for any purpose, without the express written permission of Microsoft
Corporation.
Microsoft may have patents, patent applications, trademarks, copyrights, or other intellectual
property rights covering subject matter in this document. Except as expressly provided in any
written license agreement from Microsoft, the furnishing of this document does not give you any
license to these patents, trademarks, copyrights, or other intellectual property.
17
© 2009 Microsoft Corporation. All rights reserved. Microsoft products are licensed to OEMs by
Microsoft Licensing Inc., a wholly owned subsidiary of Microsoft Corporation.
Microsoft, Active Directory, Visual Studio, Windows, Windows Vista, and Windows Server are
trademarks of the Microsoft group of companies.
All other trademarks are property of their respective owners.
18

