Determination of Carbon Residue (Micro Method)1
advertisement
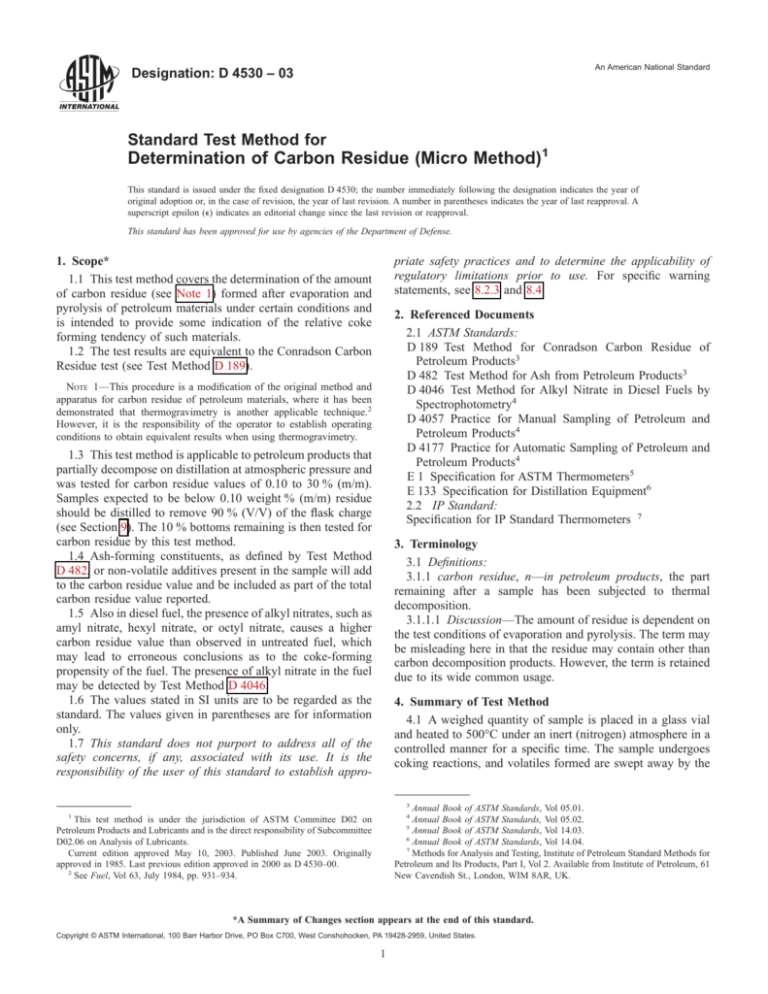
An American National Standard Designation: D 4530 – 03 Standard Test Method for Determination of Carbon Residue (Micro Method)1 This standard is issued under the fixed designation D 4530; the number immediately following the designation indicates the year of original adoption or, in the case of revision, the year of last revision. A number in parentheses indicates the year of last reapproval. A superscript epsilon (e) indicates an editorial change since the last revision or reapproval. This standard has been approved for use by agencies of the Department of Defense. priate safety practices and to determine the applicability of regulatory limitations prior to use. For specific warning statements, see 8.2.3 and 8.4. 1. Scope* 1.1 This test method covers the determination of the amount of carbon residue (see Note 1) formed after evaporation and pyrolysis of petroleum materials under certain conditions and is intended to provide some indication of the relative coke forming tendency of such materials. 1.2 The test results are equivalent to the Conradson Carbon Residue test (see Test Method D 189). 2. Referenced Documents 2.1 ASTM Standards: D 189 Test Method for Conradson Carbon Residue of Petroleum Products3 D 482 Test Method for Ash from Petroleum Products3 D 4046 Test Method for Alkyl Nitrate in Diesel Fuels by Spectrophotometry4 D 4057 Practice for Manual Sampling of Petroleum and Petroleum Products4 D 4177 Practice for Automatic Sampling of Petroleum and Petroleum Products4 E 1 Specification for ASTM Thermometers5 E 133 Specification for Distillation Equipment6 2.2 IP Standard: Specification for IP Standard Thermometers 7 NOTE 1—This procedure is a modification of the original method and apparatus for carbon residue of petroleum materials, where it has been demonstrated that thermogravimetry is another applicable technique.2 However, it is the responsibility of the operator to establish operating conditions to obtain equivalent results when using thermogravimetry. 1.3 This test method is applicable to petroleum products that partially decompose on distillation at atmospheric pressure and was tested for carbon residue values of 0.10 to 30 % (m/m). Samples expected to be below 0.10 weight % (m/m) residue should be distilled to remove 90 % (V/V) of the flask charge (see Section 9). The 10 % bottoms remaining is then tested for carbon residue by this test method. 1.4 Ash-forming constituents, as defined by Test Method D 482, or non-volatile additives present in the sample will add to the carbon residue value and be included as part of the total carbon residue value reported. 1.5 Also in diesel fuel, the presence of alkyl nitrates, such as amyl nitrate, hexyl nitrate, or octyl nitrate, causes a higher carbon residue value than observed in untreated fuel, which may lead to erroneous conclusions as to the coke-forming propensity of the fuel. The presence of alkyl nitrate in the fuel may be detected by Test Method D 4046. 1.6 The values stated in SI units are to be regarded as the standard. The values given in parentheses are for information only. 1.7 This standard does not purport to address all of the safety concerns, if any, associated with its use. It is the responsibility of the user of this standard to establish appro- 3. Terminology 3.1 Definitions: 3.1.1 carbon residue, n—in petroleum products, the part remaining after a sample has been subjected to thermal decomposition. 3.1.1.1 Discussion—The amount of residue is dependent on the test conditions of evaporation and pyrolysis. The term may be misleading here in that the residue may contain other than carbon decomposition products. However, the term is retained due to its wide common usage. 4. Summary of Test Method 4.1 A weighed quantity of sample is placed in a glass vial and heated to 500°C under an inert (nitrogen) atmosphere in a controlled manner for a specific time. The sample undergoes coking reactions, and volatiles formed are swept away by the 3 Annual Book of ASTM Standards, Vol 05.01. Annual Book of ASTM Standards, Vol 05.02. 5 Annual Book of ASTM Standards, Vol 14.03. 6 Annual Book of ASTM Standards, Vol 14.04. 7 Methods for Analysis and Testing, Institute of Petroleum Standard Methods for Petroleum and Its Products, Part I, Vol 2. Available from Institute of Petroleum, 61 New Cavendish St., London, WIM 8AR, UK. 1 4 This test method is under the jurisdiction of ASTM Committee D02 on Petroleum Products and Lubricants and is the direct responsibility of Subcommittee D02.06 on Analysis of Lubricants. Current edition approved May 10, 2003. Published June 2003. Originally approved in 1985. Last previous edition approved in 2000 as D 4530–00. 2 See Fuel, Vol 63, July 1984, pp. 931–934. *A Summary of Changes section appears at the end of this standard. Copyright © ASTM International, 100 Barr Harbor Drive, PO Box C700, West Conshohocken, PA 19428-2959, United States. 1 D 4530 – 03 FIG. 1 Sample Vial Holder and Vial 6.3 Eyedropper, Syringe, or Small Rod, for sample transfer. 6.4 Coking Oven8 with circular heating chamber approximately 85 mm (33⁄8 in.) in diameter by 100-mm (4-in.) deep, for top loading, with heating capability from 10 to 40°C/min rate to 500°C, with exhaust port 13-mm (1⁄2-in.) inside diameter for nitrogen purge of oven chamber (inlet near top, exhaust at bottom center) with thermocouple sensor located in oven chamber next to but not touching sample vials, with lid capable of sealing out air, and with removable condensate trap located at the oven chamber base. A schematic diagram is given in Fig. 2. 6.5 Sample Vial Holder—Cylindrical aluminum block, approximately 76 mm (3 in.) in diameter by 16-mm (5⁄8-in.) thick, with twelve evenly spaced holes (for vials) each 13 mm (1⁄2 in.) in diameter by 13-mm (1⁄2-in.) deep. The holes are arranged in a circular pattern approximately 3 mm (1⁄8 in.) from the perimeter. The holder has legs 6-mm (1⁄4-in.) long, with guides to center in oven chamber, and an index mark on the side to use as position reference. The sample vial holder is shown in Fig. 1. 6.6 A modified version of the standard sample vial holder (see Fig. 1) is required when larger glass sample vials (see 6.2) are used. The modified sample vial holder is similar in nature to the twelve hole vial holder, except that there are six evenly nitrogen. The carbonaceous-type residue remaining is reported as a percent of the original sample as “carbon residue (micro).” 4.1.1 When the test result is expected to be below 0.10 % (m/m), the sample can be distilled to produce a 10 % (V/V) bottoms, prior to performing the test. 5. Significance and Use 5.1 The carbon residue value of the various petroleum materials serves as an approximation of the tendency of the material to form carbonaceous type deposits under degradation conditions similar to those used in the test method, and can be useful as a guide in manufacture of certain stocks. However, care needs to be exercised in interpreting the results. 5.2 This test method offers advantages of better control of test conditions, smaller samples, and less operator attention compared to Test Method D 189, to which it is equivalent. 5.3 Up to twelve samples may be run simultaneously, including a control sample when the vial holder shown in Fig. 1 is used exclusively for sample analysis. 6. Apparatus 6.1 Glass Sample Vials, 2-mL capacity, 12-mm outside diameter by approximately 35-mm high. 6.2 Larger 4 dram Glass Sample Vials, 15-mL capacity (20.5 to 21-mm outside diameter by 70 6 1-mm high), may be used for samples that are expected to yield residues <0.10 % (m/m) so that a more appreciable mass difference can be determined. It should be noted the precision statements for the test method were determined using the 2-mL capacity vials only (with sample residues between 0.3 and 26 % (m/m) and that the precision associated with using the larger sample vials has not been determined. 8 The sole source of supply of a satisfactory oven with associated automatic controls that performs this carbon residue test known to the committee at this time is ALCOR-PAC, Inc., 3234 East Pasadena Freeway, Pasadena, TX 77503. This commercial unit is known as the MCRT. If you are aware of alternative suppliers, please provide this information to ASTM International Headquarters. Your comments will receive careful consideration at a meeting of the responsible technical committee 1, which you may attend. 2 D 4530 – 03 FIG. 2 Coking Oven and Lid spaced holes (for vials) each 21.2 6 0.1 mm in diameter by approximately 16-mm deep, arranged in a circular pattern. 6.7 Thermocouple, suitable for controller and temperature range of interest, with exterior temperature readout, degrees Celsius. 6.8 Analytical Balance, with 60.1 mg sensitivity to 20 g minimum weighing capacity. 6.9 Nitrogen, minimum 99.998 % purity with suitable means of delivering a pressure of 0 to 200 kPa (0 to 30 psig). Cylinders of zero grade nitrogen have been found suitable to use. 7. Sampling 7.1 Using the practices outlined in Practice D 4057 (manual sampling) or Practice D 4177 (automatic sampling), ensure that a representative sample of material to be tested is obtained. 8.1.2 During weighing and filling, handle vials with forceps to help minimize weighing errors. Discard the sample vials after use. 8.1.3 It is assumed that a representative sample of the stock or process has been obtained for laboratory use following Practice D 4057 or similar standard. Stir the sample to be tested, first warming if necessary to reduce its viscosity. Samples that are homogeneous liquids can be transferred directly to vials using a rod, syringe, or eyedropper. Solid materials may also be heated; or frozen with liquid nitrogen, and then shattered to provide manageable pieces. 8.1.4 Transfer an appropriate mass of the sample (see Table 1) into a tared-sample vial, reweigh to nearest 0.1 mg, and record. Place the loaded sample vials into vial holder (up to twelve), noting position of each sample with respect to index mark. 8. Procedure 8.1 Sample Preparation: 8.1.1 Determine the mass of each clean sample vial being used in the sample analysis, and record the mass to nearest 0.1 mg. NOTE 2—A control sample can be included in each batch of samples being tested. This control sample should be a typical sample that has been tested at least 20 times in the same equipment in order to define an average percent carbon residue and standard deviation. Results for each batch are deemed acceptable when results for the control sample fall within the average percent carbon residue 6 three standard deviations. Control 3 D 4530 – 03 TABLE 1 Guide for Sample Size Sample Description Black, viscous or solid Brown, viscous Lube oil consistency and appearance, 10 % bottoms on distillate material Large vials only Small vials only Expected Carbon Residue, (m/m) % Recommended Sample Size, g >5 1–5 0.1–<1 0.15 6 0.05 0.5 6 0.1 1.5 6 0.5 <0.1 <0.1 5.0 6 1.0 1.5 6 0.5 9. Procedure for Carbon Residue on 10 % (V/V) Distillation Residue 9.1 This procedure is applicable to light distillate materials, such as ASTM No. 1 and No. 2 fuel oil or materials expected to have less than 0.1 % (m/m) carbon residue. 9.2 A distillation analysis using either a 100 or 200-mL starting volume is required in order to collect a sufficient amount of the 10 % (V/V) residue needed in this analysis. For a 100-mL distillation, assemble the distillation apparatus described in Specification E 133, using flask B (125-mL bulb volume), flask support board with 50-mm diameter opening, and graduated cylinder B (100-mL capacity). For a 200-mL distillation, assemble the distillation apparatus described in Specification E 133, using flask D (250-mL bulb volume), flask support board with 50-mm diameter opening, and graduated cylinder C (200-mL capacity). A thermometer is not required, but the use of the ASTM High Distillation Thermometer 8F or 8C, as prescribed in Specification E 1, or the IP High Distillation Thermometer 6C, as prescribed in the Specification for IP Thermometers, is recommended. 9.3 Depending upon which distillation flask is used, place either 100 or 200 mL of sample (as measured at ambient temperature) into a tared distillation flask that is held at a temperature between 13°C and ambient, and record the mass of sample transferred (E1). Maintain the condenser bath temperature between 0 and 60°C so as to provide a sufficient temperature differential for sample condensation, while avoiding any solidification of waxy material in the condenser tube. Use, without cleaning, the cylinder from which the sample was measured as the receiver, and place it so that the tip of the condenser does not touch the wall of the cylinder. The receiver temperature is required to be maintained at the same temperature (within 63°C) as the sample taken at the start of the test in order to obtain an accurate volume measurement in the receiving flask. 9.4 Apply the heat to the flask at a uniform rate so regulated that the first drop of condensate exits from the condenser between 10 and 15 min (for 200-mL samples) or between 5 and 15 min (for 100-mL samples) after initial application of heat. After the first drop falls, move the receiving cylinder so that the tip of the condenser tube touches the wall of the cylinder. Then regulate the heat so that the distillation proceeds at a uniform rate of 8 to 10 mL/min (for 200-mL samples) or 4 to 5 mL/min (for 100-mL samples). For 200-mL samples, continue the distillation until approximately 178 mL of distillate has been collected, and then discontinue heating and allow the condenser to drain until 180 mL (90 % (V/V) of the charge to the flask) has been collected in the cylinder. For 100-mL samples, continue the distillation until approximately 88 mL of distillate has been collected, and then discontinue heating and allow the condenser to drain until 90 mL (90 % (V/V) of the charge to the flask) has been collected in the cylinder. 9.5 Catch final drainage, if any, by immediately replacing the cylinder with a suitably tared container, such as a small Erlenmeyer flask. Add to this container, while still warm, the distillation residue left in the distilling flask, and mix well. The contents of the container then represents a 10 % (V/V) distillation residue from the original product. Allow the contents of results that are outside these limits indicate problems with the procedure or the equipment. 8.2 Processing of Samples: 8.2.1 With the oven at less than 100°C, place the vial holder into the oven chamber and secure lid. Purge with nitrogen for at least 10 min at 600 mL/min. Then decrease the purge to 150 mL/min and heat the oven slowly to 500°C at 10°–15°C/min. 8.2.2 If the sample foams or spatters, causing loss of sample, discard and repeat the test. NOTE 3—Spattering may be due to water that can be removed by prior gentle heating in a vacuum, followed by a nitrogen sweep. Alternatively, a smaller sample size can be used. 8.2.3 Hold oven at 500 6 2°C for 15 min. Then shut off furnace power and allow oven to cool freely while under nitrogen purge of 600 mL/min. When oven temperature is less than 250°C, remove the vial holder for further cooling in desiccator. After the samples are removed from the oven, the nitrogen purge may be shut off. (Warning—Do not open oven to air at any time during the heating cycle. The introduction of air (oxygen) will likely cause the sample to ignite and spoil the test. (Because of the oven design and materials, such an ignition is normally not a hazard to the operator.) Open the oven only after oven temperature falls below 250°C during the cooling step. Maintain nitrogen flow until after the vial holder has been removed from the oven.) (Warning—Locate the coking oven in laboratory exhaust hood for safe venting of smoke and fumes. Alternatively, install vent line from MCRT oven exhaust to laboratory exhaust system.) (Warning—If a vent line is used, do not connect directly to exhaust chimney to avoid creating negative pressure in the line.) NOTE 4—To reduce oven temperature for the next run, remove the oven lid to allow faster cooling. As required by the procedure, the subsequent test can be started when the oven has been cooled to below 100°C. 8.3 Final Weighing—Transfer sample vials (maintained in place in the vial holder) to desiccator and allow vials to cool to room temperature. Weigh the cooled vials to the nearest 0.1 mg and record. Handle the vials with forceps. Discard the used glass sample vials. 8.4 Occasionally examine the condensate trap at the bottom of the oven chamber; empty if necessary and replace. (Warning—The condensate trap residue may have some carcinogenic materials present. Avoid contact with the trap residue; dispose of it in accordance with local laboratory practice.) 4 D 4530 – 03 FIG. 3 Carbon Residue (Micro) Precision Data the container to cool to ambient temperature before weighing the container and its contents in order to obtain an accurate measurement. 9.6 If the distillation residue is too viscous to flow freely at ambient temperature, it is necessary to warm the distillation residue to a sufficient temperature that will allow a portion of the material to be transferred into a previously weighted vial for analysis (see Table 1). After allowing the material in the vial to cool to ambient temperature, determine the mass of the test specimen to the nearest 0.1 mg and carry out the carbon residue test in accordance with the procedure described in Section 8. NOTE 5—Precision data and Conradson carbon residue/micro carbon residue correlation data were generated by a task force in 1983. The round robin involved 18 laboratories, six petroleum materials in duplicate analysis for both micro method and Test Method D 189 tests. The range of values for samples was from 0.3 % to 26 % (m/m). No precision data or correlation data exists for results obtained using 10 % bottoms or 15-mL vials, or both. 12.2 Repeatability—The difference between two test results, obtained by the same operator with the same apparatus under constant operating conditions on identical test material, would, in the long run, in the normal and correct operation of the test method, exceed the values shown in Fig. 3 in only one case in twenty. 12.3 Reproducibility—The difference between two single and independent results, obtained by different operators working in different laboratories on identical test material, would, in the long run, in the normal and correct operation of the test method, exceed the values shown in Fig. 3 in only one case in twenty. 12.4 Bias—The procedure in Test Method D 4530 for measuring carbon residue of petroleum by the carbon residue method has no bias because the mass % of carbon residue can be defined only in terms of the test method. 10. Calculation 10.1 Calculate the mass % carbon residue in the original sample, or in the 10 % distillation bottoms as follows: 10.1.1 Calculate percent residue as follows: % carbon residue 5 ~A 3 100! W (1) where: A = carbon residue, g, and W = sample used, g. 11. Report 11.1 Report the value obtained as Micro Method carbon residue, percent or as Micro Method carbon residue on 10 % distillation residue, percent to the nearest 0.1 % (m/m). 13. Keywords 13.1 carbon residue; carbon residue (micro method); diesel fuel; lubricating oil; petroleum products 12. Precision and Bias 9 12.1 The precision of this test method as determined by (see Note 5) statistical examination of interlaboratory results is as follows: 9 Supporting data have been filed at ASTM International Headquarters and may be obtained by requesting Research Report RR: D02-1192. 5 D 4530 – 03 FIG. X1.1 Correlation of Conradson and Carbon Residue (Micro) Tests APPENDIXES (Nonmandatory Information) X1. CORRELATION TO OTHER METHODS X1.1 A correlation (see Fig. X1.1) has been derived between the carbon residue test by the micro method and the Conradson carbon residue test (see Test Method D 189) in a cooperative program involving 18 laboratories and six petroleum materials. and nonparametric analysis show that, considering the precisions of both tests, there is no difference between the two methods. The data generated by the carbon residue test by the micro method are statistically equivalent to the Conradson carbon residue test, except for better precision in the micro method residue test. X1.2 Statistical analysis using modified Student’s t tests X2. HELPFUL HINTS FOR THE ANALYST X2.1 An exhaust system should be provided that will remove the small amount of smoke produced during carbon residue testing. Any suction line used to draw the smoke away should not be connected directly to the MCRT chimney. Allow a small space between the chimney and the suction line. This prevents a negative pressure from being created within the apparatus. X2.4 The final residue should be less than about 50 mg and preferably around 25 mg. If too much sample is taken, the material may boil over during heating, especially with high residue oils. Use the equation and the table given in this test method as a guide for recommended sample masses to be taken. X2.2 The sample vials should be handled only with gloved hands or forceps. X2.5 If there is spattering or foaming of samples during the initial heating stage, this may be due to the presence of water in the sample. A smaller sample size can be used, or the water can be removed by gentle heating in vacuum, followed by a nitrogen sweep. X2.3 The large 4 dram vials should be used only for light oils and the samples that are expected to yield residues less than 0.10 m/m %. 6 D 4530 – 03 SUMMARY OF CHANGES Subcommittee D02.06 has identified the location of selected changes to this standard since the last issue (D 4530–00) that may impact the use of this standard. (1) Updated 6.2. (2) Updated 6.3. (3) Updated address of the vendor in Footnote 8. (4) Deleted use of only cylinders as a source of nitrogen in 6.9. (5) Simplified sample requirements in 8.1.3. (6) Added 9.6 for guidance on handling viscous distillation residue. (7) Deleted 10.1.2. (8) Updated 11.1 to allow reporting of 10 % distillation residue results. (9) Changed Appendix X1 title. (10) Added new Appendix X2 to provide helpful hints to the analyst for running this test. ASTM International takes no position respecting the validity of any patent rights asserted in connection with any item mentioned in this standard. Users of this standard are expressly advised that determination of the validity of any such patent rights, and the risk of infringement of such rights, are entirely their own responsibility. This standard is subject to revision at any time by the responsible technical committee and must be reviewed every five years and if not revised, either reapproved or withdrawn. Your comments are invited either for revision of this standard or for additional standards and should be addressed to ASTM International Headquarters. Your comments will receive careful consideration at a meeting of the responsible technical committee, which you may attend. If you feel that your comments have not received a fair hearing you should make your views known to the ASTM Committee on Standards, at the address shown below. This standard is copyrighted by ASTM International, 100 Barr Harbor Drive, PO Box C700, West Conshohocken, PA 19428-2959, United States. Individual reprints (single or multiple copies) of this standard may be obtained by contacting ASTM at the above address or at 610-832-9585 (phone), 610-832-9555 (fax), or service@astm.org (e-mail); or through the ASTM website (www.astm.org). 7
