Instructional Technology Word Processing Lab: Tables SKILL
advertisement
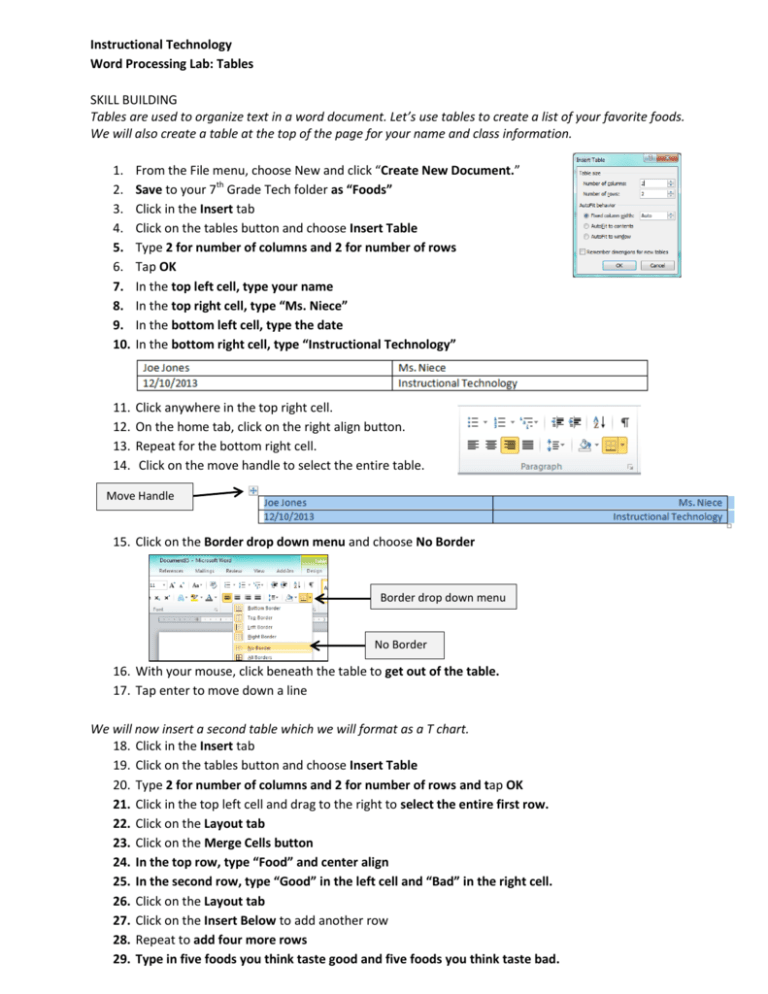
Instructional Technology Word Processing Lab: Tables SKILL BUILDING Tables are used to organize text in a word document. Let’s use tables to create a list of your favorite foods. We will also create a table at the top of the page for your name and class information. 1. 2. 3. 4. 5. 6. 7. 8. 9. 10. From the File menu, choose New and click “Create New Document.” Save to your 7th Grade Tech folder as “Foods” Click in the Insert tab Click on the tables button and choose Insert Table Type 2 for number of columns and 2 for number of rows Tap OK In the top left cell, type your name In the top right cell, type “Ms. Niece” In the bottom left cell, type the date In the bottom right cell, type “Instructional Technology” 11. 12. 13. 14. Click anywhere in the top right cell. On the home tab, click on the right align button. Repeat for the bottom right cell. Click on the move handle to select the entire table. Move Handle 15. Click on the Border drop down menu and choose No Border Border drop down menu No Border 16. With your mouse, click beneath the table to get out of the table. 17. Tap enter to move down a line We will now insert a second table which we will format as a T chart. 18. Click in the Insert tab 19. Click on the tables button and choose Insert Table 20. Type 2 for number of columns and 2 for number of rows and tap OK 21. Click in the top left cell and drag to the right to select the entire first row. 22. Click on the Layout tab 23. Click on the Merge Cells button 24. In the top row, type “Food” and center align 25. In the second row, type “Good” in the left cell and “Bad” in the right cell. 26. Click on the Layout tab 27. Click on the Insert Below to add another row 28. Repeat to add four more rows 29. Type in five foods you think taste good and five foods you think taste bad. 30. Position your cursor on the left side of the table (cursor will become a double arrow) 31. Drag right to reduce the width of the column about 2 inches 32. Position your cursor on the right side of the table 33. Drag left to reduce the width of the column to about 2 inches Note: When you click on the border drop down menu, you will see some commands are highlighted in yellow. This means the border has been applied. Click a highlighted border to remove it. 34. 35. 36. 37. 38. 39. Click on the table’s “move handle” to select the entire table. Click on the Border drop down arrow Select “No Borders.” This removes all borders. Click on the Border drop down arrow Select “Inside Borders.” This adds just inside borders. Call me over for checking INDEPENDENT TASK In Life Science, you have been studying the states of matter. Your teacher, Mr. Scienceguy, gave you a list of items which he wants you to categorize as Gas, Liquid, or Solid. 1. 2. 3. 4. 5. 6. 7. 8. 9. 10. In Word, create a new document and save it as “States of Matter” Create a table with two columns and two rows. Enter your name and the date in the cells in the left column. Enter the class and the teacher’s name in the cells in the right column. Right align the text in the right column. Remove all borders. Create a second table below the first with three columns and two rows. Merge the cells in the first row and type, ”States of Matter” In the second row, type “Gas” “Solid” and “Liquid” in each the cells respectively Create new rows as needed and enter the following items in the correct columns: Milk, cookie, oxygen, fish, pencil, maple syrup, shampoo, carbon dioxide, ice cube, wet paint, oil, salt, water vapor, gasoline, helium, sand 11. Adjust the width of the columns so there is as little extra space as possible 12. Remove outside borders 13. Center align all the text in the table Task 2 column, 2 row table with student and class information created All borders removed Text in right column is right aligned 3 column table created with states of matter items listed Top row is merged Outside borders removed Column width reduced Text is center aligned Total Pts. 20 10 10 20 10 10 10 10 100

