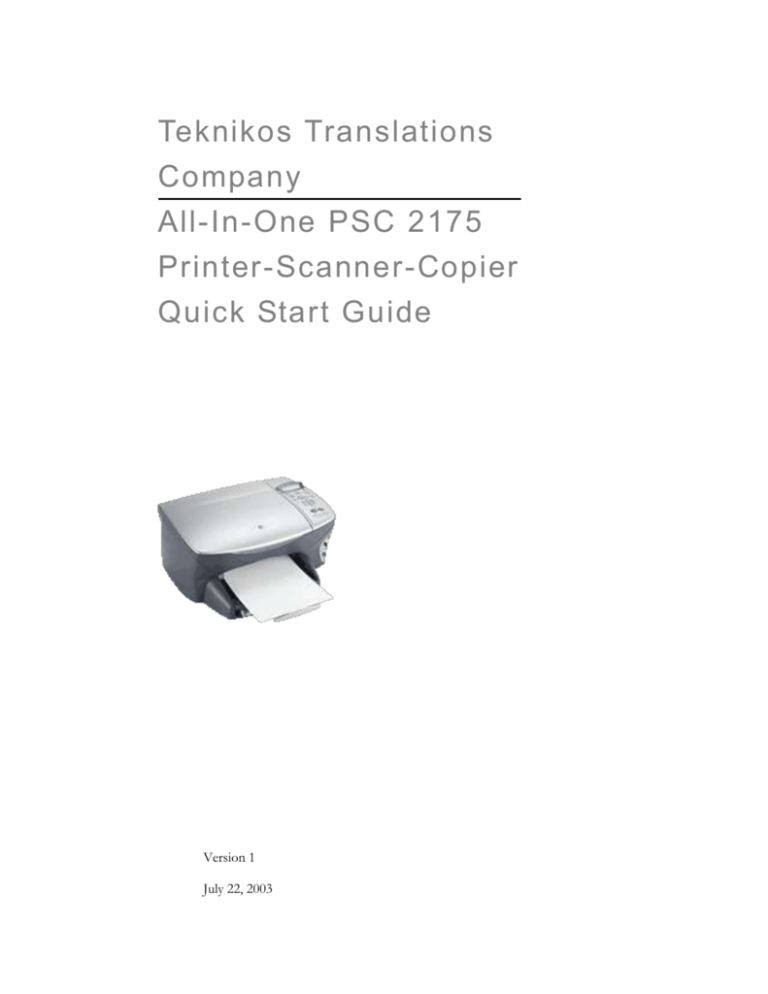
Teknikos Translations
Company
All-In-One PSC 2175
Printer-Scanner-Copier
Quick Start Guide
Version 1
July 22, 2003
Copyright Information
The Teknikos Translations Company owns the copyright to this manual, and the hardware described
in it, with all rights reserved. The Teknikos Translations Company has registered the trademarks
Teknikos Translations and the corporate logo.
Teknikos Translations
PO Box 35148
St. Petersburg, FL 33705
Error! Use the Home tab to apply Book Title to the text that you want to appear here.
2
TABLE OF CONTENTS
TA B L E O F C O N T E N T S
SETTING UP THE PSC 2175 .................................................................................................. 5
CHECKING THE COMPONENTS ....................................................................................... 5
CHECKING ESSENTIAL ITEMS ....................................................................................................................... 5
CHECKING SPECIAL ACCESSORIES............................................................................................................... 5
UNPACKING THE PSC 2175 .................................................................................................. 6
CABLING THE PSC 2175 ........................................................................................................ 7
LOADING PAPER AND INK ................................................................................................. 7
INSTALLING THE TEKNIKOS DIRECTOR SOFTWARE ................................................ 8
PRINTING AND SCANNING BASICS ................................................................................ 10
PRINTING FROM YOUR COMPUTER ............................................................................. 10
SCANNING TO YOUR COMPUTER .................................................................................. 10
COPYING BASICS ................................................................................................................. 12
COPYING A TEXT DOCUMENT ........................................................................................ 12
REDUCING OR ENLARGING A COPY.............................................................................. 12
CARING FOR THE PSC 2175 ................................................................................................ 14
CLEARING A PAPER JAM ................................................................................................... 14
ADDING REPLACEMENT PAPER ..................................................................................... 14
CHANGING INK CARTRIDGES ......................................................................................... 15
3
Error! Use the Home tab to apply Book Title to the text that you want to appear here.
Error! Use the Home tab to apply Book Title to the text that you want to appear here.
4
SETTING UP THE PSC 2175
SETTING UP THE PSC 2175
This chapter explains how to set up the PSC 2175 to operate from your computer
and as a standalone device from the unit’s front operating panel. Preparing the PSC
2175 for use takes only a few minutes. You must complete setup before you can
print, scan or copy documents.
C h e c k i n g th e c o m p o ne n t s
The shipping box contains the PSC 1275 main unit and all peripheral components
required to print, scan and copy using your unit. The main unit sits at the bottom of
the shipping box. A shipping tray above the main unit contains the essential items
needed for initial set up. A plastic bag marked Special Accessories contains items
needed for advanced, creative projects.
Checking essential items
Take inventory of the items as you unpack the box. Check that the shipping tray
contains the following items:
8 foot, light gray USB cable
8 foot, black power cord
Dark gray paper guide output tray
HP Black #56 print cartridge
HP Tri-color #57 print cartridge
Multiuse white paper starter pack
Teknikos Director software CD
Obtain replacement items if any essential components are missing or damaged by
contacting Teknikos Translations support at 1-800-123-4567.
Checking special accessories
Locate a plastic bag in the shipping tray marked Special Accessories. This bag
contains the items needed to complete advanced, creative projects. Items in the bag
include:
PictureIt! CD-ROM disk
Teknikos Simple Guide to Digital Photography
PosterIt! CD-ROM disk
Teknikos Simple Guide to Poster Creation
We recommend setting the Special Accessories bag aside and keeping it in a safe
place for later use. The Special Accessories items are used when completing
advanced projects.
5
Error! Use the Home tab to apply Book Title to the text that you want to appear here.
U n p a c k i n g t h e P S C 2 1 75
With the essential items from the shipping tray ready, you can now position the
main unit.
1. Choose a location for the PSC 2175 no farther than eight feet from the
computer you wish to use with the PSC 2175 unit.
2. Place a printer stand or sturdy table where you want to locate the PSC 2175. We
recommend using a special printer stand that provides a place under the unit to
store extra paper, ink cartridges and other supplies.
3. Lift the main unit out of the packing box using both hands.
4. Place the PSC 2175 in the middle of the printer stand or table.
5. Position the unit so the message display panel faces forward.
6. Slide the square end of the dark gray paper output tray into the front guide slots
of the PSC 2175 until the tray clicks in place.
7. Ensure there is enough room around the PSC 2175 to easily retrieve printed
documents, open and close the back access panel and lift up the top hinged
panel.
8. Check that there is also enough space for ventilation around all four sides of the
unit.
The PSC 2175 is now ready for cabling.
Error! Use the Home tab to apply Book Title to the text that you want to appear here.
6
SETTING UP THE PSC 2175
Cabling the PSC 2175
Cable the PSC for both power and communication with your computer.
1. Insert the small square end of the USB cable into the USB port located on the
back of the PSC 2175, at the lower right corner.
2. Insert the flat rectangular end of the light gray USB cable into the USB port on
your computer.
3. Plug the female end of the black power cord into the AC power slot on the
back of the PSC 2175, at the middle left side.
4. Plug the power cord into a three-prong electrical outlet.
The PSC 2175 makes a whirring and clicking sound when it receives power. The
lights on the front operating panel blink briefly. The Copy button displays solid
green indicating the unit is properly cabled.
Once cabled, the PSC 2175 is ready for paper and ink.
L o a d i n g pap e r a n d in k
Paper must be loaded and ink cartridges installed for the PSC 2175 to print, copy or
scan.
1. Open the multiuse white paper starter pack and slide the paper into the lower
paper input tray on the front of the PSC 2175.
2. Push the light gray slider toward the PSC 2175 until it rests firmly against the
paper stack, holding the paper in place.
3. Grasp the front of the PSC 2175 and lift open the unit to expose the printer
cartridge carriage.
The carriage automatically slides left and positions itself in the center of the
unit.
4. Open the #56 printer cartridge pack and peel back the amber protector strip.
5. Press down on the top of the gray #56 cartridge carrier using your index finger
while pulling the front latch forward with your thumb.
6. Slide the #56 Black cartridge into the cartridge carrier until the amber end
touches the back of the carriage and the cartridge clicks in place.
7
Error! Use the Home tab to apply Book Title to the text that you want to appear here.
7. Close the top of the cartridge carrier using your forefinger to press it down on
the printer cartridge while pushing the front latch portion forward with your
thumb until it snaps into position.
8. Repeat steps four to seven to load the #57 Tri-color cartridge into the blue #57
cartridge carrier.
9. Close the PSC 2175.
The printer carriage automatically moves into position and a cartridge alignment
message displays on the front message panel.
10. Press Enter to align the cartridges.
An align cartridges page prints automatically.
With paper and ink correctly loaded, you are ready to install the Teknikos
Director software on your computer.
I n s t a l l in g t he T e k n i k os D i r e c t o r s o ft w a r e
Connecting the USB and power cables cause automatic detection of the PSC 2175
by your computer. You must install the Teknikos Director software in order for
your computer to communicate with the PSC 2175.
1. Check your computer screen for a message dialog box indicating new hardware
has been found.
2. If you do not see this message, check to ensure the USB cable is attached firmly
to your computer.
3. If you still do not see this message, reboot your computer.
4. Click OK when you see the message dialog box indicating new hardware has
been found.
5. Insert the Teknikos Director CD into your computer’s CD-ROM drive.
The Teknikos Director installer starts automatically and displays the installer
window.
6. Click the Start Install button.
Error! Use the Home tab to apply Book Title to the text that you want to appear here.
8
SETTING UP THE PSC 2175
7.
8.
9.
10.
The installer dialog progress box opens and displays a progress indicator bar as
the software is installed.
Follow the step-by-step Installer prompts.
Select Local Computer when prompted for type of connection.
Select Teknikos 2000 Family when prompted for type of printer driver.
Click on Finish when the Wizard indicates setup is complete.
The CD ejects from your computer and a test page automatically prints,
indicating completion of the Teknikos Director installation.
The PSC 2175 is now ready for printing and scanning with your computer.
9
Error! Use the Home tab to apply Book Title to the text that you want to appear here.
PRINTING AND SCANNING BASICS
This chapter provides instructions for getting going quickly with basic printing and
scanning functions. The PSC 2175 works with many desktop applications on your
computer, but starting with Microsoft Word is the fastest way to begin printing and
scanning.
P r i n t i n g f r om y o u r c om p u t e r
The PSC 2175 prints laser quality text for personal and work documents on a wide
variety of paper types and sizes directly from Microsoft Word on your computer.
1. Open the document you wish to print using the Microsoft Word application.
2. Select Print from the dropdown File menu.
The Print dialog box opens.
3. Select “teknikos psc 2170 series” from the dropdown Name menu, if not
already displayed.
4. Select special printing properties, such as color and layout, by clicking the
Properties button.
5. Select pages and numbers of copies by entering the desired information in the
prompt areas of the Print dialog box.
6. Click OK.
The document is sent to the PSC 2175 for printing.
The main user guide provides additional instructions for printing a variety of
formats such as posters, labels, or greeting cards, using different types of paper and
printing from a variety of desktop applications.
S c a n n i n g to y o u r c omp u t e r
Scanning allows you to take a picture of something or a page of text and put it in
your computer. Documents scanned at the PSC 2175 are sent directly to Microsoft’s
Word application on your computer.
1. Select the document you wish to scan.
2. Lift the top access panel of the PSC 2175 unit and place the document face
down on the glass using the alignment guides to position the top and side
document edges.
3. Press the Scan button on the PSC 2175.
4. Press the forward arrow button until “Microsoft Word” displays in the message
panel window of the PS 2175.
5. Press the Black or Color start button.
The teknikos scan application automatically starts, a low resolution scan begins
at the PSC 2175 and an image of your document appears in the teknikos
preview window of your computer.
6. Click Accept.
A dialog box displays the message “Scanning to Microsoft Word” and the PSC
2175 begins a high-resolution scan. The Microsoft Word application starts
Error! Use the Home tab to apply Book Title to the text that you want to appear here.
10
PRINTING AND SCANNING BASICS
automatically, if not already running, and the scanned document displays in
Word when scanning completes. You can now save or manipulate the scan
using Word’s application features.
The PSC 2175 also scans to other popular applications. The main user guide
provides additional instructions for scanning to other desktop applications.
11 Error! Use the Home tab to apply Book Title to the text that you want to appear here.
COPYING BASICS
Copying documents is easy and performed as a standalone operation at the PSC
2175. You perform this function from the operating panel of the PSC 2175 without
the use of your computer.
C o p y i n g a t e x t d o c ume n t
The PSC 2175 makes black and white or color copies of documents. Making copies
of a text document requires a few easy steps.
1. Select the document you wish to copy.
2. Lift the top access panel of the PSC 2175 unit and place the document face
down on the glass using the alignment guides to position the top and side
document edges.
3. Press the Copy button located on the operating panel of the PSC 2175.
4. Press the forward arrow button until the desired number of copies appears in
the message panel window of the PSC 2175.
5. Press the Black or Color start button.
Printed copies are deposited to the upper paper output tray.
R e d u c i n g or e n l a r gi n g a c o p y
The PSC 2175 can reduce or enlarge a document during the copy process. Adjusting
the copy size of your original document requires a few simple steps.
1. Select the document you wish to copy.
Error! Use the Home tab to apply Book Title to the text that you want to appear here.
12
COPYING BASICS
2. Lift the top lid of the PSC 2175 unit and place the document face down on the
glass using the alignment guides to position the top and side document edges.
3. Press the Copy button located on the operating panel of the PS 2175.
4. Press the Options button repeatedly until “Reduce/Enlarge” appears in the
message panel window of the PSC 2175.
5. Press the forward arrow button repeatedly until the desired copy size appears in
the message panel window.
6. Press the Black or Color start button.
Printed copies of the requested size are deposited to the upper paper output tray.
13 Error! Use the Home tab to apply Book Title to the text that you want to appear here.
CARING FOR THE PSC 2175
The PSC 2175 requires surprisingly little upkeep; however performing a few simple
maintenance tasks keeps the PSC 2175 running at top performance.
Clearing a paper jam
Paper caught in the mechanics of the PSC 2175 must be cleared before the unit can
continue to operate. A “Paper Jam” message in the message window on the PSC
2175 or a “Printing problem has been encountered” message at your computer
indicates a paper jam.
1. Check that the paper supply is neatly loaded in the lower paper input tray by
removing the dark gray paper output tray located above the paper supply.
2. Remove any crinkled, misaligned or bunched paper.
3. If the tray is overloaded, remove excess paper.
4. Replace the paper guide output tray.
5. Remove the clean out door access panel located on the back of the unit by
simultaneously pressing the two light gray tabs toward one another and pulling
the panel straight out.
6. Remove any crinkled, misaligned or bunched paper from the guide wheels.
7. Replace the clean out door access panel by pushing it in until it snaps back into
position.
8. Remove any crinkled, misaligned or bunched paper from the output tray.
9. Press the Enter button to reset the PSC 2175.
With jams cleared, the PSC 2175 resumes normal printing and copying functions.
A d d i n g r epl a c e m e n t pa p e r
The PSC 2175 operates using a variety of papers to meet your different printing
requirements and prints or copies well with most brands of laser printer paper.
1. Select any paper designed for use with a laser printer.
2. Keep the lower paper input tray filled with an adequate supply for printing.
3. Avoid overfilling, which can cause paper jams.
Error! Use the Home tab to apply Book Title to the text that you want to appear here.
14
CARING FOR THE PSC 2175
4. Add paper when you see an “Out of Paper” message on your computer or the
message panel window of the PSC 2175.
5. Load paper with the side to be printed facing down.
6. Push the light gray slider toward the PSC 2175 until it rests firmly against the
paper stack, holding the paper in place.
We recommend keeping a supply of your preferred types of paper on hand for your
different printing and copying needs.
C h a n g i n g in k c a r t ri d ge s
An “Ink Low” message on your computer or in the PSC 2175 window indicates it is
time to change the ink cartridge. Black and color cartridges do not have to be
changed at the same time. The PSC 2175 requires HP #56 Black and HP #57 Tricolor Inkjet Printer Cartridges.
1. Grasp the front of the PSC 2175 and lift to open the printer cartridge access
panel and expose the printer cartridge carriage.
The carriage automatically slides left and positions itself in the center of the
unit.
2. Open the printer cartridge pack and peel back the amber protector strip.
3. Press down on the top of the cartridge using your index finger while pulling the
front portion forward with your thumb.
4. Remove the old cartridge by pulling it toward you and depositing it in the
recycling envelope provided with your new printer cartridge.
5. Slide the new printer cartridge into the cartridge carrier until the amber end
touches the back of the carriage and the cartridge clicks into place.
6. Close the top of the cartridge carrier using your forefinger to press down on the
printer cartridge while pushing the front portion forward with your thumb until
it snaps into position.
7. Close the PSC 2175.
The PSC makes a whirring sound as the printer carriage moves into position
and a cartridge alignment message displays on the front message panel.
8. Press Enter to align cartridges.
An align cartridge page prints automatically.
With fresh ink loaded, quality printing and copying can continue. We
recommend dropping the postage-paid recycling envelope in the mail for reuse
by the manufacturer.
15 Error! Use the Home tab to apply Book Title to the text that you want to appear here.
Error! Use the Home tab to apply Book Title to the text that you want to appear here.
16
INDEX
Index
A
aaaaa
aaaaa
B
bbbbb
bbbbb
bbbbb
C
ccccc
ccccc
ccccc
17 Error! Use the Home tab to apply Book Title to the text that you want to appear here.
Index
Index
D
ddddd
ddddd
E
eeeee
eeeee
eeeee
F
fffff
fffff
fffff
Error! Use the Home tab to apply Book Title to the text that you want to appear here.
18

