Unfortunately, we are not done yet. To make the formulas look nicer
3.22 Mechanical Properties of Materials
Spring 2003, Solution Set #10
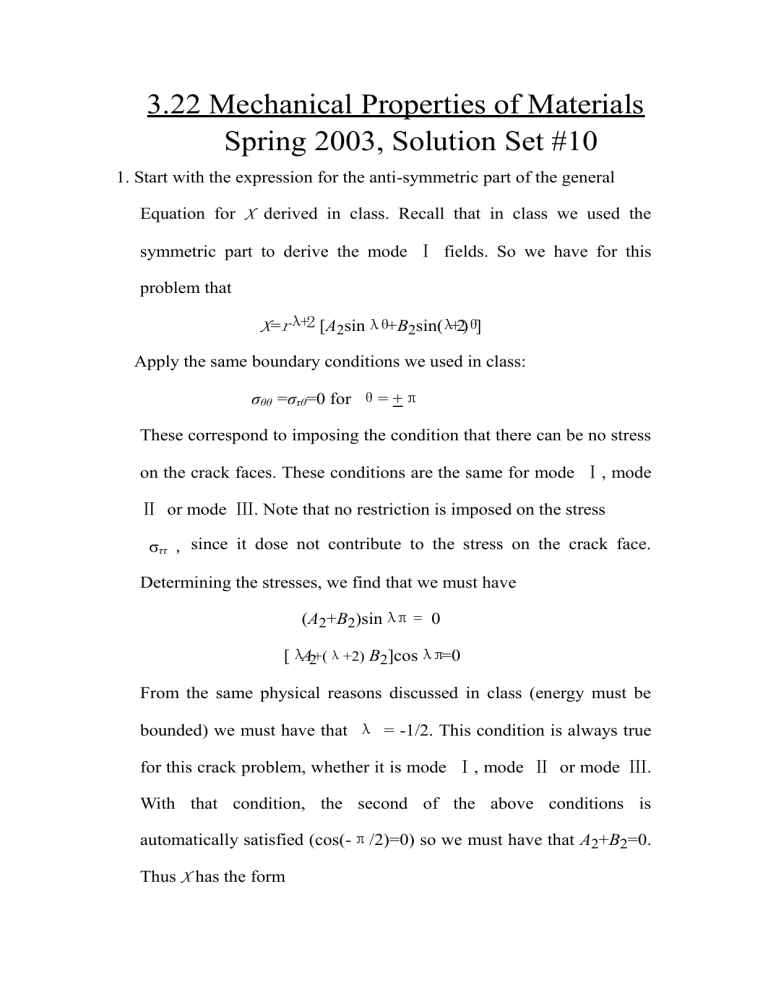
1. Start with the expression for the anti-symmetric part of the general
Equation for X derived in class. Recall that in class we used the symmetric part to derive the mode Ⅰ fields. So we have for this problem that
X = r λ+2
[ A
2 sin λθ B
2 sin( λ ]
Apply the same boundary conditions we used in class:
σ
θθ
= σ
τθ
=0 for θ = + π
These correspond to imposing the condition that there can be no stress on the crack faces. These conditions are the same for mode Ⅰ , mode
Ⅱ or mode Ⅲ . Note that no restriction is imposed on the stress
σ
ττ
, since it dose not contribute to the stress on the crack face.
Determining the stresses, we find that we must have
( A
2
+ B
2
)sin λπ = 0
[ λ A
2+(
λ
+2) B
2
]cos λπ
From the same physical reasons discussed in class (energy must be bounded) we must have that λ = -1/2. This condition is always true for this crack problem, whether it is mode Ⅰ , mode Ⅱ or mode Ⅲ .
With that condition, the second of the above conditions is automatically satisfied (cos(π /2)=0) so we must have that A
2
+ B
2
=0.
Thus X has the form
We may now evaluate the stresses using the Airy stress function relations:
In an analogous way to the mode I problem, we define
A
2
=K
II
/√2π ,so that
Unfortunately, we are not done yet. To make the formulas look nicer
(And allow us to compare with the book), we should eliminate the terms involving cos3
θ/2 and sin3
θ/2
by replacing them with terms involving cos
θ/2
and sin
θ/2
. Using the trigonometric double angle formulas you can show that:
Substitute these back into above expressions for the stresses and simplify (you can simplify in different ways; it helped me to take a
look at the expressions in the book to make sure I was heading in the right direction)
Which agrees with the expressions in the book.
3.The stress intensity factor for this crack configuration is given by
We approximate the cylinder as a thin-walled pressure vessel (90 mm inner diameter and a 110 mm outer diameter) so in this case the appropriate stress is the hoop stress, σ
θθ
= Pr/t=4.5P
.The factor Q is given in section A.7 as (include the plasticity correction)
And we know that
When the values a = 1.5 mm and c = 2.55 mm are substituted in. So the expression for K becomes:
To find the value when the crack can grow by fast fracture, set K = K
I c
. Plugging in the values σ y =550 MPa, K
I c = 30 MPa
√ m and a = 1.5 mm, and performing some simplifications find that
Use the above equation to solve for σ/σ y
. I found that σ/σ y
= 0.912
Or σ = 502 MPa and thus P = σ/4.5 = 111 MPa. Thus the pressure reached a value more than double the maximum intended pressure.
4. (a) For the test to be a valid measurement all the dimensions must be at least 25 times larger that the size of the plastic zone, of
These conditions come from the fact that in order for our K field
To be valid, which is an elasticity solution, the extent of plasticity
Must be small compared to the in-plane dimensions of the sample,
and in order for the problem to be one of plane strain the dimension
B must be significantly larger than the plastic zone. Substitute in the given values of σ y
and K
Ic
we find that 25 × r p
= 5.97 cm. Since we are given that a/W = 0.45, setting a = 5.97 cm ensures that
W a satisfies the above condition. So we have that a = B = 5.97 cm. Since we are given that a/W = 0.45, setting a = 5.97 cm ensures that W - a satisfies the above condition. So we have that a = B =
5.97 cm, W = 13.27 cm.
(b) Now calculate the volume and mass of each sample type. For the compact specimen the volume of the sample is approximately given by 1.2
W
×
1.2
W
×
B = 1.44
BW 2 and thus the mass (assume the density of steel is 7.8 g/cm 3 ) is 11.8 kg or ≈ 25 lbs. For the bend specimen the volume is B × W × 4 W , and thus the mass is 33.1 kg, or ≈ 72 lbs. In both case we neglect the weight lost due to the starter notch, and the weight lost due to the load pin holes for the compact specimen.
(c) Calculate the loads from the expressions given in the appendix for these geometries, i.e. for the compact specimen we have
Where f = 8.34 for a/W = 0.45. The load P at failure corresponds to
K
I
= K
Ic
so we have that
and for the bend specimen
Where f = 2.29 for a/W = 0.45. Also, I set the span S equal to 3 W .
The load P at failure corresponds to K
I
= K
Ic so we have that
Both are larger than our available test machine capacity of 200 kN.
(d) We find that the specimen size requirements necessitate a very large sample, and the load requirements are larger than the available test machine. This is generally the case for ductile materials, which have large plastic zones. Even by cleverly changing the specimen dimensions (i.e a/W ) the load requirements are too high.
In practice, what is generally done for these types of materials (low strength, high-toughness) is to use fracture-testing techniques based on what is called J -integral testing. The specimen size requirements are much less severe, so that reasonably sized specimens can be used. Those interested may refer to Chapter 9 in the book by
D. Broek, Elementary Engineering Fracture Mechanics, for more details.


