BIOSPHERE DATA COLLECTION PROTOCOLS
advertisement
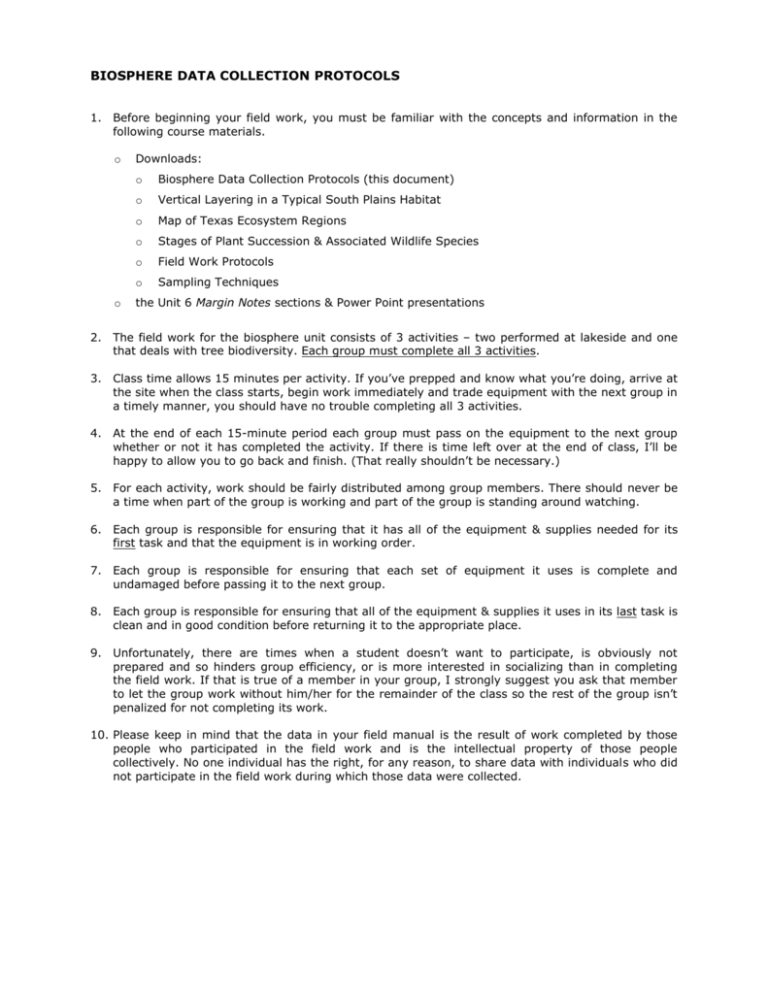
BIOSPHERE DATA COLLECTION PROTOCOLS 1. Before beginning your field work, you must be familiar with the concepts and information in the following course materials. o o Downloads: o Biosphere Data Collection Protocols (this document) o Vertical Layering in a Typical South Plains Habitat o Map of Texas Ecosystem Regions o Stages of Plant Succession & Associated Wildlife Species o Field Work Protocols o Sampling Techniques the Unit 6 Margin Notes sections & Power Point presentations 2. The field work for the biosphere unit consists of 3 activities – two performed at lakeside and one that deals with tree biodiversity. Each group must complete all 3 activities. 3. Class time allows 15 minutes per activity. If you’ve prepped and know what you’re doing, arrive at the site when the class starts, begin work immediately and trade equipment with the next group in a timely manner, you should have no trouble completing all 3 activities. 4. At the end of each 15-minute period each group must pass on the equipment to the next group whether or not it has completed the activity. If there is time left over at the end of class, I’ll be happy to allow you to go back and finish. (That really shouldn’t be necessary.) 5. For each activity, work should be fairly distributed among group members. There should never be a time when part of the group is working and part of the group is standing around watching. 6. Each group is responsible for ensuring that it has all of the equipment & supplies needed for its first task and that the equipment is in working order. 7. Each group is responsible for ensuring that each set of equipment it uses is complete and undamaged before passing it to the next group. 8. Each group is responsible for ensuring that all of the equipment & supplies it uses in its last task is clean and in good condition before returning it to the appropriate place. 9. Unfortunately, there are times when a student doesn’t want to participate, is obviously not prepared and so hinders group efficiency, or is more interested in socializing than in completing the field work. If that is true of a member in your group, I strongly suggest you ask that member to let the group work without him/her for the remainder of the class so the rest of the group isn’t penalized for not completing its work. 10. Please keep in mind that the data in your field manual is the result of work completed by those people who participated in the field work and is the intellectual property of those people collectively. No one individual has the right, for any reason, to share data with individuals who did not participate in the field work during which those data were collected. ACTIVITY #1 ALGAE IDENTIFICATION EQUIPMENT & SUPPLIES o o o o o o o o o plastic container scraper magnifying glass Major Algae Groups chart Algae Identification Guide Visually Identifying Algae chart clean towels plastic gloves small trash bag CONSIDERATIONS o Algae are the major food source for all aquatic and marine animals, either directly or indirectly, and they are keystone species in some ecosystems. Algae also produce a large proportion of the oxygen that humans and other animals breathe. o Unlike most other organisms, some algae can fix nitrogen (use nitrogen gas from air). That means they can out-compete other photosynthetic forms when dissolved nitrogen compounds become depleted from the habitat. o Algae are aquatic vegetation that have no leaves or vascular system, but do have chlorophyll to make them green. Examples are water that looks like "pea soup," "stringy green stuff" and floating mats of green, brown and yellow vegetation. o Professional phycologists use special algae keys such as those found at www.algaebase.org/, www.BGSU.edu/departments/biology/algae/index.html and http://agc.bio.ns.ca/dinoflaj/. Since algal composition is frequently used as an indication of environmental water quality and as evidence for the origin of forensic and even archaeological samples, phycological taxonomy is a useful skill which you could acquire on your own with a little practice, a decent light microscope and a phycological manual. METHODOLOGY Prep (last 15 minutes of previous class meeting) o Read the instructions for all activities and ask questions about anything of which you are uncertain. o Familiarize yourself with the equipment … make sure you know how to use it. o If this is your first activity, make certain that you have all of the equipment on the equipment & supplies list and that it is clean and in good condition. o KNOW WHAT YOU NEED TO DO BEFORE YOU START! In the Field 1. How to collect micro-organisms: a. The easiest way to collect micro-organisms and other small water life is to squeeze the water from water plants or pond scum into a container. b. Another method is to scrape the growth from water plants or other things that are covered by a green or brown growth. An old credit card makes an excellent scraper if you’re careful not to drop it in the water! I’ve given you a metal scraper to use. It works just as well but be careful to use it gently. 2. Using a magnifying glass to examine any organisms collected by the methods above can give you a clue to the organisms present in the water. If the growth is brown there is a good chance you will find diatoms. White fluffy masses are often colonies of bell animalcules. Use the Algae Identification Guide to identify individual organisms. 3. You should also visually inspect the water as a whole in the area of your flag, looking for mass evidence of algae. Use the Visually Identifying Algae chart for help. 4. Record your data as the presence of any of 5 algae groups as individual organisms, mass organisms, both or neither. Wrap-Up (first 15 minutes of next class meeting) o Transfer your field data onto the Hydrosphere Field Work Group Report sheet provided making certain to put the data in the correct spaces on the data sheet. o Make certain your data are connected to the appropriate flag number. o You must turn in your completed Hydrosphere Field Work Group Report at the end of the wrap-up. I will combine all of the data into class reports. Each participant in the field work will receive a copy for his/her field manual. o If this was your last activity, make certain that all of the equipment on the equipment & supplies list is clean, in good condition and returned to the professor. ALGAE IDENTIFICATION DATA algae group LAKE FLAG # ___ presence of individual organisms presence of mass organisms planktonic __ none __ unsure __ present __ none __ unsure __ present blue green algae __ none __ unsure __ present __ none __ unsure __ present filamentous __ none __ unsure __ present __ none __ unsure __ present chara / musk grass __ none __ unsure __ present __ none __ unsure __ present nitella __ none __ unsure __ present __ none __ unsure __ present ACTIVITY #2 AQUATIC INVERTEBRATE SAMPLING EQUIPMENT & SUPPLIES o o o o o o o o o o standard mesh pond net with telescoping handle 2 shallow pans plastic spoons brushes magnifying glass BMWP Identification Chart Key to Macro-invertebrate Life in the River clean towels plastic gloves small trash bag CONSIDERATIONS o Those who monitor pollution use the mixture of invertebrates in a stream or pond as an indication of water purity. Water with little more than red worms (Tubifex) is almost certainly very low in dissolved oxygen probably due to high levels of bacteria. Such water will not support fish and is not safe to drink. Water with a large variety of organisms including stone flies and riffle beetles will have a high oxygen concentration, low bacterial population and be good quality water. o The use of invertebrates as indicators has many advantages over chemical analyses since it indicates the quality of the ecosystem and its ability to cope with a certain amount of organic pollution. Declining biodiversity indicates that there is a problem. o Access to desired parts of the water may be problematic. o It is important to consider the sampling method, including the locations chosen for sampling and the length of time to kick or sweep for. o The accuracy of visual observations and identifications must be taken into account METHODOLOGY Prep (last 15 minutes of previous class meeting) o Read the instructions for all activities and ask questions about anything of which you are uncertain. o Familiarize yourself with the equipment … make sure you know how to use it. o If this is your first activity, make certain that you have all of the equipment on the equipment & supplies list and that it is clean and in good condition. o KNOW WHAT YOU NEED TO DO BEFORE YOU START! In the Field 1. Rinse net, trays, spoons and brushes 3 times in water before beginning. 2. If possible, indentify different habitats around your flag (fast moving riffles, shallow water, slow water, weeds, tree roots, water surface, under stones and logs, etc) that you will use for sampling. Devote approximately 3 minutes to sampling each habitat. 3. Stand the pond net on the lake bed and use the brush to gently disturb the area just ahead of the net for about one minute. If there are any large stones in the area, gently brush those as well. Use brush and hand motions to gently push the water toward the net. The organisms will be carried by the current into the net. 4. Avoid netting deep accumulations of soft sediment, large accumulations of plant material and root masses, as it makes subsequent sorting difficult. The netted sample should be as debrisand silt-free as possible. 5. For weeds and tree roots, sweep the net through the area in a figure-8 motion for about 1 minute. 6. Fill a tray with stream water. Lower the net into the water in the tray, carefully turn it inside out and shake gently to release the contents for examination. 7. Identify any macro-invertebrates shown on the BMWP Identification Chart. 8. When finished, pour water and contents back into the sampled area. 9. Record your data as the presence of specific invertebrates listed on the BMWP index. Wrap-Up (first 15 minutes of next class meeting) o If necessary, identify any organisms you were unable to identify in the field. o Make sure you complete all four index values and check the correct water quality rating before turning in your data. o Make certain your data are connected to the appropriate flag number. o Transfer your field data onto the Hydrosphere Field Work Group Report sheet provided making certain to put the data in the correct spaces on the data sheet. o You must turn in your completed Hydrosphere Field Work Group Report at the end of the wrap-up. I will combine all of the data into class reports. Each participant in the field work will receive a copy for his/her field manual. o If this was your last activity, make certain that all of the equipment on the equipment & supplies list is clean, in good condition and returned to the professor. INVERTEBRATE SAMPLING DATA BMWP Scores Index ACTIVITY #3 MEASURING BIODIVERSITY EQUIPMENT & SUPPLIES o o o o o o o o white sheet tapping stick magnifying glass tree field guide Insect & Selected Non-Insect Orders invertebrate field guides plastic gloves small trash bag CONSIDERATIONS o It is important that you follow directions exactly in order to standardize techniques between groups. o Some insects are very good at holding on to vegetation and you will not, of course, catch internal feeders such as leaf miners and stem borers. o The recording of data in the field is one of the most important aspects of any fieldwork and is often done badly. Failure to keep adequate notes will destroy the scientific content of the project. Fieldwork is often very exciting and, in the heat of the moment, it is easy to forget to write down essential details. Never leave labeling for later. o The identification of organisms to the level of order and suborder should not be beyond the capabilities of any careful student with access to basic books. o Many ecologists and entomologists feel it is necessary to capture and kill insects to observe and identify them and, in some situations, this may be necessary to prove to others that you really did see what you claim you saw. It is, however, quite possible to identify insects without killing them. Capture insects if necessary for closer examination to identify, then release. Identify as many as possible without disturbing them just as you would with other animals. o Different ecosystems are made up of varying species and varying numbers of organisms. Several terms may be used. RELATIVE ABUNDANCE – the number of organisms collected or seen per unit of time or per unit of space, e.g. 3 daisies per 30 minutes or 6 daisies per hour FREQUENCY – the percent of total units of space or total samples containing a given organism, e.g. 50% of the plots contain sycamore trees DENSITY – the number of organisms per unit of space, e.g. 20 1-ft2 plots equals a total of 20 ft2 so that if 10 ladybugs are in that 20-ft2 area, the density is 0.5 ladybugs per ft2 RELATIVE DENSITY – density expressed as a percent of the total, e.g. if ladybug density equals 0.5 per ft2, mosquito density equals 0.5 per ft2 and butterfly density equals 0.5 per ft2, the relative density of ladybugs is 33% METHODOLOGY Prep (last 15 minutes of previous class meeting) o Read the instructions for all activities and ask questions about anything of which you are uncertain. o Familiarize yourself with the equipment … make sure you know how to use it. o If this is your first activity, make certain that you have all of the equipment on the equipment & supplies list and that it is clean and in good condition. o KNOW WHAT YOU NEED TO DO BEFORE YOU START! In the Field 1. Find the tree marked with the same number flag as your lake flag. 2. Identify the tree you will be sampling using the field guide provided. 3. Unfold sheet so that it is wide and long enough to fit a low hanging branch. 4. Hold sheet fairly tight and as high as possible under the branch. 5. Tap the branch strongly with stick. Wait a couple of seconds and tap it a second time. 6. Invertebrates will fall off of the branch and on to the sheet. 7. Do NOT simply beat on the branch as you will damage the tree and end up with a large pile of leaves and debris on your sheet, which will take longer to search through. 8. If NO invertebrates fall from the branch, try tapping the branch a third time or repeat the procedure with another branch. 9. Lay the sheet gently on the ground and carefully identify all gastropods, arachnids, crustaceans and insects to at least the ORDER level. 10. Because many invertebrates move quickly and/or fly, it is important that all group members carefully participate in spotting and identifying organisms. 11. When you have identified all invertebrates, gently shake any remaining on the sheet on to the ground near the tree. 12. Record your data, keeping count of how many organisms in each order are spotted. When all organisms have been counted and identified, add up the total number of individual organisms and the total number of orders they represent. Wrap-Up (first 15 minutes of next class meeting) o Transfer your field data onto the Hydrosphere Field Work Group Report sheet provided making certain to put the data in the correct spaces on the data sheet. o If necessary, identify any organisms you were unable to identify in the field. o Make certain your data are connected to the appropriate flag number. o You must turn in your completed Hydrosphere Field Work Group Report at the end of the wrap-up. I will combine all of the data into class reports. Each participant in the field work will receive a copy for his/her field manual. o If this was your last activity, make certain that all of the equipment on the equipment & supplies list is clean, in good condition and returned to the professor. BIODIVERSITY COUNTS TREE FLAG # ___ Tree species: tally order BLATTARIA COLEOPTERA COLLEMBOLA DERMAPTERA DIPTERA EPHEMEROPTERA HEMIPTERA HOMOPTERA HYMENOPTERA ISOPTERA LEPIDOPTERA MANTODEA MECOPTERA NEUROPTERA ODONATA ORTHOPTERA PHASMIDA PHTHIRAPTERA PLECOPTERA PSOCOPTERA SIPHONAPTERA THYSANOPTERA THYSANURA TRICHOPTERA ACARI ARANEAE Class CHILOPODA Class DIPLOPODA ISOPODA OPILIONES PSEUDOSCORPIONES SCORPIONIDA SOLIFUGAE UROPYGI OTHER # individual organisms: # individual orders: notes
