Lab3 prelim
advertisement
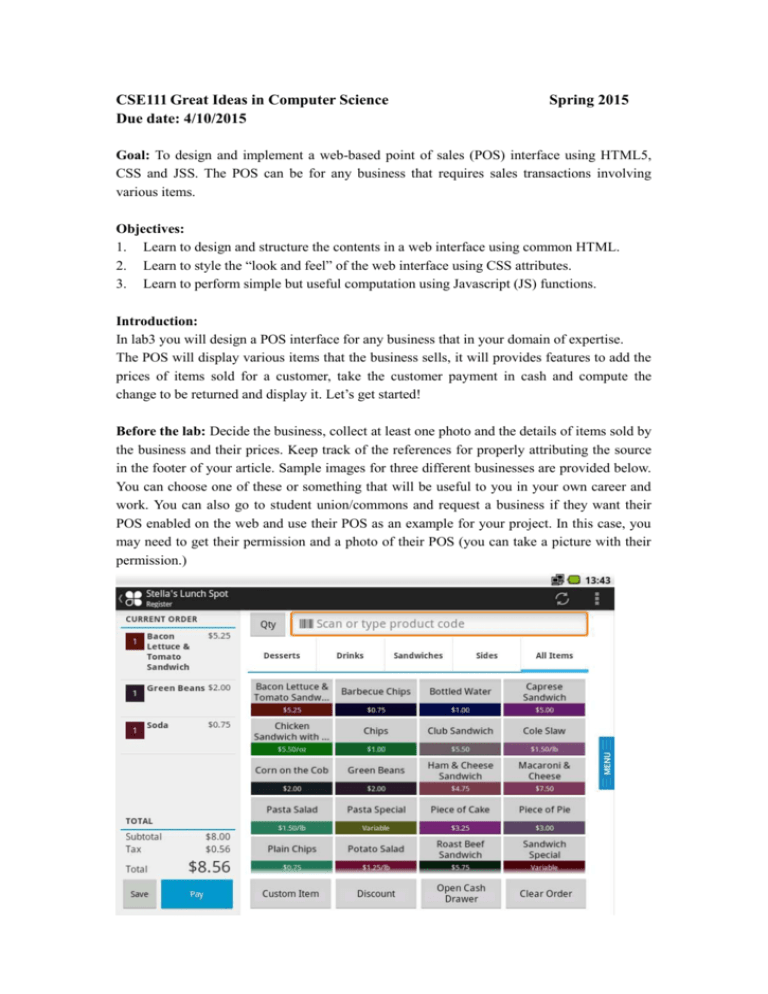
CSE111 Great Ideas in Computer Science Due date: 4/10/2015 Spring 2015 Goal: To design and implement a web-based point of sales (POS) interface using HTML5, CSS and JSS. The POS can be for any business that requires sales transactions involving various items. Objectives: 1. Learn to design and structure the contents in a web interface using common HTML. 2. Learn to style the “look and feel” of the web interface using CSS attributes. 3. Learn to perform simple but useful computation using Javascript (JS) functions. Introduction: In lab3 you will design a POS interface for any business that in your domain of expertise. The POS will display various items that the business sells, it will provides features to add the prices of items sold for a customer, take the customer payment in cash and compute the change to be returned and display it. Let’s get started! Before the lab: Decide the business, collect at least one photo and the details of items sold by the business and their prices. Keep track of the references for properly attributing the source in the footer of your article. Sample images for three different businesses are provided below. You can choose one of these or something that will be useful to you in your own career and work. You can also go to student union/commons and request a business if they want their POS enabled on the web and use their POS as an example for your project. In this case, you may need to get their permission and a photo of their POS (you can take a picture with their permission.) The first one is for a sandwich shop, the second one is a POS for a gym and the third one is for a pizza shop. You can choose one of the above. Assume only CASH payment needs to be considered. You will take the order, press the appropriate buttons, compute the total price, and based on the cash tendered, compute the change to be returned. All the selections, cash given and change returned need to be displayed. Your POS can a simple implementation with buttons only for the needed items. You should be able to clear the POS at any stage of a transaction. Requirements: 1. Create a lab folder for lab3: Lab3; inside that create a lab3.html, lab3.css and lab3.js 2. Complete a working POS. Your choice could any of the above or one that see with vendors in Putnams or Commons. 3. You will link the completed POS to the home page you created in Lab2. Implementation Details: 1. Collect all the information you need: the theme, the products, prices, images for the buttons etc. 2. Design the layout on paper by hand or using touch screen on a document. 3. The interface will have input regions with all the buttons and output region where computed prices and change are display. 4. Follow coffee bean counter design that we completed in class. 5. Develop the interface incrementally: add few buttons, one row of button a time, test it, and add region by region. Test each region before moving on to the next. 6. All the style elements should be defined in the .css file. 7. User inputs the items she/he has orders. 8. The data collected for an order is passed on as parameters to javascript program that does the computation of total price. Total price is computed using function(s) in javascript. The total price is displayed. 9. Make sure output $ displays are formatted to 2 digits. 10. After the user enters the amount he has paid in a text box that is passed on to a javascript function that computes the change and displays it. You can enhance the basic POS by other features with recommendations, promotions (BOGO), etc. Submission on ublearns: To zip your file When you want to zip several files together, Right lick on the Lab3 folder, select Send to->Zip folder. Name your zip file Lab3.zip To upload to ublearns Go to “ublearns.buffalo.edu” and log in with your Ubit account. Select the course CSE111 from My Course on the right; Locate the Assignment. Click the name of the Assignment. The Upload Assignment page appears. Complete the Comments field on the Upload Assignment page, if you wish. Click Browse next to “File To Attach” to browse the local system and select a file to attach. Multiple files may be attached using the Add Another File option. Click Submit.
