Northcote Pottery Practical Activity
advertisement
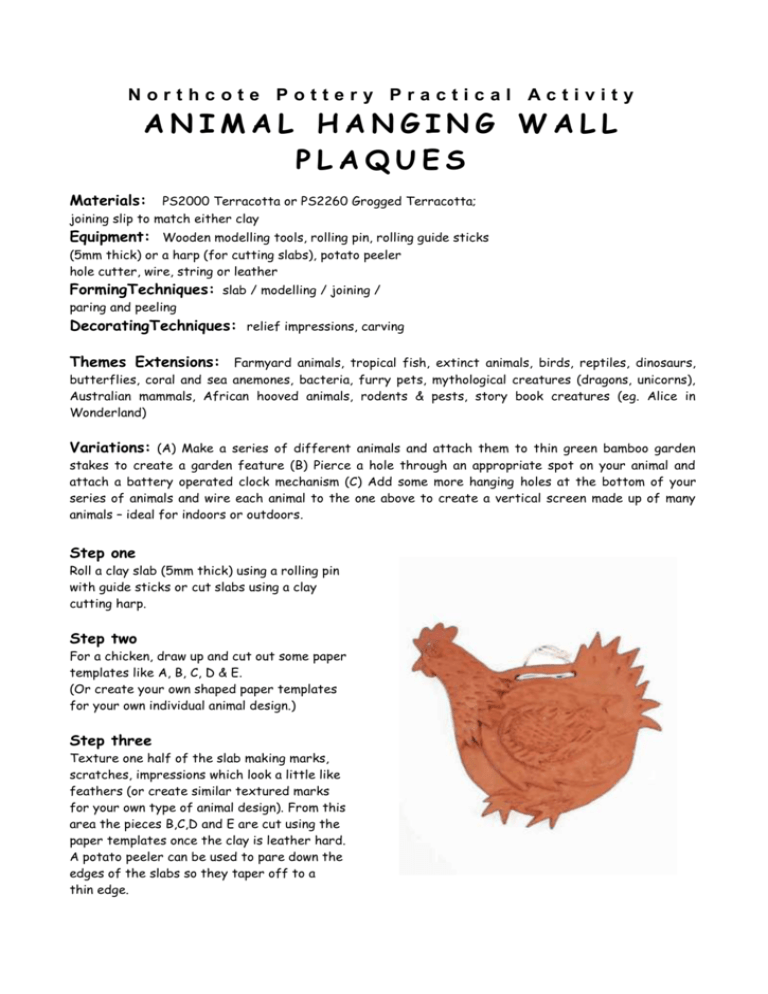
Northcote Pottery Practical Activity ANIMAL HANGING WALL PLAQUES Materials: PS2000 Terracotta or PS2260 Grogged Terracotta; joining slip to match either clay Equipment: Wooden modelling tools, rolling pin, rolling guide sticks (5mm thick) or a harp (for cutting slabs), potato peeler hole cutter, wire, string or leather FormingTechniques: slab / modelling / joining / paring and peeling DecoratingTechniques: relief impressions, carving Themes Extensions: Farmyard animals, tropical fish, extinct animals, birds, reptiles, dinosaurs, butterflies, coral and sea anemones, bacteria, furry pets, mythological creatures (dragons, unicorns), Australian mammals, African hooved animals, rodents & pests, story book creatures (eg. Alice in Wonderland) Variations: (A) Make a series of different animals and attach them to thin green bamboo garden stakes to create a garden feature (B) Pierce a hole through an appropriate spot on your animal and attach a battery operated clock mechanism (C) Add some more hanging holes at the bottom of your series of animals and wire each animal to the one above to create a vertical screen made up of many animals – ideal for indoors or outdoors. Step one Roll a clay slab (5mm thick) using a rolling pin with guide sticks or cut slabs using a clay cutting harp. Step two For a chicken, draw up and cut out some paper templates like A, B, C, D & E. (Or create your own shaped paper templates for your own individual animal design.) Step three Texture one half of the slab making marks, scratches, impressions which look a little like feathers (or create similar textured marks for your own type of animal design). From this area the pieces B,C,D and E are cut using the paper templates once the clay is leather hard. A potato peeler can be used to pare down the edges of the slabs so they taper off to a thin edge. Step four Cut (piece A) from the plain, non-textured part of the slab using the paper template. Step five Using the scratch ‘n’ slip method of joining, join the smaller slab pieces onto the larger (A) base piece. Join B (wing) onto A (body).Join C (neck) onto A (body). Join D (wing) onto B (wing).Join E (wing) onto D (wing) to build up a layered look for the chicken’s wings and neck. A V-shaped lino carving tool can be used to carve any additional textural detail on the piece once you have put the animal sections together. It is also advisable to cut out of the centre of each slab any excess clay (see illustration) which could also make the final slab form too thick in the built up areas. Step six Roll a small ball of clay for the chicken’s eye and join it on with slip to C. Then add small balls under the beak to C and some hand modeled feet to A. Use the scratch and slip joining method. Make sure that the feet do not protrude over the edge of the body too far or they’ll break off Step seven Pierce two holes using a hole cutter through section A to hang the chicken after firing with some string, leather or wire. Step eight Dry the whole piece very slowly on a piece of compressed cement sheet. Fire once to 1100C without any glaze. Use the same firing rate as for a bisque firing. NOTE: You can use this layering technique to make any other style of animal. Be sure that you do not create too much thickness by layering no more than 4 layers (slabs) anywhere on the form because you will encounter drying cracks. The drying rates of the sections differing thickness will vary and the clay will shrink at variable speeds throughout the piece. Kerry Punton 2002 Northcote Pottery 85A Clyde Street, Thornbury 3071. Phone: 03 9484 4580 Fax: 03 9480 3075
