Importing Photos into Sims .net
advertisement
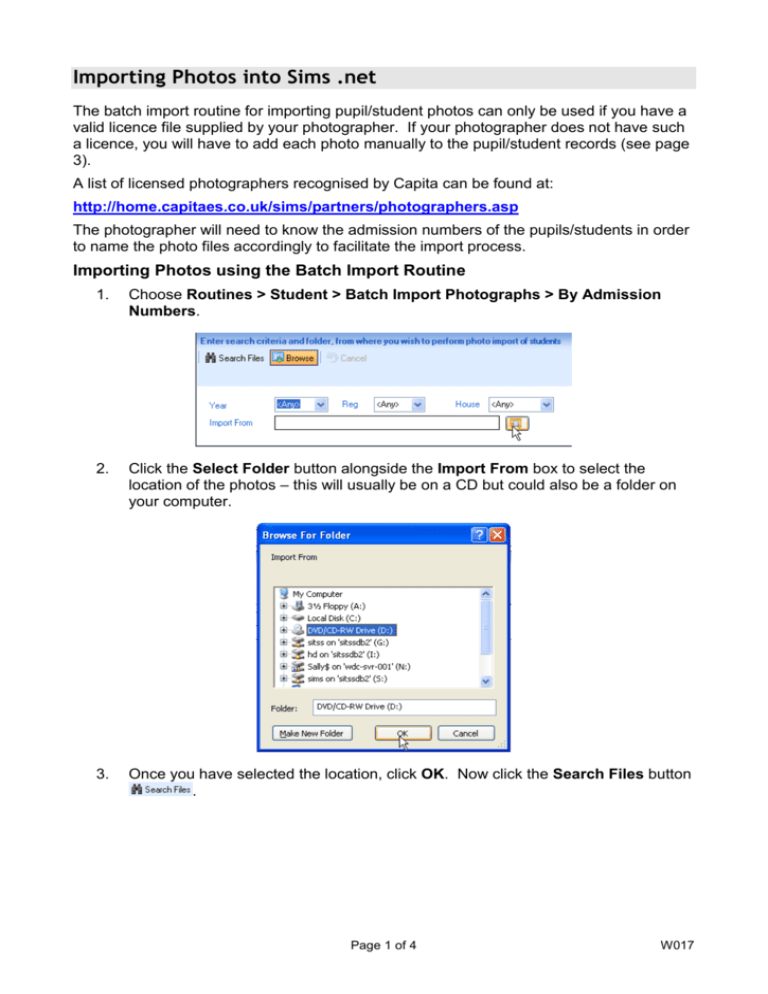
Importing Photos into Sims .net The batch import routine for importing pupil/student photos can only be used if you have a valid licence file supplied by your photographer. If your photographer does not have such a licence, you will have to add each photo manually to the pupil/student records (see page 3). A list of licensed photographers recognised by Capita can be found at: http://home.capitaes.co.uk/sims/partners/photographers.asp The photographer will need to know the admission numbers of the pupils/students in order to name the photo files accordingly to facilitate the import process. Importing Photos using the Batch Import Routine 1. Choose Routines > Student > Batch Import Photographs > By Admission Numbers. 2. Click the Select Folder button alongside the Import From box to select the location of the photos – this will usually be on a CD but could also be a folder on your computer. 3. Once you have selected the location, click OK. Now click the Search Files button . Page 1 of 4 W017 The routine will match the admission number with the existing record and show you details about the pupil/student, the new photo plus any existing photo. The admission number must match EXACTLY. In the example above, one photo filename does not have the leading zeros so does not have a match to a pupil/student. Your school may have a different format for admission numbers, but whatever it is, the photos must be named accordingly. 4. You must then browse for the Licence File by clicking the Select Licence File button. 5. Licence files have the extension “.lic”. Locate the file and click Open. 6. Click the Import button to carry out the photo import. 7. Once the import is complete a report will show whether each photograph has been successfully imported or not. Page 2 of 4 W017 8. This report can be saved into a folder on your computer by clicking the Save As button, or alternatively it can be printed by clicking the Print button . If any photos have not been matched, they can be copied to a folder by specifying a Target Folder and then clicking the Copy to Target Folder button . Click Close to close the Photo Import Status screen. Importing Photos Manually 1. Open the pupil/student record by clicking the Pupil/Student Details button and searching for the pupil/student. Double click on the name to open the record. 2. Click the Browse button 3. Change the View to Thumbnails to see each photograph. 4. Select the photo for the pupil/student and click Open. alongside the photograph area to locate the photo. Page 3 of 4 W017 5. Now Save the record. 6. Repeat for other pupils/students. NOTE: There are some photo reports on the Reporting page on our website at: http://www.thegrid.org.uk/info/traded/sitss/mis/sims/reporting.shtml Page 4 of 4 W017
