Trimming your IMAC Plane
advertisement
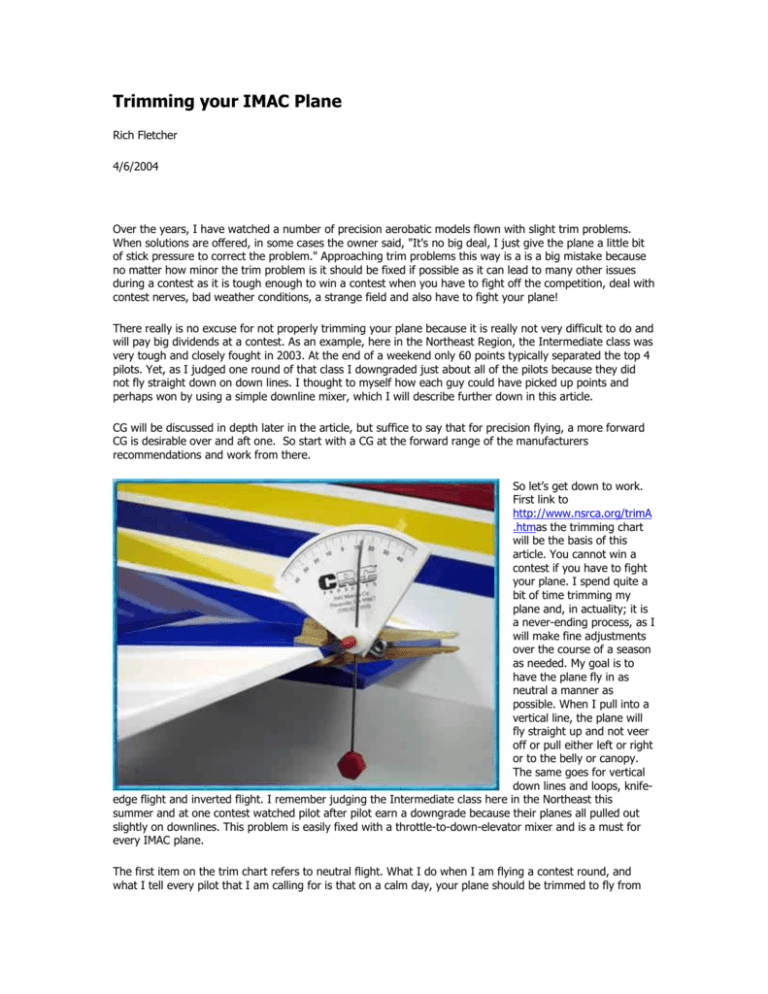
Trimming your IMAC Plane Rich Fletcher 4/6/2004 Over the years, I have watched a number of precision aerobatic models flown with slight trim problems. When solutions are offered, in some cases the owner said, "It's no big deal, I just give the plane a little bit of stick pressure to correct the problem." Approaching trim problems this way is a is a big mistake because no matter how minor the trim problem is it should be fixed if possible as it can lead to many other issues during a contest as it is tough enough to win a contest when you have to fight off the competition, deal with contest nerves, bad weather conditions, a strange field and also have to fight your plane! There really is no excuse for not properly trimming your plane because it is really not very difficult to do and will pay big dividends at a contest. As an example, here in the Northeast Region, the Intermediate class was very tough and closely fought in 2003. At the end of a weekend only 60 points typically separated the top 4 pilots. Yet, as I judged one round of that class I downgraded just about all of the pilots because they did not fly straight down on down lines. I thought to myself how each guy could have picked up points and perhaps won by using a simple downline mixer, which I will describe further down in this article. CG will be discussed in depth later in the article, but suffice to say that for precision flying, a more forward CG is desirable over and aft one. So start with a CG at the forward range of the manufacturers recommendations and work from there. So let’s get down to work. First link to http://www.nsrca.org/trimA .htmas the trimming chart will be the basis of this article. You cannot win a contest if you have to fight your plane. I spend quite a bit of time trimming my plane and, in actuality; it is a never-ending process, as I will make fine adjustments over the course of a season as needed. My goal is to have the plane fly in as neutral a manner as possible. When I pull into a vertical line, the plane will fly straight up and not veer off or pull either left or right or to the belly or canopy. The same goes for vertical down lines and loops, knifeedge flight and inverted flight. I remember judging the Intermediate class here in the Northeast this summer and at one contest watched pilot after pilot earn a downgrade because their planes all pulled out slightly on downlines. This problem is easily fixed with a throttle-to-down-elevator mixer and is a must for every IMAC plane. The first item on the trim chart refers to neutral flight. What I do when I am flying a contest round, and what I tell every pilot that I am calling for is that on a calm day, your plane should be trimmed to fly from one side of the box to the other in a dead straight line, hands off. To demonstrate this I will trim my plane for hands off flight and then do it, I'll hold the transmitter over my head and have the pilot I am teaching watch the plane fly across the box, literally hands off. The idea is that when you exit a maneuver, when you release the sticks, that the plane will fly dead straight. So get into the habit of trimming your plane using the trims so that it will fly dead straight. Once you have done this, it is a good idea to re-adjust the clevises and servo arms so that everything is back to neutral, meaning that you want the servo arms to be back to neutral so that you do not lose any mechanical advantage, or introduce a differential effect. The next item on the chart is setting the maximum amount of throw. My technique is to use conditions (or flight modes depending on your band of radio) for rate adjustments. I have on one switch a 3D rate and a “sequence flying” rate. The “sequence flying” rate gives me just enough throw on ailerons, rudder and elevator to get through the sequence I have to fly that year. To determine how much throw you will need for ailerons, if your sequence has as an example, a square loop with a roll on top, fly that maneuver and adjust the aileron throw so that the roll presents well when you push the stick to the stop. In other words you want a full stick aileron roll to not be too fast or too slow. The reason you would set the aileron rate in this maneuver is because the plane will need more throw to get through this maneuver, as the airspeed will be low after the vertical climb to the top of the square loop. Set the rudder by decreasing the throw until the plane will no longer hold a knife-edge, and then increase it until it will. Set the elevator by decreasing it until you need almost full elevator to pull out of a loop, or the corner of a down line, like a humpty bump. I will also set up my down elevator so that it has a bit more throw then up elevator, as an example 14 degrees up and 17 down. The reason for this adjustment is that I want the elevator feel to be the same for both upright and inverted flight. You do not want to have to jam in a lot of down elevator input to hold an inverted line. For left and right rolls, if the plane rolls faster to the left then the right I will adjust the ATVs to give the plane a bit more right aileron when I move the stick to the full right aileron position so that my roll rate is the same for both left and right rolls. Next is adjusting the CG. Here you have some room for variability. I have found that our big IMAC planes fly better when they are nose heavy vs. being tail heavy. Here are some guidelines - If the plane is difficult to hammer head, move the CG forward. If it pitches to the belly in knife-edge moving it forward will also help. If the plane drops it's nose like a brick in spin entries and landings, it is probably too nose heavy. I tend to adjust the CG until the plane has a comfortable feel in my sequence, not too 'floaty', indicating tail heaviness, and also that the plane does not immediately drop it's nose when I pull the power off. Again, trying hammerheads and knife-edge is a very good way to adjust the CG. Once the cg is at its optimal point, re-trimming the plane is a must. Engine up and down thrust adjustments are very straightforward. Pull the plane into a vertical climb. It should go straight up for several hundred feet. If it pulls to the canopy, add some down thrust. If it pulls to the belly, take out some of the down thrust. For large adjustments I use washers under the engine mounting bolts. For fine adjustments I use washers I make out of soup cans. Keep in mind that up and down thrust adjustments will interact with CG adjustments so it is a good idea to only make one change to your setup at a time, so you won't get confused. And this brings up a good point, be sure to make only one change at a time as each change may interact with another. An example is CG adjustments. When you move the CG forward the aileron and elevator sensitivity will be decreased. Quite often I will display the screen on my transmitter that controls the function I want to adjust and flying with a buddy, make adjustments during the flight. Be sure your plane is high and at reduced throttle and that your buddy is watching it closely before you take your eyes off the plane and make the transmitter adjustments. Incidence adjustments. I use a digital level and long Robart incidence meter bars and carefully align the incidences when I am building the plane. There is no substitute for building a straight plane and no amount of trimming will correct a crooked plane and make it fly straight. For instance if you build even a slight warp into a wing panel the plane will roll at different rates when flying at different speeds. The only real solution is to replace the warped wing panel. If the plane's incidences are correctly set up during the building period they will rarely need adjustment during the trim flights. You will read and hear advice to adjust the incidences to correct down line pitching or knife edge flight. I rarely if ever do this, instead I adjust the CG to correct knife-edge problems, usually I need to add nose weight to correct pulling to the belly. Correcting downlines If the plane pulls out towards the canopy, setup a mixer for a slight amount of down-elevator-to-idle. Usually you will only need 1 - 2 percentage of movement of down elevator and it is usually even hard to see the elevator move such a small amount. If the plane pulls to the belly, it is way too tail heavy so you will need to add nose weight. This condition is very rare but pulling to the canopy is very common and is easily fixed with this simple mixer. Uneven elevator throws. This is a common problem not often caught and corrected. Tip the plane up on it's landing gear onto it's nose, stand about 10 - 15 feet behind it, line up the elevators and slowly move the elevator stick up and down and watch the tracking of the elevators. You must adjust the movement of each side so that they are always equal. This can be pretty difficult to do depending on the geometry of your linkages but is essential because the plane will not loop straight unless the elevators are adjusted properly. The problem also shows up when you pull out from downlines, as you will have difficulty establishing the correct heading. We make the problem worse as we try to correct the heading using rudder. So take your time and start turning clevises, bending horns, trying different servo arms and adjust transmitter settings until you get the elevators to track together perfectly. You will definitely notice that the plane will fly better. Knife-edge flight. Roll coupling is caused by an incorrect dihedral angle in the wings. If there is too much dihedral the plane wants to roll out of the knife-edge and if there is too little then it wants to roll over on it's back. There are only two ways to correct roll coupling, either change the dihedral angle or setup a programmable mixer that will input aileron throw tied to the rudder channel. So if the plane wants to roll out you will need adverse aileron mix and if the plane wants to roll over, proverse mix. Pitch coupling is usually caused by one of the following: an incorrect CG setting, thrust setting or placement of the stab. Some designers will try moving the stab down from it's scale location to eliminate or minimize pitch coupling. My AW 37% 300L's stab was lowered 1 1/2" from the scale location which has helped minimize pitch coupling. I highly recommend that anyone building a big IMAC plane lower the stab. If I have this problem I will usually add nose weight to correct pitching to the belly. We can also setup a rudder to elevator mixer to help correct the problem. Generally I will try to avoid mixers and correct coupling problems with physical adjustments because mixers will kick in when you don't want them to if they are left on all the time. For instance you apply rudder in an upline and the plane starts to roll because the roll coupling mixer kicks in. The best scenario is if you have a plane that does not pitch or roll during knife-edge at all. Another technique I use to help with this problem is to not apply very much rudder during knife-edge, as more rudder will worsen the problem. Tip weight test. This test is used to correct a heavy wing panel. You want to trim the plane so that both wing panels weigh the same because if one panel is heavy, that panel will drop in loops. Also when you roll inverted the heavy panel will drop and you will have to input aileron adjustments just to fly level. So loop the plane using elevator input only and watch the wings. The heavy wing will soon drop. Flip the plane inverted and fly a few outside loops and again watch the wings. If the same wing drops, that one is heavy. If the other wing drops, check the elevators for incorrect alignment. Side engine thrust. This one is very straightforward and easy to correct. Pull the plane into a vertical upline into the wind and watch to see if it veers off either right or left. What we are looking for is immediate veering, as all planes will eventually veer off to the left as it loses speed and the engine's torque pulls it to the left. Adjust the engine's thrust line using washers placed under the mounting lugs until it will fly straight up for several hundred feet in a nice straight line. Aileron Differential. Follow the instructions on the trimming chart. If you have a differential problem it is usually very noticeable and when it is corrected the difference is like night and day. You want to adjust the differential so that when you are flying up an upline, the plane will roll axially. If it has a differential problem it will barrel roll and you will definitely lose points. Expect the trimming process to take around fifty flights, each flight fine-tunes the plane over the last one, making tweaks here and there, all the while readjusting the other parameters affected by the change. Yes you can fly the sequence and practice during this period, as it will help you make the required trimming changes. After fifty or so flights, you should feel that the plane is fairly well “dialed in” and ready for competition. As the season goes on, look for subtle changes in the way the plane flies and make changes as necessary. Using the digital level has made the process easier and quicker as it is far easier to trim a plane that is setup straight to begin with. But all planes will need trimming and spending time to do it properly is time well spent and will pay big dividends down the road. This article should get you prepared for the trimming process, now get out there and trim your plane, and in the process enjoy picking up those extra points!

