A New Technology: An Early History of Pottery
advertisement
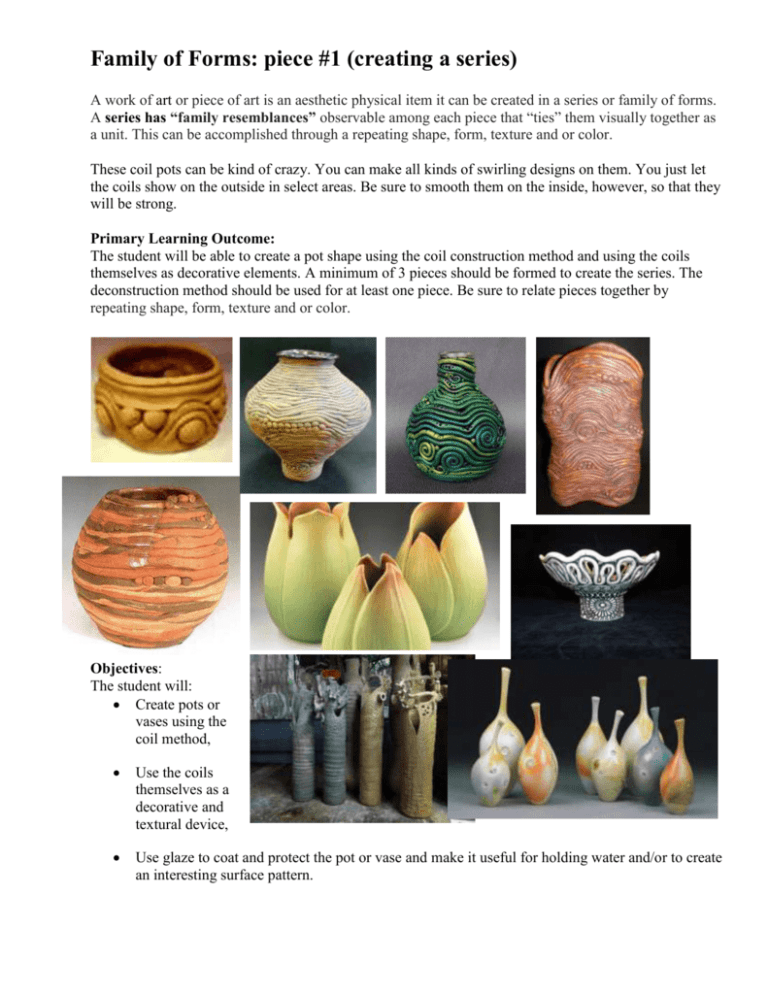
Family of Forms: piece #1 (creating a series) A work of art or piece of art is an aesthetic physical item it can be created in a series or family of forms. A series has “family resemblances” observable among each piece that “ties” them visually together as a unit. This can be accomplished through a repeating shape, form, texture and or color. These coil pots can be kind of crazy. You can make all kinds of swirling designs on them. You just let the coils show on the outside in select areas. Be sure to smooth them on the inside, however, so that they will be strong. Primary Learning Outcome: The student will be able to create a pot shape using the coil construction method and using the coils themselves as decorative elements. A minimum of 3 pieces should be formed to create the series. The deconstruction method should be used for at least one piece. Be sure to relate pieces together by repeating shape, form, texture and or color. Objectives: The student will: Create pots or vases using the coil method, Use the coils themselves as a decorative and textural device, Use glaze to coat and protect the pot or vase and make it useful for holding water and/or to create an interesting surface pattern. Procedures: 1. Sketch at least 6 different variations for pieces #1: make decisions on where and how the coils and slabs will be used as decorations. Coils and slabs should be used as decorative design and texture. 2. Once the sketches are done and a design for the series is approved for the project, then wedge the clay to a smooth consistency. If using coils, pull a golf ball size piece off and shape it into a smooth ball. Flatten the ball into a hamburger patty shape about 3/8” thick for the base. (Caution: do not overwork the clay as it will start to look cracked and dry on the surface if it is overworked.) 3. Next, pull off another golf ball size piece and roll it into a coil about ½” in diameter or use a slab of clay 3/8” thick. Attach the clay to the base, smoothing on the inside until perfectly smooth. Continue attaching the coils or slabs around the base and then to the other pieces so a shape is made. 4. After one or two coils or slabs are attached, smooth the inside for sturdier piece. NOTE: Just be sure to know where you will be allowing the coils to show on the outside as decoration. 5. When the piece is completely made, smooth the top edge and loosely cover the whole pot with plastic so that it slowly dries to a leather hard consistency. 6. You may or may not add a foot at this point. If you do not, then tap the bottom just a little so that it is a bit concave. This makes it sit more firmly and distributes shock better when the piece is set down. If you do decide to make a foot, this is how to do it. MAKING A FOOT: When the piece or pot is leather hard, turn it over and lightly draw a circle on the bottom where you want the foot to be placed. Score and slip the circle and attach a coil in a circle on the bottom. Cut the coil off when you reach the starting end of it so that the coil is a perfect circle. Smooth both inside and outside attached edges, tilting the foot outward just a bit. Allow it to sit a few minutes so that the coil is a bit firmer, then turn the pot over and make sure that the foot sits flat on the table surface. You can put a bit of pressure on it to straighten it. 7. The piece should be allowed to dry slowly, but thoroughly, and then fired. After bisque firing, a different glaze can be used on the inside and on the outside. Demonstrate good glaze technique ensuring that the bottom of the foot is uncoated. Create the series by tying colors together.
