January 7th
advertisement
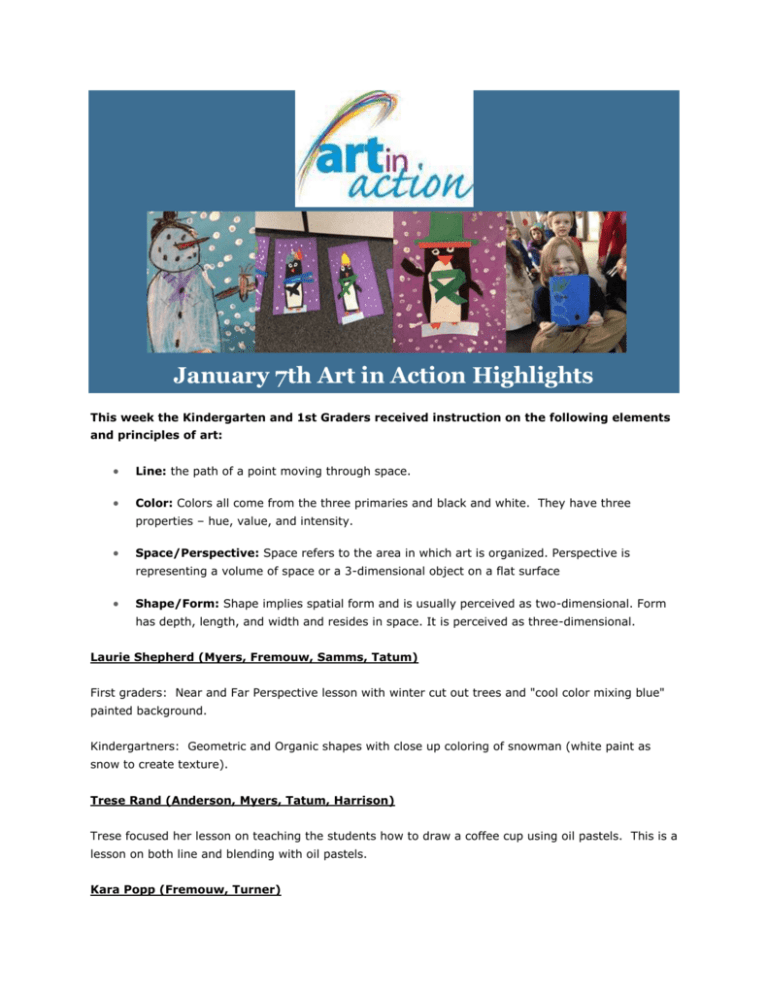
January 7th Art in Action Highlights This week the Kindergarten and 1st Graders received instruction on the following elements and principles of art: Line: the path of a point moving through space. Color: Colors all come from the three primaries and black and white. They have three properties – hue, value, and intensity. Space/Perspective: Space refers to the area in which art is organized. Perspective is representing a volume of space or a 3-dimensional object on a flat surface Shape/Form: Shape implies spatial form and is usually perceived as two-dimensional. Form has depth, length, and width and resides in space. It is perceived as three-dimensional. Laurie Shepherd (Myers, Fremouw, Samms, Tatum) First graders: Near and Far Perspective lesson with winter cut out trees and "cool color mixing blue" painted background. Kindergartners: Geometric and Organic shapes with close up coloring of snowman (white paint as snow to create texture). Trese Rand (Anderson, Myers, Tatum, Harrison) Trese focused her lesson on teaching the students how to draw a coffee cup using oil pastels. This is a lesson on both line and blending with oil pastels. Kara Popp (Fremouw, Turner) Mrs. Popp focused her lesson on making penguins out of construction paper. Every accent on the paper was done with paper, without the use of marker, pencil, or crayon. The students focused on creating a piece of artwork that was similar to their classmates but uniquely their own. The work of art was done with the season we are in presently and using an animal that lives in a winter habitat. Karen Nieman on behalf of Kaila Russell (Witsil, Anderson) Mrs. Nieman focused her lesson on teaching the students how animals can be created from simple shapes and letters. The animal Mrs. Nieman chose for this lesson was making a winter penguin using black, white, and orange construction paper. The lesson started out by showing the students a book on penguins and talking to them about the different colors and shapes of the penguins. The students began their picture by drawing the penguins body and belly from a U shape on black and white construction paper. Next they drew the wings using a skinny D or a semi-circle on black construction paper. The eyes were made out of white and black circles and the beak an orange triangle. For the penguins feet, the students were given the option to draw and cut out a triangle shape or crown using the letter M or W. To ensure that the penguin was not floating on the page, the students added an iceberg to place their penguin on. This was made using a rectangle shape from light blue paper. Once the penguin was complete and placed on the ice, the students were given the option to add a hat and scarf. The color and shape of the hat were left up to the student. The scarf could be made out of felt or construction paper. Lastly, the students were given the option to add snow to their penguin picture. This was done by having the students dip a q-tip in white tempera paint to make snow flakes. It is always fun to end an art lesson with an interesting story associated with the lesson. Mrs. Nieman chose to bring a book called "Turtles Penquin Day" which is a very cute story. Kathleen Soleibe (Turner, Witsil) Mrs. Soleibe worked on making snowman with the students. Since the students just got back from winter break, Mrs. Soleibe took the opportunity to turn the students snowman drawings into 'thank you cards' and had them write a note to someone who did something special for them over the break. The kids were all super creative and thoughtful! This was a great way to add in a literacy component to an art lesson. Art At Home Warm and Cool Colors: Review the primary and secondary colors with your child. Talk about how these colors can also be grouped in another way. Warm and cool. Talk about things that make us feel warm and what colors they are. Like the sun is yellow and makes us feel warm, fire has yellow, red and orange and also makes us feel warm. Do the same for the cool colors (blues, greens and blue-violets). Have your child draw a picture that makes them feel warm and cool using only the warm and cool colors. Remind them that if they are going to use red, yellow and orange (warm colors) they must draw something that is warm. The same with greens, blues and purple (cool colors). Perspective: In drawing and painting, perspective is a method of creating the illusion of depth by means of converging lines. In simple terms that means that by taking and arranging your lines on a piece of paper, you can make your image appear as though it is three dimensional. Visualize standing at the side of the road. OK, good. Now visualize a car driving towards you way in the distance. As that car gets closer, you will see more of it... you will see the color of the car, the shape, the person driving it and so on. The same goes in a drawing. The farther away something is, the smaller and less detailed it is, the closer that something is, the more detailed it is.
