Medieval Castle Floor Plans
Every Medieval
castle was uniquely built depending on many factors. Over the centuries technologies and abilities changed
and this affected how the castle was built and what materials were used. Other factors that affected the floor
plan of a castle was the terrain it was built on, the surrounding landscape, the number of people it would
support and the wealth of the Nobles or Royalty who were building it. But Even with all these variations
there was one thing that all Castle Floor Plans had in common. They were all designed with life or death in
mind. A castle was a place of maximum safety and this was the rule that they all followed.
A Castle Floor Plan was designed with the safety and security of its occupants in mind - It had to withstand
sieges, battles, enormous and powerful siege engines, and attacks from land and often from sea. It had to
protect its occupants through centuries of warfare
With this maximum security and safety in mind there are some rules that many castle builders followed in
making their floor plans. And there were some very unique design ideas and tricks that they used. Let's
review some of these unique things found in medieval castles and look at some floor plans.
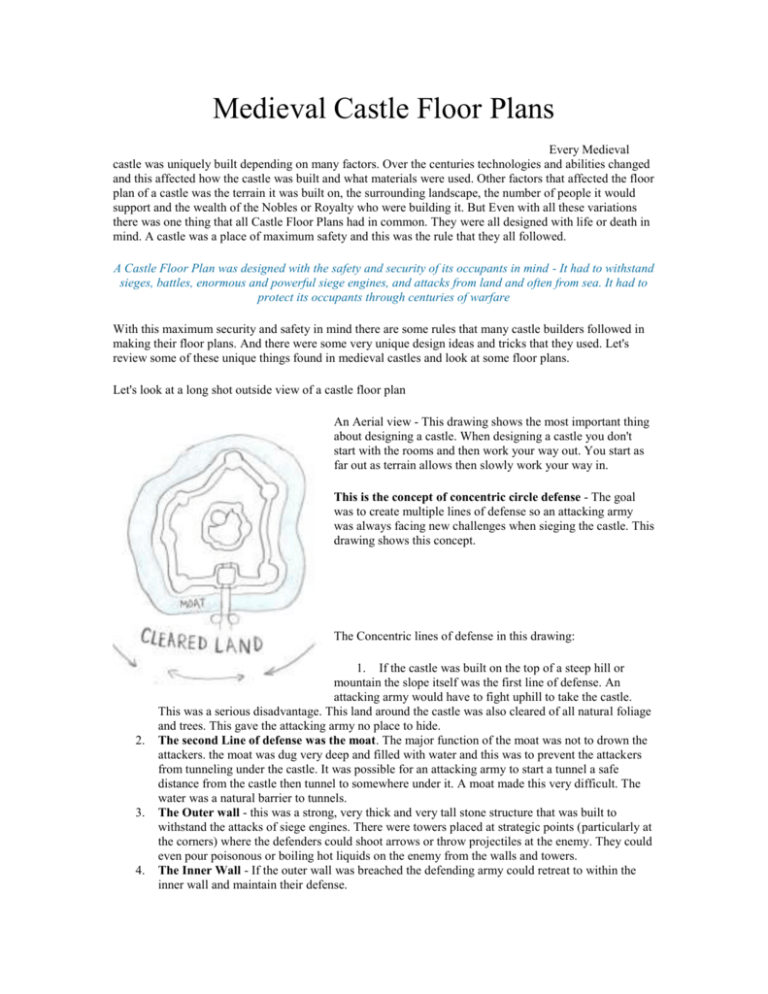
Let's look at a long shot outside view of a castle floor plan
An Aerial view - This drawing shows the most important thing
about designing a castle. When designing a castle you don't
start with the rooms and then work your way out. You start as
far out as terrain allows then slowly work your way in.
This is the concept of concentric circle defense - The goal
was to create multiple lines of defense so an attacking army
was always facing new challenges when sieging the castle. This
drawing shows this concept.
The Concentric lines of defense in this drawing:
2.
3.
4.
1. If the castle was built on the top of a steep hill or
mountain the slope itself was the first line of defense. An
attacking army would have to fight uphill to take the castle.
This was a serious disadvantage. This land around the castle was also cleared of all natural foliage
and trees. This gave the attacking army no place to hide.
The second Line of defense was the moat. The major function of the moat was not to drown the
attackers. the moat was dug very deep and filled with water and this was to prevent the attackers
from tunneling under the castle. It was possible for an attacking army to start a tunnel a safe
distance from the castle then tunnel to somewhere under it. A moat made this very difficult. The
water was a natural barrier to tunnels.
The Outer wall - this was a strong, very thick and very tall stone structure that was built to
withstand the attacks of siege engines. There were towers placed at strategic points (particularly at
the corners) where the defenders could shoot arrows or throw projectiles at the enemy. They could
even pour poisonous or boiling hot liquids on the enemy from the walls and towers.
The Inner Wall - If the outer wall was breached the defending army could retreat to within the
inner wall and maintain their defense.
5.
The Castle Keep was the center and heart of the defense. This was the last line of defense for the
inhabitants of the castle. It was where the living quarters often were and it usually had the highest
tower so they could look out over the whole landscape and castle.
You can see that the most important thing about a castle floor plan is the overall long picture of it as a
design. It was designed from the outside in and in concentric circles of defense. A sieging army would have
to overcome a series of difficult challenges if they were to take the castle.
Now Lets take a look at a more specific Castle floor plan and some of the very
ingenious methods that were used in design to defend the people of the castle.
Let's start at the outer wall of the castle. This illustration
shows the castle wall and a tower. The Stones at the top of the
wall and at the top of the tower have notches cut into them.
These are called crenellations and this is so the defenders of the
castle could either fire arrows or hurl other projectiles at the
attacking army while still remaining protected.. The height of
the tower was important because they could look out on the
surrounding lands and look along the length of the tower.
Another very interesting aspect of the
castle outer wall was this type of floor plan. The illustration on the right is a cut away
of the main gate and drawbridge over the moat. See how the main gate leads into a
large closed in area? This area was called the inner passage. It is the area between the
inner gate and the outer gate. . This area was a difficult trap for any attacking army. If
the attackers broke through the main gate the defenders could lower both portcullises
in the front and rear. Then the attackers would be trapped in this courtyard. Then the
castle inhabitants could fire arrows and other projectiles through the windows and
from the towers. These windows were often called Murder holes. This was a very
effective and dangerous trap and often times attacking armies would not even bother
with the main gate of the castle. They would attack other points along the outer wall
to avoid this trap.
Now Let's take a closer look at a complete Castle Floor Plan
This is a thumbnail sketch of a castle floor plan. On the next page we look at an
enlarged version of this plan and look at
some of the more important points in this
design. Large Castle Floor Plan
Copyright©2007-2010 Kalif Publishing - All
Rights Reserved
Name: _______________________________________ Date: ________________ Class: ________________
Medieval Castle Floor Plan
Answer the following questions before designing your own castle:
1. Above all else, castle floor plans were designed with what in mind?
2. Name 3 factors that affected a castle’s floor plan.
3. What were the 5 concentric lines of defense?
4. What are crenellations?
5. What was the importance of the inner passage?
Using a piece of graph paper, design a floor plan for your own castle. Drawn your
floor plan from the top-down view. Be sure to include all 5 of the concentric lines of
defense. Include what kind of terrain your castle will be built on. Identify and label
as many details of the castle’s defenses as you can. Finally, name your castle and use
the name you come up with as the title at the top of your paper.
For additional extra credit, create a 3 dimensional model of the castle you have
designed.

