Notes for some of the demonstrations with risk assessments
advertisement
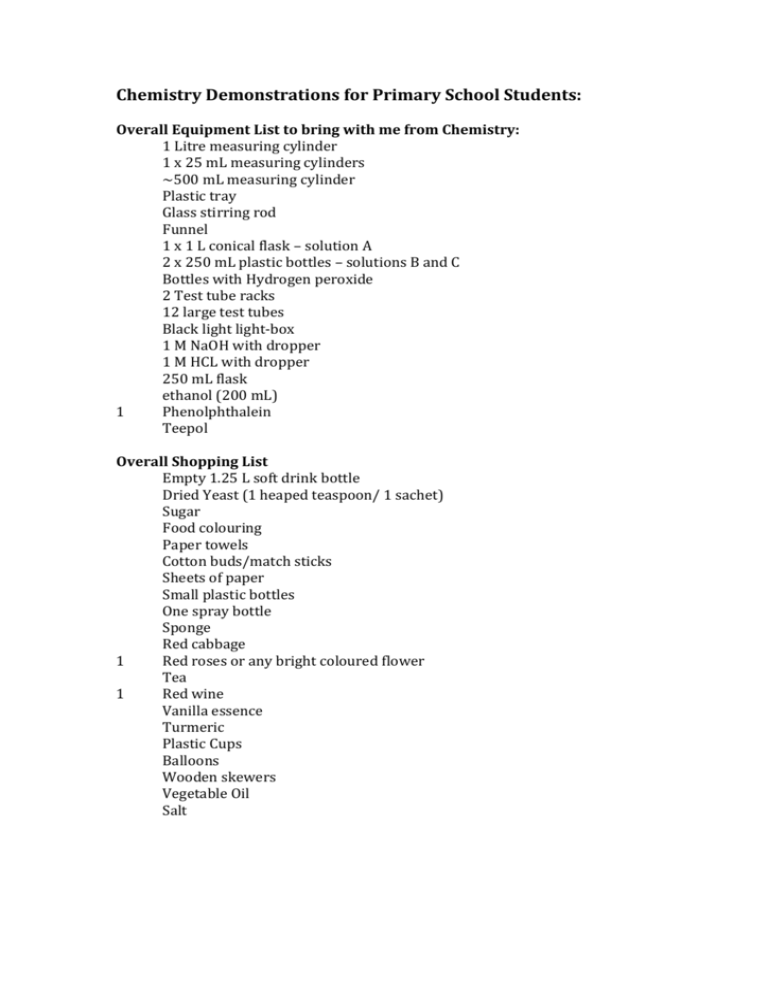
Chemistry Demonstrations for Primary School Students: Overall Equipment List to bring with me from Chemistry: 1 Litre measuring cylinder 1 x 25 mL measuring cylinders ~500 mL measuring cylinder Plastic tray Glass stirring rod Funnel 1 x 1 L conical flask – solution A 2 x 250 mL plastic bottles – solutions B and C Bottles with Hydrogen peroxide 2 Test tube racks 12 large test tubes Black light light-box 1 M NaOH with dropper 1 M HCL with dropper 250 mL flask ethanol (200 mL) 1 Phenolphthalein Teepol Overall Shopping List Empty 1.25 L soft drink bottle Dried Yeast (1 heaped teaspoon/ 1 sachet) Sugar Food colouring Paper towels Cotton buds/match sticks Sheets of paper Small plastic bottles One spray bottle Sponge Red cabbage 1 Red roses or any bright coloured flower Tea 1 Red wine Vanilla essence Turmeric Plastic Cups Balloons Wooden skewers Vegetable Oil Salt 1. Elephant’s toothpaste: Catalytic decomposition of H2O2 using MnO2/NaOH/detergent. Demonstration 7.8 Equipment: 1 Litre measuring cylinder 25 mL measuring cylinder plastic tray glass stirring rod Reagents: manganese dioxide, MnO2, 1 heaped nickel spoon full in sample jar sodium hydroxide, NaOH (1 M, 20 mL) hydrogen peroxide, H2O2 (30 % w/w, 30 mL) measured out and placed in an opaque H2O2 bottle. Teepol (20 mL) Preparation: Put large measuring cylinder in plastic tray Use 25 mL measuring cylinder to measure out NaOH Place MnO2, NaOH and Teepol in large measuring cylinder and stir Procedure: Add H2O2 Results: The volume of foam depends on the strength of the H2O2 2H2O2 -> 2 H2O (l) + O2 (g) Caution: NaOH is corrosive, avoid contact with skin. In case of contact with skin wash with plenty of water. H2O2 is an oxidizing agent and is corrosive and can explode when heated. The required volume of 30 mL will be poured into an opaque bottle for transport. It will then be poured directly into the measuring cylinder for the experiment. Contact with skin will be avoided and eye protection will be worn. In case of contact with skin wash with plenty of water. O2 is potentially explosive, perform experiment in a well ventilated area with no open flames. Clean up: Mop up the foam with a paper towel and dispose of in garbage bin, cylinder and tray can be rinsed with water, which can be washed down the sink. 1b Variation on Elephants toothpaste Equipment: Empty 1.25 L soft drink bottle Plastic cup Funnel Plastic tray Reagents: Dried Yeast (1 heaped teaspoon/ 1 sachet) Sugar (1/4 teaspoon) Warm Water (4 tablespoons) Black or other colour food colouring (not cochineal) Hydrogen Peroxide (6% 125 mL) Teepol (20 mL) Preparation: Put soft drink bottle in plastic tray Place Black food colouring, Yeast, Sugar and warm water in plastic cup and stir, allow to rest for about 5 minutes Pour H2O2 into soft drink bottle and add Teepol and food colouring, swirling to mix Procedure: Use funnel to pour yeast solution into bottle. Results: The volume of foam depends on the strength of the H2O2 2H2O2 -> 2 H2O (l) + O2 (g) Caution: H2O2 is an oxidizing agent and is corrosive and can explode when heated, the more dilute solution is much safer. O2 is potentially explosive, perform experiment in a well ventilated area with no open flames. Clean up: Mop up the foam with a paper towel and dispose of in garbage bin, soft drink bottle and tray can be rinsed with water, which can be washed down the sink. 2. The oscillating iodine reaction Three solutions are added together quickly, the resultant solution then oscillates between a golden colour, dark blue and colouless, finally stopping at a deep blue colour. Demonstration 7.5, This experiment will be made at half the volumes of the lecture demonstrations Equipment: 4 Reagents: 4 4 4 4 4 3 x 250 mL conical flasks + stoppers 2 x 250 mL plastic bottles 1 x 1 L conical flask magnetic heater/stirrer and spin bar 4 long stirring rod potassium iodate, KIO3 (14.5 g - fresh) sulfuric acid, H2SO4 [5 ml of 6M] malonic acid, CH2(CO2H)2 (5.25 g) manganese sulfate, MnSO4 .4H2O (1.1 g) or MnSO4 .H2O (0.84 g) hydrogen peroxide, H2O2 (30 w/v%, 150 g - fresh) 4 Vitex (starch solution) distilled water Preparation: Solution A; label the 1 L flask “A” Put 350 mL distilled water in the flask Place on a warm hotplate with stirring bar 4 Add KIO3 (14.5 g) and 6 M H2SO4 (5 mL) Stir to dissolution. 4 Remove from heat. 4 Make up to the 1Lmark with distilled water. 4 Stopper lightly. 4 Allow to cool Seal with parafilm for transport Solution B; label one 250 mL flask “B” Mark at 250 mL Put 200 mL distilled water in the flask Add MnSO4 .4H2O (1.1 g), malonic acid (5.25 g) and half a nickel spoon of Vitex indicator Stir to dissolve Make up to 250 mL mark with distilled water and transfer to a plastic bottle labeled “B”. Solution C; label one 250 mL flask “B” Mark at 250 mL Add H2O2 (30% 148.2 g) and make up to 250 mL with distilled water Transfer to an opaque plastic bottle labeled “C” – an empty H2O2 bottle. Procedure: Transfer solutions B and C into the 2 L flask, A Results: Initially, the solution will be clear and colourless. After several seconds a rapid colour change to golden brown will occur. After several further seconds the solution will change to deep-blue, then colourless again. The above sequence should repeat itself up to 15 times before the solution settles to a permanent, deep blue. The overall reaction is: IO3– +2H2O2 +CH2(CO2H) +H+ 5-> ICH(CO2H) +2O2 +3H2O Caution: The individual reagent solutions will be made in the Chemistry School and solutions B and C will be decanted into plastic bottles for transport. The made up concentrations of all reagents are very low, with the exception of H2O2, and do not constitute a hazard. H2O2 is an oxidizing agent and is corrosive and can explode when heated. The required volume of solution C will be poured into an opaque bottle for transport and poured into the flask directly. Contact with skin will be avoided and eye protection will be worn. In case of contact with skin wash with plenty of water. The O2 evolved is potentially explosive, perform experiment in a well ventilated area with no open flames. Clean up: The reaction flask will be returned to the chemistry school and any I2 formed will be reduced to iodide by addition of sodium thiosulfate. The flask will be cooled, if necessary, and the cold solution can be flushed down the sink. 3. Natural pH Indicators Demonstration 5.8 with the addition of vanilla and turmeric Equipment: 2 Test tube racks 2 large test tubes for each indicator used, 12 total 250 mL flask 200 mL plastic Bottle 2 x plastic cups Reagents: 6 6 6 6 hydrochloric acid, HCl (1 M) sodium hydroxide, NaOH (1 M) ethanol (200 mL) red cabbage red roses or any bright coloured flower tea red wine vanilla essence turmeric 6 Preparation:6 Boil red cabbage in 200 mL of water to extract the purple colour and place in bottle for transport Extract the pigment from the flowers by soaking them in ethanol for about half an hour in the 250 mL flask (do this at school, first, before the other demonstrations). Dilute 30 mL of red wine 1:6 with water in a plastic cup. 6 Make a strong 200 mL cup of tea. Cool and place in plastic bottle. Dissolve 2 teaspoons of turmeric in about 200 mL of water in plastic cup. 6 Pour some of each solution into each of the two test tubes. Procedure Add a few drops of HCl to one test tube and a few drops of NaOH to the other Results: Each of the pigments has a distinct alkaline and acid colour and can therefore be used as a pH indicator. Vanilla is an olfactory (ie smell) indicator. You can’t smell the vanilla in a basic solution because the vanillin molecule ionizes although you can smell it in a neutral or acidic solution Caution: HCl and NaOH are corrosive, avoid contact with skin. In case of contact with skin wash with plenty of water. Ethanol is volatile and flammable, perform in a well ventilated area with no open flames. Clean up: All solutions can be flushed down the sink. 4. Secret Writing Equipment: Cotton buds/ matchsticks Sheets of paper Plastic bottle One spray bottle One or two plastic cups Sponge Black light light-box Reagents: Phenolpthalein indicator Laundry detergent Starch solution (vitex or rinse water from rice or potatoes or cornflour solution; 1 teaspoon of cornflour) Tonic Water I2 (about 1 nickel spoon full), or tincture of iodine (1 mL) Water Preparation: Put the vitex or starch solution into a plastic bottle. If using corn flour, mix a teaspoon of corn flour with ¼ cup of cold water in plastic cup. Cook in a microwave for 1 minute, stirring after 15 seconds and at the end. Cool. Dissolve some laundry powder in water in the spray bottle. Dissolve the I2 in about 10-15 mL of water and put in the plastic cup. Procedure: Use a cotton bud to write on the paper with the phenolphthalein, starch solution and tonic water. Let the paper dry. “Develop” the writing, spraying with the laundry powder solution for the phenolphthalein to show pink writing and sponging over the I2 solution for the starch show blue writing. The quinine in tonic water fluoresces and can be seen using the black light box. Caution: Phenolphthalein is a possible carcinogen and is dissolved in methanol and ethanol, which are volatile and flammable. Gloves should be used and skin contact avoided. In case of contact with skin wash with plenty of water. Phenolphthalein writing will only be done by me, not the students, in a well ventilated area with no open flames. Iodine is an antibacterial and can potentially stain skin and clothes. The iodine solution should not be drunk and gloves should be worn sponging the iodine over the paper. Clean up: All solutions can be flushed down the sink. Awesome Balloon Experiment Equipment: Balloons Wooden skewers Vegetable Oil Paper towels Preparation: Inflate and tie off the balloons so that they are not too inflated Tap the sharp pointed ends of the skewers on the table to slightly blunt them Use the paper towel to coat the skewer with vegetable oil. Procedure: Slowly twist the skewer through the very top of the balloon (where the balloon is thickest) using gentle twisting motion. Keep pushing and twisting until the skewer emerges near the balloon tie. Pull and twist the skewer out slowly through the tied end. As the skewer goes completely through the top hole the balloon will slowly deflate. After you’ve pulled the skewer out jab the balloon with it and it will pop. Alternately you can poke multiple skewers through the balloon. Results: This demonstration indicates that the polymer chains that make up the balloon can rearrange themselves about the skewer, sealing the hole, as long as you move the skewer slowly. If you move it too fast (like when you pop the balloon at the end) there isn’t enough time to reseal the hole. Caution: The skewers are sharp and can cause injury, do not let students play with them. Clean up: All items can be disposed of in a garbage bin. Salt or Sugar Lava Lamp Equipment: Large glass or ~500 mL measuring cylinder Reagents: Vegetable Oil Salt or Sugar Food Colouring Water Procedure: Pour about 5-10 cm of water into the glass or measuring cylinder. Pour in about ½ cup vegetable oil. Add a few drops of food colouring. Sprinkle sugar or salt generously over the top. Results: Oil is lighter and less dense than water so it floats. Water and oil are immiscible liquids. This means they don't mix and form separate layers. The food colouring is denser than the oil and so sinks through the oil before dissolving in the water underneath (some colours will have components that are soluble in the oil). Salt and sugar are heavier than water so when you pour them into the liquid, they sink to the bottom. As they sink, they carry a blob of oil with them. The sugar and salt then dissolve in the water and release the oil, and it floats back up to the top. As the oil blobs float back up to the top, this experiment looks very much like a lava lamp. A lava lamp however, contains hot wax which rises to the top of the lamp, cools and then falls. Clean up: All items can be disposed of down the sink.
