Handout
advertisement
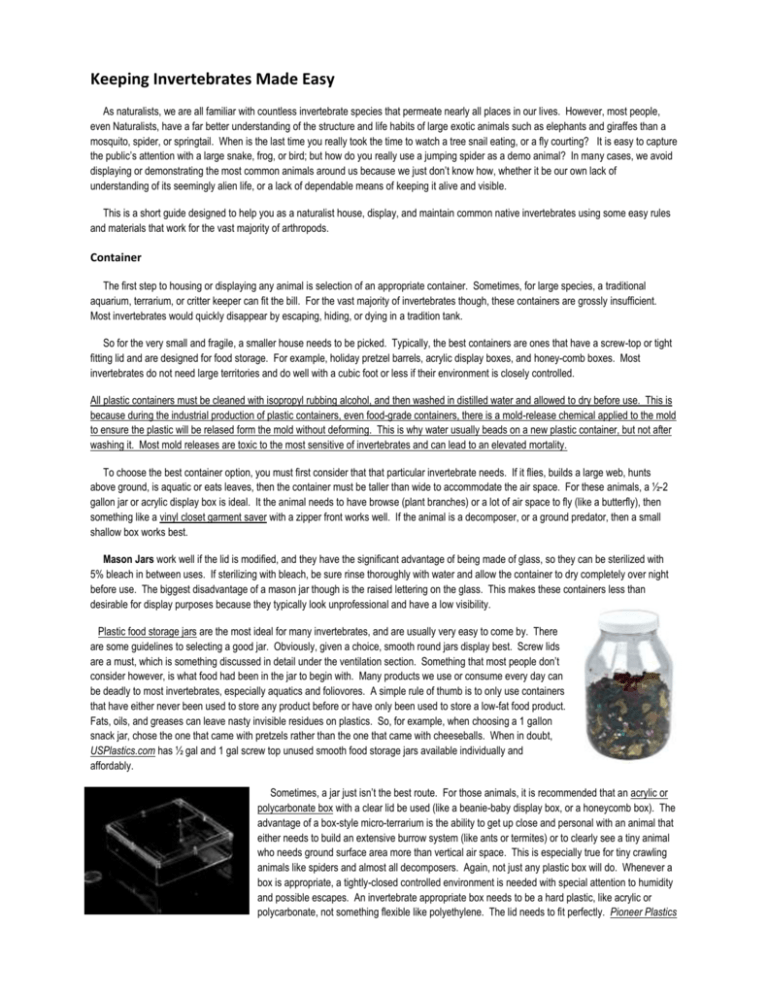
Keeping Invertebrates Made Easy As naturalists, we are all familiar with countless invertebrate species that permeate nearly all places in our lives. However, most people, even Naturalists, have a far better understanding of the structure and life habits of large exotic animals such as elephants and giraffes than a mosquito, spider, or springtail. When is the last time you really took the time to watch a tree snail eating, or a fly courting? It is easy to capture the public’s attention with a large snake, frog, or bird; but how do you really use a jumping spider as a demo animal? In many cases, we avoid displaying or demonstrating the most common animals around us because we just don’t know how, whether it be our own lack of understanding of its seemingly alien life, or a lack of dependable means of keeping it alive and visible. This is a short guide designed to help you as a naturalist house, display, and maintain common native invertebrates using some easy rules and materials that work for the vast majority of arthropods. Container The first step to housing or displaying any animal is selection of an appropriate container. Sometimes, for large species, a traditional aquarium, terrarium, or critter keeper can fit the bill. For the vast majority of invertebrates though, these containers are grossly insufficient. Most invertebrates would quickly disappear by escaping, hiding, or dying in a tradition tank. So for the very small and fragile, a smaller house needs to be picked. Typically, the best containers are ones that have a screw-top or tight fitting lid and are designed for food storage. For example, holiday pretzel barrels, acrylic display boxes, and honey-comb boxes. Most invertebrates do not need large territories and do well with a cubic foot or less if their environment is closely controlled. All plastic containers must be cleaned with isopropyl rubbing alcohol, and then washed in distilled water and allowed to dry before use. This is because during the industrial production of plastic containers, even food-grade containers, there is a mold-release chemical applied to the mold to ensure the plastic will be relased form the mold without deforming. This is why water usually beads on a new plastic container, but not after washing it. Most mold releases are toxic to the most sensitive of invertebrates and can lead to an elevated mortality. To choose the best container option, you must first consider that that particular invertebrate needs. If it flies, builds a large web, hunts above ground, is aquatic or eats leaves, then the container must be taller than wide to accommodate the air space. For these animals, a ½-2 gallon jar or acrylic display box is ideal. It the animal needs to have browse (plant branches) or a lot of air space to fly (like a butterfly), then something like a vinyl closet garment saver with a zipper front works well. If the animal is a decomposer, or a ground predator, then a small shallow box works best. Mason Jars work well if the lid is modified, and they have the significant advantage of being made of glass, so they can be sterilized with 5% bleach in between uses. If sterilizing with bleach, be sure rinse thoroughly with water and allow the container to dry completely over night before use. The biggest disadvantage of a mason jar though is the raised lettering on the glass. This makes these containers less than desirable for display purposes because they typically look unprofessional and have a low visibility. Plastic food storage jars are the most ideal for many invertebrates, and are usually very easy to come by. There are some guidelines to selecting a good jar. Obviously, given a choice, smooth round jars display best. Screw lids are a must, which is something discussed in detail under the ventilation section. Something that most people don’t consider however, is what food had been in the jar to begin with. Many products we use or consume every day can be deadly to most invertebrates, especially aquatics and foliovores. A simple rule of thumb is to only use containers that have either never been used to store any product before or have only been used to store a low-fat food product. Fats, oils, and greases can leave nasty invisible residues on plastics. So, for example, when choosing a 1 gallon snack jar, chose the one that came with pretzels rather than the one that came with cheeseballs. When in doubt, USPlastics.com has ½ gal and 1 gal screw top unused smooth food storage jars available individually and affordably. Sometimes, a jar just isn’t the best route. For those animals, it is recommended that an acrylic or polycarbonate box with a clear lid be used (like a beanie-baby display box, or a honeycomb box). The advantage of a box-style micro-terrarium is the ability to get up close and personal with an animal that either needs to build an extensive burrow system (like ants or termites) or to clearly see a tiny animal who needs ground surface area more than vertical air space. This is especially true for tiny crawling animals like spiders and almost all decomposers. Again, not just any plastic box will do. Whenever a box is appropriate, a tightly-closed controlled environment is needed with special attention to humidity and possible escapes. An invertebrate appropriate box needs to be a hard plastic, like acrylic or polycarbonate, not something flexible like polyethylene. The lid needs to fit perfectly. Pioneer Plastics specializes in entomological-safe polycarbonate and acrylic boxes at very affordable rates. Many coin, hobby, and collectable stores also carry similar display boxes. When escape is a serious concern, or feeding is difficult because the prey is flying, one very simple modification to nearly any plastic container is to add a port with a small screw lid. The best way to do this is to cut the top off of a beverage bottle right below the brim of the neck. Cut a hole in the container the size of the inner diameter of the lid from the beverage container and save both the sealing ring and lid. Remove the ring, but keep the teeth on it intact. Insert the neck of the bottle through the hole from the inside of the container and replace the ring from the outside. A little glue might be in order to keep the fit snug. Now the cap can be opened and closed easily, giving a very small access point without compromising the containers actual ability to open and close. Ventilation For almost all invertebrates, the biggest husbandry challenge is humidity. Even if you are only planning to maintain the animal on an enclosure for a few hours just to use for a program and then release it, the fatality rate may be shockingly high. Most arthropods do not drink, and can not control moisture loss through their respiratory systems. It does not take long at all to dry out if your body mass is less than a gram. For that reason, well ventilated terrariums can quickly be the death of an invertebrate. 60-80% relative humidity is perfect for most. The easiest way to control that is a combination of low ventilation and moist substrate. A jar or box with no holes or screens will not suffocate most small arthropods. Unless a container is completely water-tight, the air exchange around a lid can support an insect or spider. Obviously, for most, that isn’t ideal though. So, here are some guidelines and options. To make tiny holes in an acrylic or polycarbonate lid, a large needle and a lighter are sufficient. For screened over larger holes, a metal mesh (no vinyl window screen) hot-glued or siliconed in place works best. Silicone, while nice to work with, tends to peel off of plastic surfaces more than hot-glue does. Both are invertebrate safe after 24 hours and an isopropyl wash. Bioquip is an excellent source of fine insect-friendly metal meshes. For the quicker cheaper option, the mesh commonly used on tea strainers is about perfect material for most invertebrate enclosures that do not require a full-lid screen. First take a good look at where the animal is found. If it is a large spider dangling from a thin web in open air space on a dry cool day, chances are it wants a well-ventilated container, like a jar with a large screen in the lid. If it is a leaf-eater, or has long skinny appendages, then chances are it needs a high humidity. It is lives on/in the ground or is a decomposer, then it needs nearly no ventilation, but a rather moist substrate. For decomposers, a small box needs no ventilation. A moderate box or jar needs a few tiny holes, or one small hole with a piece of screen over it. In a large container, maybe a single large hole (no more than 20% of the lid) with a screen. The substrate should be checked weekly for moisture. For open air predators, ventilation should be a screen opening on the lid, which is why hard screw-on lids are a must on jar-type enclosures. Any animal in a a container with a screen lid should be misted with a spray bottle daily. For foliovores and long-slender appendaged animals, one or two 1” diameter holes with mesh screen in a 1-2 gal jar are sufficient. Any animal in a container with a screen lid should be misted with a spray bottle daily. Substrate After choosing the proper combination of container and ventilation, choosing the perfect substrate is the next major hurdle. Basically, there are six major substrate materials that are common to use. Almost all invertebrates will thrive on some combination of these materials. We will discuss the useful traits of each, and then make some recommendations of which ones to use in various applications. o o o o o o Peat Sand Coconut Husk Fiber Aquarium Gravel Leaf compost Hydrostone (high-grade plaster) Peat is heavily decayed plant matter, and can absorb an extreme amount of moisture over a long period of time, but it is prone to mold and drying out easily. Once it does dry out, it becomes very dusty, which can clog breathing apparati, as well as desiccate the invertebrate. Peat should never be used alone as a substrate if the container has any screen ventilation. Sand, while abrasive, is very good at storing water and maintaining air pockets in the substrate. The problems with sand is that it wicks water very quickly and tends to promote algal growth. Sand can be used exclusively, but only with aquatics and animals that are found on beaches. It is a rare animal that thrives on sand. Coconut fiber husk is a peat-like substrate solids at pet stores and lawn and garden stores. It is a nutrient poor fibrous sediment that has some very unusual properties. First, it is absorbs water quickly, and dries quickly, both unlike peat. Second, it is anti-microbial. This is both useful and dangerous when housing invertebrates. Coconut fiber must never be used in an enclosure with decomposers because it can destroy their gut biota and cause them to starve to death while still eating. Aquarium gravel is very straight forward. It holds water in large pore spaces and drains easily. The big disadvantage to gravel is that fact that it so readily shifts and can crush small animals unless it is mixed with something else like sand to give it some rigidity. Leaf compost is the best substrate for any animal that is a decomposer. It holds moisture well. It is often full of other decomposers. It is both the substrate and the food. Again though, there are some things that can go wrong here. First of all, just because it was a leaf doesn’t mean it was safe, or nutritious. Hardwood tree leaves make the best compost by far, especially if a little hardwood mulch or pulp is mixed into it. If using leaf litter, make sure it is moist, and it might help to mix in a little crushed bird seed. Most decomposers will thrive on it. Then there is Hydrostone, possible one of the best kept secrets of invertebrate husbandry. Water drops are life-threatening enemies if you weigh less than one, but moisture is essential. Hydrostone is often a cure for both problems. Hydrostone is a high grade (finely powdered) plaster that sells for around $30/50lb bag. Realistically, if you can find it, regular Plaster of Paris can also work fine, but isn’t as nice to work with. Plaster, when as a dry powder, is the mineral anhydrite, which is very similar to gypsum, but lacks the H2O molecule bound in its crystal structure. When anhydrite is exposed to water, it recrystallized into a matrix of gypsum crystals and gives off a lot of heat. By powdering the anhydrite, you can mix it with water and pour it into a mold to cause that matrix to crystalize in a particular shape. What makes it perfect for a substrate is really not obvious. When the plaster powder is mixed with water into a slurry, the volume ratio of powder to water will determine how close the interlocking crystals are when they grow. Typically it is almost a 1:1 ratio. During the crystallization, the heat of the reaction will evaporate the free water, leaving a honeycomb-like matrix of pore spaces supported by a sturdy crystal structure. You can make the pore volume larger or smaller by using more of less water in the original mixture. The result is a substrate that feels like stone, but can hold a lot of water, which readily evaporates to maintain a constant humidity in the container. You can even add a few drops of concrete or mortar dye to color the Hydrostone, making it a more attractive display. If water-based pottery clay is shaped and placed in the container before Hydrostone is poured, then the clay can be removed after curing leaving chambers and burrows for invertebrates to seek safety in while still clearly on display. This strategy works miracles for ants and spiders. Combination substrates are usually the way to go unless leaf compost is used. For moisture retention, a mixture of 50% peat and 50% coconut fiber works best. The coconut fiber reduces the mold that the peat tends to grow, and absorbs water quickly, which then slowly saturates the peat. For inverts that need an airier soil, or do not spend much time on their substrate, a mixture of 50% peat and 50% sand, or 35% peat, 35% coconut fiber and 30% sand works very well. Décor, Hides, and Dishes Generally natural props work best for most invertebrates. Things like bark, stones, leaves, sticks, etc. provide the best cover or perching points. Bottle caps make perfect dishes. Sometimes though a bit more structure is desired or required. For those applications, a sculpting or plumbing epoxy is suggested. Apoxy Sculpt by Aves is an animal safe, aquarium safe molding compound used commonly be zoos and aquaria. It is available in a variety of natural colors and blends well with other substrate materials to give you more control over the display of your invertebrates. Food Food is often the greatest unknown for any invertebrate you find. Field guides are essential to teasing out a diet. Realistically, if the animal is to be used for a program, and released, then it should be able to be kept for a couple days even without having solved the food mystery. Many invertebrates do not eat every day. Predators are easy. The trick is just to find a prey that is the right size and moves the right way. Fruit flies, grain moths, crickets are all easy to find in the warm months, and easy to raise indoors year round. Plant eaters can be easy while the plant is in season, but much harder the rest of the year. Most foliovores will eat frozen leaves of the right plant. Branches, leaves and seed pods can be frozen during their prime in freezer bags that have been largely deflated to minimize frost bite so that invertebrates can be displayed and used even beyond the end of their outdoor season. During times when clippings are available, water spikes are very useful for keeping turgor pressure in clippings without the insects being able to drown. Decomposers are very easy to maintain because they basically eat their substrate, with the occasional sweet potato or fish flake treat. Nectar eaters can be a little tricky. Most nectar eaters will take 10-20% sugar water, but some won’t. If they don’t take the sugar water, try 15% honey water. If they are ants, remember that ant adults eat only liquids, but larvae eat only solids, so you have to supplement with dead insects like fruit flies or pinhead crickets. Many nectar eaters thrive on nectar alone for a few weeks, but ultimately need a supplement of bee pollen for protein. Legalities Every naturalist knows you should not just capture an owl and use it for programs. Most also know that the majority of reptiles, amphibians, mammals, and birds require special permitting to possess. The same is not as true for most invertebrates. In general, any invertebrate you find can be maintained and displayed in the same place you found it. There are exceptions for a few endangered, protected, or invasive species. Each state or county of course may have their own restrictions, but generally the largest set of rules governing the possession of invertebrates are set and enforced by APHIS, a division of the USDA and are designed to restrict the transport of species of invertebrates that have potential of becoming plant pest species. APHIS requires permits to possess many exotic insects, but natives are generally unregulated so long as they are not taken across state borders, and even then only if they are terrestrial and a mantis (except Chinese Mantis) or eat live plant parts at one or more of their life stages. Non-mantis predators and decomposers generally do not require permits. When in doubt, it never hurts to call or email and ask. APHIS is very encouraging of captive invertebrate education and display. Invertebrate Husbandry and Display is an Art Like any animal husbandry, experience makes all the difference. Many species have baffled scientists for decades of failed husbandry. Don’t be discouraged if you aren’t the one to crack the recipe for perfect husbandry for any given species. However, if you follow the guidelines presented here, and practice the art, many of the species you commonly encounter can become great program and display animals . This Guide is a summary of tips and tricks developed from over a decade and a half experience in invertebrate husbandry, exhibit design, and program use. For questions, comments, or custom enclosure requests, please contact Tony and Lauren Kramer (513) 384-6862. Tony – isotelus@hotmail.com Lauren – Christ_in_me_uc@hotmail.com
