Part 1. Create or customize your digital badge.
advertisement
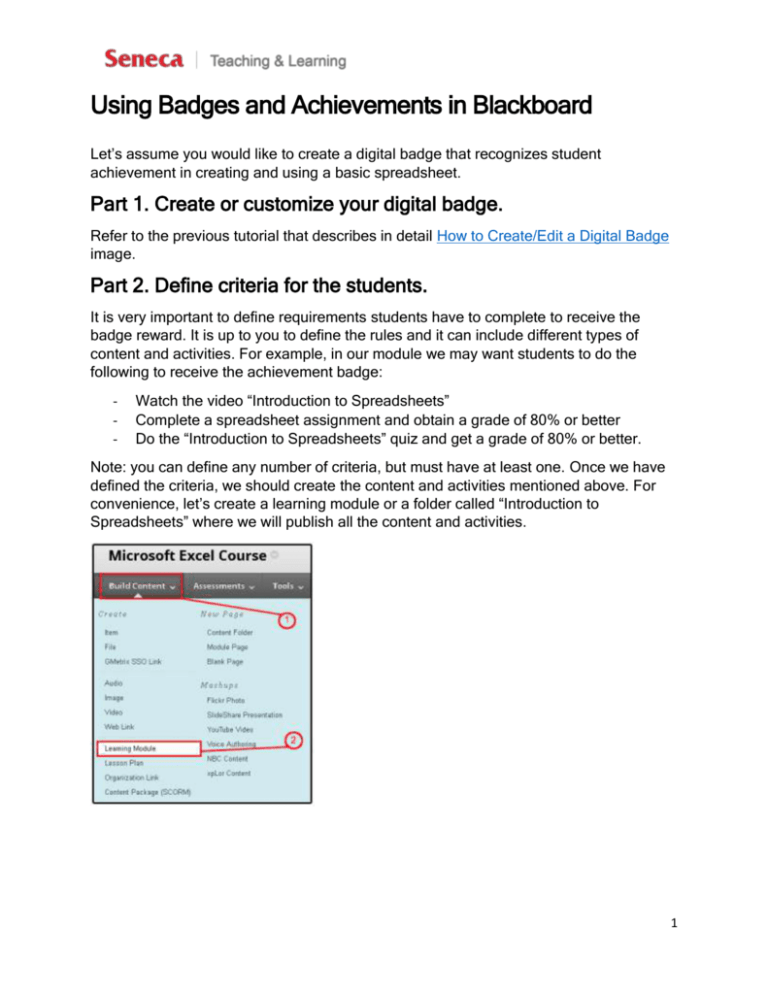
Using Badges and Achievements in Blackboard Let’s assume you would like to create a digital badge that recognizes student achievement in creating and using a basic spreadsheet. Part 1. Create or customize your digital badge. Refer to the previous tutorial that describes in detail How to Create/Edit a Digital Badge image. Part 2. Define criteria for the students. It is very important to define requirements students have to complete to receive the badge reward. It is up to you to define the rules and it can include different types of content and activities. For example, in our module we may want students to do the following to receive the achievement badge: - Watch the video “Introduction to Spreadsheets” Complete a spreadsheet assignment and obtain a grade of 80% or better Do the “Introduction to Spreadsheets” quiz and get a grade of 80% or better. Note: you can define any number of criteria, but must have at least one. Once we have defined the criteria, we should create the content and activities mentioned above. For convenience, let’s create a learning module or a folder called “Introduction to Spreadsheets” where we will publish all the content and activities. 1 Once we have created the Learning Module/Folder, add the content and/or activities. You can refer to our other tutorials on how to add videos, assignments or quizzes to a content folder or learning module. When done it should look something like this: 2 Part 3. Adding the achievement. The last step is to create the achievement. Be sure that you have created your content and activities before creating the achievement. 1. Click Achievements in the Course Tools area within the Control Panel. 2. Click Create Achievement and choose either Milestone or Custom achievement. (Note: it is not recommended to create a Course Completion achievement.) 3 3. In the Create Achievement window provide the name and description of the achievement. In Step 1 (Achievement Information) click the Browse button. 4. Choose the location in the course for the achievement. 4 You will be redirected back to the previous page and the location of the achievement will be displayed. Click Define Triggers. Setting Rules These settings will allow you to set the criteria we have defined in Part 2. Follow the next steps to set up the rules: 1. Provide a name for the rule and the deadline for completion (if required) 2. You can make the achievement option available only for specific users or group (if required) 3. Select a Grade Column and conditions for students to obtain an achievement. Click Add Item to add the condition. In our example we have to choose the quiz and the assignment from the list. 5 3.1. Choose the assignment from the Grade Center Column. 3.2. Then, as we want users to get 80% or more for this assignment to qualify for the achievement badge, we have to define this rule in the next line assigning percent greater than or equal to 80. Click Add Item to submit the condition. 3.3. Repeat the steps from 3.1-3.2 to set the quiz conditions. Finally you will see that both conditions are defined. 6 3.4. The next step is to add the last condition, i.e., the user has to watch the video. We will do it in the Review Status area (Step 5). Click Browse, find the item and click Add. Once you have done so will see the condition at the bottom of Review Status block. 4. Once all three conditions have been added, click Select Reward. Selecting Reward 1. In the form, provide Reward Details information. The only required information is the Issuer Name. 7 2. Click Browse My Computer and find the badge created in Part 1 on your computer. Click Upload Badge 3. Once the badge is successfully uploaded, it will appear in the list of badges. Choose it and click Save and Exit. 4. You should now see the list of achievements you have created. 8 Then, once students earn their reward they will be notified and will find the badge in Tools – Achievements. 9
