EXPERIMENT 1 - staff.city.ac.uk
advertisement

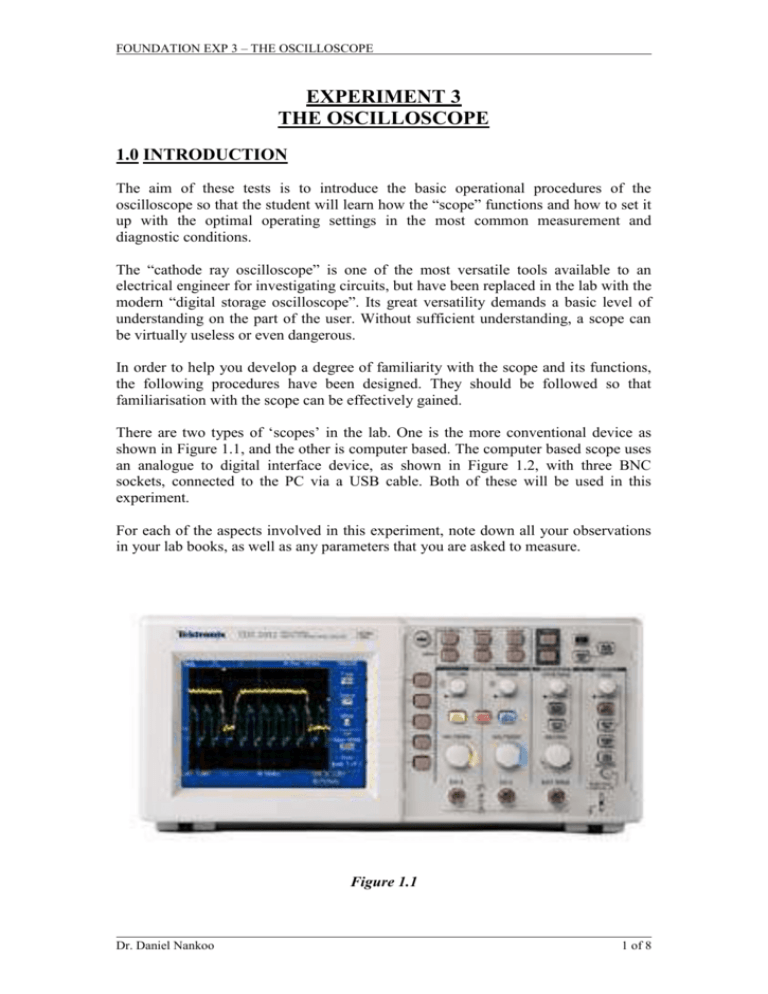
FOUNDATION EXP 3 – THE OSCILLOSCOPE EXPERIMENT 3 THE OSCILLOSCOPE 1.0 INTRODUCTION The aim of these tests is to introduce the basic operational procedures of the oscilloscope so that the student will learn how the “scope” functions and how to set it up with the optimal operating settings in the most common measurement and diagnostic conditions. The “cathode ray oscilloscope” is one of the most versatile tools available to an electrical engineer for investigating circuits, but have been replaced in the lab with the modern “digital storage oscilloscope”. Its great versatility demands a basic level of understanding on the part of the user. Without sufficient understanding, a scope can be virtually useless or even dangerous. In order to help you develop a degree of familiarity with the scope and its functions, the following procedures have been designed. They should be followed so that familiarisation with the scope can be effectively gained. There are two types of ‘scopes’ in the lab. One is the more conventional device as shown in Figure 1.1, and the other is computer based. The computer based scope uses an analogue to digital interface device, as shown in Figure 1.2, with three BNC sockets, connected to the PC via a USB cable. Both of these will be used in this experiment. For each of the aspects involved in this experiment, note down all your observations in your lab books, as well as any parameters that you are asked to measure. Figure 1.1 Dr. Daniel Nankoo 1 of 8 FOUNDATION EXP 3 – THE OSCILLOSCOPE Figure 1.2 2.0 EQUIPMENT REQUIRED 1 Tektronix TDS2002 Digital Storage Scope 1 USB Instruments Scope BNC-BNC leads (Figure 2.1) BNC-croc clipped leads (Figure 2.2) Frequency Generator and Counter Breadboard Figure 2.1 Dr. Daniel Nankoo 2 of 8 FOUNDATION EXP 3 – THE OSCILLOSCOPE Figure 2.2 3.0 BASIC INVESTIGATION 3.1 INITIALISATION The type of scope installed in the lab is the Tektronix TDS2002 digital storage oscilloscope. These scopes are small, lightweight, benchtop packages that can be used to take ground-referenced measurements. To switch on the scope, push the button located to the left on the top surface of the device. After a few seconds, the main scope screen will appear, which has a black background with dotted horizontal and vertical lines. The scope has two channels, (so that two signals can be displayed simultaneously) Channel 1 (CH1) and Channel 2 (CH2). Channel 1 and its related controls have a yellow designation. This also means that when a signal is connected to the CH1 input, a yellow trace will appear. Channel 2 is designated with the colour blue. First, it is necessary for the yellow (CH1) trace to be visible in the centre of the screen in order to initialise Channel 1. This is achieved by first pressing the yellow CH1 MENU until in the bottom left of the main screen you see yellow text saying “CH1” followed by a voltage value. If in the same part of the screen you see blue text, (CH2, voltage value), press the blue CH2 MENU button until this disappears. To initialise Channel 1, press the AUTO SET button, which is located in the top right hand corner of the scope controls. You should now see the yellow Channel 1 horizontal trace in the centre of the screen. Can you initialise Channel 2 in the same way? Next, you are to display a signal from the Function Generator on Channel 1 of the scope screen. Connect a BNC-BNC (BNC stands for Bayonet Neill Concelman) cable from Ch1 (Channel 1) of the scope to the OUTPUT socket Dr. Daniel Nankoo 3 of 8 FOUNDATION EXP 3 – THE OSCILLOSCOPE on the Function Generator, which is the lower of the three BNC sockets on the far lower left of the workstation. On the frequency generator, locate the 50/600 switch, and make sure it is out (50 selected). On the DISPLAY button, make sure F/G is selected, which allows the frequency to be displayed on the digital readout of the frequency counter (upper left quadrant). Select the sinusoidal function on the generator and select the X100K frequency multiplier button. Use the dial to obtain a frequency of 20kHz. To the left of the scope control panel, there are five buttons that go from top to bottom. On the right of the scope screen there are five parameters that correspond to the five function buttons. If these five parameters are not displayed, press the yellow CH1 MENU button in order to bring them up. From top to bottom, the functions are: i) Coupling – set this to AC by pressing the button to the right ii) BW limit – set to off iii) Volts/div – set to Coarse iv) Probe – set to 1x v) Invert – set to off Note that the coupling button, when set to Ground, displays a horizontal line (yellow for CH1, blue for CH2) which can be moved vertically by turning the VERTICAL POSITION dials. This function can be used to select an alternative zero reference if desired. Experiment with this and make a note in your lab books regarding your observations. 3.2 BASIC CONTROLS Figure 3.1 Figure 3.1 shows the screen of the scope, and what the axes represent. Use the SEC/DIV (seconds per horizontal division) dial and VOLTS/DIV (volts per vertical division) dial for Channel 1 (yellow) of the scope controls to obtain a Dr. Daniel Nankoo 4 of 8 FOUNDATION EXP 3 – THE OSCILLOSCOPE trace on the scope of at least 2 periods and by adjusting the AMP button on the frequency generator, obtain a waveform that fills at least two-thirds of the screen. Make a note in your lab book of the VOLTS/DIV and SEC/DIV settings which are located at the bottom of the screen, and use them to visually measure the waveform’s frequency and peak-to-peak voltage. Take the following measurements: (i) Positive peak to ground voltage (ii) Negative peak to ground voltage Adjust the VERTICAL POSITION, HORIZONTAL POSITION, VOLTS/DIV and SEC/DIV buttons, and by observing the changes made to the waveform on the screen, explain what these controls do in your lab book. Next press the MEASURE button, which is at the top of the scope controls. Use the function buttons on the left of the scope controls to set the “Source” to CH1 (top button). Press the second function button several times, and make a note of all the parameters that this button cycles through. Lastly, the AMP dial on the Function Generator has two ranges, one large and one small. The dial can be pulled out to enable the shorter range, and when left in, the longer range is enabled. Use the scope to measure the maximum peak to peak voltage that can be produced for each of the AMP ranges. 3.3 DC OFFSET Locate the OFFSET button on the Function Generator. Pull this button to the “out” position, and turn the button clockwise and anticlockwise. Make a note of what is happening on the screen of the scope as you vary the DC offset. Next, press the yellow CH1 MENU button and select DC coupling. Observe what happens when you adjust the “offset” button of the frequency generator. Can you explain what is being added to the waveform on the scope screen? Push the OFFSET button back in once you have finished with this part of the experiment, and reselect AC coupling on the scope. 4.0 USING TWO CHANNELS 4.1 CIRCUIT AND SET UP C=100nF i + Vin + 18 - Vout - Figure 4.1 Dr. Daniel Nankoo 5 of 8 FOUNDATION EXP 3 – THE OSCILLOSCOPE Construct the above circuit on your breadboard. Vin is to be supplied by the Function Generator. Use Channel 1 of the scope to measure an input sinusoidal waveform of 20kHz with a peak to peak voltage of 8V. 4.2 PROCEDURE On the scope controls, press the blue CH2 MENU button in order to allow two waveforms to be displayed at the same time using the scope’s second channel, Channel 2. Waveforms displayed on Channel 2 are blue in colour, and any related parameters have blue text. Attach a BNC cable to the Channel 2 input of the scope, and connect the two crocodile clipped ends to measure the output of your circuit across the resistor. Adjust the VOLTS/DIV for Channel 2 to obtain a suitable trace on the screen. In your lab books, draw accurately what you see, not forgetting to note down the SEC/DIV and VOLTS/DIV for both channels. What is the overall peak-to-peak gain of the circuit, which is a ratio of the output and input voltages? Using the following formula, calculate this gain in decibels. Gain in dB = 20 log10 (Vout/Vin) Next use the CH1 and CH2 MENU buttons to find the peak to peak values of both waveforms, and use this to recalculate the gain. Then press the red MATH MENU button. Press the Operation button in order to select +. Describe what you see, and explain what is being displayed on the scope. Do the same for when – is selected. Then press the MATH MENU to switch off the red trace. 5.0 TRIGGER FUNCTION 5.1 EXPLANATION OF THE TRIGGER FUNCTION The TRIGGER function controls allow the oscilloscope display to be synchronised with the signal you want to investigate. To provide a more stable trace on the scope screen, modern oscilloscopes have a function called the trigger. When using triggering, the scope will pause each time the sweep (which is the steady motion of the trace across the screen) reaches the extreme right side of the screen. The scope then waits for a specified event before drawing the next trace. The trigger event is usually the input waveform reaching some user-specified threshold voltage in the specified direction (going positive or going negative). The effect is to resynchronise the timebase to the input signal, preventing horizontal drift of the trace. In this way, triggering allows the display of periodic signals such as sine waves and square waves. Trigger circuits also allow the display of nonperiodic signals such as single pulses or pulses that don't recur at a fixed rate. Dr. Daniel Nankoo 6 of 8 FOUNDATION EXP 3 – THE OSCILLOSCOPE 5.2 EXPERIMENTAL PROCEDURE Press the TRIG MENU button located on the right of the scope controls. This activates the trigger functions which should appear on the right side of the screen. Leave the “Type” on “Edge”. Switch the source between CH1 and CH2 (ignoring Ext, Ext/5 and AC Line). Can you describe what is happening? Vary the TRIGGER LEVEL dial for both CH1 and CH2 sources. Describe what happens and draw what you see. Next, while still in the TRIGGER menu, switch the “Source” function to “Ext” (for external). What can you see on the scope? Draw in your lab books what you see. Fetch another BNC-croc clips cable. Connect the BNC end of this cable to the EXT TRIG (trigger input) socket on the scope. Attach the crocodile clips to the input of your circuit. Draw what is displayed on the scope screen. Does what you see on the screen look familiar? Why? Now attach the crocodile clips from the trigger input BNC cable to the output of your circuit (across the resistor). Draw and explain what you see. Can you explain the triggering function based on what you have observed? 6.0 THE PC BASED USB SCOPE 6.1 SET UP The final part of the experiment will require the use of a PC. Switch on the PC at your bench, and log into the ‘student’ account (password: student). Double click on the ‘EasyScope II for DS1M12’ icon, which opens up the USB scope window. When the USB scope window opens, two red LEDs light up on the analogue to digital (A-to-D) converter device adjacent to two of its BNC sockets. These LEDs indicate that the USB scope’s two channels (A and B) have been activated. The socket for Channel A is on the right of the device, and the middle socket is for Channel B. 6.2 PROCEDURE Before making any connections, use the benchtop oscilloscope, the appropriate leads and the workstation to set up a 20kHz sine wave, with a peak to peak voltage of 8V. Next disconnect the frequency generator from the scope, and reconnect it to Channel A of the USB scope’s A-to-D converter. Using the mouse, select ChA on the ‘Trigger’ panel of the EasyScope window. Adjust the T/Div and Dr. Daniel Nankoo 7 of 8 FOUNDATION EXP 3 – THE OSCILLOSCOPE Volts/Div to get a suitable trace on the screen. Note in your lab books these settings and draw what you see. Switch the USB scope to DC coupling. On the Frequency Generator, pull out the OFFSET control, and vary the dial. Note in your lab book what happens as you do this. Explain what happens when you push the dial back in. Switch the USB scope back to AC. Click on the ‘Meter A’ tab at the bottom of the window, and note down what you see. At the bottom of this new window, click on the ‘Configure’ tab. For Meter 1, select ‘Peak-to-peak voltage’, then ‘minimum voltage’ and finally ‘maximum voltage,’ each time noting down the relevant figures for each parameter. Vary the “AMP” dial on the Function Generator, and note down the subsequent changes for the three parameters above. Close Meter A, and click on ‘Cursor X’. Two vertical lines should appear on the USB scope screen. These are labelled 1 and 2. Use the mouse to position these two lines onto adjacent peaks. Note down the value of ‘Delta’ in the bottom left of the window, and use this figure to compute the wave’s frequency (f = 1/T). Verify if this matches what is displayed on the Frequency Counter. 7.0 COMMENTS AND CONCLUSIONS When writing your report in your lab book, conclude by explaining what you have learnt about the oscilloscope and its various controls. What potential uses do you think an oscilloscope could have? Which type of scope did you prefer using (the PC based scope, or the conventional one), and explain the benefits and drawbacks of both. Dr. Daniel Nankoo 8 of 8


