Review of newly issued AMEC Specifications on
advertisement
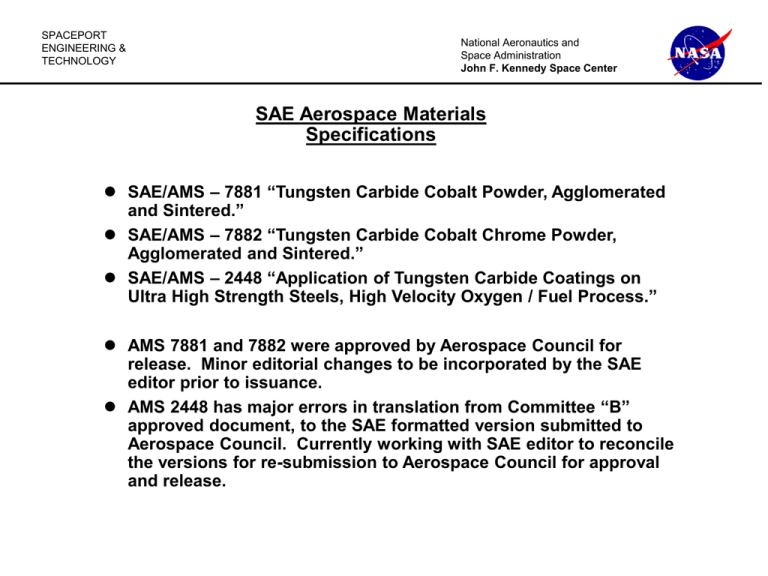
SPACEPORT ENGINEERING & TECHNOLOGY National Aeronautics and Space Administration John F. Kennedy Space Center SAE Aerospace Materials Specifications SAE/AMS – 7881 “Tungsten Carbide Cobalt Powder, Agglomerated and Sintered.” SAE/AMS – 7882 “Tungsten Carbide Cobalt Chrome Powder, Agglomerated and Sintered.” SAE/AMS – 2448 “Application of Tungsten Carbide Coatings on Ultra High Strength Steels, High Velocity Oxygen / Fuel Process.” AMS 7881 and 7882 were approved by Aerospace Council for release. Minor editorial changes to be incorporated by the SAE editor prior to issuance. AMS 2448 has major errors in translation from Committee “B” approved document, to the SAE formatted version submitted to Aerospace Council. Currently working with SAE editor to reconcile the versions for re-submission to Aerospace Council for approval and release. SPACEPORT ENGINEERING & TECHNOLOGY National Aeronautics and Space Administration John F. Kennedy Space Center FRACTURE AND RESIDUAL STRESS CHARACTERIZATION OF TUNGSTEN CARBIDE 17% COBALT THERMAL SPRAY COATINGS APPLIED TO HIGH STRENGTH STEEL FATIGUE SPECIMENS ACKNOWLEDGMENTS University of Florida Department of Materials Science Engineering Oak Ridge National Laboratory X-Ray Diffraction Users Facility NASA/Kennedy Space Center SPACEPORT ENGINEERING & TECHNOLOGY National Aeronautics and Space Administration John F. Kennedy Space Center INTRODUCTION This Research is intended to provide an understanding of the fracture initiation and propagation characteristics of the HVOF Sprayed WC17% Co coatings subjected to axial fatigue stresses on high strength steel substrates. This research involves evaluation of coated fatigue specimens using Scanning Electron Microscopy and Xray Diffraction, Residual Stress Analysis. SPACEPORT ENGINEERING & TECHNOLOGY National Aeronautics and Space Administration John F. Kennedy Space Center Residual stress results from distortion of the WC Hexagonal Close Packed Structure SPACEPORT ENGINEERING & TECHNOLOGY National Aeronautics and Space Administration John F. Kennedy Space Center X-RAY DIFFRACTION Joint Project with Oak Ridge National Laboratory. User agreement #2002032 with the High Temperature Materials Laboratory. “Hands On” work with three days of training 2 weeks of running experiments using HTML equipment, data analysis software and database, library. Joint publication of results in technical journal. SPACEPORT ENGINEERING & TECHNOLOGY National Aeronautics and Space Administration John F. Kennedy Space Center PROCESS • X-ray diffraction baselines determined from theta – 2 theta scans. • WC 17% Co powder – determine peak location of constituents. • Virgin WC – extract do for strain calculation. • Sprayed Coating – identify peaks with good resolution. SPACEPORT ENGINEERING & TECHNOLOGY National Aeronautics and Space Administration John F. Kennedy Space Center X-RAY DIFFRACTION STRESS MEASUREMENT PROCESS • Base Metal – Shot-Peened. • Base Metal – Shot Peened and Grit Blasted. • Scanned the 117 and 121 degrees 2-theta peaks (211 and 103 reflections) for WC coatings. • Coated Specimen – As-sprayed. • Coated Specimen – Sprayed and Finish Ground. • Fatigue Tested Specimens. • 110ksi, 150ksi, 220ksi, 1 duplicate each. SPACEPORT ENGINEERING & TECHNOLOGY National Aeronautics and Space Administration John F. Kennedy Space Center BASE METAL RESULTS • Baseline measurements indicate that grit blasting the base metal substrate (shot-peened) increased the compressive stress in the axial direction, and decreased the compressive stress in the hoop and radial directions. Condition Axial Hoop Radial 4340 substrate Shot-peened -133 ksi -137 ksi -22 ksi Shot-peened & Al2O3 grit blasted -154 ksi -89 ksi -3.1 ksi SPACEPORT ENGINEERING & TECHNOLOGY National Aeronautics and Space Administration John F. Kennedy Space Center AFFECT OF GRINDING ON COATING RESULTS • Baseline measurements indicate that grinding and polishing the coating increased the compressive stress in the axial and hoop direction and decreased the compressive stress in and radial directions. Condition Axial Hoop Radial (211) reflection -85 ksi -116 ksi -99 ksi (103) reflection -50 ksi -73 ksi -76 ksi (211) reflection -264 ksi -224 ksi -33 ksi (103) reflection -193 ksi -245 ksi -22 ksi As-sprayed WC-17%Co Ground & Polished WC-17%Co SPACEPORT ENGINEERING & TECHNOLOGY National Aeronautics and Space Administration John F. Kennedy Space Center RESIDUAL STRESS FOR THE FATIGUE SPECIMENS Condition Axial Hoop Radial -158 ksi -146 ksi -12 ksi (211) reflection -280 ksi -215 ksi -21 ksi (103) reflection -140 ksi -130 ksi +27 ksi (211) reflection -219 ksi -125 ksi -32 ksi (103) reflection -100 ksi -33 ksi -25 ksi Fatigue Tested at 110 ksi (211) reflection Fatigue Tested at 150 ksi Fatigue Tested at 220 ksi SPACEPORT ENGINEERING & TECHNOLOGY National Aeronautics and Space Administration John F. Kennedy Space Center DATA INTERPRETATION FOR THE 110KSI SPECIMEN Sample did not fracture, was a run-out at 107 cycles, R=0.1. Data for the 103 peak reflection of the 110ksi specimen flawed due to low intensity of reflecting planes. Intensity for the 211 WC peak was sufficient to collect accurate FWHM data and the d vs. Psi2 was nearly linear with a good fit indication accurate strain values. SPACEPORT ENGINEERING & TECHNOLOGY National Aeronautics and Space Administration John F. Kennedy Space Center DATA INTERPRETATION FOR THE 150KSI AND 220KSI SPECIMEN d vs. Psi2 plots showed near linear behavior (accurate stain data). Significantly greater intensity for the 211 WC peak vs. the 103 peak indication more accuracy of the results. Shallow penetration depths of the xray beam at acute angles skew the near surface values, especially for the radial stress calculations since the free surface is defined as ZERO stress. Greater mathematical regression analysis needed to remove statistically erroneous data and further refine the accuracy of the measurements. SPACEPORT ENGINEERING & TECHNOLOGY National Aeronautics and Space Administration John F. Kennedy Space Center FRACTOGRAPHY • JEOL 5900LV was used to examine the coated specimens before and after fatigue testing. • Surface morphology, coating /substrate before and after fatigue testing. • Fracture surface characterization for both the coating and substrate. • Energy Dispersive Spectroscopy was used to evaluate delaminated coating regions as well as defect at the fatigue crack origins. SPACEPORT ENGINEERING & TECHNOLOGY National Aeronautics and Space Administration John F. Kennedy Space Center SURFACE MORPHOLOGY BEFORE FATIGUE TESTING SHOWING MACHINE LINES AND DEFECTS ON FINISH GROUND COATING SPACEPORT ENGINEERING & TECHNOLOGY National Aeronautics and Space Administration John F. Kennedy Space Center SUBSTRATE IMBEDDED GRIT ON THE 110ksi SPECIMEN (UNDER A DELAMINATED COATING SECTION SPACEPORT ENGINEERING & TECHNOLOGY National Aeronautics and Space Administration John F. Kennedy Space Center Crack propagation follows intersplat boundaries through the softer cobalt matrix causing carbide particle decohesion (110ksi Maximum Applied Stress – Run Out Specimen) SPACEPORT ENGINEERING & TECHNOLOGY National Aeronautics and Space Administration John F. Kennedy Space Center AT LOWER APPLIED STRESS LEVELS For samples that fractured during the test, below 175ksi maximum applied stress, the predominant mode of initiation was at a subsurface defect (4340 tested at 125ksi, R=-1). SPACEPORT ENGINEERING & TECHNOLOGY National Aeronautics and Space Administration John F. Kennedy Space Center AT HIGHER APPLIED STRESS LEVELS For samples that fractured during the test, above 175ksi maximum applied stress, the predominant mode of initiation was at a surface defect (4340 tested at 190ksi, R=-1). At 165ksi – 175ksi, mixed mode was observed with both surface and subsurface defect origins. SPACEPORT ENGINEERING & TECHNOLOGY National Aeronautics and Space Administration John F. Kennedy Space Center Imbedded aluminum oxide grit sites confirmed by XRD, and EDS. SPACEPORT ENGINEERING & TECHNOLOGY • • • • National Aeronautics and Space Administration John F. Kennedy Space Center SUMMARY There were reductions in the substrate compressive residual stress state after abrasive blasting the shot-peened surfaces; however the overall stress state is still compressive.. Failure mode and crack initiation at lower applied stresses relied on inherent substrate defects and mechanical properties of the substrate. Only the reduction in compressive residual stress was noted as a possible root cause in relative reduction of fatigue life at these applied stress levels. Substrate defect near the max depth of the shot-peened layer. Failure mode and crack initiation at higher applied stresses relied on interfacial defects from the blasting operation. The reduction in fatigue life at these applied stress levels is clearly related to the concentration of defects available for crack initiation. There were changes in the coating residual stress profile after finish grinding the coatings as well. Both axial and hoop stress increased dramatically, whereas radial stress was reduce by half. SPACEPORT ENGINEERING & TECHNOLOGY National Aeronautics and Space Administration John F. Kennedy Space Center SUMMARY CONTINUED • Coating fracture behavior was relatively consistent throughout the applied stress range for the fatigue specimens. Cracks propagated radially towards the substrate in the cobalt matrix along splat and WC particle boundaries. • Substrate fatigue cracks initiated at either subsurface origins, or interfacial defects (imbedded aluminum oxide grit particles). No coating crack showed any correlation to base metal fatigue site initiation. • At higher applied stresses, coatings delaminated circumferentially due to the inability to plastically deform with the substrate. Phenomena was more pronounced for Aermet 100 specimens, which makes sense due to the increased reduction in area properties inherent in this alloy. SPACEPORT ENGINEERING & TECHNOLOGY National Aeronautics and Space Administration John F. Kennedy Space Center CONCLUSIONS AND RECOMMENDATIONS • The method of substrate surface preparation prior to coating should be investigated further to reduce the effect on the shot-peened residual stress. • Reduction in imbedded grit could significantly decrease the fatigue life reduction at higher applied stresses. • Alternative methods. • Water jet blasting. • Low pressure, or glancing angle blast process. • Grit size change. • Ultrasonic surface cleaning after blasting. SPACEPORT ENGINEERING & TECHNOLOGY National Aeronautics and Space Administration John F. Kennedy Space Center CONCLUSIONS AND RECOMMENDATIONS • Low stress grinding and polishing process provide a beneficial change in residual stress state of applied coatings. Could affect cracking tendency. • Increased residual stress on the coating surface should behave like the substrate shot-peening effects and assist in hindering crack initiation. • However, surface defects can mitigate the effects of residual compressive stress and provide surface crack initiation sites. • Ra is a “Gross” measurement of surface profile and other measurements needed to accurately characterize the surface morphology.
