Pneumatic Clamp - Mechanical Kits Ltd.
advertisement
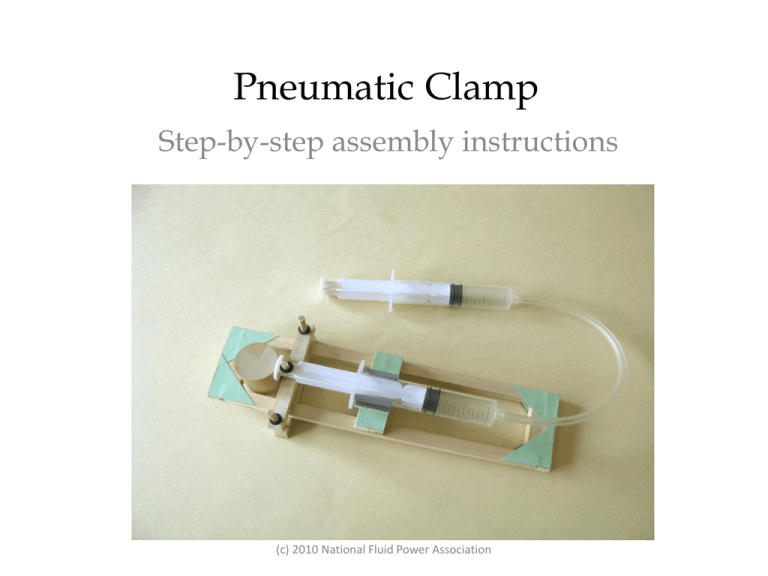
Pneumatic Clamp Step-by-step assembly instructions (c) 2010 National Fluid Power Association Contents of Pneumatic Clamp Kit Wooden pieces (⅜” cross-section): 4 X 9¼”; 2 X 3½”(drilled); 5 X 2½”; 4 X 1¾” Green corner gussets: 1 card Syringes, 20cc: 2 (1 has a hole in the plunger) Plastic Tubing: 1 length Wooden dowel, 3/16” diam.: 3 X 2¼” Syringe Holder: 1 Mini-washers: 3 Stirring Sticks: 1 Clamp Object: 1 Plus a small piece of sandpaper (c) 2010 National Fluid Power Association Make a 2 ½” by 10” frame using two 2 ½” pieces and two 9 ¼” pieces. To join the pieces of wood together use a green triangle and a small amount of wood glue. Use four corner triangles or gussets on one side only. Place a 1 ¾” piece of wood temporarily between the long pieces near to each end as spacers (not shown). (c) 2010 National Fluid Power Association On the other side of the frame glue two 1 ¾” pieces into the smaller ends. Secure them with glue and with four corner gussets, one on each corner. (c) 2010 National Fluid Power Association Place a 1 ¾” piece so that it lies across the frame 4 ⅞” from one end. (c) 2010 National Fluid Power Association Place the last 1 ¾” piece alongside it away from the measured end. (c) 2010 National Fluid Power Association Glue two corner gussets to secure the two 1 ¾” pieces to the frame. Trim a third corner gusset to cover the pieces and glue it in place. (c) 2010 National Fluid Power Association Turn the frame over again and glue two 2 ½” pieces to the central struts. Secure them with a cardboard strip 2 ½” long X ¾” wide. (c) 2010 National Fluid Power Association Peel off the backing tape from the syringe clip and mount it onto the middle of the 2 ½” x ¾” strip to form a central ‘platform’ (c) 2010 National Fluid Power Association Glue the three 2 ¼” axles into the holes of a drilled 3 ½” piece. The dowels are to flush with one side and this is covered by a 3 ½” by ⅜” cardboard strip. Use the other drilled 3 ½” piece to ensure that the axles are perpendicular to both of the 3 ½” pieces. (c) 2010 National Fluid Power Association Check that the plunger that has a hole in it rotates when attached to the center axle (c) 2010 National Fluid Power Association Attach the second 3 ½” piece to the axles so that each of the 3 ½” pieces are on different sides of the frame. The assembly should slide freely. Finish with two mini-washers on the end axles. (c) 2010 National Fluid Power Association Push the plunger with the hole in it into its barrel and the place the plunger onto the centre axle. Secure the plunger with the third mini-washer. Carefully place the barrel of the syringe into the syringe clip and attach the tubing to the syringe. (c) 2010 National Fluid Power Association Carefully push the plunger into its barrel as far as it comfortably goes. To operate the clamp attach the other syringe, fully open with its plunger out, onto the tubing and then press its plunger in. The clamp will close. Pull the plunger out and the clamp will open. (c) 2010 National Fluid Power Association
