BIO1140 Lab 4: Mitosis
Lab Objectives
• Visualize DNA following staining procedure
• Identify and compare stages of the cell cycle
using plant and animal tissue
• Determine relative time cells spend in each
stage of the cell cycle
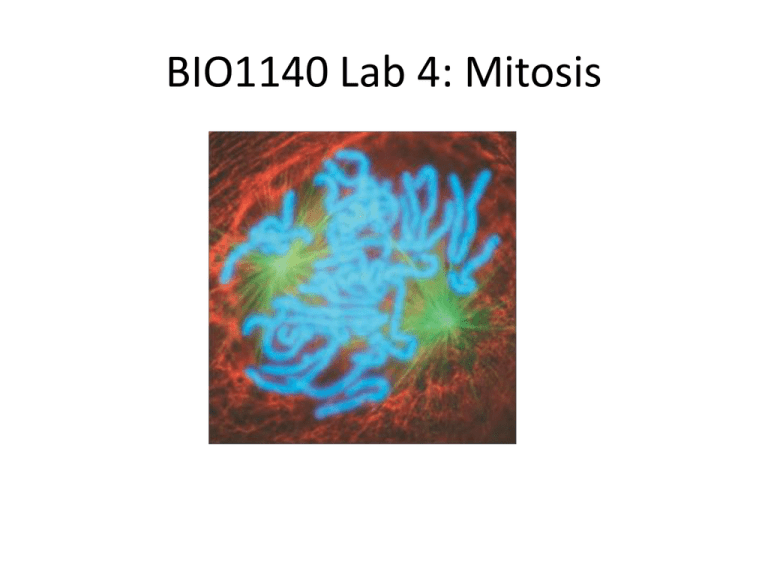
Phases of mitosis
No chromosome visible
nucleolus present
chromosomes visible
Nucleolus disappeared
chromosomes visible
nuclear membrane disintegrated
Recorded as Prophase
Copyright © 2008 Pearson Cummings. All rights reserved
Phases of mitosis
Chromosomes align
on the equator plate
sister chromatids
separate and start
migrating toward
pole
Copyright © 2008 Pearson Cummings. All rights reserved
Chromosomes
unfold and new
nuclear membrane
forms around new
nuclei
cytoplasm starts to
divide
daughter cells split
and enter interphase
Mitosis Lab activities
•Staining and squash of broad bean (Vicia faba)
root tip.
•Identification and count of mitotic stages on
various samples:
–Whitefish (Coregonus clupeaformis) blastula
–onion (Allium cepa) root tip
–broad brean (Vicia faba) root squash
•Collect class data
Vicia faba (broad bean) root squash
Material Provided:
• Root tips fixed in Carnoy-lebrun fixative (stops
cell processes and preserves tissues).
• Step by step procedure described in lab manual:
• Step 1: Label microtube with your name before
starting staining procedure.
• Step 2: Remove Fixative using plastic pipette
– Dispose of fixative in chemical waste bucket
– Use toothpick to hold in your sample if necessary
Vicia faba (broad bean) root squash
• Step 3: Washes
• Rinse tips once in 95% alcohol then discard
alcohol using plastic pipette
• Step 4: Hydrolysis
• Add 1N hot HCl to fixed roots.
• Incubate at 60°C for 10 minutes precisely.
• Discard HCl then GENTLY add ice-cold distilled H20
(stops hydrolysis)
Vicia faba root squash
• Step 5: Staining
• Discard water
• Add Feulgen stain (be extremely careful it stains
virtually anything instantly)
• Stain for 30-40 minutes or until root tip is red (observe
first prepared slide in the meantime: either onion root
or whitefish embryo)
• Remove staining solution using plastic pipette and
rinse with water 2-3 times (caution with rinsing water
it still can stain)
• Keep stained roots in water so that they won’t dry out
Vicia faba root squash
• Step 6: Preparing the root tip squash
• Add 1 drop of acetic acid to microscope slide
• Add 1 root tip
• Using a razor blade, cut off last 2 mm (deeply
stained) discard the rest
• Add coverslip
Vicia faba root squash
Step 7: Squash
Apply direct downward
pressure – No twisting,
banging, striking etc!!!
Press hard
Check under
Microscope then press
again if needed.
www.npc.edu/Bio105/media/m1_l6-05.gif
Evaluation of squash
• Show your preparation to your TA
• Present one picture of your squash to TA for
evaluation (light, colour balance, focus…..)
• Choose your best shot!
Counting cell stages
• Under the 40X objective, count the # of cells in
each stage of the cell cycle – count at least 50
cells (take a snapshot at 40x then count on
screen).
• Repeat count twice (or until you counted at least
150 cells).
• Record results in lab manual table and then in lab
website (Lab4 page).
• Start with one prepared slide, then your squash,
then the second prepared slide
Onion (Allium cepa) root tip (40 min.)
faculty.clintoncc.suny.edu/ faculty/Michael.Gr...
Whitefish (Coregonus clupeaformis)
blastula (30 minutes)
CAUTION – SLIDES ARE THICK – USE FINE FOCUS
www.karlloren.com/ biopsy/images/mitosis.jpg
Lab 4 evaluation
• Prelab quiz
• Technical skills count for 20% of this lab. You
will be evaluated on:
– Cleanliness
– Microscope skills
– Ability to produce a good quality squash (= not
too thick, cells not damaged…)
– Quality of picture presented to Tas
• Lab report
Lab 4 Report
• Read instructions on lab web site
• Report: 3 Pages
1. Title Page
2. A graph (two panels) presenting the % of cells in
each of the cell cycle phases, for all 3 different
organisms.
• Upper Panel: Combined data from the class (average +
standard error: posted on lab website)
• Lower Panel: Your own measurements (calculate the %
of cells in each stage from your data)
Upper panel: class
data
(average PLUS
standard error)
Symbol key
series 1
series 2
series 3
1
Multi panel graph instructions:
Stack two graphs one on top of
the other. Follow the same rules
as for a one-panel graph except:
1 Two panels share a common
Y axis
2 X axis on both panels with
Y axis
Percentage of cells
tick marks
3 X-axis label is only present
on lower panel
Same scale on Y axis
4
2
Lower Panel
group data
THIS IS NOT A
PERFECT GRAPH
JUST AN EXAMPLE
OF 2-PANEL GRAPH LAYOUT
Don’t forget the caption
1
2
3
4
5
X Axis: Stages of the cell cycle
3
Don’t forget to add a caption below the graph
Lab4 report
• Page 3: Conclusion about graphed data
– Brief comparison of data: between organisms and
group vs. class.
– Answer the question: based on your observations
during the lab, determine the relative length of
each phase of the cell cycle.
• Page 3: max. 2/3 page long (1.5 space, 12
points font = 15 lines max).
Lab4 report (cont’d)
Combined DATA is available on the
Lab4 page of the lab website
DUE DATE: ONE WEEK FROM TODAY
All lab4 samples are exam material (= you must be
able to recognize a mitosis phase on a picture)

