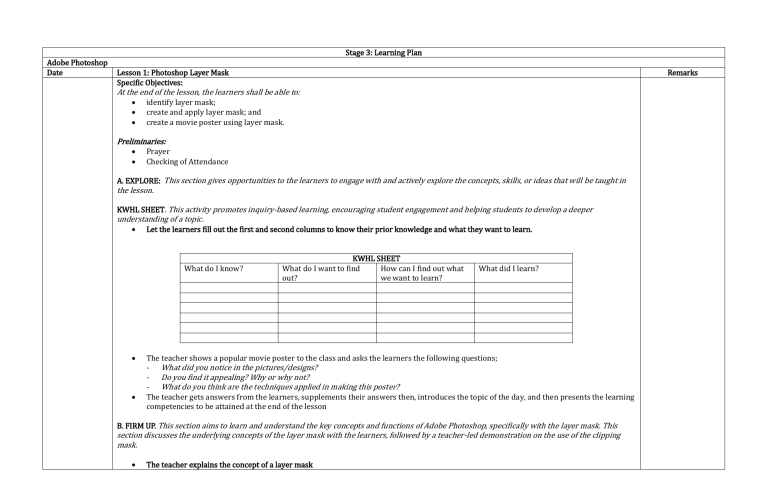
Stage 3: Learning Plan Adobe Photoshop Date Lesson 1: Photoshop Layer Mask Specific Objectives: Remarks At the end of the lesson, the learners shall be able to: identify layer mask; create and apply layer mask; and create a movie poster using layer mask. Preliminaries: Prayer Checking of Attendance A. EXPLORE: This section gives opportunities to the learners to engage with and actively explore the concepts, skills, or ideas that will be taught in the lesson. KWHL SHEET. This activity promotes inquiry-based learning, encouraging student engagement and helping students to develop a deeper understanding of a topic. Let the learners fill out the first and second columns to know their prior knowledge and what they want to learn. What do I know? KWHL SHEET What do I want to find How can I find out what out? we want to learn? What did I learn? The teacher shows a popular movie poster to the class and asks the learners the following questions; - What did you notice in the pictures/designs? - Do you find it appealing? Why or why not? - What do you think are the techniques applied in making this poster? The teacher gets answers from the learners, supplements their answers then, introduces the topic of the day, and then presents the learning competencies to be attained at the end of the lesson B. FIRM UP. This section aims to learn and understand the key concepts and functions of Adobe Photoshop, specifically with the layer mask. This section discusses the underlying concepts of the layer mask with the learners, followed by a teacher-led demonstration on the use of the clipping mask. The teacher explains the concept of a layer mask What is a Layer Mask? Layer masking is a reversible way to hide part of a layer. This gives you more editing flexibility than permanently erasing or deleting part of a layer. Layer masking helps make image composites, cutting out objects for use in other documents and limiting edits to part of a layer. You can add black, white, or gray color to a layer mask. One way to do that is by painting on the layer mask. Black on a layer mask hides the layer that contains the mask, so you can see what is underneath that layer. Gray on a layer mask partially hides the layer that includes the mask. White on a layer mask shows the layer that contains the mask. Layer Mask is an essential part of Photoshop tools that can hide and reveal parts of the layer without deleting them. This is a very efficient and non-destructive way of working. And it helps designers to become more efficient and more creative. After discussing the concepts and proceeding to the hands-on demonstration, the teacher asks for questions or clarifications from the learners. - TEACHER-LED DEMONSTRATION (layer mask). This section aims to provide learners with a visual and practical learning experience, allowing them to see the process of performing layer mask in real-time and ask questions and clarifications. • The teacher will explain and demonstrate how to create a layer mask Create a layer mask Select a layer in the Layers panel. Click the Add layer mask button at the bottom of the Layers panel. A white layer mask thumbnail appears on the selected layer, revealing everything on the selected layer. Add black to a layer mask to conceal. Adding black to a layer mask hides the layer that contains the mask. Ensure a white border is around the layer mask thumbnail in the Layers panel. If there is not a white border, click the layer mask thumbnail. Select the Brush tool in the Toolbar. In the Options bar, open the Brush Picker and choose the size and hardness of the brush. Press D to set the default colors of white and black in the Toolbar. Then press X to switch the colors, so black becomes the foreground color. Paint over the image, which adds black to the layer mask. Black on the mask hides the layer with the mask to see the layer below or the checkerboard pattern representing transparency. Add white to a layer mask to reveal. Adding white to a layer mask shows the layer that contains the mask. You can paint white on a layer mask to reveal content you had previously concealed with black on the layer mask. Press X to switch the foreground and background colors in the Toolbar so white becomes the foreground color. Paint over hidden areas of the image. This adds white to the layer mask, bringing corresponding areas of the masked layer into view. After demonstrating the steps in creating a clipping mask, the teacher asks for questions or clarifications from the learners. - STUDENT DEMONSTRATION. This section allows the learners to apply their learning and demonstrate their understanding of layer mask. After the teacher's demonstration, the teacher asks a volunteer/ or learner to demonstrate how to perform layer mask The teacher shows a real-life application of layer mask After the teacher and learner's demonstration, the teacher asks for questions or clarifications from the learners. C. DEEPEN. To deepen the learners' understanding of layer masks, the learners will work on guided and individual practice exercises in creating a movie poster. - GUIDED AND INDIVIDUAL PRACTICE. MOVIE POSTER. Let us put the concepts into practice by making a movie poster from the movie Avengers. In performing this task, pictures will be provided by the teacher and follow the steps given below: We will make a movie poster for a well-known Hollywood movie, "Avengers," so let's start working on it. 1. 2. 3. 17. 18. 19. Launch the Adobe Photoshop software. Open the background image(background.png) in your folder. This will serve as the background for our movie poster. So, let's take the first image. Place the iron man first and put it in the middle of the sky. To insert the image, go to File->Place Embedded, then choose the ironman.jpg image and click Place. Resize your image and set its position properly As the Ironman layer is selected, click the add mask. Then grab the brush tool (press the letter B on your keyboard). Set the following settings; Soft Round Pressure Opacity and Flow, brush size (150px), and start painting on the image to hide unwanted parts of the image. Look at the layer mask; it displays some black area you have painted, and the black color hides pixels. Now insert the following image, "captainamerica.jpg." And do the same process as before on the iron man image. Repeat the same process on the other three images in this activity. Put the ironman on the top of the layer panel because it is on the middle portion, so it will not look good to be behind all the other layers The bottom edges of all images are still sharp. Grab the brush tool and blur all bottom edges so that all images look properly merge Once done with it, select all five images (press the Shift key while selecting the images) and press CTRL + G to put them all in a single group. And change the blend mode of that group to "screen" and look like it is nicely blended with the sky. Then make the image more effective with the help of a "curve Adjust the curves into desired settings. Now we need to give a title to our poster. Insert the title image(title.jpg) from the folder. You can choose the title that you wish to add. Now take a layer mask for this image and start painting with black color and smooth round brush on unwanted parts of the image. Remove that all-black color around the title. And then change the blending mode to "linear dodge. Drag it down below the curve layer Save your File with the following format, FullName_ movieposter.jpg (ex. MundLapitan_movieposter.jpg) The output of the learners will be submitted to the teacher for presentation, feedback and critiquing 4. 5. 6. 7. 8. 9. 10. 11. 12. 13. 14. 15. 16. - STUDENT PRESENTATION. This section allows the learners to show the class their movie poster output and share their experience performing the task. - FEEDBACK AND CRITIQUING OF WORK. The teacher provides learners feedback and critique on their work to help them identify areas where they need to improve and refine their understanding of the subject matter. - VALUES INTEGRATION. The following question will be asked to the learners to reflect on their experiences performing the activities and how they can apply them in real-world situations. What insights or perspectives did you gain from the experience of designing using layer masks that you think will be valuable to you in other aspects of your personal and future professional life? - SYNTHESIS The teacher and learners synthesize the lesson. The following questions serve as a guide to summarize the lesson. - What is a layer mask? - What are the steps in creating a layer mask? - How can layer masks enhance a design project's visual impact and message? C. TRANSFER. To apply the learners' understanding of the layer mask, the learners will work together on the design to help them learn from each other through discussion and collaboration. - COLLABORATIVE WORK. This assessment aims for learners to share ideas, provide feedback, and learn from one another, leading to more creative solutions and designs. - MOVIE POSTER ACTIVITY. The following instructions will be given to the class: • The class will be grouped and tasked to create their movie poster • One meeting is allotted for the planning and brainstorming for the poster, and another meeting for taking pictures • The learners will be given time to edit their movie posters. • The output must be submitted in a jpg or pdf file MOVIE POSTER RUBRIC Criteria Technical proficiency Excellent (10 points) Proper layer management, skillful use of layer masks, and advanced techniques are evident and effectively contribute to the overall design quality. Design and aesthetics The design is visually striking and attentiongrabbing, with effective use of color, typography, and composition to convey the film's mood, tone, and genre. The design is original, Concept and creativity Good (8 points) Proper layer management, skillful use of layer masks, and use of advanced techniques are generally present but may not be fully realized or may have some minor flaws. The design effectively conveys the film's mood, tone, and genre but may have minor flaws in color, typography, or composition. Fair (5 points) The use of layer masks is evident but not particularly skillful or creative, and technical issues may mar the design. Poor (3 points) Layer masks are not used effectively, or technical issues mar the design to the point that it detracts from the overall quality of the poster. The design lacks one or more key areas, such as color, typography, or composition, or the design may be unbalanced or visually uninteresting. The design is unappealing or fails to effectively convey the film's mood, tone, or genre. The design is generally The design may lack The design is unoriginal or relevant to the film's content, and showcases creativity and innovation in using layer masks to create a unique and effective design. original and relevant to the film's content but may lack some creativity or innovation in using layer masks. originality or relevance to the film's content, or layer masks may be derivative or uninspired. irrelevant to the film's content, and the use of layer masks is uninspired or ineffective. References: Grosheva, I. (2020). How to create a movie poster in Photoshop. Envato Tuts+. Retrieved from https://design.tutsplus.com/tutorials/how-to-create-a-movie-poster-in-photoshop--cms34689 Scott, L. (2018). Photoshop tutorial: Create a movie poster. Creative Bloq. Retrieved from https://www.creativebloq.com/how-to/create-a-movie-poster-in-photoshop - STUDENT PRESENTATION. Once the outputs have been submitted, each group will present their movie poster to the class, which is open to constructive criticism, feedback, and suggestions.


