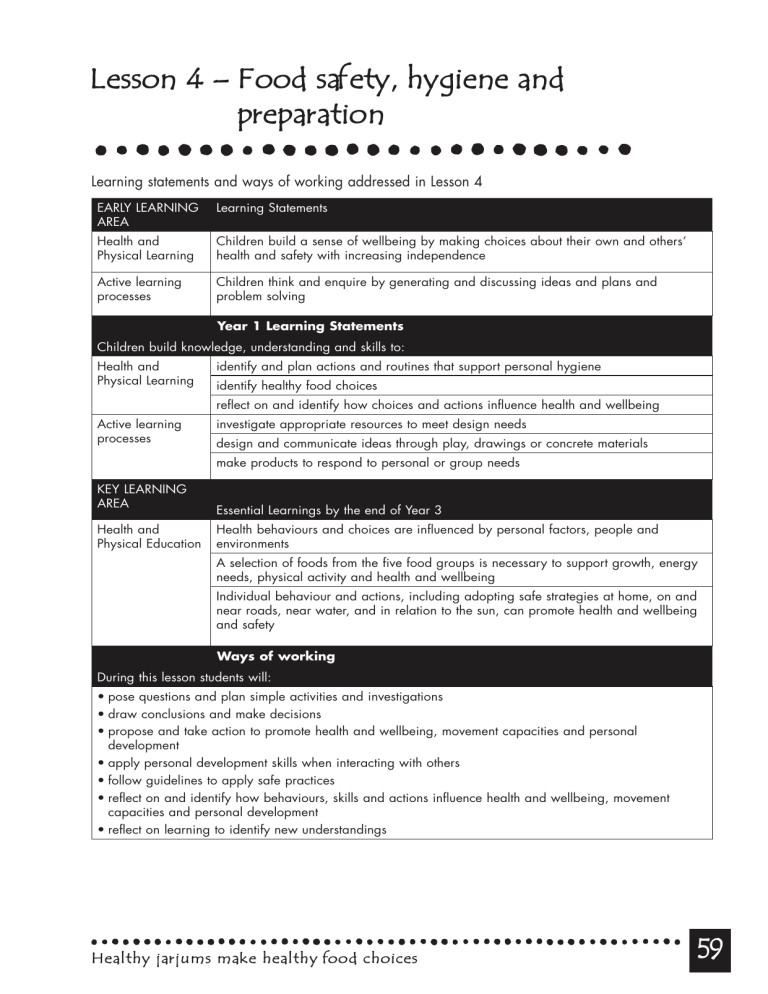
Lesson 4 – Food safety, hygiene and preparation Learning statements and ways of working addressed in Lesson 4 EARLY LEARNING AREA Learning Statements Health and Physical Learning Children build a sense of wellbeing by making choices about their own and others’ health and safety with increasing independence Active learning processes Children think and enquire by generating and discussing ideas and plans and problem solving Year 1 Learning Statements Children build knowledge, understanding and skills to: Health and Physical Learning identify and plan actions and routines that support personal hygiene identify healthy food choices reflect on and identify how choices and actions influence health and wellbeing Active learning processes investigate appropriate resources to meet design needs design and communicate ideas through play, drawings or concrete materials make products to respond to personal or group needs KEY LEARNING AREA Health and Physical Education Essential Learnings by the end of Year 3 Health behaviours and choices are influenced by personal factors, people and environments A selection of foods from the five food groups is necessary to support growth, energy needs, physical activity and health and wellbeing Individual behaviour and actions, including adopting safe strategies at home, on and near roads, near water, and in relation to the sun, can promote health and wellbeing and safety Ways of working During this lesson students will: • pose questions and plan simple activities and investigations • draw conclusions and make decisions • propose and take action to promote health and wellbeing, movement capacities and personal development • apply personal development skills when interacting with others • follow guidelines to apply safe practices • reflect on and identify how behaviours, skills and actions influence health and wellbeing, movement capacities and personal development • reflect on learning to identify new understandings Healthy jarjums make healthy food choices 59 Learning objectives By the end of this lesson students will be able to: 1 Demonstrate and practise correct hand washing techniques. 2 Recall the basic hygiene ‘rules’ in a food preparation area. 3 Demonstrate hygienic behaviour in a food preparation area. 4 Practise and demonstrate food preparation. 5 Taste a variety of different fruits. 6 Demonstrate following rules and procedures. 7 Demonstrate sharing equipment Extension Activities 8 Identify potential hazards in the food preparation area. 9 Propose and demonstrate ways to promote a safe environment in the food preparation area. 10 Plan the preparation and tasting of a variety of different fruits/sandwiches. Resources ➔ Flip chart 10 ➔ ‘My favourite food’ handout for each student ➔ Small container of bright coloured glitter ➔ Jar of Vaseline ➔ 4-5 clean buckets ➔ Liquid soap/bar of soap ➔ Paper towels ➔ Water and access to a sink/tap ➔ Butcher’s paper ➔ Marker pens ➔ Wooden skewers/paddle pop sticks ➔ Serviettes ➔ 5-10 plastic food containers or bowls ➔ A variety of chopped fruit chunks ➔ Chopping board and knives For Extension Activities • 'Spot the dangers' handouts • Flip chart 11 Healthy jarjums make healthy food choices 60 Things to do before the lesson ➔ Prepare for hand washing activity. ➔ Read background information. ➔ Photocopy ‘My favourite food’ handout. ➔ Have discussion with students about what fruits they would like on their kebabs. ➔ If collecting fruit from home, send out note with children (coincide with Centrelink payments if necessary). ➔ Collect or purchase different fruits. ➔ Chop fruits into chunks. ➔ Buy skewers/paddle pop sticks, serviettes. ➔ Collect fruit containers for Activity 5. ➔ Optional: Send a letter home to invite parents for Activity 5 (Section 4 p 73). ➔ Remind students to bring ‘My Food Book’. Extension Activities ➔ Purchase/collect equipment required. ➔ Read background information. ➔ Photocopy ‘My favourite food’ and ‘Spot the dangers’ handouts. ➔ Talk to students about what sandwich they would like to make and arrange parent helpers if necessary. ➔ Cut the tomatoes into slices. ➔ Grate the carrot and cut up lettuce (the students may be able to do this). ➔ Remind students to bring ‘My Food Book’. ➔ Optional: Send a letter home to invite parents/guardians for Activity 5 (see Section 4 p 73). Healthy jarjums make healthy food choices 61 Lesson 4 – Food safety, hygiene, preparation Background Information Food safety is a term that describes those everyday things which we do to prevent becoming sick from eating food. Despite Australia having a safe and secure food supply, it is estimated that around two million people suffer from some type of food-borne illness each year. There is a lot we can all do to prevent this illness in our friends and families. Food-borne illness is usually caused by germs. These germs are incredibly small and can multiply at an alarming rate. They can already be on foods, or passed from you to the food. You cannot always tell whether the food contains germs just by looking, tasting or smelling the food. Food poisoning risk can be greatly reduced if food is properly handled, stored correctly, cooked sufficiently and eaten immediately. Obviously, many food safety techniques are beyond the capacity of the primary school student. However the early primary school years are important in forming life-long habits – so introducing and reinforcing basic personal hygiene and safety ‘rules’ for children during these years is important. Basic personal hygiene standards that can be child centred include: • Washing hands • Not sneezing or coughing on food • Tying hair back • Keeping dogs, cats and insects away from food • Not sitting on benches/tables or any food preparation surface • Keeping jarjums/‘Bubbas’ away from any dangers/hazards in the kitchen • Throwing away food that has fallen on the floor/ground or been touched by an animal. The term ‘Bubbas’ is used when referring to very young children in some Aboriginal and Torres Strait Islander families. A person can be called ‘Bubba’ up to any age, by anyone who is older than them. Aboriginal and Torres Strait Islander people often have extended family members staying with them at home. Extended family members may include Aunties, Uncles, Grandma, Grandad and any other members of their family. Extended families vary in size and mix of people. In extended families, the older children are expected to help care for any younger children. Children can be expected to look after ‘Bubbas’ from as early as five or six years of age. Roles and responsibilities of younger children vary in each family but you should be aware of different expectations placed on Aboriginal and Torres Strait Islander children at home. Healthy jarjums make healthy food choices 62 Lesson 4 Plan Content Resources Revise Revise with students what they learnt in the last lesson. Activity 1 Keeping Clean in the Kitchen Germ demonstration • Scoop approximately one teaspoon of Vaseline into your hand. • Add a teaspoon of glitter, rub the Vaseline and glitter into the palm of your hands. • Small container of brightly coloured glitter • Jar of Vaseline • Begin the lesson, not mentioning the glitter but make a point to touch objects and students in the early stages of the lesson. • As you touch students, pens, board etc, glitter will be spread around classroom. • When students notice the glitter, make the analogy between glitter and germs the glitter spreads everywhere very quickly, just like germs do. • Emphasise the importance of washing hands before preparing food to stop the spread of germs. • Discuss how germs can be transferred from one person to the other very easily. • Following basic rules can prevent this. • Show Flip chart 10 and discuss the importance of personal hygiene in the kitchen or food preparation area. Flip chart 10 • Discuss the following personal hygiene rules: ➔ Wash hands ➔ Turn your head away from food when sneezing or coughing ➔ Tie your hair back ➔ Keep dogs and other animals away from food ➔ Sit on chairs and not on food preparation surfaces (benches or tables) ➔ Keep jarjums /‘Bubbas’ away from any dangers / hazards in the kitchen. ➔ Wipe down benches before and after food preparation ➔ Throw away food that has fallen on the floor/ground or been touched by an animal. Ask students what they do to help in meal preparation at home. (eg. Do they set the table, peel, chop or mash vegies or wash up?). Healthy jarjums make healthy food choices 63 Activity 2 Hand washing – practise washing your hands Ask students why/when they should wash their hands. • Have the children sit in a group on the floor. • Position the buckets containing clean water in front of the group. • Choose 4-5 children at a time (depending on number of buckets) to come to the front and wash their hands. • Use the instructions below for washing and drying hands. • The students who have not washed their hands can copy the actions of the ‘hand washing’ group. • Make sure water is changed regularly. 1 Rub backs of hands for 10 seconds (ask everyone to count) • 4-5 buckets of water • Liquid or bar of soap • Roll of paper hand towels • Access to a tap and sink 2 Rub in between fingers for 10 seconds (ask everyone to count) 3 Scrape fingernails on palms for 10 seconds (ask everyone to count) 4 Rinse hands well under running water for 10 seconds (ask everyone to count) 5 Dry hands with clean hand towels – palms, backs of hands, in between fingers. This activity has been adapted from ‘Germ Busters Early Childhood Hand Hygiene Program’. For further information on Germ Busters see reference section. Resources for this activity in Germ Busters include the use of glitter-bug gel, a hand washing song and UV light-box. Activity 3 Safety in the Food Preparation Area • Talk about the importance of safety in the kitchen and food preparation area. • Brainstorm with the children: ➔ What accidents can happen in the kitchen? • Write a list on the board. • Show the children Flip chart 11 and discuss the dangers shown in the pictures. • Ask the children to think about how they could prevent these dangers in the kitchen. • Give the students ‘Spot the dangers’ handout. Ask them to circle the dangers in the picture. Activity 4 Flip chart 11 ‘Spot the dangers’ activity sheet Safety Rules in the Kitchen Ask students to develop safety rules for the kitchen. Display safety rules in the food preparation area. • Butcher’s paper • Marker pens/paints Extension Activity Make up a poster of safety tips in the kitchen from the students’ ideas. Healthy jarjums make healthy food choices 64 Activity 5 Food preparation Fruit kebabs Fruit kebabs are quick and easy to prepare and a great way to encourage children to increase fruit in their diet. Making fruit kebabs gives children the opportunity to be creative with food and make food interesting. • Prior to the lesson, tell the students that they will be making fruit kebabs. Involve the students in the planning of this lesson. Ask them to think about and decide: ➔ What fruit they would like to use for the kebabs? Explain that fresh fruit is best for this activity, as frozen or tinned fruit may be too soft. ➔ Prompt students to think about the colours and shapes and textures of the fruit used in combinations. How could they design the kebabs to look interesting and delicious. Would the kebabs be able to encourage fruit consumption in a person who is not interested in eating fruit? ➔ How will you obtain the fruit for the lesson? Will the school pay or will everyone contribute a piece of fruit? (Be aware that some children may have limited fruits to choose from at home.) ➔ Should we invite parents to come and help to make fruit kebabs too? • Discuss safety if using skewers. • Preparing fruit kebabs: 1 Set up a series of lunch tables/work stations. • Containers for fruit • Knives • Skewers/ paddle pop sticks • Serviettes • A variety of chopped fruit, eg. rockmelon, banana, apple, kiwi fruit, watermelon and grapes. The fruit is best cut up in large chunks (children will be able to prepare soft fruit eg. banana; parents may be able to help with this if the children can’t manage) 2 Students are to wash hands. Remind them to practise the hand washing technique. 3 A container of fruit chunks should be placed on each table/work station. 4 Give each student a skewer (or paddle pop stick) and a serviette. 5 Students are to thread on several pieces of fruit, pushing the fruit up the paddle pop stick or skewer (ensuring that skewer is pointing down at all times) 6 Remind them to combine a variety of colours, shapes, tastes and textures. 7 When all students have finished, everyone can enjoy the fruit kebabs. 8 Ask all children to be involved in cleaning up. • Variation: Foods that the student may be unfamiliar with, such as vegetables, could be substituted for fruit. • Discuss the taste, smells, texture and appearance of the kebabs. Reflect why fruit is good for us and review where it belongs in the 'Food Star'. Healthy jarjums make healthy food choices 65 Extension Activity Making Sandwiches Early in the week, talk to the students about the food preparation lesson. Involve the students in planning this lesson. Ask them to think about and decide: • What fillings they would like to use in their sandwiches. You will need to come up with two or three fillings (suggested fillings are listed below). Some students may express dislike for some ingredients suggested. • Encourage students to be adventurous with their fillings – try something new! • How will they obtain the ingredients for the lesson? • Will the school pay or will they all contribute? • Should they invite parents to come to the school to help? Be careful to note any religious beliefs and medical/allergies that students may have and choose foods accordingly. 1 Set up workstations (4 tables = 4 students to a group). 2 In the centre of the tables place the fillings and breads. 3 Remind students to wash their hands before starting the exercise. 4 Place one serviette and one plastic knife in front of each student. 5 Students are to prepare a sandwich using the ingredients they decided on. 6 When finished, cut the sandwich in quarters so other students can try it. The mountain bread can be spread with filling (eg avocado mashed with a little lemon juice to prevent browning, shredded lettuce, thinly sliced cucumber, tomatoes and grated cheese) then rolled up and cut into small rolls to share. • Pocket bread, mountain bread or sliced bread (preferably a mixture of wholemeal, grain and white) • Cheese, carrots, sultanas, lettuce, tomato – sliced • 1 jar peanut butter11 2 tablespoons for each table • 2 graters • 2 chopping boards • Empty food containers or bowls for the chopped up ingredients • Serviettes/napkins and plastic knives. • As students are preparing a sandwich be sure to describe colours, textures, tastes and smell of each food. • Explain that this is a healthy sandwich that is cheap and easy to make. • Encourage students to make their own sandwiches at home. Ask students what foods they have at home and what foods would make a healthy sandwich. • Continue to discuss safety and hygiene practices eg. clean up as soon as we finish. Display safety rules from earlier in the food preparation area. • Get students to think of other unusual foods that can be put onto a sandwich and to reflect on where their sandwiches might belong in the 'Food Star'. 11 If there is anyone in the class with a known nut allergy, avocado mashed with a little lemon juice to prevent it browning may be used in the place of peanut butter. Healthy jarjums make healthy food choices 66 Activity 6 Reflection and evaluation • Reflect with students what was discussed in this lesson. ➔ What new things have they learned? • Prompt them to think about ➔ how germs can be spread/prevented from spreading ➔ how they can keep food safe to prevent sickness ➔ what is important to remember to be safe in a kitchen ➔ where the foods prepared in the lesson belong in the Food Star. How do those foods help us? Post-evaluation of students’ food preferences This activity, repeated from lesson 1, evaluates what your students have learnt about healthy food choices from this program. • Ask students to circle foods that are good to eat everyday then compare for each student to see if any change in food knowledge has occurred since Lesson 1. • Copy the ‘lunch box’ and ‘foods for the lunchbox’ templates in Section 4 (p 75-76) and give them to each student (recycle lunch box and food pictures used in Lesson 1 if possible). • The students construct the lunch box and choose five foods they would like to take for lunch. • Record these choices so you can compare them for each student to see if any change in food preference has occurred since Lesson 1. Home Activity Hand out ‘My favourite food’ sheet for students to take home, complete and colour in. Add to ‘My Food Book’. Healthy jarjums make healthy food choices • Everyday foods post-test handout (Section 4) • Lunch box • Foods for the lunchbox (use the same ones prepared for Lesson 1). These may need to be cut out already for younger children. ‘My favourite food’ sheet 67
