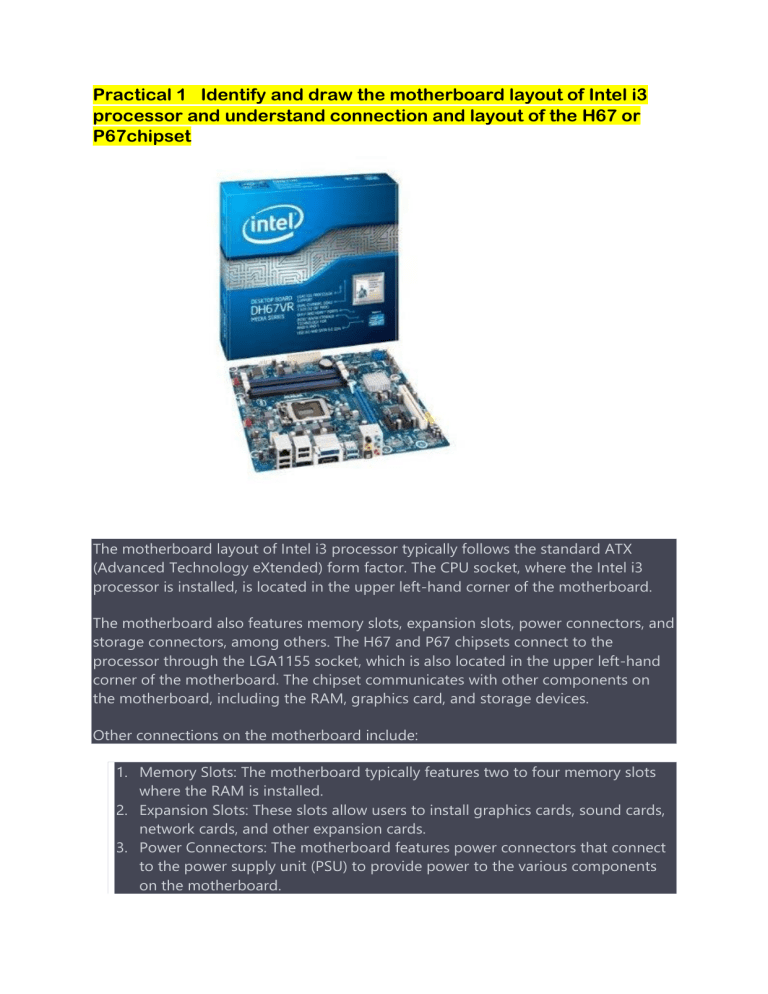
Practical 1 Identify and draw the motherboard layout of Intel i3 processor and understand connection and layout of the H67 or P67chipset The motherboard layout of Intel i3 processor typically follows the standard ATX (Advanced Technology eXtended) form factor. The CPU socket, where the Intel i3 processor is installed, is located in the upper left-hand corner of the motherboard. The motherboard also features memory slots, expansion slots, power connectors, and storage connectors, among others. The H67 and P67 chipsets connect to the processor through the LGA1155 socket, which is also located in the upper left-hand corner of the motherboard. The chipset communicates with other components on the motherboard, including the RAM, graphics card, and storage devices. Other connections on the motherboard include: 1. Memory Slots: The motherboard typically features two to four memory slots where the RAM is installed. 2. Expansion Slots: These slots allow users to install graphics cards, sound cards, network cards, and other expansion cards. 3. Power Connectors: The motherboard features power connectors that connect to the power supply unit (PSU) to provide power to the various components on the motherboard. 4. Storage Connectors: The motherboard features storage connectors such as SATA and M.2 slots that allow users to connect storage devices such as hard drives and solid-state drives. 5. USB Ports: The motherboard features USB ports that allow users to connect USB devices such as keyboards, mice, and external hard drives. 6. Audio Connectors: The motherboard features audio connectors for speakers, headphones, and microphones. In summary, the motherboard layout of Intel i3 processor follows the ATX form factor with the CPU socket in the upper left-hand corner. The motherboard features various connections such as memory slots, expansion slots, power connectors, storage connectors, USB ports, and audio connectors, among others, that connect and communicate with the Intel i3 processor. The H67 chipset is a motherboard component that is commonly used with Intel i3 processors. The layout of the H67 chipset can vary slightly depending on the manufacturer and specific motherboard model, but typically, it features the following components: 1. Northbridge Chip: The H67 chipset's Northbridge chip is responsible for communicating with the processor through the LGA1155 socket. It also controls the integrated graphics of the Intel i3 processor. 2. Southbridge Chip: The H67 chipset's Southbridge chip controls the communication between the Northbridge chip and other components on the motherboard, including the RAM, storage devices, and expansion slots. 3. Expansion Slots: The H67 chipset typically features two PCIe x16 slots, two PCIe x1 slots, and one PCI slot. These slots allow users to install graphics cards, sound cards, network cards, and other expansion cards. 4. Storage Connectors: The H67 chipset typically features four to six SATA connectors, which allow users to connect storage devices such as hard drives and solid-state drives. 5. USB Ports: The H67 chipset typically features several USB 2.0 and USB 3.0 ports, which allow users to connect USB devices such as keyboards, mice, and external hard drives. 6. Audio Connectors: The H67 chipset typically features audio connectors for speakers, headphones, and microphones. In summary, the H67 chipset layout includes the Northbridge and Southbridge chips, expansion slots, storage connectors, USB ports, and audio connectors. These components allow for the communication and control of the various components on the motherboard with the Intel i3 processor. Practical 2 Perform Basic Input/output System (BIOS) setting and configuration setup using Complementary Metal Oxide Semiconductor (CMOS). a general guide on how to perform basic BIOS settings and configuration setup using CMOS. 1. Turn on the computer and immediately press the key to enter the BIOS setup. The key varies depending on the computer manufacturer and model but commonly used keys are F2, F10, or Del. 2. Once inside the BIOS setup, navigate to the CMOS setup utility. The location of the CMOS setup utility varies depending on the BIOS version, but it is usually found under the Advanced or Main tab. 3. Configure the system date and time under the Date/Time tab. This is important for correct system operation and timestamps for files. 4. Configure the boot order of the computer under the Boot tab. The boot order determines the sequence in which the computer searches for bootable devices. 5. Configure the system performance settings such as CPU speed, RAM timings, and voltage settings under the Performance tab. 6. Configure the power management settings such as standby mode and sleep mode under the Power Management tab. 7. Configure the integrated peripherals such as USB ports, SATA controllers, and audio under the Integrated Peripherals tab. 8. Save the changes made to the CMOS setup utility by pressing the key to save the settings and exit the BIOS setup. The key to save and exit varies depending on the computer manufacturer and model but commonly used keys are F10 or F12. 9. The computer will restart with the new BIOS settings and configuration setup. It is important to note that accessing and modifying the BIOS settings and configuration setup should only be done by experienced users as incorrect settings may cause the computer to malfunction. It is also recommended to backup the original settings before making any changes. Practical 3 Format, partition and install a Hard Disk Drive (HDD) and format a pen drive a general guide on how to format, partition, and install a Hard Disk Drive (HDD) and format a pen drive on a Windows operating system. Formatting and Partitioning an HDD: 1. Connect the HDD to the computer. 2. Open the Disk Management tool by right-clicking on the Start menu and selecting Disk Management. 3. Locate the HDD in the list of available drives. 4. Right-click on the HDD and select "Delete Volume" to remove any existing partitions. 5. Right-click on the unallocated space and select "New Simple Volume". 6. Follow the prompts to create a new partition, including choosing the size of the partition, assigning a drive letter, and formatting the partition. NTFS is the recommended file system for Windows operating systems. 7. Once the partition has been created and formatted, it will appear as a new drive in Windows Explorer. Installing Windows on an HDD: 1. Insert the Windows installation media (e.g. DVD or USB drive) into the computer and boot from it. 2. Follow the prompts to begin the installation process. 3. When prompted to select an installation location, choose the partition that was created on the HDD. 4. Follow the prompts to complete the installation process, including selecting the language, entering the product key, and creating a user account. Formatting a Pen Drive: 1. 2. 3. 4. Connect the pen drive to the computer. Open Windows Explorer and locate the pen drive in the list of available drives. Right-click on the pen drive and select "Format". Choose the desired file system, such as FAT32 or NTFS, and assign a name to the drive. 5. Click "Start" to begin the formatting process. 6. Once the formatting is complete, the pen drive will be ready for use. • may need several different size screwdrivers to install your hard drive. You can purchase an electronics screwdriver kit from any major retailer. Method 1 Installing a hdd Drive in a Desktop 1 Make sure that you're using a Windows computer. While it's technically possible to replace an iMac hard drive, doing so is incredibly difficult and could void your warranty. Windows desktop computers, on the other hand, tend to be fairly easy to tinker with. • If you want to install a hard drive on a Mac computer, you can take it to an Apple professional and have them help you. 2 Back up your computer's data. If you're removing an existing hard drive from your computer, back up its information so that you can restore the information later. • If you want to keep your original hard drive installed, consider adding a second hard drive instead. Alternatively, you can clone an existing hard drive to a newer one. • You can back up your data using another hard drive or external device, or using a cloud storage service, like Google Drive, iCloud, Dropbox, or OneDrive. 3 Make sure you are able to install a hard drive on your computer. Before you go purchasing a new hard drive for your computer, make sure you are able to install a new hard drive on your computer. If you want to install a second hard drive on your desktop PC, make sure it has an expansion slot that allows you to install a second hard drive. If you have an all-in-one PC monitor, make sure the hard drive inside the monitor is replaceable. 4 Buy a hard drive that is compatible with your desktop motherboard. SATA is the most common hard drive type for modern computers, though many newer motherboards support M.2 SSD hard drives, which are much smaller and often faster than SATA drives (if the drive and your motherboard support NVMe).[1] • SATA drives come in two sizes. 3.5 inch (8.9 cm) SATA drives are used in most desktop computers. All-in-one PC monitors may require a 2.7 inch (6.9 cm) SATA drive. • Solid State Drive (SSD) vs. Hard Disk Drive (HDD): Hard Disk Drives are mechanical disk drives. They are usually slower, but less expensive. Solid-state drives have no moving parts. They are much faster, quieter, and more expensive. You can also purchase a hybrid HDD/SSD drive. 5 Shut off and unplug your computer. To shut down your computer, click the Windows Start icon and the power icon in the Start menu. Click Shut Down to turn off your computer. You can also press and hold the power button on your laptop keyboard, or desktop PC tower to shut down your computer. Unplug your computer and press the power button to exhaust any residual electricity in the computer electronics. 6 Ground yourself. This will prevent electrostatic shock from damaging the components of your computer. You can ground yourself by touching something metal while you work, or purchasing static wrist bands that you wear while you work inside your computer. 7 Remove your computer panel. You will most likely need a Phillips screwdriver. Remove the side panel of the computer tower. You may need to remove both sides of the computer tower. 8 Remove the old drive. The way a hard drive is mounted varies from one computer case to the next.[2] If you are removing an old hard drive, make sure any and all cables are disconnected from both the motherboard and the power supply. You may need to remove more cables or cards in order to access the hard drives in a tight case. • Drive Bays: Some computer cases have a drive bay that you slide the hard drive into and then secure it by fastening it to the chassis with screws. If this is the case, remove the screws and then slide the hard drive out of the drive bay. • Drive Cages: In some computer cases, the hard drive is mounted to a metal or plastic drive cage that is then inserted into the computer case. The hard drive may be secured to the drive cage using screws, or it may be a toolless drive cage that uses pins and clips that fasten to the hard drive. If your computer case uses a drive cage, remove the screws or detach the clips that secure it to the computer chassis, and then slide the cage out with the hard drive inside. 9 Transfer the drive cage to the new hard drive (if present). If your computer case uses a drive cage, remove all the screws and pull the old hard drive out. Place the new hard drive in the same enclosure and secure it with the screws. If you have a toolless drive cage, pull the sides away from the hard drive to unfasten it, and then slide the hard drive out of the drive cage. 10 Secure the hard drive. Once the hard drive has been inserted, use the screws that came with it to secure the hard drive in the drive cage. Ideally, you should use two screws on each side of the hard drive. If the hard drive is loose, it can rattle and cause more noise and lead to physical damage. • Tighten the screws to a firm tightness but don't over-tighten as that may cause damage as well. • If you are using a toolless drive cage, make sure the hard drive is securely fastened to the clips and pins of the mounting bracket. 11 Slide the hard drive back into the case. Go ahead and slide the hard drive back into the hard drive bay in the computer chassis. If needed, secure it using screws. 12 Attach the drive to the motherboard. Newer hard drives will use SATA cables, which are thin and resemble USB cables. Use a SATA cable to connect the hard drive to the motherboard. SATA cables can be connected in either direction. • If you are connecting your primary hard drive, the SATA cable should be plugged into the first SATA channel. This may be labeled SATA0 or SATA1. Refer to your motherboard documentation for detailed information on your motherboard. 13 Connect the power supply to the hard drive. Most newer power supplies have SATA power connectors, though older power supplies typically only have Molex (4 pin) connectors. If this is the case, and you are installing a SATA drive, you will need a Molex-to-SATA adapter. • Ensure that none of the cables can come undone by wiggling them a little bit. 14 Close up your computer. Replace the case sides and reconnect your cables if you had to move the case to work on the inside.[3] 15 Plug in your computer and power it back on. You should hear the hard drive begin to spin up. • If you hear beeps or any jarring noises, immediately turn off the computer and check the hard drive's connections. 16 Format the hard drive. If you are installing a new primary hard drive, you will need to install Windows. If you are installing the new hard drive as a secondary drive, you will need to format the new hard drive. Use the following steps to do so on Windows:[4] • Right-click the Windows Start menu and click Disk Management. • Locate the new hard drive. It will probably be listed as "Unallocated." • Right-click the new hard drive and click New simple volume. • Click Next in the dialog box. • Leave the drive space as it is and click Next. • Enter a new drive letter (or leave it as it is) and click Next. • Click Next and then click Finish. It is important to note that formatting and partitioning an HDD will erase all existing data on the drive, so it is important to back up any important data before proceeding. Practical 4 Understand layout, characteristics and functions of different components of Hard Disk Drive (HDD) as a storage device The components of a Hard Disk Drive (HDD) include: 1. Platters: These are the circular disks that are coated with a magnetic material. Data is stored on the platters in the form of magnetic patterns. A typical HDD can have multiple platters stacked on top of each other. 2. Read/Write Heads: These are small electromechanical devices that are used to read and write data on the platters. The read/write heads move back and forth across the platters, reading and writing data using magnetic fields. 3. Actuator Arm: This is an arm that holds the read/write heads and moves them across the platters to access the data. 4. Voice Coil: The voice coil is responsible for moving the actuator arm and the read/write heads. It works on the principle of electromagnetic induction, where a current is passed through a coil of wire, creating a magnetic field that interacts with the permanent magnet on the actuator arm, causing it to move. 5. Spindle Motor: The spindle motor is responsible for rotating the platters at a constant speed. This allows the read/write heads to access the data on the platters. 6. Controller Board: The controller board is the brain of the HDD. It consists of a microprocessor and firmware that control the various components of the HDD. The controller board also handles communication between the HDD and the computer. 7. Cache: The cache is a small amount of high-speed memory that is used to temporarily store frequently accessed data. This allows the HDD to access data more quickly and improves overall performance. 8. Interface: The interface is the connection between the HDD and the computer. Common interfaces include SATA, SCSI, and SAS. These components work together to store and retrieve data on the HDD. The platters, read/write heads, and actuator arm work together to read and write data, while the spindle motor ensures that the platters are rotating at a constant speed. The controller board controls the functions of all components, communicates with the computer, and ensures that data is read and written correctly. The cache and interface help to improve performance and ensure that data is transferred quickly and efficiently. Functions of the HDD components: The function of a Hard Disk Drive (HDD) is to store and retrieve digital data on a long-term basis. It is a non-volatile storage device, which means that it retains data even when the computer is turned off. When data is written to an HDD, it is stored on the platters in the form of magnetic patterns. The read/write heads access this data by moving across the platters and reading the magnetic patterns. The actuator arm moves the read/write heads to the correct location on the platters to access the data. The spindle motor rotates the platters at a constant speed, allowing the read/write heads to access the data quickly and efficiently. The controller board controls the functions of all components, communicates with the computer, and ensures that data is read and written correctly. HDDs are commonly used in desktop computers, laptops, servers, and other electronic devices for long-term data storage. They are widely available, affordable, and offer large storage capacities, making them an ideal choice for storing large amounts of data, such as operating systems, applications, documents, and media files. • • • • • Platters store the data in magnetic form. Spindle motor rotates the platters at a constant speed to access the data. Read/Write heads read and write data on the platters. Actuator moves the read/write heads across the platters to access data. Controller board controls the functions of all components, communicates with the computer and ensures that data is read and written correctly. Characteristics of the HDD: 1. Capacity: HDDs are available in a range of storage capacities, ranging from a few hundred gigabytes to several terabytes. They offer high storage density, which means that a large amount of data can be stored in a small physical space. 2. Speed: The speed of an HDD is determined by its rotational speed, which is measured in revolutions per minute (RPM). Higher RPMs generally result in faster data access and transfer speeds. 3. Access time: Access time refers to the time it takes for the read/write heads to move to the correct location on the platters and access the data. Lower access times generally result in faster performance. 4. Reliability: HDDs are generally reliable and can last for several years if maintained properly. However, they can be prone to mechanical failure due to the moving parts inside the drive. 5. Cost: HDDs are generally more affordable than other types of storage devices, such as Solid State Drives (SSDs). 6. Noise: HDDs can generate noise due to the spinning platters and moving read/write heads. However, modern HDDs are designed to be relatively quiet. 7. Power consumption: HDDs require more power to operate than other types of storage devices, such as SSDs. This can result in higher energy consumption and heat generation. In summary, the HDD is a complex storage device that uses multiple components to store and retrieve data. Understanding the layout, characteristics, and functions of these components can help users make informed decisions when choosing an HDD for their computing needs. Practical 5 Install Video Graphics Array (VGA) or Super Video Graphics Array (SVGA) display cards. 1. Determine compatibility: First, check if your computer's motherboard has an available expansion slot that can accommodate a VGA or SVGA display card. Check the specifications of the motherboard or computer to ensure that the expansion slot is compatible with the display card you plan to install. 2. Prepare the computer: Before installing the display card, shut down the computer and unplug it from the power source. Open the computer case and locate an available expansion slot, typically a PCIe slot. Also, ensure that you have the necessary tools, such as a screwdriver, to remove and secure the metal bracket that covers the expansion slot. 3. Remove the metal bracket: Locate the metal bracket that covers the expansion slot you plan to use, and unscrew it from the case using a screwdriver. Remove the bracket and keep it in a safe place as you will need it later to secure the display card to the case. 4. Insert the display card: Gently align the VGA or SVGA display card with the expansion slot, making sure that the connectors on the card align with the slot. Push the card down gently until it clicks into place. 5. Secure the display card: Once the display card is fully inserted into the expansion slot, use the screw that was removed earlier to secure the display card to the case. 6. Connect the display cable: Connect the VGA or SVGA cable from the monitor to the display card's VGA or SVGA port. 7. Close the computer case: Once the display card is securely installed, close the computer case and reattach any screws or other connectors that were removed earlier. 8. Power on the computer: Reconnect the power source and turn on the computer. The display card should be detected automatically by the operating system, and it may prompt you to install any necessary drivers. 9. Install drivers: If prompted, install the drivers for the display card. These can typically be downloaded from the manufacturer's website or provided on a CD or DVD that came with the display card. 10. Configure display settings: Once the display card and drivers are installed, configure the display settings in the operating system to match the resolution and refresh rate supported by the display card. This can typically be done in the display settings of the operating system. That's it! With the VGA or SVGA display card successfully installed, you should be able to enjoy improved graphics and visual performance on your computer. Practical 6 Install and understand the working of printer A printer is an output device that prints text or graphics on paper or other print media. There are various types of printers available, but the most common ones are inkjet printers and laser printers. Inkjet printers work by spraying tiny droplets of ink onto the paper through a print head that moves back and forth across the page. The ink cartridges contain different colored ink, and the printer mixes these colors to create the desired color output. The print head moves across the page in a series of horizontal lines, laying down ink droplets as it goes, until the entire image or document has been printed. Laser printers, on the other hand, use a toner cartridge that contains a powder made up of tiny particles of toner. The printer heats up the toner particles and transfers them onto the paper in the form of an electrostatic charge. The toner is then fused onto the paper using heat, resulting in a high-quality printout. Before printing, the user sends the document to be printed to the printer through a cable or wireless connection. The printer receives the data and converts it into a format that can be understood by the print head or toner cartridge. The printer then prints the document by moving the print head or toner cartridge across the page and depositing ink or toner onto the paper. In summary, a printer works by receiving digital data from a computer, converting it into a printable format, and then depositing ink or toner onto paper or other print media to create a physical copy of the document or image. Steps to install printer Practical 7 Install and understand the working of Input/output devices such as scanner and modem. To install a scanner, follow these steps: 1. Connect the scanner to your computer using a USB cable or a wireless network connection, depending on the type of scanner you have. 2. Turn on the scanner and wait for it to warm up. 3. Insert the installation CD that came with your scanner into your computer's CD/DVD drive. If your computer doesn't have a CD/DVD drive, you can usually download the necessary drivers and software from the scanner manufacturer's website. 4. Follow the prompts on the installation wizard to install the necessary drivers and software for your scanner. 5. Once the installation is complete, restart your computer. 6. Test the scanner by opening the scanner software that came with the installation and try scanning a document or photo. To install a modem, follow these steps: 1. Make sure your modem is compatible with your computer and your internet service provider (ISP). 2. Connect the modem to your computer using an Ethernet cable or USB cable, depending on the type of modem you have. 3. Connect the modem to a power outlet and turn it on. 4. Insert the installation CD that came with your modem into your computer's CD/DVD drive. If your computer doesn't have a CD/DVD drive, you can usually download the necessary drivers and software from the modem manufacturer's website. 5. Follow the prompts on the installation wizard to install the necessary drivers and software for your modem. 6. Once the installation is complete, restart your computer. 7. Connect the modem to your telephone or cable line, depending on your ISP. 8. Test your internet connection by opening a web browser and visiting a website. Working of Scanner: A scanner is an input device that captures digital images of documents, photographs, or other printed material. The working of a scanner can be summarized in the following steps: 1. Place the document or photo to be scanned on the scanner bed. 2. The scanner uses a light source and sensors to capture the image, and converts it into a digital format that can be stored on the computer. 3. The scanner software then processes the digital image, allowing the user to edit or manipulate it as needed. Working of Modem: A modem is an input/output device that connects a computer to the internet over a telephone line or cable line. The working of a modem can be summarized in the following steps: 1. The modem connects to the computer using a USB or Ethernet cable. 2. The modem then connects to the internet service provider (ISP) using a telephone line or cable line. 3. The modem communicates with the ISP to establish a connection to the internet. 4. Once the connection is established, the modem allows the computer to send and receive data over the internet. In summary, a scanner captures digital images of documents or photos, while a modem connects a computer to the internet over a telephone or cable line. Both devices are input/output devices that allow the user to send and receive data between the computer and external sources. practical 10 Find faults related to Monitor. Here are some common faults related to monitors in more detail: 1. No display: This is a common issue that can be caused by several factors, including a loose connection between the monitor and computer, a faulty cable, a problem with the graphics card, or a power supply issue. To troubleshoot, try checking the connections, testing the cable with another device, and restarting the computer. 2. Flickering or blurry display: This can be caused by a faulty cable, incorrect resolution settings, or a problem with the monitor itself. To troubleshoot, try adjusting the resolution settings, testing the cable with another device, or performing a monitor self-test. 3. Dead pixels: These are tiny black or colored dots on the screen that do not change when the rest of the image changes. Dead pixels are usually caused by manufacturing defects and cannot be fixed. If you notice dead pixels on your monitor, contact the manufacturer for a repair or replacement. 4. Stuck pixels: These are pixels that are stuck in one color, usually red, green, or blue. They can sometimes be fixed by using a pixel fixing software. If the software does not fix the issue, contact the manufacturer for a repair or replacement. 5. Oversized or undersized display: This can be caused by incorrect resolution settings, outdated graphics drivers, or a problem with the monitor's hardware. To troubleshoot, try adjusting the resolution settings and updating the graphics drivers. 6. Ghosting or trailing: This is when the image on the screen appears to lag or leave a trail behind moving objects. It can be caused by a slow response time of the monitor, outdated graphics drivers, or a faulty cable. To troubleshoot, try adjusting the response time settings, testing the cable with another device, or updating the graphics drivers. 7. Color distortion: If the colors on the monitor appear washed out or incorrect, it could be due to incorrect color settings, outdated graphics drivers, or a faulty monitor. To troubleshoot, try adjusting the color settings and updating the graphics drivers. Practical 11 Find faults related to CPU A CPU, or central processing unit, is one of the most important and expensive components in a computer. It’s responsible for performing the calculations and instructions that allow your computer to do what you want it to. So when your CPU starts to fail, it can be a major inconvenience. Here are 12 signs of a failing CPU: 1. Your computer is taking a long time to start up. If your computer is taking a long time to start up, then there is a chance that your CPU maybe failing as it isn’t able to process information quickly enough. 2. Your computer is running slowly. If your computer seems to be running more slowly than usual, this could be another sign that your CPU is starting to fail. This is because a failing CPU won’t be able to process information as quickly as a healthy one. 3. Your computer is crashing or freezing often. If your computer keeps crashing or freezing, it’s likely that your CPU isn’t able to handle the high demand that’s being put on it. This can cause the system to become unstable and result in crashes or freezes. 4. You’re getting blue screens often. Blue screens are a common indication that something is wrong with your computer and one of the things they can indicate is a failing CPU. If you’re seeing blue screens often, it’s definitely worth investigating whether or not your CPU is the issue. 5. Your computer’s fans are spinning unusually fast. If your computer’s fans are spinning faster than normal, it could be a sign that your CPU is struggling. This is because when a CPU starts to fail, it can put a lot of stress on the system and cause the fans to work harder in order to keep the system cool. 6. Programs are running slowly or not at all. If programs are running slowly or not even starting up, then it’s likely that your CPU is to blame. This is because the CPU is responsible for running all of the programs on your computer, so if it’s not working properly, then everything will start to slow down. 7. Your internet browser keeps freezing up. If your interner browser keeps freezing up, it could be a sign that your CPU is struggling. This is because the CPU is responsible for handling all of the internet traffic, so if it’s not working properly, then you may experience some problems. 8. Your computer is making strange noises. If your computer is making strange noises, it could be a sign that something is wrong with your CPU. This is because the CPU is responsible for controlling all of the fans in your computer, so if it’s not working properly, you may hear some strange noises. 9. Your computer is overheating. If your computer is overheating, it could be a sign that your CPU is failing. This is because the CPU is responsible for handling all of the tasks that your computer performs, so if it’s not working properly, your computer may overheat. 10. Your computer won’t turn on. If your computer won’t turn on, or is shutting down randomly, it could be a sign that your CPU is failing. This is because the CPU is responsible for starting up your computer, so if it’s not working properly, your computer may not turn on at all. 11. Your computer’s battery life has decreased significantly. If your computer’s battery life has decreased significantly, it could be a sign that your CPU is failing. This is because the CPU is responsible for handling all of the tasks that your computer performs, so if it’s not working properly, your computer may overheat. 12. Your computer’s performance has decreased significantly. If your computer’s performance has decreased significantly, it could be a sign that your CPU is failing. This is because the CPU is responsible for handling all of the tasks that your computer performs, so if it’s not working properly, your computer may be very slow. Practical 12 A Find faults related to Hard disk. 1. Slow performance: A hard disk may become slow due to fragmentation, outdated firmware, or bad sectors. 2. Clicking or grinding noises: These noises may indicate mechanical issues such as a faulty hard drive head or damaged platters. 3. Data corruption: This can occur due to a virus or malware infection, hardware issues, or power outages. 4. Bad sectors: Certain sectors on the hard disk can become unreadable due to physical damage or aging. 5. Failure to boot: This may be caused by a corrupted operating system, a damaged boot sector, or a failing hard disk. 6. Inaccessible files or folders: This may be caused by corrupt system files, bad sectors, or file system errors. 7. SMART errors: These errors are reported by the Self-Monitoring, Analysis, and Reporting Technology system and can indicate potential hardware failure. 8. Overheating: A hard disk may overheat due to poor ventilation or a malfunctioning cooling system. 9. Power surges: Sudden increases in power can cause damage to hard disks. 10. Physical damage: Hard disks can be damaged due to accidents, such as dropping the computer or spilling liquid on it. 11. Firmware issues: Outdated or corrupt firmware can cause a hard disk to malfunction. 12. File system errors: These can occur due to power outages or system crashes. 13. Electrical failures: Hard disks can fail due to electrical issues, such as faulty power supplies or electrical shorts. 14. Controller board failures: These can occur due to power surges, static electricity, or other electrical issues. 15. Software issues: Certain software, such as disk optimization or antivirus programs, can interfere with hard disk performance. 16. Partition errors: These can occur due to incorrect partitioning or resizing of the hard disk. 17. Driver issues: Outdated or incorrect drivers can cause a hard disk to malfunction. 18. Magnetic interference: Hard disks can be affected by strong magnetic fields. 19. Age: Hard disks have a limited lifespan and can fail due to wear and tear over time. 20. Manufacturing defects: Hard disks can have manufacturing defects that can cause them to fail prematurely.
