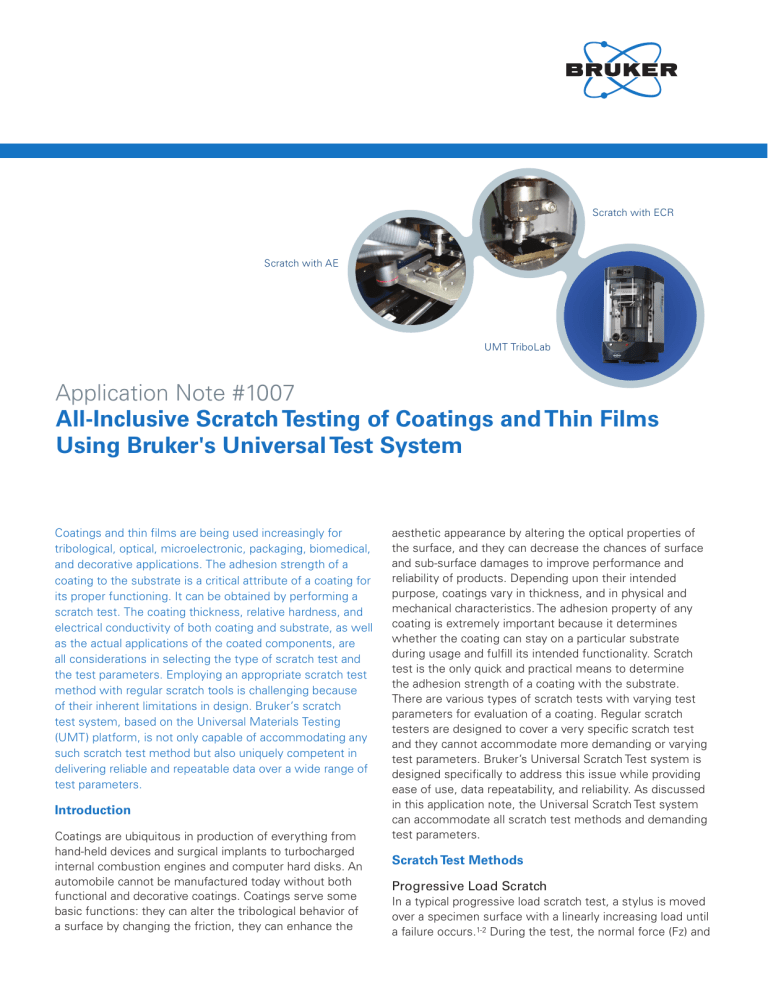
Scratch with ECR Scratch with AE UMT TriboLab Application Note #1007 All-Inclusive Scratch Testing of Coatings and Thin Films Using Bruker's Universal Test System Coatings and thin films are being used increasingly for tribological, optical, microelectronic, packaging, biomedical, and decorative applications. The adhesion strength of a coating to the substrate is a critical attribute of a coating for its proper functioning. It can be obtained by performing a scratch test. The coating thickness, relative hardness, and electrical conductivity of both coating and substrate, as well as the actual applications of the coated components, are all considerations in selecting the type of scratch test and the test parameters. Employing an appropriate scratch test method with regular scratch tools is challenging because of their inherent limitations in design. Bruker’s scratch test system, based on the Universal Materials Testing (UMT) platform, is not only capable of accommodating any such scratch test method but also uniquely competent in delivering reliable and repeatable data over a wide range of test parameters. Introduction Coatings are ubiquitous in production of everything from hand-held devices and surgical implants to turbocharged internal combustion engines and computer hard disks. An automobile cannot be manufactured today without both functional and decorative coatings. Coatings serve some basic functions: they can alter the tribological behavior of a surface by changing the friction, they can enhance the aesthetic appearance by altering the optical properties of the surface, and they can decrease the chances of surface and sub-surface damages to improve performance and reliability of products. Depending upon their intended purpose, coatings vary in thickness, and in physical and mechanical characteristics. The adhesion property of any coating is extremely important because it determines whether the coating can stay on a particular substrate during usage and fulfill its intended functionality. Scratch test is the only quick and practical means to determine the adhesion strength of a coating with the substrate. There are various types of scratch tests with varying test parameters for evaluation of a coating. Regular scratch testers are designed to cover a very specific scratch test and they cannot accommodate more demanding or varying test parameters. Bruker’s Universal Scratch Test system is designed specifically to address this issue while providing ease of use, data repeatability, and reliability. As discussed in this application note, the Universal Scratch Test system can accommodate all scratch test methods and demanding test parameters. Scratch Test Methods Progressive Load Scratch In a typical progressive load scratch test, a stylus is moved over a specimen surface with a linearly increasing load until a failure occurs.1-2 During the test, the normal force (Fz) and lateral force (Fx) values are recorded along with test time and scratch distance. In addition, it is preferable to record the acoustic emission (AE) and electrical contact resistance (ECR) data, which are very vital to precisely detect subsurface and incipient failure. The scratch failure-mode of the coating is examined by an optical microscope after the test. The normal load at which such failure occurs is known as the critical load (Lc). There may be a number of critical loads corresponding to each mode of failure. The critical load is a function of a number of factors, including the adhesion strength between the coating and the substrate, radius of the stylus or scratch-tip, loading rate (N·s-1), mechanical properties of the substrate and the coating, coating thickness, internal stress in the coating, flaw-size distribution in the coating and at the coating-substrate interface, and the coefficient of friction between the stylus and the coating.3 Progressive load scratch test covers the complete load range with a single test. Therefore, it is faster than other types of scratch tests. The test is suitable for rapid assessment and QC of coatings and thin films. One of the progressively increasing load tests is the linear scratch test. The schematic load and scratch-width profiles for a linear scratch test are shown in Figures 1(A) and 1(B), respectively. As the linear scratch progresses with increasing normal force, the width of the scratch also increases, as indicated schematically in Figure 1(B). Another type of progressive load scratch test is zigzag scratch. In this test, the stylus oscillates along one (Y) direction while, at the same time, a scratch test is performed with increasing load along the perpendicular (X) direction. The load and scratch-width profiles for such a test are shown in Figures 2(A) and 2(B), respectively. Under zigzag test, a series of micro-scratches are produced during scratching by oscillation of the stylus in Y direction. The zigzag scratch test is very useful to find out the scratch adhesion values of soft and/or thin coatings. A B Figure 1. Schematics of (A) load and scratch-width (B) profiles of a linear scratch test. A B Figure 2. Schematics of load (A) and scratch-width (B) profiles of a zigzag scratch test. 2 Constant Load Scratch Constant load scratch testing provides better differentiation of damage levels. However, the constant load scratch test requires more specimen surface and test time. Nevertheless, a constant load test provides a greater statistical confidence in the results. Such scratch tests are very popular for research and process development of coatings. In such tests, a series of scratches are produced with constant normal loads on a coating to obtain the critical loads. Each scratch is examined with an optical microscope for failure of the coating and the evaluation of the critical load. Depending upon the electrical characteristics of the coating and the substrate, acoustic emission (AE) and electrical contact resistance (ECR) data may also be monitored during the test to confirm the failure. A constant load scratch test can be performed either unidirectionally or in X-Y. In unidirectional scratching, the constant load scratch is performed by moving the stylus in one direction with a constant normal force. The schematic load and scratch width profiles for unidirectional scratch test are shown in Figures 3(A) and 3(B), respectively. An X-Y scratch is produced by moving the stylus alternately in the X and Y directions under a constant normal load. The schematic load and scratch path for an X-Y scratch are shown in Figures 4(A) and 4(B), respectively. In the X-Y scratch, the spacing between two successive scratches along the X-direction is gradually reduced, as is shown in Figure 4(B). The failure mode in such scratch test indicates the extent of flaw tolerance of the specimen. At the critical spacing, the failure takes place due to the presence of micro-cracks that were formed or subsurface stresses that were induced during prior scratching along one direction (X). A B Figure 3. Schematics of load (A) and scratch-width (B) profiles of a unidirectional scratch. A B Figure 4. Schematics of load (A) and scratch (B) paths of an X-Y scratch. A constant load scratch test can also be used to scrape through any micro-feature to obtain the adhesion energy that is required of scratching such features off the substrate. Blade-type geometry as opposed to sharp-tip geometry is often used for adhesion energy scratch testing. After the test, the lateral force is plotted against the scratch distance. The area under the Fx versus distance curve yields the adhesion energy that can be used for comparison of the adhesion strength of such micro-features. Bruker’s Scratch Test System Bruker’s scratch test system is built on the Universal Mechanical Test (UMT TriboLab™) platform, which provides precision control of load, speed, and position. The system’s modular design ensures the flexibility to cover test capabilities over a wide range of forces and velocities to perform any scratch test. TriboLab utilizes three major drive systems, Carriage, Slider, and Y-stage for Z-, X-, and Y-motion, respectively. Integrated “intelligent” hardware (TriboID™) and software (TriboScript™) interfaces make the tester an extremely user-friendly, versatile, and productive scratch tool. TriboID not only automatically detects the various components attached to the system, but it also configures them. TriboScript offers an enhanced and secured scripting interface for easy compilation of scratch test sequences from the built-in test blocks. The system is also equipped with a real-time control and data analysis software to ensure high accuracy and repeatability. Bruker’s scratch test system can be used successfully for scratch testing under progressive and constant load conditions. Carriage provides motion along Z-direction for loading and displacement. Carriage also accommodates the slider that houses a force sensor and an optical microscope. The slider provides motion along the X-direction. The linear stage is for mounting the test specimen and providing movement along the Y-direction. The scratch test system has options for simultaneous measurement of electrical contact resistance (ECR), electrical surface resistance (ESR), acoustic emission (AE), and in-situ scratch depth profiling using a capacitance sensor or tip-displacement, and optical microcopy for automated imaging of the entire scratch. Bruker’s Data Viewer software allows for plotting of the entire image of the scratch along with other data, such as Fx, Fz, AE, scratch distance and depth, ECR, and ESR. There are a series of force sensors [FVL: 1 to 100 mN; FL: 5 to 500 mN; DFM series: 0.05 to 20 N; DFH series: 0.5 to 200 N] and scratching styli/tips [diamond stylus: 2.5, 5, and 12.5 μm tip radius; Rockwell indenter: 200 μm tip radius with 120° cone angle; Vickers Indenter (with a 4-sided 136° apex angle), Knoop Indenter: with two apex angles (130° and 172°50/); microblade (tungsten carbide, diamond)] are available for scratch testing in the Bruker’s all-inclusive scratch test system. Scratch Test Results Scratch tests were performed on Bruker’s scratch test system on coatings and thin films. Some test results are presented below as examples. Progressive Scratch Test on Coatings Paints or ceramic coatings are routinely evaluated for their scratch adhesion properties using Bruker’s scratch test system. Figure 5 shows COF, Fz, and R (ECR) versus distance plots for scratch test on a DLC coating on a steel substrate. The scratch test was performed with a tungsten carbide microblade (400 μm tip radius) and a DFH-5 force sensor. The coated specimen was mounted on the Y-stage and the microblade was installed under the force sensor. The scratch test was performed by applying an initial load of 1 N on the coating with the microblade, followed by moving the specimen over a distance of 5 mm at a velocity of 0.02 mm/s. During such movement of the specimen, the vertical load (Fz) was linearly increased from 1 to 45 N. Fx, Fz, AE, and ECR data were recorded during the test. After the test, the imaging of the entire scratch was performed automatically. Scratched Scratched Adhesion Figure 5. Fx, Fz, AE, and R versus distance (Y, mm) plot for scratch test on a paint specimen. The control of Fz during the test was excellent as evidenced in Figure 5. An optical micrograph of the entire scratch is also presented on the upper half of Figure 5. An image ruler on the optical images shows the image dimension (∆X) between two horizontal line segments in yellow and the corresponding position (Y). The image ruler is used to measure on the optical image by placing the line segments at required positions using a mouse-pointer. Just before 4 mm from the start of the scratch, the electrical contact resistance plot showed a sharp decrease, AE showed high activities, and Fx exhibited a rising trend. Interestingly, the optical image of the scratch also indicated the initiation of the delamination of the coating at that point. Fx, AE, ECR data and optical image simultaneously confirmed the failure of the coating at about 4 mm from the start of the scratch. The corresponding value of Fz at which the failure of the coating took place was 39.6 N, which is the scratch adhesion value of the coating. 3 Zigzag Scratch Test on a Magnetic Disk Magnetic disks have a lubricant layer on top of a submicronthick diamond-like carbon layer (DLC) on a magnetic substrate. The DLC coating is applied to protect the disk from scratching and corrosion, and to maintain a low friction. It has a high hardness and high elasticity, improves lubricant compatibility, and reduces the surface roughness. Considering the thickness of the film and mechanical properties, the progressive scratch test method is not suitable for its evaluation. The zigzag test method is very successful to study such a thin and hard film. Figure 6 presents the Fx, COF, Fz, and AE versus scratch distance for a zigzag scratch test on a magnetic disk. COF data were derived from the lateral force and normal force during the scratch test. The zigzag scratch test was performed with a Rockwell indenter (200-μm tip radius) with a scratch distance of 2 mm along the X-direction at velocity of 4 μm/s. The normal load was linearly increased from 0.5 to 20 N over the 2-mm scratch distance along the X-direction. The stylus was oscillating along the Y-direction. An optical image of the entire scratch at the top of Figure 6 clearly exhibits three distinct areas: Region-1 showing removal of the top lubricant layer, Region-2 showing failure of the DLC layer in bluish color with increasing COF and AE at a Fz value of 7.3 N, and Region-3 showing scratching of the magnetic layer underneath DLC with high COF and AE activity. Figure 7. Trace of tip position for a X-Y scratch. Figure 8. Optical image of the X-Y scratch on a DLC coating, as shown in Figure 7. Region 1 Region 2 Region 3 Conclusions Scratched Scratched Adhesion Figure 6. Fx, COF, Fz, and AE versus distance (X) plot for a zigzag scratch on a magnetic disk. X-Y Scratch Test on DLC Coating Bruker’s scratch tester can be successfully used to evaluate a coating using the X-Y type scratch methodology. The scratch traverse in the X-Y plane and the corresponding scratch track on a diamond-like carbon (DLC) coating on steel substrate are presented in Figures 7 and 8, respectively. The scratch test was performed with a diamond stylus with 12.5-μm tip radius using an FL sensor. The length of the scratch along the Y direction was 120 μm. The values of X-spacing between successive scratches were 60, 40, 30, 20, 15, 10, and 5 μm, respectively. The test was performed with a constant normal load of 250 mN. Figure 8 shows that the coating failed between the sixth and seventh scratch, with a critical X-spacing of 10 μm. The failure mode was delamination, initiated by the micro-cracks that were introduced during the previous passes. 4 Scratch test is a vital procedure for R&D and QC activities on coatings and thin films for tribological, optical, microelectronic, packaging, biomedical, and decorative applications. Bruker’s TriboLab universal scratch test system is capable of performing all types of challenging scratch tests with automated optical imaging for comprehensive evaluation of coating and thin film materials. References 1. ASTM C1624-05 (2015), Standard Test Method for Adhesion Strength and Mechanical Failure Modes of Ceramic Coatings by Quantitative Single Point Scratch Testing, ASTM International, West Conshohocken, PA, 2015, www.astm.org. 2. Bull, S.J., “Failure Mode Maps in the Thin Film Scratch Adhesion Test,” Tribology International 30 (1997), 491–98. 3. Blees, M.H., Winkelman G.B., Balkenende A.R., and den Toonder, J.M.J., “The Effect of Friction on Scratch Adhesion Testing: Application to a Sol–gel Coating on Polypropylene,” Thin Solid Films 359 (2000), 1–13. Author ©2015 Bruker Corporation. All rights reserved. AN1007, Rev. A1 Suresh Kuiry, Ph.D., Senior Applications Scientist, Bruker Nano Surfaces Division (suresh.kuiry@bruker.com) Bruker Nano Surfaces Division San Jose, CA · USA +1.408.376.4040 productinfo@bruker.com www.bruker.com/tribology 5


