Counter
T H E
E L E C T R O N I C,
D I A G N O S T I C
A N D
Point
Volume 1 Issue 4, Fall 2005
D R I V E A B I L I T Y
Jeep Ignition Sync Problems
A
combination
of your senses,
the right test
equipment and reference
materials and experience
can make short work of
seemingly tough
diagnostic problems.
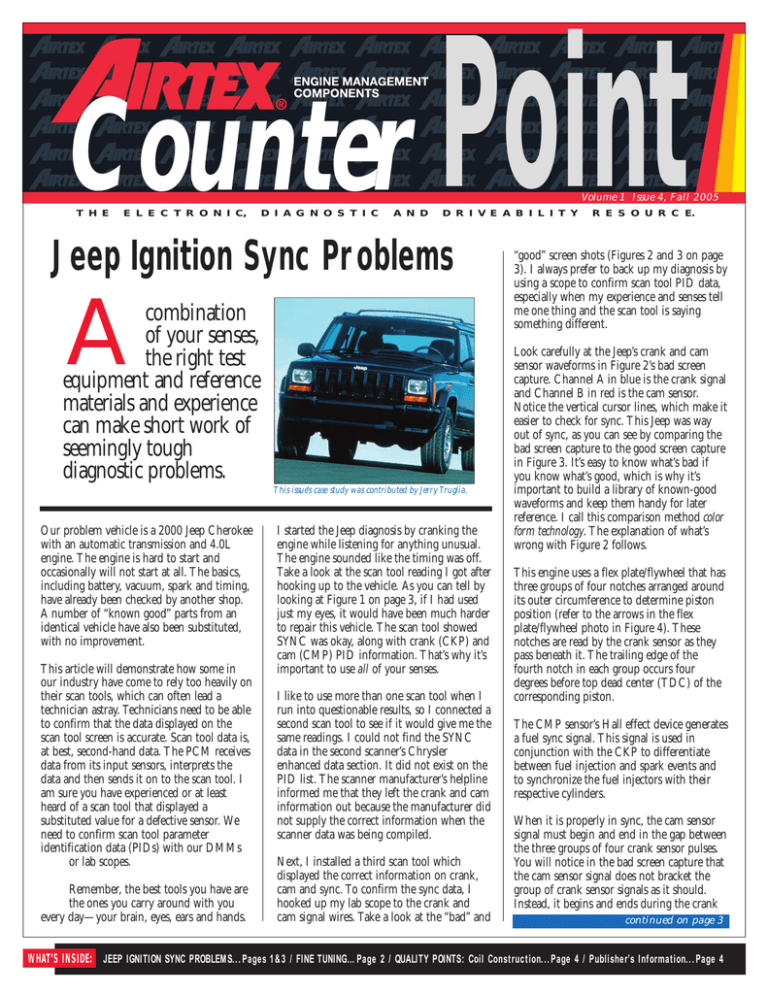
This issue’s case study was contributed by Jerry Truglia.
Our problem vehicle is a 2000 Jeep Cherokee
with an automatic transmission and 4.0L
engine. The engine is hard to start and
occasionally will not start at all. The basics,
including battery, vacuum, spark and timing,
have already been checked by another shop.
A number of “known good” parts from an
identical vehicle have also been substituted,
with no improvement.
This article will demonstrate how some in
our industry have come to rely too heavily on
their scan tools, which can often lead a
technician astray. Technicians need to be able
to confirm that the data displayed on the
scan tool screen is accurate. Scan tool data is,
at best, second-hand data. The PCM receives
data from its input sensors, interprets the
data and then sends it on to the scan tool. I
am sure you have experienced or at least
heard of a scan tool that displayed a
substituted value for a defective sensor. We
need to confirm scan tool parameter
identification data (PIDs) with our DMMs
or lab scopes.
Remember, the best tools you have are
the ones you carry around with you
every day—your brain, eyes, ears and hands.
I started the Jeep diagnosis by cranking the
engine while listening for anything unusual.
The engine sounded like the timing was off.
Take a look at the scan tool reading I got after
hooking up to the vehicle. As you can tell by
looking at Figure 1 on page 3, if I had used
just my eyes, it would have been much harder
to repair this vehicle. The scan tool showed
SYNC was okay, along with crank (CKP) and
cam (CMP) PID information. That’s why it’s
important to use all of your senses.
I like to use more than one scan tool when I
run into questionable results, so I connected a
second scan tool to see if it would give me the
same readings. I could not find the SYNC
data in the second scanner’s Chrysler
enhanced data section. It did not exist on the
PID list. The scanner manufacturer’s helpline
informed me that they left the crank and cam
information out because the manufacturer did
not supply the correct information when the
scanner data was being compiled.
Next, I installed a third scan tool which
displayed the correct information on crank,
cam and sync. To confirm the sync data, I
hooked up my lab scope to the crank and
cam signal wires. Take a look at the “bad” and
R E S O U R C E.
“good” screen shots (Figures 2 and 3 on page
3). I always prefer to back up my diagnosis by
using a scope to confirm scan tool PID data,
especially when my experience and senses tell
me one thing and the scan tool is saying
something different.
Look carefully at the Jeep’s crank and cam
sensor waveforms in Figure 2’s bad screen
capture. Channel A in blue is the crank signal
and Channel B in red is the cam sensor.
Notice the vertical cursor lines, which make it
easier to check for sync. This Jeep was way
out of sync, as you can see by comparing the
bad screen capture to the good screen capture
in Figure 3. It’s easy to know what’s bad if
you know what’s good, which is why it’s
important to build a library of known-good
waveforms and keep them handy for later
reference. I call this comparison method color
form technology. The explanation of what’s
wrong with Figure 2 follows.
This engine uses a flex plate/flywheel that has
three groups of four notches arranged around
its outer circumference to determine piston
position (refer to the arrows in the flex
plate/flywheel photo in Figure 4). These
notches are read by the crank sensor as they
pass beneath it. The trailing edge of the
fourth notch in each group occurs four
degrees before top dead center (TDC) of the
corresponding piston.
The CMP sensor’s Hall effect device generates
a fuel sync signal. This signal is used in
conjunction with the CKP to differentiate
between fuel injection and spark events and
to synchronize the fuel injectors with their
respective cylinders.
When it is properly in sync, the cam sensor
signal must begin and end in the gap between
the three groups of four crank sensor pulses.
You will notice in the bad screen capture that
the cam sensor signal does not bracket the
group of crank sensor signals as it should.
Instead, it begins and ends during the crank
continued on page 3
WHAT’S INSIDE: JEEP IGNITION SYNC PROBLEMS...Pages 1&3 / FINE TUNING…Page 2 / QUALITY POINTS: Coil Construction...Page 4 / Publisher’s Information...Page 4
Fine Tuning questions are answered by
Mark Hicks, Technical Services Manager.
Please send your questions to: Mark Hicks
c⁄ o Airtex Engine Management,
P.O. Box 70, Fond du Lac, WI
54936-0070 or e-mail him at
mhicks@airtexproducts.com.
We’ll send you a very nice golf shirt if your
question is published. So please include
your shirt size with your question.
Fine Tuning
replaced the engine in this vehicle because the
original hydro-locked after driving through deep
water. The replacement engine had a misfire
that was corrected by replacing one of the coils.
It ran great until now, but the replacement coil
also has burned out. We have replaced the
spark plugs, ignition wires, cap and rotor. What
else could be causing these coils to burn out?
Q: I am working on a 1997 Corvette. The
steering column will not unlock and there is a
light on the dash that says “Service Steering
Column Lock.” What does this mean and how do I
correct the problem?
Ted Walk
Walk Enterprises
Lothian, MD
Peter Cappazzo
Tallahassee, FL
A: Ted, this is a problem that has been
plaguing Corvette owners for the past several
years. GM incorporated an Electronic Lock
System on 1997-2004 Corvette vehicles that
is controlled by the body control module
(BCM). When the ignition key is turned to
the ON position, the BCM sends a signal to
the steering column lock motor to unlock the
column. The BCM then checks the line to
verify operation. If the BCM detects nonoperation, it will illuminate the Service
Steering Column light on the dash.
A: If the compression is not excessively high
on either of the cylinders this coil fires, begin
by looking at the circuit that controls the
negative side of the coil. A PCM driver or
transistor controls the negative side of the
coil’s primary windings. If this transistor is
partially or intermittently shorted to ground
at times other than when the PCM
commands it, current will flow through the
primary winding — increasing dwell time
and shortening coil service life.
This condition is usually caused by a defective
Electronic Lock System, BCM, wiring or a
low battery. There has also been a GM recall
on this problem. A column lock bypass
(CLB) kit is also available in the aftermarket
as a preventive repair. This kit only works on
later models with MN6 or MN12 systems
and should only be used if the unlocking
problem has not already occurred.
Results: After closer examination, it was
determined that salt water had also entered
the passenger compartment and the PCM
shorting the coil driver. To prevent future
problems, the entire wiring system should be
scrutinized.
In the last Counter Point, we began the
diagnosis of an intermittent ignition switch
on a 2001 Chevrolet Impala. The switch
would occasionally cut out the cruise control
Q: We are working on a 2001 Mitsubishi Mirage
Sedan ES with a 1.8L engine. We previously
2001 Chevy Impala
Ignition Circuit
Ignition
Switch
4
Junction
BlockLeft I/P
A/C FAN
Fuse
20A
1
CRUISE
Fuse
2A
PCM (CRANK)
Fuse
10A
2
Inside
Rearview
Mirror
Driver
Information
Center
(DIC)
Cruise
Control
Module
(CCM)
Air
Temperature
Actuator
Rear
Compartment
Occupant
Sensor
3
HVAC
Control
Module
HVAC
Control
Module
PCM/BCM/CLSTR
Fuse
10A
Cruise
Control
Release
Switch
Cruise
Control
ON/OFF
Switch
Powertrain
Control
Module
(PCM)
Body
Control
Module
(BCM)
2
Instrument
Panel
Cluster
(IPC)
and blower motor. To reach the correct
diagnosis, we took voltage measurements at
two different switch terminals by
connecting a DVOM to the fuse in
each circuit. Because the ignition
switch has one voltage source feeding
the two circuits we were testing, we
knew the switch was the problem
when the voltage dropped in one circuit but
not the other.
This article will explain how this test can be
accomplished when only one meter is
available. The analysis we are about to discuss
is called a voltage drop test. A voltage drop
test is a very easy and extremely accurate
circuit test when the essentials are
understood. A conventional resistance test,
conducted with an ohmmeter, is an adequate
method for checking ignition wires or coil
windings, but should not be depended upon
to test the primary wiring of a vehicle.
Suppose we suspect a defective battery cable
because the starter is turning slowly. The
cable may be damaged and only eight strands
of wire are still attached to the starter, but we
can’t see the problem because the damage is
hidden beneath the wire sheath. If we were to
attach ohmmeter leads to each end of this
battery cable, we would read zero
resistance and may assume the cable is
good. The low resistance occurs
because the ohmmeter’s internal
battery sends out a very weak current
through one of its leads. It then calculates
resistance by measuring how much of that
current returns to the meter through the
other lead. The small amount of current
produced by the ohmmeter will have no
problem passing through the cable’s
remaining eight strands of wire. A voltage
drop test is a more reliable test, because it
tests the circuit in operation and under load.
To perform a voltage drop test on the same
battery cable, simply leave the DVOM leads
on each end of the cable, just as if you are
checking resistance and turn the meter dial to
read DC volts. Then, energize the circuit by
attempting to or by cranking the engine. If
you read more than .5 volts on your meter at
that time, the cable is defective. The current
that cannot pass through the cable’s damaged
strands will use your meter as a path to
ground and in turn be counted.
Refer to the wiring schematic at the bottom
of this page. We can perform a voltage
drop test across this circuit by
connecting our meter to connections 1
or 2 and 4 in the fuse panel. The meter
read 10.16 volts when the problem occurred,
indicating a huge voltage drop across this
circuit and proving the ignition switch was
defective. A fifth page with pictures of this
test has been added to the PDF version of the
Summer Counter Point. It’s available
for download at our website
(www.airtexproducts.com).
The first readers to submit the correct
answer to this problem are:
Gary Dickson
Dickson Body and Paint
Johnstown, OH
Rollin D. Nelson
Nelson 7607 Automobile Service
Ord, NE
continued from page 1
Jeep Ignition Sync Problems
sensor signal groups. Look at the difference in
the crank signal’s three groups of four pulses
in relationship to the cam signal in the good
screen capture. It’s noticeable that the group
of crank sensor signals fits right into the cam
sensor signal’s rise and fall. However you
chose to view it, the difference is clear.
Remember, the scan tool PID reported that
the system was in sync at the same time that I
collected the bad screen capture.
Figure 1: First scanner PID readings.
Geoff Emmett
Auto Care by Kenely
Orangevale, CA
Figure 2: Bad cam and crank sensor SYNC waveforms.
Timing
Notches
Figure 5: Cam position sensor atop oil pump drive
housing. Arrow points to alignment hole.
Figure 3: Good cam and crank sensor SYNC waveforms.
Andy Kollman
Minneapolis, MN
If you have the answer, use the following
contact information:
E-mail: mhicks@airtexproducts.com
Fax: (920) 922-3585
Postal: Counter Point Editor,
c/o Airtex Engine Management
P.O. Box 70
Fond du Lac, WI 54936-0070
Important Dates To
WinRemember
A Shirt
The National Institute for
Automotive Service Excellence
(ASE) will offer certification
tests for repair professionals and
parts specialists on November
10th, 15th and 17th. If
you’ve already registered for the tests,
be sure to mark your calendar with
these important test dates. Airtex
Engine Management encourages
professionalism through technician
certification.
It’s not hard when you have the right
diagnostic equipment (including the stuff you
were born with), reference material and
training.
Figure 4: Flywheel/flexplate showing timing notches.
Diagnose The Problem Win A Shirt
Q: I am working on a 2001 Chevrolet Impala
with a 3.8L engine that has 82,000 miles on
it. The customer’s complaint is that the
transmission will not shift and the vehicle will
not go over 20 mph. When I test-drive the
vehicle I can hear a sucking noise coming
from the engine and it will not go any faster
than 20 mph. I installed a vacuum gauge and
it reads about 14 inches of mercury at idle.
But when I accelerate even lightly, the
vacuum drops close to zero. A
diagnostic trouble code (P0410),
representing a problem with secondary
air injection, is stored in the PCM’s
memory. Could the air pump or something
else in the air pump system be causing this? If
not what else could be wrong? How can I test
for the problem?
Refer to a computer-based repair information
system or a printed repair manual for the
proper cam sensor setup and installation
procedure. Use a drill bit to line up and set
the cam sensor. The hole in the shaft needs to
be aligned with the hole in the cam vane
blade. After installing the new parts, check
the sync with your scope to verify the repair.
The older engines used a similar setup.
However, this newer style ignition system uses
a Hall effect crank sensor—not an ACgenerating crank sensor.
Alignment
Hole
This out of sync condition occurs when the
oil pump drive shaft binds inside the oil
pump drive housing, causing the entire
housing to rotate slightly. The cam position
sensor is located at the top of the oil pump
drive housing, where the old distributor, cap
and rotor used to be located. In extreme
cases, the oil pump drive shaft or its camshaft
mating gears may break, causing a no-start
condition. More commonly, the housing
rotates slightly, causing the out of sync
condition seen here. If the housing does not
appear to be parallel with the block or shows
other signs of movement, the fix is to install a
new housing that’s been properly prelubed.
3
This case study was provided to Counter
Point by Jerry “G” Truglia. G is an
experienced automotive instructor who has
written many training classes and study
guides. His company provides training
programs and materials on OBD II and
many other topics to automotive
technicians, 11 state emissions programs
and various associations. Counter Point
looks forward to future contributions from
G, as well as other driveability instructors.
Thanks, G, for this great case study.
PRSRT STD
U.S. Postage
PAID
AIRTEX ENGINE MANAGEMENT
Fond du Lac,WI
Permit No. 433
P.O. Box 70
Fond du Lac, WI 54936-0070
ition
Jeep Ign lems
b
Sync Pro
Quality Points
Superior Coil Construction
One of the most common ignition coils is the
GM two-tower DIS coil. There are two common
causes when these coils fail. The secondary
windings may short to the primary windings, or
the secondary windings may short
to the coil’s grounded laminations.
This is usually due to high secondary
High
resistance (a defective ignition wire
Dielectric
Sleeve
or spark plug). The high secondary
resistance destroys the coil, and
possibly the ignition control module
(ICM), because there is no built-in
protection to stop it.
When the coil’s secondary windings
become electrically charged, the current will
discharge via the path of least resistance. If the
intended path is blocked, the current uses the coil
laminations or the primary windings to complete
the path instead. This also stresses the ICM.
Airtex Engine Management has corrected this
by placing a high dielectric sleeve, with lifts
on its base, between the coil’s primary and
secondary windings. This greatly improves
dielectric strength between the
primary and secondary winding,
and between the secondary
windings and the laminations,
preventing coil failure and
greatly reducing ICM stress.
If a manufacturer does not use
ingenuity to improve the quality
of its products, you are destined
to replace failed components
with new components that will fail again, and
in the same way. You can depend on Airtex
Engine Management to deliver components
of the highest quality which address original
design limitations.
Publisher’s Information
President.........................William Allen
V.P. Marketing & Sales....Steve Hildebrand
Technical Services Manager ... Mark Hicks
Newsletter Editor ................Karl Seyfert
Counter Point is a quarterly publication of
Airtex Engine Management, P.O. Box 70, Fond du
Lac, WI 54936-0070. Letters and comments
should be directed to: Counter Point Editor,
c/o Airtex Engine Management, P.O. Box 70,
Fond du Lac, WI 54936-0070.
© COPYRIGHT 2006 AIRTEX ENGINE MANAGEMENT.
All rights reserved. No reproduction in whole or part is permitted
without the written consent of Airtex Engine Management.
SUBSCRIPTION FORM: If you are not already
receiving a quarterly issue of Counter Point, please
fill out the following form and mail or fax it to:
Counter Point
c/o Airtex Engine Management
P.O. Box 70, Fond du Lac, WI 54936-0070
FAX: (920) 922-3585
www.airtexproducts.com
(If you already receive Counter Point, your subscription will
continue automatically.)
NAME/TITLE
COMPANY
STREET ADDRESS
CITY, STATE, ZIP CODE
PHONE NUMBER


