HardieTrim™ Skirt Board
INSTALLATION REQUIREMENTS
JUNE 2015
PRIMED & COLORPLUS® PRODUCTS
Visit www.hardieinstallation.com for the most recent version.
IMPORTANT: FAILURE TO INSTALL AND FINISH THIS PRODUCT IN ACCORDANCE WITH APPLICABLE BUILDING CODES AND JAMES HARDIE WRITTEN APPLICATION
INSTRUCTIONS MAY LEAD TO PERSONAL INJURY, AFFECT SYSTEM PERFORMANCE, VIOLATE LOCAL BUILDING CODES, AND VOID THE PRODUCT ONLY WARRANTY.
STORAGE & HANDLING:
• Store on flat and level surfaces
• HardieTrim Skirt Board Products may conform to the
shape of its position during storage
• Do not store in areas prone to excessive heat build-up
• When stored outdoors, keep products in boxes and in
plastic sleeves as shipped from the manufacturer
• If skirt board boxes have been opened, take care to keep
product free of dirt and debris
• Care should be taken when handling HardieTrim Skirt
Board Products.
• At the job-site use a soft cloth to gently wipe any residue
or construction dust left on the product
CUTTING AND JOINING INSTRUCTIONS:
•
•
•
•
HardieTrim Skirt Boards are best cut using a miter saw
Cut skirt boards using a finish grade saw blade (80 teeth or greater is recommended)
Place HardieTrim Skirt Boards face up when cutting
For best results use a scarf joint (22.5-45 degree) instead of a butt joint when joining long
runs of skirt board (see fig. 1)
• Due to HardieTrim Skirt Board’s dimensional stability, expansion joints are not necessary when
joining two pieces
• Adhesives are not required when joining long runs of HardieTrim Skirt Boards
• After cutting there may be some residue left on the skirt board that should be removed and
cleaned. Remove cut residue with a utility knife and wipe clean
GENERAL REQUIREMENTS
SCARF JOINTS
For best results, when splicing long runs join skirt board
members using a scarf joint. Use a bevel cut of 22.5º 45º cut when joining.
22.5° – 45° Cut
Paint, caulk, or seal
all field cut ends
• HardieTrim Skirt Board shall be installed such that they maintain clearance and/or flashing
requirements prescribed by James Hardie® siding and trim products. See HardieInstallation.com.
• Consult with local building code for additional requirements.
• Install flashing and water-resistive barrier as required by code. James Hardie will assume no
responsibility for water infiltration.
• HardieTrim Skirt Board shall be attached to wood or steel backing.
• HardieTrim Skirt Board shall be installed with minimum ¼ in. clearance from grade, steps, paths,
driveways, & roof decks. Consult with local building code requirements for appropriate grade
clearances.
• Do not install James Hardie products such that they may remain in contact with standing water.
FIGURE 1
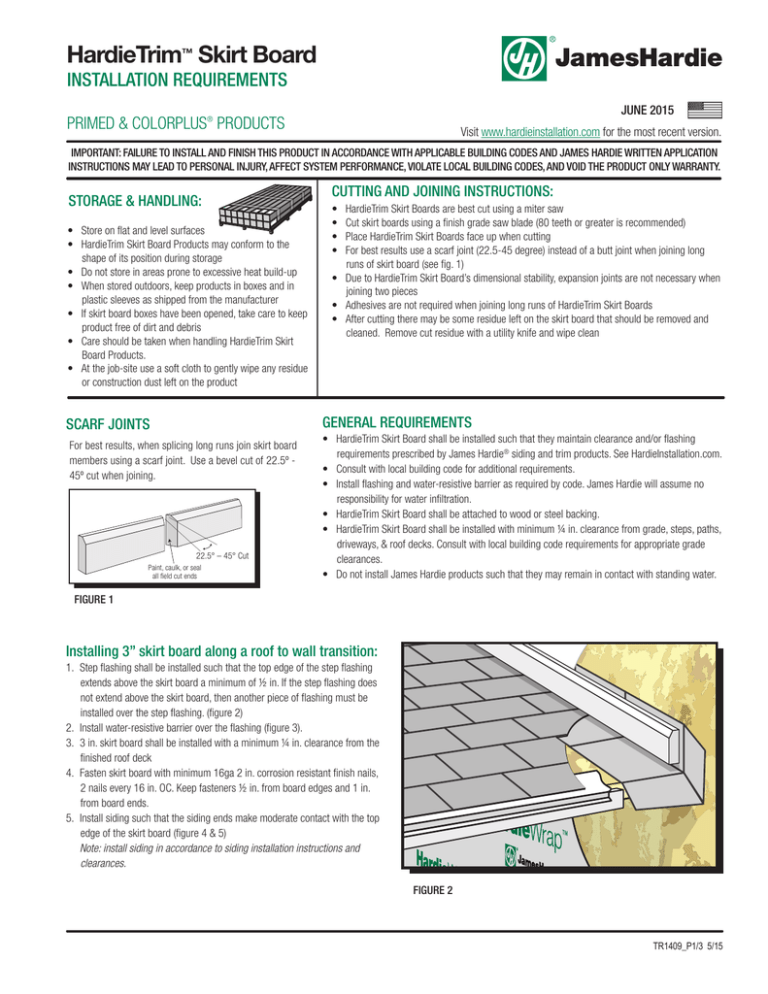
Installing 3” skirt board along a roof to wall transition:
1. Step flashing shall be installed such that the top edge of the step flashing
extends above the skirt board a minimum of ½ in. If the step flashing does
not extend above the skirt board, then another piece of flashing must be
installed over the step flashing. (figure 2)
2. Install water-resistive barrier over the flashing (figure 3).
3. 3 in. skirt board shall be installed with a minimum ¼ in. clearance from the
finished roof deck
4. Fasten skirt board with minimum 16ga 2 in. corrosion resistant finish nails,
2 nails every 16 in. OC. Keep fasteners ½ in. from board edges and 1 in.
from board ends.
5. Install siding such that the siding ends make moderate contact with the top
edge of the skirt board (figure 4 & 5)
Note: install siding in accordance to siding installation instructions and
clearances.
FIGURE 2
TR1409_P1/3 5/15
FIGURE 3
FIGURE 4
FIGURE 5
CROSSCUT VIEW
Installing 3” skirt board as a starter trim, belly band,
or water table:
1. Install flashings and water-resistive barrier as required.
2. Flashing(s) for skirt board can be installed as shown in figure 6 or figure 7
3. Install skirt board a minimum ¼ in. clearance above finished graded
surface. Check with local building code for proper clearance requirements.
4. Fasten skirt board with minimum 16ga 2 in. corrosion resistant finish
nails, 2 nails every 16 in. OC. Keep fasteners ½ in. from board edges
and 1 in. from board ends.
5. Install starter strip and siding as shown. (figure 6 or 7)
FIGURE 6
TR407_P2/3 5/15
CAULKING
For best results when caulk is used, use an Elastomeric Joint Sealant complying
with ASTM C920 Grade NS, Class 25 or high quality paintable caulk or a Latex
Joint Sealant complying with ASTM C834. Caulking/Sealant must be applied in
accordance with the caulking/sealant manufacturer’s written instructions or
ASTM C1193.
CLEANING
Clean with mild detergent and water, Nylon brush or mild cleaner or degreaser.
Avoid harsh cleaners with glycol ethers, ethanol or isopropyl alcohol. Test cleaner
on a small area prior to full use.
CUT EDGE TREATMENT
Caulk, paint or prime all field cut edges and joints.
FILLER
Fill all holes and gaps; repair scratches, dents or gouges by applying a
"non-shrinking" plastic paintable putty.
FIGURE 7
COLORPLUS® TOUCH-UP
FASTENER REQUIREMENTS
• Pneumatic fastening is recommended.
• For most profiles use a minimum 16-18 gauge galvanized finish nail.
• Fastener length shall be selected such that the fastener penetrates into
substrate a minimum 1 in. for wood, ¼ in. for steel, & 3 threads for screws.
Ensure HardieTrim Skirt Board is adequately fastened.
• Fasten minimum 1 to 2 fasteners every 16 in. o.c.
• Position fasteners no closer than 1/8 in. from the edges and 1 in. from ends.
• Adjust and calibrate nail-gun to achieve proper fastener depth (usually
between 60-80 psi).
• Exterior grade screws may be substituted as equivalent fastener.
• When utilizing screws, countersink the fastener and fill with exterior grade
wood filler. A composite installation kit may also be used.
Note: Fasteners must be corrosion resistant, hot-dipped galvanized or stainless
steel. Electro-galvanized are acceptable but may exhibit premature corrosion.
James Hardie is not responsible for the corrosion resistance of fasteners.
Stainless steel fasteners are recommended when installing James Hardie
products near the ocean, large bodies of water, or in very humid climates.
Flush
Figure A
Finish Nail
• Touch up nicks, scrapes and nail heads using the ColorPlus® Technology
touch-up applicator. Touch-up should be used sparingly.
• If large areas require touch-up, replace the damaged area with new
HardieTrim Skirt Board with ColorPlus Technology.
• James Hardie does not warrant the usage of third party touch-up or paints
used as touch-up on James Hardie ColorPlus products.
• Ensure surface is clean, dry and free of dust, dirt, grease or debris.
• On ColorPlus products, touch-up all field cut edges with ColorPlus Touch-Up
edge coater to ensure consistent finish.
PAINTING
• Primed product comes ready to paint.
• Due to HardieTrim Skirt Board’s dimensional stability, there are no LRV (Light
Reflective Value) restrictions when painting with dark colors.
• DO NOT use stain on James Hardie products.
• James Hardie primed products must be painted within 180 days from time
of install.
• 100% acrylic exterior grade topcoats are recommended.
• Be sure surface is clean, dry and free of dust, dirt, grease or debris.
• Do not paint when wet.
• Apply finish coat in accordance with paint manufacturers written instructions
regarding coverage, application methods and application temperature.
Do not
Under
Drive Nails
© 2015 James Hardie Building Products, Inc. All rights reserved.
TM, SM, and ® denote trademarks or registered trademarks of
James Hardie Technology Limited. is a registered
trademark of James Hardie Technology Limited.
TR1409_P3/3 5/15


