Electric Random Orbital Sander Kits
advertisement
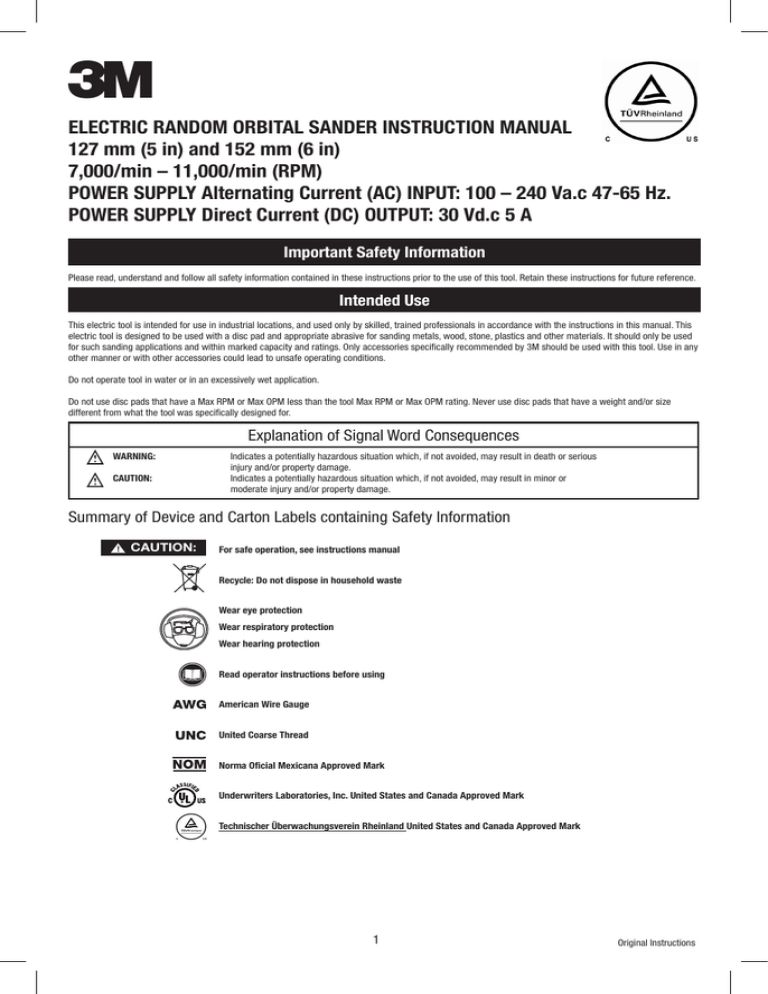
3 ELECTRIC RANDOM ORBITAL SANDER INSTRUCTION MANUAL 127 mm (5 in) and 152 mm (6 in) 7,000/min – 11,000/min (RPM) POWER SUPPLY Alternating Current (AC) INPUT: 100 – 240 Va.c 47-65 Hz. POWER SUPPLY Direct Current (DC) OUTPUT: 30 Vd.c 5 A Important Safety Information Please read, understand and follow all safety information contained in these instructions prior to the use of this tool. Retain these instructions for future reference. Intended Use This electric tool is intended for use in industrial locations, and used only by skilled, trained professionals in accordance with the instructions in this manual. This electric tool is designed to be used with a disc pad and appropriate abrasive for sanding metals, wood, stone, plastics and other materials. It should only be used for such sanding applications and within marked capacity and ratings. Only accessories specifically recommended by 3M should be used with this tool. Use in any other manner or with other accessories could lead to unsafe operating conditions. Do not operate tool in water or in an excessively wet application. Do not use disc pads that have a Max RPM or Max OPM less than the tool Max RPM or Max OPM rating. Never use disc pads that have a weight and/or size different from what the tool was specifically designed for. Explanation of Signal Word Consequences WARNING: CAUTION: Indicates a potentially hazardous situation which, if not avoided, may result in death or serious injury and/or property damage. Indicates a potentially hazardous situation which, if not avoided, may result in minor or moderate injury and/or property damage. Summary of Device and Carton Labels containing Safety Information CAUTION: For safe operation, see instructions manual Recycle: Do not dispose in household waste Wear eye protection Wear respiratory protection Wear hearing protection Read operator instructions before using American Wire Gauge United Coarse Thread Norma Oficial Mexicana Approved Mark Underwriters Laboratories, Inc. United States and Canada Approved Mark Technischer Überwachungsverein Rheinland United States and Canada Approved Mark 1 Original Instructions s WARNING Read the Material Data Sheets (MSDS) Before using any materials MSDS Contact the suppliers of the workpiece materials and abrasive materials for copies of the MSDS if one is not readily available. Exposure to DUST generated from workpiece and/or abrasive materials can result in lung damage and/or other physical injury. Use dust capture or local exhaust as stated in the MSDS. Wear government-approved respiratory Protection and eye and skin protection. Failure to follow this warning can result in serious lung damage and/or physical injury. GENERAL POWER TOOL SAFETY WARNINGS WARNING: Read all safety warnings and all instructions. Failure to follow the warnings and instructions may result in electric shock, fire, and/or other serious injury. Save all warnings and instructions for future reference. The term “power tool” in the warnings refers to your mains-operated (corded) power tool or batteryoperated (cordless) power tool. 1) Work Area Safety a) Keep work area clean and well lit. Cluttered or dark areas invite accidents. b) Do not operate power tools in explosive atmospheres, such as in the presence of flammable liquids, gases or dust. Power tools create sparks which may ignite the dust or fumes. c) Keep children and bystanders away while operating a power tool. Distractions can cause you to lose control. 2) Electrical Safety a) Power tools plugs must match the outlet. Never modify the plug in any way. Do not use any adapter plugs with earthed (grounded) power tools. Unmodified plugs and matching outlets will reduce risk of electric shock. b) Avoid body contact with earthed or grounded surfaces such as pipes, radiators, ranges and refrigerators. There is an increased risk of electric shock if your body is earthed or grounded. c) Do not expose power tools to rain or wet conditions. Water entering a power tool will increase the risk of electric shock. d) Do not abuse the cord. Never use the cord for carrying, pulling or unplugging the power tool. Keep cord away from heat, oil, sharp edges or moving parts. Damaged or entangled cords increase the risk of electric shock. e) When operating a power tool outdoors, use an extension cord suitable for outdoor use. Use of a cord suitable for outdoor use reduces the risk of electric shock. f) If operating a power tool in a damp location is unavoidable, use a ground fault circuit interrupter (GFCI) protected supply. Use of a GFCI reduces the risk of electric shock. 3) Personal Safety, a) Stay alert, watch what you are doing and use common sense when operating a power tool. Do not use a power tool while you are tired or under the influence of drugs, alcohol or medication. A moment of inattention while operating power tools may result in serious personal injury. b) Use personal protective equipment. Always wear eye protection. Protective equipment such as dust mask, non-skid safety shoes, hard hat, or hearing protection used for appropriate conditions will reduce personal injuries. c) Prevent unintentional starting. Ensure the switch is in the off-position before connecting to power source and/or battery pack, picking up or carrying the tool. Carrying power tools with your finger on the switch or energizing power tools that have the switch on invites accidents. d) Remove any adjusting key or wrench before turning the power tool on. A wrench or a key left attached to a rotating part of the power tool may result in personal injury. e) Do not overreach. Keep proper footing and balance at all times. This enables better control of the power tool in unexpected situations. f) Dress properly. Do not wear loose clothing or jewelry. Keep your hair, clothing and gloves away from moving parts. Loose clothes, jewelry or long hair can be caught in moving parts. g) If devices are provided for the connection of dust extraction and collection facilities, ensure these are connected and properly used. Use of dust collection can reduce dust-related hazards. 4) Power Tool Use and Care a) Do not force the power tool. Use the correct power tool for your application. The correct power tool will do the job better and safer at the rate for which it was designed. b) Do not use the power tool if the switch does not turn it on and off. Any power tool that cannot be controlled with the switch is dangerous and must be repaired. c) Disconnect the plug from the power source and/or the battery pack form the power tool before making any adjustments, changing accessories, or storing power tools. Such preventive safety measures reduce the risk of starting the power tool accidentally. d) Store idle power tools out of reach of children and do not allow persons unfamiliar with the power tool or these instructions to operate the power tool. Power tools are dangerous in the hands of untrained users. e) Maintain power tools. Check for misalignment or binding of moving parts, breakage of parts and any other condition that may affect the power tool’s operation. If damaged, have the power tool repaired before use. Many accidents are caused by poorly maintained power tools. f) Keep cutting tools sharp and clean. Properly maintained cutting tools with sharp cutting edges are less likely to bind and are easier to control. g) Use the power tool, accessories and tool bits, etc. in accordance with these instructions, taking into account the working conditions and the work to be performed. Use of the power tool for operations different from those intended could result in a hazardous situation. 5) Service Have your power tool serviced by a qualified repair person using only identical replacement parts. This will ensure that the safety of the power tool is maintained. 2 ADDITIONAL SAFETY WARNINGS - Hold power tools by insulated gripping surfaces when performing an operation where the cutting tool may contact hidden wiring or its own cord. Contact with a “live” wire will make exposed metal parts of the tool “live” and shock the operator. - To reduce the risk of injury. Operate the 3M Electric power tool with the 3M Power Supply. Other types of power supplies may cause personal injury or damage. Tool Current Extension Cord Length ft (m) 25 (7.6) 50 (15.2) 75 (22.8) 100 (30.4) 0–6A (mm 2) 18 AWG (1.0) 16 AWG (1.5) 16 AWG (1.5) 14 AWG (2.5) WARNING To reduce the risks associated with impact from abrasive product, disc pad, or tool breakup, sharp edges, hazardous downforce, rupture, vibration and noise: • Only personnel who are properly trained should be allowed to service this tool. • If you notice any abnormal noise or vibration when operating the tool, immediately discontinue its use and inspect for worn or damaged components. Correct or replace the suspect component. If abnormal noise or vibration still exists, return the tool to 3M for repair or replacement. Refer to warranty instructions. • Prior to use, inspect abrasive product and accessories for possible damage. If damaged, replace with new abrasive product and accessories available from 3M. • Only use accessories supplied or recommended by 3M. To reduce the risks associated with vibration: • If any physical hand/wrist discomfort is experienced, work should be stopped promptly to seek medical attention. Hand, wrist and arm injury may result from repetitive work, motion and overexposure to vibration. To reduce the risks associated with loud noise: • Always wear hearing protection while operating this tool. Follow your employer’s safety policy or local/national standards for personal protective equipment requirements. To reduce the risks associated with fire or explosion: • Do not operate the tool in explosive atmospheres, such as in the presence of flammable liquids, gases, or dust. The abrasives are able to create sparks when working material, resulting in the ignition of the flammable dust or fumes. • Refer to MSDS of material being worked as to potential for creating fire or explosion hazard. To reduce the risks associated with ingestion of harmful / toxic dusts from sanding surfaces such as lead painted surfaces, woods and metals: • Contact with or inhalation of these dusts can endanger the health of operator and bystanders. Use appropriate personal protective equipment. • Use appropriate respiratory and skin protection, or local exhaust as stated in the MSDS of the material being worked on. CAUTION To reduce the risk associated with environmental contamination: • Do not throw electric power tools into the household waste! In accordance with the European Directive 2002/96/CE on Waste Electrical and Electronic Equipment and transposition into national law, used electric power tools must be collected separately and recycled in an environmentally friendly manner. • Separate collection of used products and packaging allows materials to be recycled. Use of recycled materials helps prevent environmental pollution and reduces the demand for raw materials. • Dispose of all the process dust in accordance with all applicable regulations. To reduce the risks associated with fly off of abrasive product or parts: • Use care in attaching abrasive product and disc pad; following the instructions to ensure that they are securely attached to the tool before use. • Never free spin the tool or otherwise allow it to be started unintentionally. • Never point this product in the direction of yourself or another person, or start tool unintentionally. • Never over-tighten accessory fasteners. 3 Parts List 1 42 21 43 2 29 3 38 30 22 4 41 37 31 47 32 40 5 39 23 6 24 7 46 33 8 45 44 9 52 10 51 25 50 11 49 12 13 26 34 27 35 14 35 38 15 28 36 16 17 48 18 19 20 4 Parts List Item 1 2 3 4 5 6 7 8 9 10 11 12 13 14 15 15 15 15 16 17 18 19 20 21 22 22 23 24 25 26 26 27 28 29 30 31 32 33 34 35 35 36 37 38 39 40 41 42 43 44 44 45 46 47 48 48 49 50 51 52 3M UPC PN 28113 28107 55135 55116 55136 55125 55161 55143 55133 55132 55130 55137 55117 55118 55141 55142 55153 55154 30320 28103 28104 28105 28174 55146 55128 55129 28109 55145 55150 55147 55155 28108 NA 55134 55119 55126 55120 55138 55157 55158 55159 55160 55139 55122 55121 55140 55151 55127 55094 55148 55156 55163 28301 20341 55123 55124 55149 55144 55152 55131 3M PN A0040 A0021 55135 55116 55136 55125 55161 55143 55133 55132 55130 55137 55117 55118 55141 55142 55153 55154 30320 A0016 A0017 A0018 B0018 55146 55128 55129 A0031 55145 55150 55147 55155 A0022 NA 55134 55119 55126 55120 55138 55157 55158 55159 55160 55139 55122 55121 55140 55151 55127 55094 55148 55156 55163 28301 20341 55123 55124 55149 55144 55152 55131 Description External Retaining Ring Bearing - 2 Shields (6000ZZ) 10 mm x 26 mm x 8 mm Rear End Plate Stator Fixed Ring Rotor Set Screw (M3 x 3L) Front End Plate Bearing - 2 Shields (6000ZZ) 15 mm x 32 mm x 9 mm O-Ring 44.4 mm x 3.1 mm Lock Ring ( M56) Cooling Fan Small Spacer - Cooling Fan Large Spacer - Cooling Fan Orbit Shaft Balancer 5 x 3/32 in. Orbit Shaft Balancer 5 x 3/16 in. Orbit Shaft Balancer 6 x 3/32 in. Orbit Shaft Balancer 6 x 3/16 in. Double Row Angular Contact Bearing - 1 Seal 12 mm x 28 mm x 16 mm Spacer 12.1 Inner Diameter (ID) x 18.0 Outer Diameter (OD) x 0.2 Thick Belleville Washer Retaining Ring Spindle Grip 5 in. / 6 in. Lever for 3M 11,000 RPM 2.5 mm (3/32 in.) Orbit Lever for 3M 11,000 RPM 5mm (3/16 in.) Orbit Lever Spring Pin Machined Housing 5 in. / 6 in. Non-Vacuum Shroud 5 in. / 6 in. Central Vacuum Shroud 5 in. Central Vacuum Shroud 6 in. Pad Wench 24 mm 1 Pad supplied with each tool Dust Cover Valve System Magnet Spring,10.3 mm OD x 25 mm (L) x 0.85 mm Ø Grip Mounting Plate Plain Washer (M5 x 10) Hexagon Socket Button Head Screw (M5 x 6L) Hexagon Socket Button Head Screw (M5 x 10L) Hexagon Socket Button Head Screw (M5 x 25L) Printed Circuit Board Controller Connector Assembly Speed Button Base Plate-Printed Circuit Board Wrist Rest Logo Plate - 3M Hexagon Socket Head Cap (M2 x 12L) Swivel Exhaust Fitting 5 in. Swivel Exhaust Fitting 6 in. Super Vacuum Swivel Hose Fitting 1 in./28 mm Vacuum Hose - Ø 1 in. x 6 ft. Hose End Adaptor - 1 in. / 28 mm Hose Thread x 1 1/2 in. OD Female Connector Cable Assembly (12 feet) Female Connector Cable Assembly (24 feet) Frame-Front End Power Supply Frame-Rear End Power Cord 5 QTY 1 1 1 1 1 1 3 1 1 1 1 1 1 1 1 1 1 1 1 1 1 1 1 1 1 1 1 1 1 1 1 1 1 1 1 1 1 1 1 1 1 1 1 2 1 1 1 1 4 1 1 1 1 1 1 1 1 1 1 1 Product Configuration / Specifications: Electric Random Orbital Sander Model Orbit Pad Size Product Net WT. Height mm Length mm *Noise Level dBA **Vibration Level m/ **Uncertainty Vacuum Type Number mm (in.) mm (in.) kg (lb.) (in.) (in.) Pressure (Power) s2 (ft/s2) K m/s2 28426 Non-Vacuum 2.5 (3/32) 127 (5) 0.875 (1.92) 97.2 (3.82) 173 (6.81) 70 (81) 2.36 (7.67) 1.5 28427 Non-Vacuum 5.0 (3/16) 127 (5) 0.9 (1.98) 97.2 (3.82) 173 (6.81) 69 (80) 2.73 (8.87) 1.5 28428 Non-Vacuum 2.5 (3/32) 150 (6) 0.905 (1.99) 97.2 (3.82) 185 (7.28) 70 (81) 2.76 (8.97) 1.5 28429 Non-Vacuum 5.0 (3/16) 150 (6) 0.93 (2.04) 97.2 (3.82) 185 (7.28) 70 (81) 3.21 (10.4) 1.5 28430 Central Vacuum 2.5 (3/32) 127 (5) 0.945 (2.08) 96.6 (3.8) 214 (8.42) 70 (81) 2.27 (7.37) 1.5 28431 Central Vacuum 5.0 (3/16) 127 (5) 0.965 (2.12) 96.6 (3.8) 214 (8.42) 68 (79) 2.48 (8.06) 1.5 28432 Central Vacuum 2.5 (3/32) 150 (6) 0.995 (2.19) 96.6 (3.8) 225 (8.85) 70 (81) 3.22 (10.4) 1.5 28433 Central Vacuum 5.0 (3/16) 150 (6) 1.02 (2.24) 96.6 (3.8) 225 (8.85) 72 (83) 3.33 (10.8) 1.5 * Declared noise levels; measurements carried out in accordance with standard EN 60745-1 and EN 60745-2-4. (Uncertainty K=3dB). ** Declared vibration levels in accordance with EN 12096; measurements carried out in accordance with standard EN 60745-1 and EN 60745-2-4. IMPORTANT NOTE: The noise and vibration values stated in the table are from laboratory testing in conformity with stated codes and standards and are not sufficient risk evaluation for all exposure scenarios. The actual exposure values and amount of risk or harm experienced to an individual is unique to each situation and depends upon the surrounding environment, the way in which the individual works, the particular material being worked, work station design, as well as upon the exposure time and the physical condition of the user. 3M cannot be held responsible for the consequences of using declared values instead of actual exposure values for any individual risk assessment. POWER SUPPLY SPECIFICATIONS Model Number 28436 Mains Input Voltage* 100-240 Mains Frequency 47-63 Hz Output Efficiency 30 VD C 5A 85% Min. Total Output Regulation +/- 2% Operating Temperature Operating Humidity C (F) 0-40 (23-105) 10-90% H *Note: Device evaluated @ 100-120 Va.c only for U.S. and Canada. Operating Instructions PRIOR TO THE OPERATION The tool is intended to be operated as a hand held tool. It is always recommended that while using the tool, operators stand on a solid floor, in a secure position with a firm grip and footing. Be aware that the sander can develop a torque reaction. “STAND-BY” MODE AND “RUN” MODE The tool has a safety function that reduces the chance of unintended operation. When the tool is connected to the Power Supply, it is in “Stand-By” Mode. This mode prevents tool from running if the lever is pushed accidentally. “Run” Mode is the normal function of the tool while it is being used. To switch the tool from “Stand-By” to “Run“ Mode: 1. Ensure the tool is connected to the Power Supply and the Power Supply is in the “ l ” (ON) position. The LED on the back of the Sander will show flashing green color. This shows that the Sander is in “Stand-By” Mode. 2. Press either the “+” or “-“ button one time, on the back of the Sander. The LED on the back of the Sander will show solid green color. This shows that the Sander is in “Run” Mode. The tool can now be used normally. While in “Run” Mode, the “+” and “-“ buttons will operate to raise and lower the speed of the tool. 3. The Sander will automatically switch back to “Stand-By” Mode anytime it is left un-used for 10 seconds. It can be put back into “Run” Mode by repeating Step 2 above. STARTING AND STOPPING SANDER CAUTION: Make certain the Switch on the Power Supply is in the “O” (OFF) position, and the AC power source is the same as specified range on the Power Supply nameplate. 1. Connect the AC power cord to the Power Supply. 2. Connect the 12 ft (3.6 m) or 24 ft (7.4 m) DC cable the tool and to the Power. Ensure both ends of the DC cable are connected and screwed in completely. 3. Turn the Switch on the Power Supply is in the “ l ” (ON) position. The “DC OK” LED on the Power Supply will show green color. The LED on the back of the Sander will show flashing green color. This shows that the sander is in “Stand-By” Mode. 4. Press either the “+” or “-“ button one time, on the back of the Sander. The LED on the back of the Sander will show solid green color. This shows that the sander is in “Run” Mode. 5. Press the lever to start the tool. Release the Lever to stop the tool. 6. When the tool is left un-used in “Run” Mode for 10 seconds, it will go back into “Stand-By” Mode. To return to “Run” Mode, press either the “+” or “-“ button on the back of the Sander. 6 100-240 VAC Socket on Power Supply 30 VCD Socket LED Figure 1 Figure 2 MAXIMUM SPEED FUNCTION The 3M™ Electric Random Orbital Sander has three preset Maximum Speeds (7,000, 9,000 and 11,000 RPM) When the Sander is started after the Power Supply is turned “ON”, the Maximum Speed will be 11,000 /min (RPM). The Maximum Speed can be changed at any time while the Sander is running or when it is stopped and still in “Run” Mode, as long as the Power Supply is turned “ON”. Any setting for the Maximum Speed will be stored while the Power Supply is turned “ON”. When the Power Supply is turned “OFF”, the setting will return to 11,000 RPM when the Power Supply is turned “ON” again. MAXIMUM SPEED AND INTERMEDIATE SPEED CONTROL 1. Maximum Speed is adjusted by pressing the “+” or “-“ buttons on the back of the Sander. While the Sander is in “Run” Mode, each touch will raise or lower the speed to the next setting. 2. Intermediate speeds between Zero (0) RPM and the set Maximum Speed can be used with intermediate Lever positions. OVERLOAD PROTECTION SYSTEMS The 3M Electric Random Orbital Sander has two systems to protect the motor and circuit board from overloading and overheating. Downforce Overload System The Sander has the ability to monitor and maintain the preset Maximum Speed as user downforce increases or decreases during use. During periods of overly high user downforce, the Sander will flash the LED on the back of the tool from Green to Red and cause the motor to slow slightly as a warning to the user. Continuous downforce should be no greater than approximately 7 lbs (30 N). If the user continues with overly high downforce, the Sander will change the LED to solid Red and stop. To restart the sander immediately, released the lever and pressed down again and continue sanding. Repeated overloading will result in frequent motor stops and increased tool temperature. Temperature Overheat System The Sander has the ability to monitor temperature of the internal electronic systems, and can shut the tool down when temperature reach damaging levels. During periods that result in high internal temperature, the Sander will shut down if the temperature reaches a damaging level. The Sander will not be able to be restarted until the internal temperature cools to a level safe for the electronic systems. Cooling time depends on local conditions. An initial waiting period of 5 minutes is recommended. Repeated overheating will result in longer cool down times. ATTACHING DISC PADS 3M™ Disc Pads are specially designed to mate to the 3M™ Electric Random Orbital Sander. 1. Secure the Spindle with the flat wrench provided with the tool, and screw the Disc pad on. Tighten to firm hand-tightness. Do not over tighten. 2. To remove the Disc Pad, insert the flat wrench between the Disc Pad and shroud. Secure the Spindle with the flat wrench and unscrew the Disc pad. Figure 3 CLEANING 1. Periodically blow out all air passages and area above Disk Pad and under shroud with dry compressed air. All plastic parts should be cleaned with a soft damp cloth. NEVER use solvents to clean plastic parts. 2. Wear safety glasses while using compressed air. 7 HEALTH AND SAFETY INFORMATION RoHS Compliant This product and the associated component parts are “RoHs Compliant” and do not contain any of the substances in excess of the maximum concentration values in EU Directive 2002/95/EC, as amended by Commission Decision 2005/618/EC and other amendments issued as of the date code marked on the product. Unless otherwise stated by 3M in writing, this information represents 3M’s knowledge and belief based on information provided by third party suppliers to 3M. Waste Electrical & Electronic Equipment (WEEE) Compliant • Do not dispose of electrical appliances as unsorted municipal waste, use separate collection facilities. • Contact your local government for information regarding the collection systems available. • If electrical appliances are disposed of in landfills or dumps, hazardous substances can leak into the groundwater and get into the food chain, damaging your health and well-being. • When replacing old appliances with new ones, the retailer is legally obligated to take back your old appliance for disposal at least for free of charge. Federal Communications Commission (FCC) Compliance Statement IMPORTANT NOTE: This equipment has been tested and found to comply with the limits for a Class A digital device, pursuant to Part 15 of the FCC rules. These limits are designed to provide a reasonable protection against harmful interference when the equipment is operated in a commercial environment. This equipment generates, uses, and can radiate radio frequency energy and, if not installed and used in accordance with the instruction manual, may cause harmful interference to radio communications. Operation of this equipment in a residential area is likely to cause harmful interference in which case the user will be required to correct the interference at his own expense.” NOTICE: Changes or modifications not expressly approved by the party responsible for compliance could void the user’s authority to operate the equipment. Industry Canada Compliance Statement This Class A digital apparatus complies with Canadian ICES-003. Cet appareil numérique de la classe A est conforme à la norme NMB-003 du Canada. The 3M™ Electric Random Orbital Sander System 3M Electric Random Orbital Sanders Part Number 28426 28427 28428 28429 28430 28431 28432 28433 3M Electric Random Orbital Sander Kits Part Number (Kit) 28523 28524 28525 28526 28519 28520 28521 28522 8 3M Power Supply Part Number 28436 Warranty and Limited Remedy: 3M warrants this tool against defects in workmanship and materials under normal operating conditions for one (1) year from the date of purchase. 3M MAKES NO OTHER WARRANTIES, EXPRESS OR IMPLIED, INCLUDING, BUT NOT LIMITED TO, ANY IMPLIED ARRANTY OF MERCHANTABILITY OR FITNESS FOR A PARTICULAR PURPOSE OR ANY IMPLIED WARRANTY ARISING OUT OF A COURSE OF DEALING, CUSTOM OR USAGE OF TRADE. User is responsible for determining whether the 3M tool is fit for a particular purpose and suitable for user’s application. User must operate the tool in accordance with all applicable operating instructions, safety precautions, and other procedures stated in the operating manual to be entitled to warranty coverage. 3M shall have no obligation to repair or replace any tool or part that fails due to normal wear, inadequate or improper maintenance, inadequate cleaning, nonlubrication, improper operating environment, improper utilities, operator error or misuse, alteration or modification, mishandling, lack of reasonable care, or due to any accidental cause. If a tool or any part thereof is defective within this warranty period, your exclusive remedy and 3M’s sole obligation will be, at 3M’s option, to repair or replace the tool or refund the purchase price. Limitation of Liability: Except where prohibited by law, 3M and seller will not be liable for any loss or damage arising from the 3M product, whether direct, indirect, special, incidental or consequential, regardless of the legal theory asserted, including warranty, contract, negligence or strict liability. Submitting a Warranty Claim: Contact your dealer when submitting a warranty claim in accordance with the restrictions listed above. Please note that all warranty claims are subject to manufacturer’s approval. Be sure to keep your sales receipt in a safe place. This must be submitted when filing a warranty claim, within 1 year from the date of purchase. For additional assistance call 1-800-362-3550. Product Repair after Warranty Has Expired: Repair of 3M Abrasive Power tools that are not under warranty is available through 3M or a 3M Authorized Tool Repair Representative. Contact your 3M Abrasive Power Tool Distributor for details, or call 1-800-362-3550. 3 Abrasive Systems Division 3M Center St. Paul, MN 55144-1000 9 www.3M.com/abrasives ©3M 2011. 3M is a trademark of 3M Company. 34-8707-8156-3
