Admin Server Essentials
TimeClock Plus
Admin Server Essentials
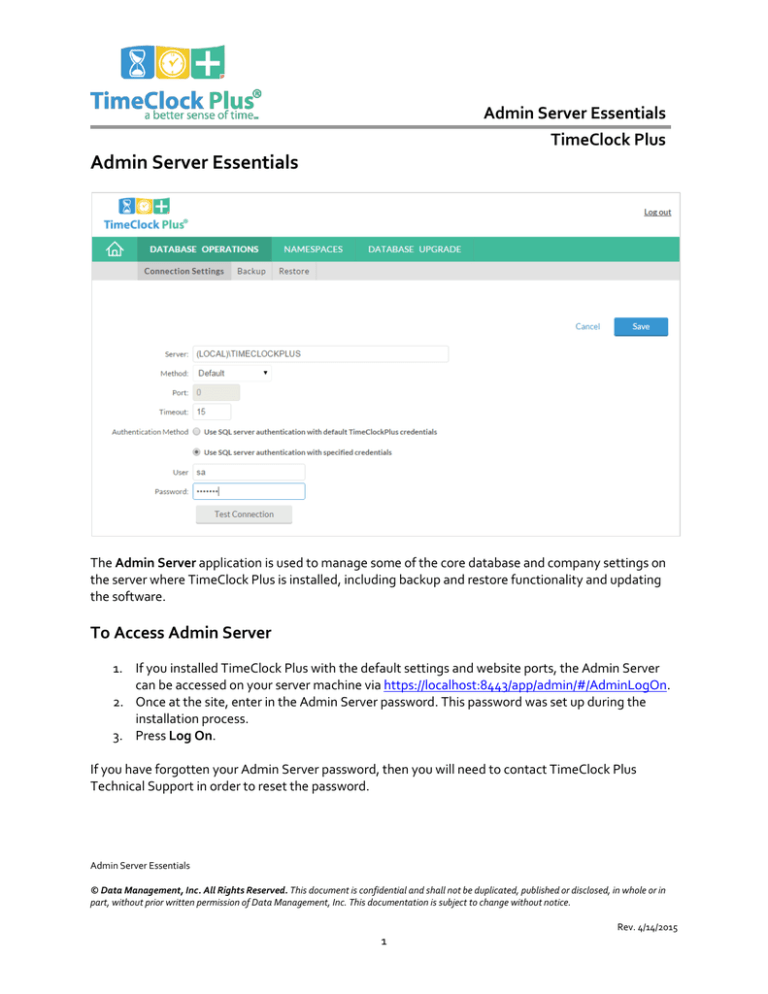
The Admin Server application is used to manage some of the core database and company settings on
the server where TimeClock Plus is installed, including backup and restore functionality and updating
the software.
To Access Admin Server
1. If you installed TimeClock Plus with the default settings and website ports, the Admin Server
can be accessed on your server machine via https://localhost:8443/app/admin/#/AdminLogOn.
2. Once at the site, enter in the Admin Server password. This password was set up during the
installation process.
3. Press Log On.
If you have forgotten your Admin Server password, then you will need to contact TimeClock Plus
Technical Support in order to reset the password.
Admin Server Essentials
© Data Management, Inc. All Rights Reserved. This document is confidential and shall not be duplicated, published or disclosed, in whole or in
part, without prior written permission of Data Management, Inc. This documentation is subject to change without notice.
Rev. 4/14/2015
1
Admin Server Essentials
TimeClock Plus
Database Operations
If you need to back up your database, or restore a database from a backup file, this can be achieved via
the Database Operations section. In order to use these features, you will first need to connect to the
TimeClock Plus server under Connection Settings.
Backing up a database
1.
2.
3.
4.
Connect to the SQL database engine in DATABASE OPERATIONS > Connection Settings.
Browse to DATABASE OPERATIONS > Backup.
Highlight the database that you would like to back up and click the Backup button.
In the Backup Database window that appears, you can specify a file path for the backup file on
the database server. By default, the backup file will save into the Microsoft SQL Server
directory.
5. Click Ok. This will take you to a window where you can monitor the progress of the backup
operation.
Restoring a database
1. Connect to the SQL database engine in DATABASE OPERATIONS > Connection Settings.
2. Browse to DATABASE OPERATIONS > Restore.
3. In the blank field marked Backup file, enter in the backup’s file path. This will be the file path on
the same computer running the SQL database engine.
4. Fill in the Restore as blank with the new database name (typically TimeClockPlus70 or a
variant thereof), and fill in the File name field with what the new database should be called
(typically TCPlus70 or a variant thereof).
5. Click the Verify button at the top to verify the backup file. If the file checks out, click Restore.
Admin Server Essentials
© Data Management, Inc. All Rights Reserved. This document is confidential and shall not be duplicated, published or disclosed, in whole or in
part, without prior written permission of Data Management, Inc. This documentation is subject to change without notice.
Rev. 4/14/2015
2
Admin Server Essentials
TimeClock Plus
Namespaces
If there are multiple companies within your TimeClock Plus database, and/or you utilize multiple
databases, then those can be managed via the Namespaces section in the Admin Server application.
You can also use this utility to create companies and to update existing companies with new license
files should the need arise.
Creating a Company
1. Browse to NAMESPACES within Admin Server, and highlight the appropriate namespace in
the left-hand list.
2. On the upper right side of the screen, click on the Create Company button.
3. In the window that appears, fill in a Company ID with any numerical that you choose, although
the blank will automatically fill in with the next highest value. Also fill in a company name and
your TimeClock Plus Product Key.
4. Click Submit to create the company.
5. Browse to your TimeClock Manager login site (typically located at
https://localhost/app/manager/index.html#/ManagerLogOn on a local install), and log in as
ADMIN. You will then be guided through the Organization Setup wizard.
Admin Server Essentials
© Data Management, Inc. All Rights Reserved. This document is confidential and shall not be duplicated, published or disclosed, in whole or in
part, without prior written permission of Data Management, Inc. This documentation is subject to change without notice.
Rev. 4/14/2015
3
Admin Server Essentials
TimeClock Plus
Database Upgrade
If you have installed TimeClock Plus 6.0 and/or Web Edition 3.0, then the Database Upgrade utility will
create a brand new TimeClock Plus v7 database with all of the previous version’s data intact. Please
note that you will need a valid license key in order to successfully perform the upgrade.
For assistance please call Customer Support at: (325) 223-9300
Admin Server Essentials
© Data Management, Inc. All Rights Reserved. This document is confidential and shall not be duplicated, published or disclosed, in whole or in
part, without prior written permission of Data Management, Inc. This documentation is subject to change without notice.
Rev. 4/14/2015
4
Admin Server Essentials
TimeClock Plus
M-F, 9AM to 5PM CST, Excluding Holidays
Admin Server Essentials
© Data Management, Inc. All Rights Reserved. This document is confidential and shall not be duplicated, published or disclosed, in whole or in
part, without prior written permission of Data Management, Inc. This documentation is subject to change without notice.
Rev. 4/14/2015
5


