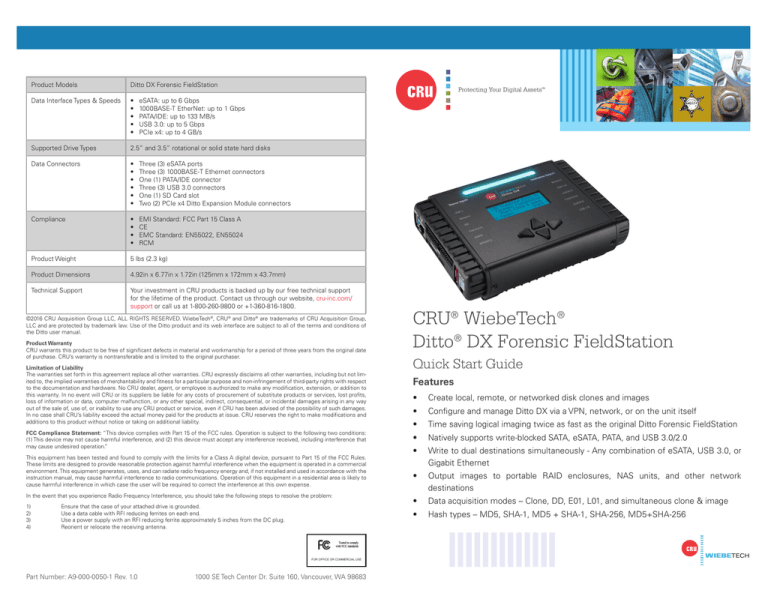
Product Models
Ditto DX Forensic FieldStation
Data Interface Types & Speeds
•
•
•
•
•
Supported Drive Types
2.5” and 3.5” rotational or solid state hard disks
Data Connectors
•
•
•
•
•
•
Three (3) eSATA ports
Three (3) 1000BASE-T Ethernet connectors
One (1) PATA/IDE connector
Three (3) USB 3.0 connectors
One (1) SD Card slot
Two (2) PCIe x4 Ditto Expansion Module connectors
Compliance
•
•
•
•
EMI Standard: FCC Part 15 Class A
CE
EMC Standard: EN55022, EN55024
RCM
Product Weight
5 lbs (2.3 kg)
Product Dimensions
4.92in x 6.77in x 1.72in (125mm x 172mm x 43.7mm)
Technical Support
Your investment in CRU products is backed up by our free technical support
for the lifetime of the product. Contact us through our website, cru-inc.com/
support or call us at 1-800-260-9800 or +1-360-816-1800.
Protecting Your Digital Assets
TM
eSATA: up to 6 Gbps
1000BASE-T EtherNet: up to 1 Gbps
PATA/IDE: up to 133 MB/s
USB 3.0: up to 5 Gbps
PCIe x4: up to 4 GB/s
©2016 CRU Acquisition Group LLC, ALL RIGHTS RESERVED. WiebeTech®, CRU® and Ditto® are trademarks of CRU Acquisition Group,
LLC and are protected by trademark law. Use of the Ditto product and its web interface are subject to all of the terms and conditions of
the Ditto user manual.
Product Warranty
CRU warrants this product to be free of significant defects in material and workmanship for a period of three years from the original date
of purchase. CRU’s warranty is nontransferable and is limited to the original purchaser.
Limitation of Liability
The warranties set forth in this agreement replace all other warranties. CRU expressly disclaims all other warranties, including but not limited to, the implied warranties of merchantability and fitness for a particular purpose and non-infringement of third-party rights with respect
to the documentation and hardware. No CRU dealer, agent, or employee is authorized to make any modification, extension, or addition to
this warranty. In no event will CRU or its suppliers be liable for any costs of procurement of substitute products or services, lost profits,
loss of information or data, computer malfunction, or any other special, indirect, consequential, or incidental damages arising in any way
out of the sale of, use of, or inability to use any CRU product or service, even if CRU has been advised of the possibility of such damages.
In no case shall CRU’s liability exceed the actual money paid for the products at issue. CRU reserves the right to make modifications and
additions to this product without notice or taking on additional liability.
FCC Compliance Statement: “This device complies with Part 15 of the FCC rules. Operation is subject to the following two conditions:
(1) This device may not cause harmful interference, and (2) this device must accept any interference received, including interference that
may cause undesired operation.”
This equipment has been tested and found to comply with the limits for a Class A digital device, pursuant to Part 15 of the FCC Rules.
These limits are designed to provide reasonable protection against harmful interference when the equipment is operated in a commercial
environment. This equipment generates, uses, and can radiate radio frequency energy and, if not installed and used in accordance with the
instruction manual, may cause harmful interference to radio communications. Operation of this equipment in a residential area is likely to
cause harmful interference in which case the user will be required to correct the interference at this own expense.
In the event that you experience Radio Frequency Interference, you should take the following steps to resolve the problem:
1)
2)
3)
4)
Ensure that the case of your attached drive is grounded.
Use a data cable with RFI reducing ferrites on each end.
Use a power supply with an RFI reducing ferrite approximately 5 inches from the DC plug.
Reorient or relocate the receiving antenna.
CRU® WiebeTech®
Ditto® DX Forensic FieldStation
Quick Start Guide
Features
•
Create local, remote, or networked disk clones and images
•
Configure and manage Ditto DX via a VPN, network, or on the unit itself
•
Time saving logical imaging twice as fast as the original Ditto Forensic FieldStation
•
Natively supports write-blocked SATA, eSATA, PATA, and USB 3.0/2.0
•
Write to dual destinations simultaneously - Any combination of eSATA, USB 3.0, or
Gigabit Ethernet
•
Output images to portable RAID enclosures, NAS units, and other network
destinations
•
Data acquisition modes – Clone, DD, E01, L01, and simultaneous clone & image
•
Hash types – MD5, SHA-1, MD5 + SHA-1, SHA-256, MD5+SHA-256
Wiebetech Branding
FOR OFFICE OR COMMERCIAL USE
Part Number: A9-000-0050-1 Rev. 1.0
1000 SE Tech Center Dr. Suite 160, Vancouver, WA 98683
ABCDEFGHIJKLMNOPQRSTUVWXYZ
abcdefghijklmnopqrstuvwxyz
2
Ditto DX Forensic FieldStation Quick Start Guide
Ditto DX Forensic FieldStation Quick Start Guide
NOTE
1 SETUP
The Ditto DX Forensic FieldStation can be configured and operated either from the Front Panel or
3
CRU recommends that you change the admin account password and create user
accounts for individual users as best data management practices.
through a web browser. To access the web browser interface via a DHCP network, follow these
You are now ready to use the browser interface to configure settings and preview, image, or clone
instructions. To connect via a direct Ethernet connection or via Static IP, see the full User Manual
attached disks.
(see Section 4)
a. Plug an Ethernet cable into the Ethernet port on the “Control Interface” side of the Ditto DX
Forensic FieldStation.
b. Connect the other end of the Ethernet cable to your network. This usually means plugging
it into a router or hub. In an office environment, you may have a network jack built into your
office wall.
2 LIGHTBAR STATUS
COLOR
STATE
Teal
Solid
Idle
Magenta
Solid
An action is in progress
Green
Solid
An action has successfully completed
Red
Solid
An error has been detected or the running action has been aborted by the user
Solid
The processor is close to reaching its recommended thermal limit. CRU suggests that
you use the Ditto DX external fan (sold separately).
Blinking
The currently running action has been suspended by the Ditto DX Forensic FieldStation’s thermal management and will automatically resume from where it left off when
temperatures have sufficiently lowered.
c. Connect the power cable to the rear of the Ditto DX Forensic FieldStation and to the provided
AC adapter.
d. Turn on the Ditto DX Forensic FieldStation’s power using the switch on the rear panel. (0 =
off, 1 = on)
e. When the Ditto DX Forensic FieldStation has booted up, press the Down navigation button on
the Ditto DX Forensic FieldStation until you reach the “Settings” menu. Then press the Right
navigation button to view the Settings.
DESCRIPTION
Amber
3 THERMAL MANAGEMENT
The Ditto DX Forensic FieldStation is a passively cooled system that pulls heat out of the processor and other electronics into the aluminum housing where it dissipates. This is an intended
f. Press Up or Down until you reach the “Ctl Network Settings” screen and press Right.
design feature that eliminates the need for a noisy internal cooling fan and drastically reduces the
g. Press Up or Down until you reach the “Ctl Network” screen.
amount of particulates that are pulled through the system.
h. If the text on the second line says “Disabled”, press the Right button to edit the setting. Press
If you are using the Ditto DX Forensic FieldStation in an environment warmer than 95° F/35° C,
Up once and then Right to commit the change. If the text says “Enabled”, continue to the
CRU recommends the use of an external fan (very little air movement is required). CRU offers
next step.
such a fan specifically designed for use with Ditto DX (Part Number: 30000-0100-0001). The Ditto
i. Press Up or Down until you reach the “Ctl Network Mode” screen.
j. If the text on the second line says anything other than “Client (DHCP)”, press Right to edit the
setting. Press Up until the second line says “Client (DHCP)” and then press Right to commit
the change. If the text already says “Client (DHCP)”, continue on to the next step.
DX fan is powered from one of the USB 2 ports on the control interface and operates very quietly.
4 COMPLETE USER DOCUMENTATION
A digital PDF copy of the complete user documentation is available from CRU’s website. The user
documentation shows you how to perform all cloning, imaging, logical imaging, and other disk
k. Press Up or Down until you reach the “Ctl IP Address” screen.
operations, how to configure the Ditto DX Forensic FieldStation for your needs, how to enable
l. Type the IP address shown into your web browser.
Quick Start Mode and Stealth Mode, and so on.
m. Log into the browser interface (the default user name and password for the administrator
You can download the Ditto DX Forensic FieldStation User Manual under the “Resources and
Documents” section here: www.cru-inc.com/products/wiebetech/ditto-dx-forensic-fieldstation/
account are both “admin”).
CRU Mark
Protecting Your Digital Assets
TM
10.25.12
PMS 711
2 cyan
85 magenta
76 yellow


