Technical information
Performance of the primary-standard resistance thermometry
bridge model CTR9000 (F900)
WIKA data sheet IN 00.31
The model CTR9000 primary-standard resistance
thermometry bridge is designed specifically for resistance
thermometry to provide the best possible accuracy. Work
on validating the performance lasted 1 ½ years. During this
time a large number of tests were being performed. This
report provides details of some of the key tests used to
determine the more critical aspects of the CTR9000 (F900)
performance.
The work was carried out in the research and development
department, which is not air-conditioned, ambient
temperatures therefore varied between about 16 °C and
30 °C. This environment is not ideal for precision electrical
measurement. It is therefore realistic to expect that the
CTR9000 (F900) should equal or exceed the performance
indicated by these tests when used in most temperature
laboratories, provided good measurement.
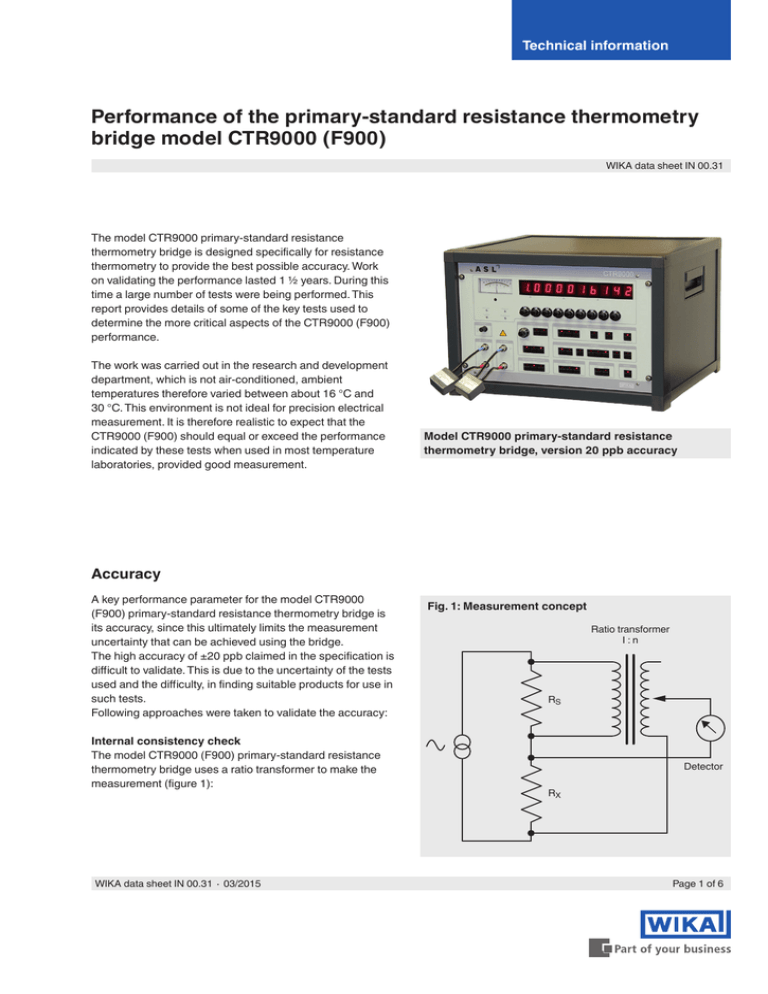
Model CTR9000 primary-standard resistance
thermometry bridge, version 20 ppb accuracy
Accuracy
A key performance parameter for the model CTR9000
(F900) primary-standard resistance thermometry bridge is
its accuracy, since this ultimately limits the measurement
uncertainty that can be achieved using the bridge.
The high accuracy of ±20 ppb claimed in the specification is
difficult to validate. This is due to the uncertainty of the tests
used and the difficulty, in finding suitable products for use in
such tests.
Following approaches were taken to validate the accuracy:
Internal consistency check
The model CTR9000 (F900) primary-standard resistance
thermometry bridge uses a ratio transformer to make the
measurement (figure 1):
WIKA data sheet IN 00.31 ∙ 03/2015
Fig. 1: Measurement concept
Ratio transformer
I:n
RS
Detector
RX
Page 1 of 6
The two resistances RS and RX carry the same current. The
ratio transformer is used to balance the voltage developed
across an unknown resistance (RX) against that across a
known standard resistance (RS). Since the ratio of the voltage
across the primary and secondary of an ideal transformer is
equal to the turns-ratio (n), the ratio of the resistances RX and
RS then equals the turns-ratio:
RX = n ∙ RS (at balance)
The ratio transformer is actually a series of cascaded
transformers. Each transformer has tappings in decimal
intervals (10:1, 10:2, 10:3 ... 10:9) and provides one decade
of resolution for the bridge. Since the tapped secondary
comprises a number of individual windings, it is possible to
connect any two of these windings “back-to-back” and use a
sensitive detector directly to measure the difference between
them. From this we can calculate the linearity errors that
would occur when the winding segments are built up into the
complete secondary winding.
However, this approach does not subject the windings to
the common voltages they will experience in practice. This
is important since the complex interwinding capacitance
relationships will inject current that depends on these
common mode voltages. The approach used was therefore to
connect all the segments of the secondary in their intended
arrangement and to compare these with a reference winding.
The ratio transformer has two “extra” windings that normally
drive subsequent decades and one of these was used as the
reference in the measurement.
The most significant ‘decade’ actually provides a ratio up to
1.2 to give the required range for thermometry. This decade
effectively determines the measurement linearity, since it is
here where the signals are greatest and therefore where any
ratio errors have the most impact on the measurement.
The winding inter-comparison was made on this decade
in order to confirm the resistance thermometry bridge
measurement linearity. The results (with measurement
uncertainties) are shown in figure 2.
Fig. 2: Non-linearity caused by ratio transformer errors
Error/ppb of UNITY
+1.0
0.0
Uncertainty shown with k = 2
-1.0
0
0.2
0.4
0.6
0.8
1
1.2
1.4
Ratio
This test confirms that the non-linearity caused by ratio
errors in the transformer is less than 1 ppb and is therefore
insignificant compared with the specified performance of
20 ppb.
This test measures linearity only; it does not check whether
the full winding accurately provides a ratio of unity. Any
errors in either the zero or unity ratio measurements further
contribute to the total measurement accuracy achieved by
the resistance thermometry bridge.
Page 2 of 6
However, it is straightforward to check “unity” performance by
connecting the potential terminal for RX to RS.
It is also easy to check “zero” performance by connecting
a four-terminal short-circuit in place of RX. These test
functions are built into the bridge and made available via
front panel keys. They provide a simple and useful instrument
performance check.
WIKA data sheet IN 00.31 ∙ 03/2015
Complement check
Although the model CTR9000 (F900) primary-standard
resistance thermometry bridge is equipped with a UNITY
self-test function, it is desirable to check the accuracy of the
ratio measurements when using actual resistors.
This was overcome in the tests by using reed relays to swap
over connections to the resistors within a few milli-seconds, a
time frame that is short enough to have no negligible impact
on the resistance.
This can be achieved by connecting two resistors of similar
value to the bridge and measuring the ratio, then swapping
over the resistors and re-measuring the ratio. The ratios
should be the reciprocal of each other so that the product
of the two ratios should be unity. The measurement error is
therefore half the difference between the product of the two
ratios and unity.
The temperature coefficient of the resistors (2 ppm/°C) mean
that a 1 mK change in temperature yields a 2 ppb error. The
resistors used in the test were therefore chosen to have
matched temperature coefficients, they were used in a stable
temperature environment and the measurements were taken
quickly in order to minimise the effect of temperature coefficient on the measurement.
Two Wilkins resistors were used in the tests. Although the
temperature coefficient and power coefficient of these resistors are low, they are significant at the level of measurement
(ppb) we are working at. The interruption of the power to
the resistors whilst they are being swapped over manually
causes the temperature and therefore the resistance of the
resistors to change significantly followed by a relatively long
recovery.
The result of complement checks in a number of resistance
thermometry bridges is shown in table 1. The complement
checks confirm that the ratio accuracy of the bridge at unity is
within specification.
Table 1: Complement errors measured
CTR9000 (F900) S/N
R1/R2
R2/R1
R1/R2 x R2/R1
Error/ppb
7869005009
1.000037014
0.999963000
1.000000013
-6.5
78669003007
1.000032194
0.999967804
0.999999997
1.5
7869001005
1.000035132
0.999964862
0.999999992
4
Comparison with a traceable IVD
For this, a ratio test unit (RTU) was used, which is an
inductive voltage divider (IVD) of our own design that is used
as a company reference standard.
The uncertainties (k = 2) for both measurements are shown
by the “error bars”. Interestingly, the resistance thermometry
bridge “error” is a mirror image of the calibration ‘error’ determined by PTB.
This suggests that the calibration ‘errors’ determined in this
test are the result of “errors” in the values assigned by PTB in
their calibration and are not real. This does not mean that the
PTB values are wrong, since the nominal or design values for
the RTU are comfortable within the uncertainties declared by
PTB.
The RTU provides ratios in integer multiples of elevenths;
this particular ratio set is useful as it exercises all the digits
of every decade when used over the range zero to unity and
thereby provides a thorough check of the ratio tappings. The
RTU was sent to PTB, the national standards laboratory of
Germany for calibration.
With the uncertainties available on the PTB calibration of
the RTU, it is not possible to use this test alone to confirm
the accuracy. However, the striking mirror image relationship
between the two results together with the design calculations
for the RTU support the view that it is legitimate to use the
nominal RTU ratios in the test.
Although the design calculations and measurements on the
ratio transformer indicate that the model CTR9000 (F900)
primary-standard resistance thermometry bridge achieves
the stated accuracy, it wanted to find some way of providing
a performance check for the whole instrument that was
traceable to national standards.
WIKA data sheet IN 00.31 ∙ 03/2015
Page 3 of 6
If WIKA use the nominal design values for the RTU in the
calibration test, we find that the errors are very small.
The maximum error is only 14 ppb and the standard deviation
is 5 ppb.
measurement system easily achieve the stated 20 ppb
accuracy. Additionally, the comparison of the resistance
thermometry bridge against the RTU indicates that the
linearity of the complete) instrument is within its specification.
The internal consistency checks confirm that the linearity of
key components within the resistance thermometry bridge
Noise
Although not part of the formal specification of the instrument, the noise performance of the model CTR9000 (F900)
primary-standard resistance thermometry bridge is vital
in determining the measurement uncertainty that can be
achieved with this equipment.
The resistance thermometry bridge measures resistance
ratio by balancing the voltage across the known and
unknown resistances using a ratio transformer. The complex
electronics surrounding the transformer serve to ‘bootstrap’
the transformer so that the magnetising currents in the transformer do not load the resistances significantly as this would
lead to measurement errors. These circuits do not directly
form part of the measurement circuit, so their contribution to
noise is limited to the noise on the very small bias currents
drawn by the amplifiers that are connected to the potential
leads of the resistance RS.
The null balance detector used also contributes to the
measurement noise. The bridge impedance is matched to the
noise impedance of the detector using a transformer in order
to optimise measurement noise. For an ideal transformer, any
resistance ‘seen’ through a transformer has its impedance
transformed by 2:1.
The detector system noise (referred to the detector amplifier
input) can be viewed as an equivalent voltage noise (VN) and
current noise (IN) as shown in figure 3.
The easiest way to determine the contribution of detector
noise to the total measurement noise is to refer the detector
noise components to position XX.
Fig. 3: Noise matching system used
Ratio transformer
I:n
A
X
RS
Impedance matching transformer
I:m
Pre-amplifier
VN
B
IN
X
RX
Detector
C
Guard
amplifier
AC bridge
Page 4 of 6
Detector with impedance matching
WIKA data sheet IN 00.31 ∙ 03/2015
At this point the impedance of the bridge is:
RB = RX + n ∙ 2 ∙ RS
Note:
When measuring low resistances (high-temperature
SPRTs or cryogenic applications), the lead resistances are
significant and need to be included in the calculation of
bridge impedance.
For the purpose of this analysis they are ignored, so the
noise VN at X-X is given by:
VN ∙ 2 = [m ∙ IN ∙ RB] ∙ 2 + [ VN ] 2
The optimum (lowest VN 2) value for m (transformer setting)
is determined by differentiating this expression w.r.t. m and
setting this to zero to yield:
Minimum noise when:
VN = m ∙ 2 ∙ R ∙ B
Considering that an ideal transformer transforms any
impedance by n2, this is equivalent to stating that optimum
noise performance is achieved when the transformer
matches the detector noise impedance to the measurement
circuit impedance. This noise matching facility enables the
resistance thermometry bridge to approach the fundamental
Johnson Noise limit over the normal resistance measurement
range used in thermometry.
An Excel spreadsheet has been produced that calculates the
theoretical noise figure for the resistance thermometry bridge
for any operating conditions (this can be supplied to model
CTR9000 (F900) primary-standard resistance thermometry
bridge customers to assist in predicting uncertainty budgets).
These predict that for a 10 Ω resistance measured at 25 °C
the resistance thermometry bridge (set to 10 Ω impedance)
would exhibit an RMS ratio noise of 62 ppb at 0.7071 mA and
9 ppb at 5 mA.
The corresponding measurements were made using Wilkins
standard resistors in a temperature stabilized oil bath, with
the results shown in table 2.
Table 2: Calculated and measured noise figures
Test current
Calculated
RMS noise
Measured
RMS noise
0.7071 mA
62 ppb
57 ppb
5 mA
9 ppb
5 ppb
The measurements confirm that the noise performance of
the is as predicted by the design calculations and closely
approaches the fundamental Johnson Noise limit.
For example:
The fundamental Johnson Noise on a 25.5 Ω standard
platinum resistance thermometer (SPRT) at 0 °C measured
with a 0.5 Hz bandwidth is 893 pV and the measurement
noise achievable with a properly configured CTR9000 (F900)
is equivalent to only 958 pV (only 7 % above the fundamental
limit).
WIKA data sheet IN 00.31 ∙ 03/2015
Page 5 of 6
Bridge current accuracy
The accuracy of the bridge current is important because of
the self-heating effect in an standard platinum resistance
thermometer (SPRT). This causes the resistance of the SPRT
at a given temperature to be dependent on the measurement
current to an extent that is significant at the target uncertainty
level of 20 ppb.
The accuracy of the bridge current is therefore important if
the SPRT is to be used as a transfer standard thermometer
at a stated current or if the bridge current is to be varied
to allow extrapolation back to the zero-power resistance.
The bridge current was measured using a Keithley model
2000 multimeter to measure the voltage developed across a
calibrated Wilkins resistor.
The errors between the measured and expected current for
all bridge settings are shown in table 3.
This test confirms that the current accuracy is comfortably
within the specified Ω ±0.1 %.
Table 3: Bridge current error
Bridge setting in mA
Error in %
50√2
0.01
20√2
0.01
50
20
10√2
10
5√2
5
2√2
2
√2
1
0.5√2
0.5
0.2√2
0.2
0.1√2
0.1
-0.01
-0.01
0.02
0.05
-0.02
-0.04
-0.03
-0.04
-0.01
0.02
0.01
-0.01
0.00
-0.01
0.02
0.05
Conclusion
As stated at the beginning, the above test results are a
limited selection of the extensive tests carried out on the
model CTR9000 (F900) primary-standard resistance
thermometry bridge over the last 18 months.
However, these tests are the ones that address the most
important performance criteria for this instrument (accuracy,
noise and bridge current accuracy). These tests confirm the
performance of this resistance thermometry bridge to be well
within its performance specification.
The resistance thermometry bridge is designed to be as
immune to environmental effects (particularly electrical noise
and temperature) as possible. It should therefore be possible
for users to achieve the specified performance.
It is however important for users to set up the primarystandard resistance thermometry bridge correctly in order
to achieve this performance. In particular, users must set
the bridge gain correctly (as documented in the operating
instructions).
Page 6 of 6
WIKA data sheet IN 00.31 ∙ 03/2015
WIKA Alexander Wiegand SE & Co. KG
Alexander-Wiegand-Straße 30
63911 Klingenberg/Germany
Tel.
+49 9372 132-0
Fax
+49 9372 132-406
info@wika.de
www.wika.de
03/2015 EN
© 2015 WIKA Alexander Wiegand SE & Co. KG, all rights reserved.
The specifications given in this document represent the state of engineering at the time of publishing.
We reserve the right to make modifications to the specifications and materials.


