Inlay Box Workshop
advertisement
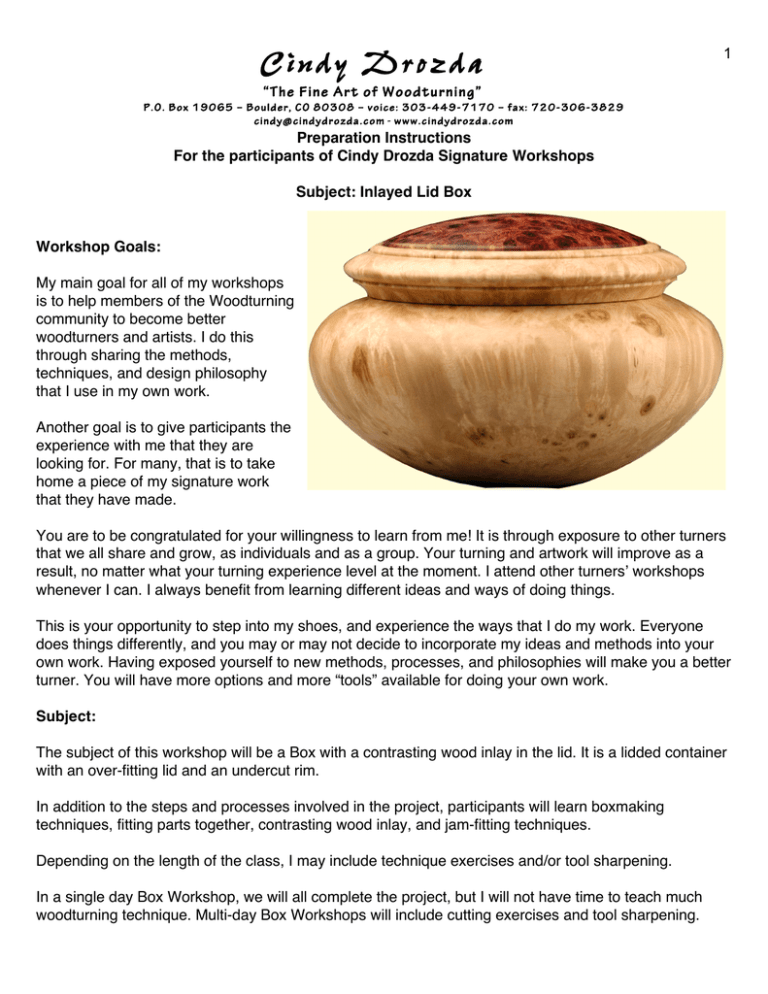
Cindy Drozda 1 “The Fine Art of Woodturning” P.O. Box 19065 – Boulder, CO 80308 – voice: 303-449-7170 – fax: 720-306-3829 cindy@cindydrozda.com - www.cindydrozda.com Preparation Instructions For the participants of Cindy Drozda Signature Workshops Subject: Inlayed Lid Box Workshop Goals: My main goal for all of my workshops is to help members of the Woodturning community to become better woodturners and artists. I do this through sharing the methods, techniques, and design philosophy that I use in my own work. Another goal is to give participants the experience with me that they are looking for. For many, that is to take home a piece of my signature work that they have made. You are to be congratulated for your willingness to learn from me! It is through exposure to other turners that we all share and grow, as individuals and as a group. Your turning and artwork will improve as a result, no matter what your turning experience level at the moment. I attend other turnersʼ workshops whenever I can. I always benefit from learning different ideas and ways of doing things. This is your opportunity to step into my shoes, and experience the ways that I do my work. Everyone does things differently, and you may or may not decide to incorporate my ideas and methods into your own work. Having exposed yourself to new methods, processes, and philosophies will make you a better turner. You will have more options and more “tools” available for doing your own work. Subject: The subject of this workshop will be a Box with a contrasting wood inlay in the lid. It is a lidded container with an over-fitting lid and an undercut rim. In addition to the steps and processes involved in the project, participants will learn boxmaking techniques, fitting parts together, contrasting wood inlay, and jam-fitting techniques. Depending on the length of the class, I may include technique exercises and/or tool sharpening. In a single day Box Workshop, we will all complete the project, but I will not have time to teach much woodturning technique. Multi-day Box Workshops will include cutting exercises and tool sharpening. Cindy Drozda 2 Class Structure: My workshops consist of short demonstrations of each step in the project, followed by time for the participants to complete that step. The focus will be on completing the process as a group, and learning some techniques along the way. I do not recommend spending a lot of time sanding and finishing. We will have a morning session, a lunch break of about 1 hour, and an afternoon session. At the end of the day, we will leave the shop as clean as we found it. Hours of class will vary, depending on the facility that we are using. Usually, we spend a 6-7 hour day working at the lathe. Please contact your clubʼs representative for the hours of your class, and any other specific details. Turning Experience Required: This workshop is the lesson, not the final exam! Your performance in class will not be graded or judged. We all learn at our own level and our own rate. It is the nature of clubs and guilds that the workshop participants will be at different levels. Itʼs my job as instructor to challenge everyone at their level. All skill levels are welcome, though some turning experience is highly recommended. Technical Preparation: You should be “current” with your own tools and methods. In other words, it will be better for you if you have turned something recently and are reasonably comfortable with what you currently do. You donʼt need excessive practice, or instruction, to prepare for this workshop. The best time to schedule time in your shop to practice is in the weeks following the class, when you can put into action the ideas and methods that you learned, and make them your own. A good preparation is to view my “Fabulous Finial Box” DVD to familiarize yourself with the project. What to Bring to Class: 1 – Safety eyewear, face shield, or goggles. This is important. Eyeglasses donʼt count unless they have protective side shields and ANSI spec safety lenses. 2 - You do not need to bring wood. All of the wood will be provided. 3 – Tools (list below) and any sharpening jigs that you like to use. 4 – Sandpaper and finishing materials if you intend to finish your project. Cindy Drozda 5 – A piece or two of your own finished work to show. 6 – Your specific goal for this workshop. 7– To get the most out of this workshop: Please bring an open mind and willingness to learn!! Suggested Tool List: I will be bringing extra tools to share, so if you donʼt already own some of these tools donʼt worry. Just bring what you have. It is a good idea to attend the workshop, and see if you want to do this work in the future, before buying new tools. Important: Face Shield or Safety Glasses – everyone must protect their eyes in this class! (regular eyeglasses don’t count unless they have side shields!) 3/8” (or 1/4”, or 1/2”) Bowl Gouge 3/8” Spindle Gouge Parting tool (not a “diamond”) 1/16” - 3/16” Bedan or scraper for making chucking tenons small scroll chuck with “standard” jaws to grip a 1 ¾” tenon. (Not a large chuck with “pin” jaws) Tailstock center with removable point, small cup center, or OneWay-type revolving tail center Notepad & Pencil Optional:(bring if you have them) Skew chisel 1/2” or 3/4” (not an oval) smaller and/or larger bowl and/or spindle gouges Round nose scraper 1/2” or 3/8” Square ended scraper 1/2” Beading and Parting tool 3/8” or 1/2” Bedan tool Box hollowing hooked scraper (see my website for details) thin parting tool 1/16” vernier calipers for scribing (General Brand, the cheap ones) depth gauge wall-thickness calipers binocular magnifiers or reading glasses (to be worn with your safety glasses of course) Center finder Ruler Awl Dust Mask 3 4 Cindy Drozda Inlay Lid Box Step By Step 1 - Material Selection: Start with a piece of dry wood 3” x 3” x 3.5” (or similar) 2 - Rough between centers, and turn a chucking point on each end 3 - Top of box in the chuck. Part off bottom of box. Reduce diameter of lid if desired. Create a recess about ¼” deep in lid for fitting onto bottom of box. Shape, sand, and finish inside of lid. 4 - Bottom of box in chuck. Flatten end of block and friction drive the flat inlay disk. Size the disk to the desired diameter of your inlay. Disk should have parallel sides and flat face (up to the tail center). Leave a shoulder on inlay disk to make it easier to handle. 5 - Transfer lid recess diameter to face of box bottom blank. 6 – Create a tenon on box bottom to jam fit lid onto. 7 – Shape top of lid and recess inlay disk into top of lid. Detail around inlay if desired. Sand and finish top of lid and inlay. 8 – Shape the box bottom. Leave plenty of material at the headstock end until hollowing is done. 9 – Hollow the box, sand and finish inside of box. 10 – Re-cut lid fit tenon if necessary to get the fit that you want. 11 – Mount a waste block in the chuck, caliper inside of box bottom, transfer onto waste block, cut a tenon to jam fit box. 12 – Shape, sand, and finish box bottom. 13 - Sign your work, You’re done! Many other designs are possible using these techniques. If we all share, we all grow. Feel free to copy, but let that be a stepping stone to discovering your own voice! Please turn responsibly! Always use eye and lung protection! Have fun!
